How to Build a Grill Surround Using Wall Block
Most of us who have a lawn or yard in our houses like to spend our weekends having parties and picnics. And the best way to light up a party is to arrange a grill; people of all ages admire it. But before arranging all these, you should have a grilling machine in your house. For this reason, today, we will describe a technique on how to build a grill surround using wall block, which will be beneficial for DIY specialists.
Requirements
There are quite a few things that you will need for making a good quality grill surround. Among them, first, you will need a measuring tape, and this is much essential for taking the exact measurements for your grill. You will also need a square and a hammer for the construction process. There is also a need for a chisel to cut the wall blocks, and lastly, for safety purposes, you will require eye goggles. This will provide you the all-around protection.
Procedure
- Step One
At first, you have to start by cleaning the whole place properly. Then you have to take the measurement of the grill that you want to make, mark the measurements using a marker or chalk so that you can quickly start working, now you have to draw a plan on the paper which will be your guide, and you have to calculate the amount of stone that you will need for the process.
- Step Two
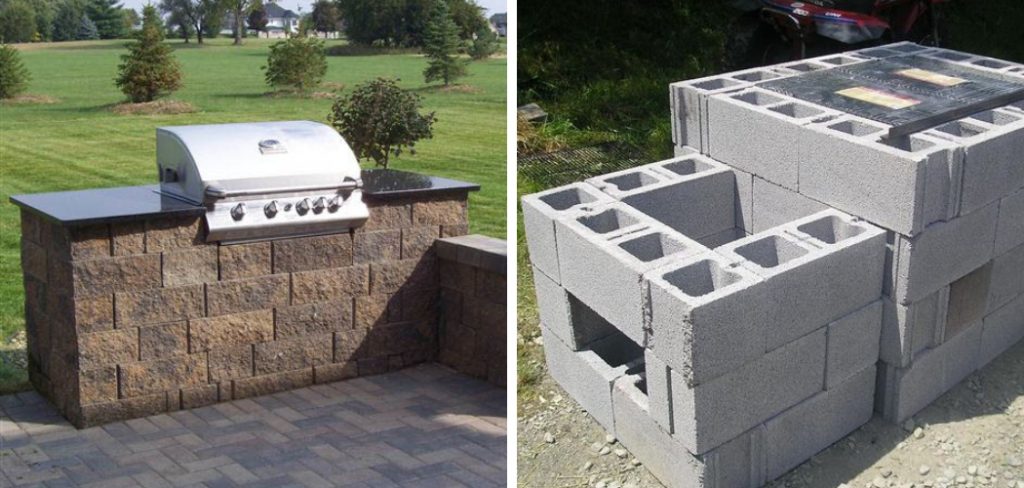
There are many different types of wall blocks available on the market, and we suggest you buy at least three different types: curved blocks for the corners, solid blocks for the core, and funneled blocks for the gas connections. Now you need to measure the blocks and mark where you want to put them according to your measurement.
- Step Three
You have to take a measuring tape and a masking tape, then mark the first column that you want to place and attach the masking tape to make it more locatable. After that, gradually, you must outline the corners and mark them with masking tape. In this manner, you will fully view your plan on the ground. Now you have to start placing the stones. For uneven surfaces, you can use asphalt shingles to balance.
- Step Four
After you have laid the first layer, you can start putting the other layers and use a chisel to break the extra part. After you have placed the blocks together, add glue in-between them to keep the attached firmly. Next, place a countertop on both sides and then place the grill in the middle of the blocks. In this manner, the total grill surround can be completed.
You Can Check It Out To Put a Grill Fire Out
Conclusion
Lastly, we would like to conclude that the technique we have stated here will help make grilling equipment in your backyard. You can easily have quality time with your friends and family, and manifolds will also improve your DIY skills. Happy grilling! Have a beautiful day!!
You may also read – How to Fix Bent Heating Vent Grills