How to Make a Tapered Table Leg
Are you looking for a unique way to spruce up your table? Adding tapered table legs is an easy and creative project that can transform the look of an ordinary piece of furniture. With a few tools, some lumber, and patience, you can easily make tapered table legs.
Making a tapered table leg may seem like a daunting task, but with the right tools and techniques, it can be done easily. Tapered legs are perfect for any furniture project, as they add an elegant touch to the overall look of your piece.
This tutorial will show you how to make tapered table legs using basic woodworking tools and materials. With patience and attention to detail, you’ll have beautifully tapered legs in no time! Keep reading to learn more about how to make a tapered table leg!
What Will You Need?
To make tapered table legs, you will need the following:
- Table saw
- Belt sander
- Tape measure
- Pencil
- Clamps
- Sandpaper (medium and fine grits)
- Wood glue
You’ll also need lumber of your choice for the legs.
Once you’ve gathered your supplies, it’s time to start!
10 Easy Steps on How to Make a Tapered Table Leg
Step 1: Measure and Mark Your Legs
First, you’ll need to measure and mark the desired length of your leg. Make sure to use a tape measure or ruler when measuring so that your cuts are accurate. Then, use a pencil to mark the length of your leg on the lumber.
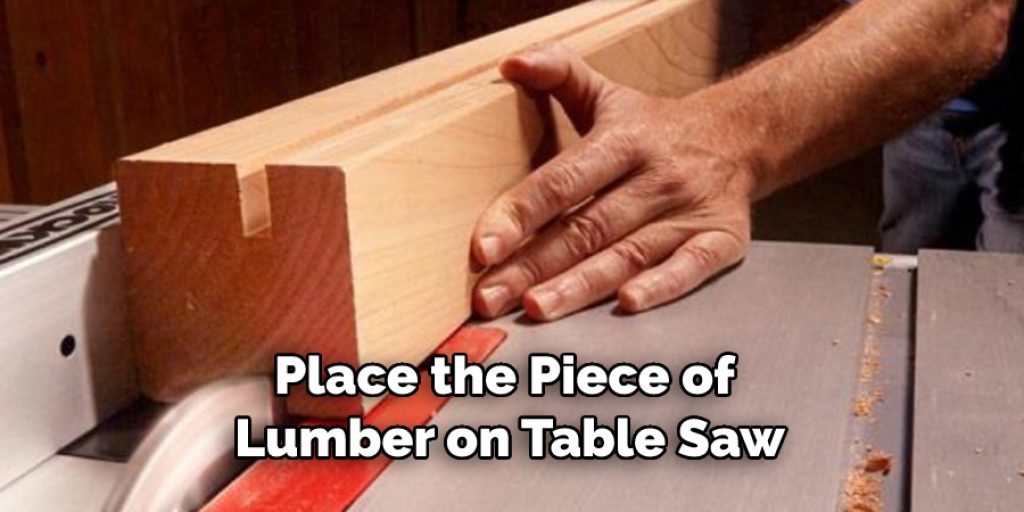
Step 2: Cut Your Tapered Leg Pieces
Now, place the piece of lumber on your table saw and adjust the blade so that it is set to make tapered cuts. Slowly feed the wood through the saw, making sure to keep an eye on your measurements. Once you have finished cutting all four pieces, you will have four tapered legs!
Step 3: Prepare Your Legs for Gluing
Use clamps to secure each leg into place while gluing them together. Ensure that each leg’s end is flush with one other before clamping them tightly together. Now, apply wood glue to all four ends of your legs and allow the glue to dry completely.
Step 4: Sanding the Legs
Once your glue has dried, you will need to sand all four pieces of wood using a belt sander. Start with a medium grit sandpaper and work your way up to a finer one until you get the desired shape and smoothness of your tapered leg. This will help create a more finished look.
Step 5: Final Assembly
Now that your tapered legs are ready, it’s time to assemble them together. Place each leg in its proper position, ensuring that they fit snugly against each other. Once everything is in place, use clamps once again and add wood glue for extra stability. Let the glue dry before continuing on with the next step!
Step 6: Finishing Touches
After the glue has dried, it’s time to do some final sanding and finishing touches. Again, use a belt sander with medium grit sandpaper to finish off the legs. Take your time and get into all the nooks and crannies for an even finish!
Step 7: Final Sanding
To ensure that your tapered legs are nice and smooth, you can use fine-grit sandpaper to finish them off. Start by lightly running the paper over each leg until they are silky smooth. Once you’re done, wipe away any excess dust with a damp cloth before continuing with the next step!
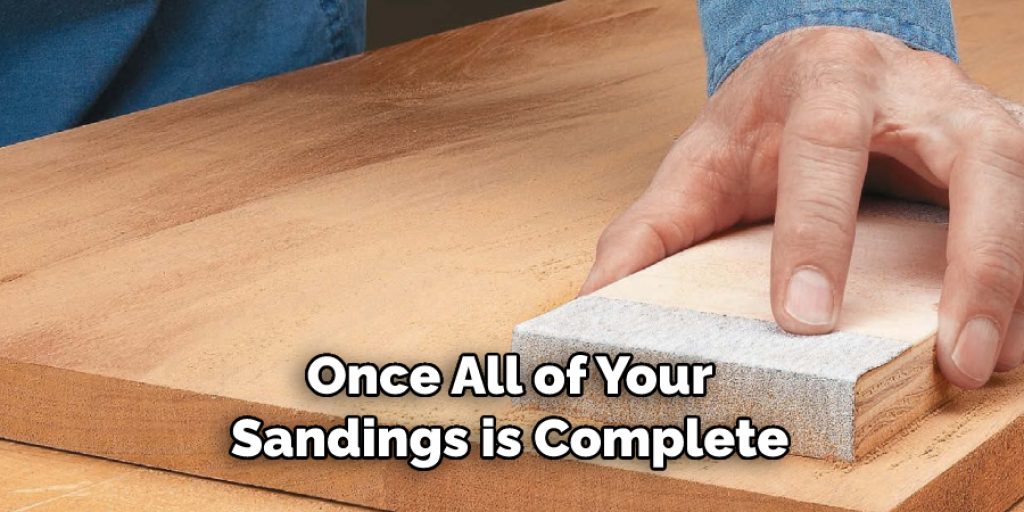
Step 8: Applying Finish
Once all of your sandings is complete, it’s time to apply a finish to protect and preserve your tapered table legs. Apply a thin layer of wood finish with a soft cloth and let it dry completely before moving on. You can also apply additional coats of finish if desired.
Step 9: Attaching the Legs to Your Table
Now that the finish has dried, you can attach your legs to your table. Use screws or nails to secure the legs and ensure they are even with one another. Once everything is in place, you can admire your beautiful new tapered-leg table!
Step 10: Enjoy Your Handiwork!
Congratulations – you’ve successfully completed your project! Now it’s time to sit back and admire your handiwork. You can enjoy the beauty that comes with a one-of-a-kind, handmade tapered-leg table!
Making a tapered table leg is not as hard as it seems! With these easy steps, you’ll be sure to have beautiful legs in no time. Now that you understand how to make a tapered table leg, you can start working on new projects for your home. Good luck and happy making!
5 Additional Tips and Tricks
- Make sure to use the right saw blade. The right saw blade will create a much cleaner cut and give you better results.
- Mark your cuts carefully with a ruler, tape measure, or similar tool so that you can accurately replicate them on all four legs of your table.
- Clamp the legs together before making your cuts to ensure an even taper from one leg to the other.
- Practice on scrap wood first to make sure you have the technique down pat before tackling your actual project pieces.
- Consider using a miter box for extra accuracy when cutting tapered table legs; it will make it easier to achieve perfect angles and precise measurements every time!

With these tips in mind, you’ll be well on your way to creating the perfect tapered table legs.
5 Things You Should Avoid
1. Avoid Using a Saw Blade That is Too Large for the Job: A larger saw blade may compromise the accuracy of your cuts and result in an uneven taper.
2. Don’t Skip Measuring and Marking Your Cuts Accurately: It is the key to achieving even tapers on all four table legs.
3. Don’t rush the process: Take your time and make sure to get it right.
4. Avoid Cutting Too Much Material: Avoid cutting too much material away, which could weaken your table’s leg structure and stability.
5. Stay Away From Using a Hand Saw: Stay away from using a hand saw if you can power tools will give you better results faster when it comes to tapered table legs.
Following these tips and avoiding the pitfalls mentioned above will help you create professional-looking tapered table legs that are both strong and visually appealing! Good luck with your projects!
5 Different Patterns for Tapered Table Legs
- A classic graduated taper pattern, with all four legs gradually narrowing from the floor up
- Alternating graduated taper pattern, with the two legs on one side of the table narrowing more than those on the other side
- Reverse graduated taper pattern, with all four legs tapering from the top down
- Combination graduated and reverse-graduated taper pattern, with two legs graduating from floor to top and two tapering from top to floor
- A cascading pyramid taper pattern, in which each leg cuts an angle narrower than its neighbor until forming a continuously downward-tapered effect
These five patterns can be used to create beautifully tapered table legs for any style of furniture.
Experiment with different patterns and see which ones you like best!
What are the Best Materials for Tapered Table Legs?
1. Hardwoods: Hardwoods like oak, maple, and walnut provide excellent balance, stability, and durability.
2. Softwoods: Softwoods like pine are lightweight and affordable but may not be as strong or long-lasting as hardwoods.
3. Metals: Metal legs can give your table a modern look and offer greater strength compared to wood in some cases.
4. Plywood: Plywood is easy to work with, very durable, and provides an interesting texture when stained or painted.
5. Laminated Materials: A blend of wood veneer, laminate, or plastic materials can give your table a unique, lightweight, and durable look.
By selecting the right materials for your table legs, you can ensure that your project is strong, structurally sound, and visually appealing. Take your time to pick out quality materials, and always make sure to use the appropriate tools to get the best results!
Conclusion
There you have it – a comprehensive guide to making tapered table legs! You can easily create beautiful and structurally sound furniture pieces with the right materials, tools, and techniques. Always make sure to measure carefully and practice on scrap wood before tackling your project pieces; this will help ensure that you get accurate results every time.
Creating tapered table legs is a great way to add visual interest and dimension to your furniture. Whether you choose a classic graduated taper pattern, an alternating graduated taper pattern, or one of the other patterns mentioned above, it’s important to use quality materials for optimal results. Additionally, take care when measuring and marking your cuts in order to achieve even tapers on all four table legs.
With these tips on how to make a tapered table leg in mind, you’ll be well on your way to creating beautifully tapered table legs that will last for years!
Angela Ervin
Angela is the executive editor of DIY quickly. She began her career as an interior designer before applying her strategic and creative passion to lifestyle and home. She has close to 15 years of experience in creative writing and online content strategy for housekeeping, home decorations as well as other niche efforts. She loves her job and has the privilege of working with an extraordinary team. She lives with her husband, two sons, and daughter in Petersburg. When she's not busy working she spent time with her family.