
How to Pump Down Ac Unit
When the weather starts to warm up, most people’s thoughts turn to how they can keep their homes cool. One way to do this is by using an air conditioner. While many people might think that turning on the AC is all they need to do to stay cool, you can do a few things to make sure your AC unit works as efficiently as possible.
In this post, we’ll give you some tips on how to pump down AC unit. Follow these tips and you’ll be able to keep your home cool and comfortable all summer long! Keep in mind that before doing any work on your AC unit, you should always consult your owner’s manual. And if at any time you feel uncomfortable doing this yourself, please call a professional technician. Read on for more information!
What Does It Mean to Pump Down Ac Unit?
Pumping down an AC unit means removing all the refrigerant from the system. This is usually done when the system needs to be repaired or replaced. You’ll need a special pump and some knowledge of how the process works to do this. So let’s take a closer look. The first thing you’ll need to locate the low-pressure service port. This is usually located on the side of the compressor. Once you’ve found it, attach the pump to the port and start pumping.
The process can take a while, so be patient. You’ll know when the reading on the pressure gauge drops to zero when it’s done. Next, you’ll need to find the high-pressure service port. This is usually located on the condenser unit. Attach the pump to this port and start pumping again. Once the pressure drops to zero, you can remove the pump, and all refrigerants will be removed from the system.
Why Should You Pump Down AC Unit?
There are a few reasons you might want to pump down your AC unit. One reason is that it can help improve the efficiency of your unit. When an AC unit is properly pumped down, all the refrigerant inside it will be at the right level. This means that the unit won’t have to work as hard to cool your home, saving you money on your energy bills.
Another reason to pump down your AC unit is that it can help prevent damage to the unit. For example, if there is too much refrigerant in the unit, it can cause the coils to freeze. This can lead to several problems, such as reduced airflow and decreased efficiency. Pumping down the unit can help prevent this from happening.
What Tools & Supplies You’ll Need?
You’ll need a few tools and supplies to pump down your AC unit. Here’s a list of what you’ll need:
A Vacuum Pump:
This is the most important tool you’ll need. You can purchase a vacuum pump at most hardware stores.
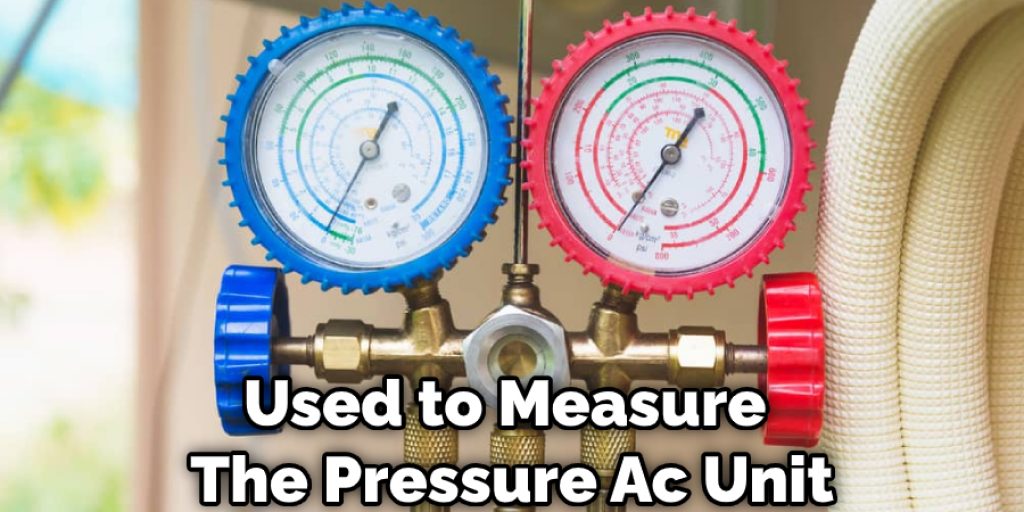
AC Gauges:
These are used to measure the pressure in your AC unit.
A Set of Wrenches:
You’ll need these to loosen and remove the AC unit’s service valves.
A Screwdriver:
You’ll need this to remove the AC unit’s access panel.
Step by Step Process: How to Pump Down AC Unit
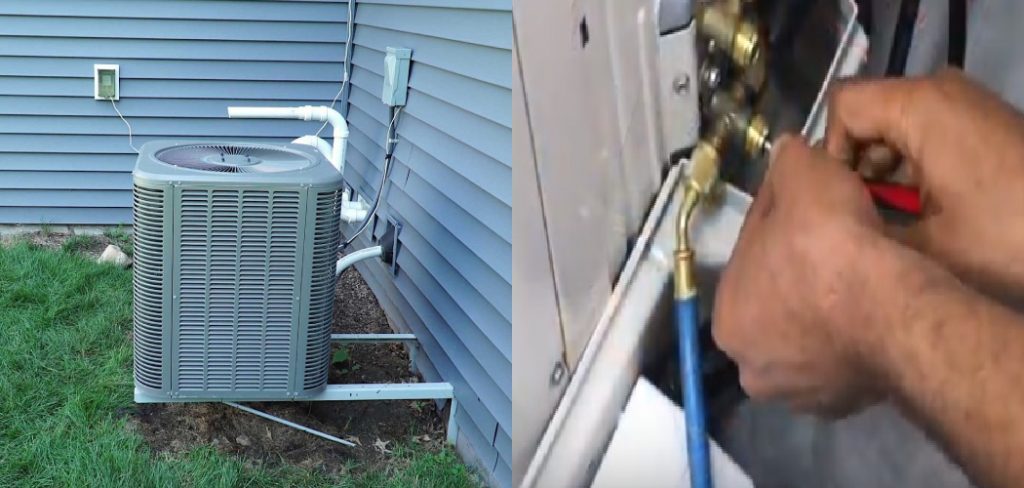
Step 1: Turn Off the Air Conditioning Unit.
The first thing you need to do is turn off your AC unit. To do this, locate the switch on the unit and flip it to the “Off” position. If you need to, also turn off the power to the unit at the breaker box. When removing the refrigerant from your AC unit, it’s important to ensure that the compressor doesn’t turn on by accident.
Step 2: Connect the Pump.
Next, you’ll need to connect the pump to the AC unit. To do this, locate the service valves on the unit. The service valves are located on the larger of the two copper pipes. The service valves have a cap that must be removed before the pump can be attached.
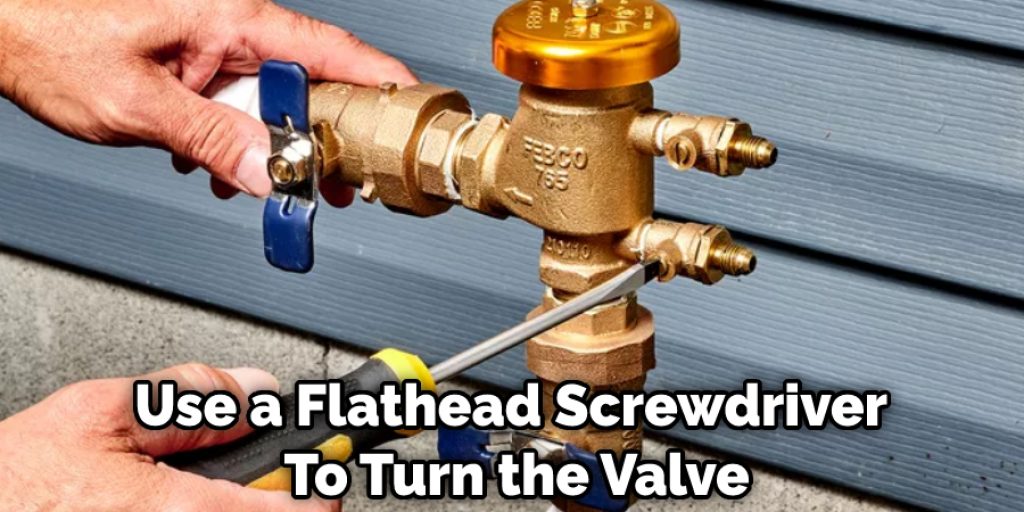
Step 3: Open the Service Valves.
Once the pump is connected, you’ll need to open the service valves. Simply turn the knob on each valve to the “Open” position to do this. If you don’t see an “Open/Close” knob, you’ll need to use a flathead screwdriver to turn the valve. Again, be careful not to over-tighten the valves, as this can damage them.
Step 4: Release the Nut on the Service Valve.
After the valves are open, you’ll need to release the nut on the top of each valve. Use an adjustable wrench to loosen the nut until it is loose enough to turn by hand. Once the nut is loose, unscrew it thoroughly and remove it from the valve. If you think the valve is damaged, you can always replace it with a new one.
Step 5: Remove the Refrigerant from the Unit.
At this point, the refrigerant should start flowing out of the unit and into the pump. Allow the pump to run until it is full. Once the pump is full, turn off the valves and remove the pump from the unit. If you think the unit is damaged, you can always replace it with a new one.
Step 6: Remove the Valve Core.
Once the pump is removed, you’ll need to remove the valve core from each service valve. To do this, use an adjustable wrench to loosen the nut on the top of each valve. Once the nut is loose, unscrew it completely and remove it from the valve.
If you think there may be any chance that you will forget which valve goes to which unit, it’s a good idea to label the valves before removing them. With the valve core removed, all of the refrigerants should be able to escape from the system. Then, allow the system to vent for at least 10 minutes before continuing.
Step 7: Attach the HVAC Gauges With Service Valves.
After the system has had a chance to vent, you’ll need to attach the HVAC gauges to the service valves. To do this, screw the gauges onto the valves where the valve cores were previously located. Make sure that the gauges are pointing in the correct direction before continuing.

Step 8: Open the High-Side Valve.
With the gauges attached, you’ll need to open the high-side valve. Turn the knob on the gauge to the “Open” position to do this. If you’re unsure which is the high-side valve, it will likely be labeled as such or have a red handle.
Step 9: Start the Pump.
Once the high-side valve is open, you can start the pump. The pump will begin to draw the refrigerant out of the system. Be sure to keep an eye on the gauges while the pump is running. Mainly the low side gauge, as this is what will tell you when the system is empty. If the low side gauge reaches zero, the system is most likely empty.
Step 10: Close the High-Side Valve.
After the system has been emptied, you’ll need to close the high-side valve. Simply turn the valve handle clockwise until it’s tight. Once the high-side valve is closed, open the low-side valve to allow any remaining refrigerant to escape. Finally, close the low-side valve when finished.
Step 11: Remove the HVAC Gauges and Service Valves.
You can now remove the HVAC gauges and service valves with the high-side valve closed. To do this, unscrew the gauges from the valves and remove them from the system. If you’re unsure which valve goes to which unit, it’s good to label the valves before removing them. With the gauges and valves removed, the system is ready to recharge.
Step 12: Seal the Service Valves.
To prevent refrigerant from leaking out of the unit, you’ll need to seal the service valves. Simply screw the nuts back onto the valves and tighten them with an adjustable wrench. Be careful not to over-tighten the nuts, as this can damage the valves. Your AC unit is now ready for storage with the service valves sealed.
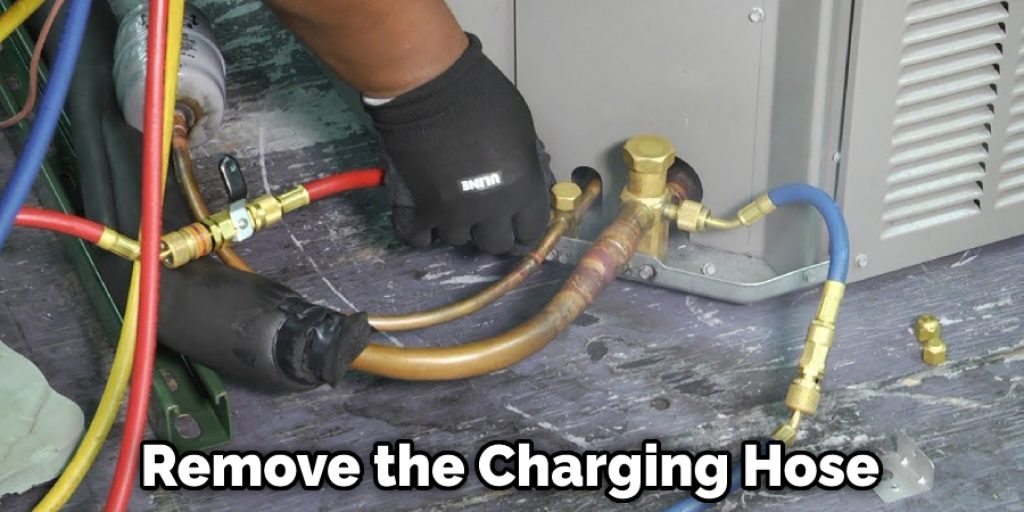
Step 13: Recharge the System.
Now that the system is sealed, you can recharge it with refrigerant. To do this, simply attach the charging hose to the low-side valve and open the valve. Be sure to follow the instructions with your AC unit to ensure that you’re adding the correct amount of refrigerant. Once the system is charged, close the low-side valve and remove the charging hose. Your AC unit is now ready to use.
Pumping down an AC unit is a relatively simple process that can be completed in a few hours. You can ensure that your AC unit is properly stored and ready for use by following these steps.
Conclusion
Now that you know how to pump down AC unit, make sure to follow these steps every time you turn off your air conditioning for the season. This will help keep your unit in good condition and prolong its life span.
And if you ever have any questions or need assistance with this process, don’t hesitate to reach out to a professional HVAC technician. We hope you found it helpful. Have any other tips for keeping an AC unit running smoothly? Share them in the comments below!


