How to Clean Air Vents in Refrigerator
Are you tired of your refrigerator not keeping your food fresh? It might be time to clean the air vents. Air vents are an essential part of a refrigerator’s cooling system, and when they get clogged with dust, dirt, or debris, it can cause your fridge to work harder and become less efficient.

Looking for an easy and efficient way to clean refrigerator air vents? Clogged air vents in your refrigerator can reduce its efficiency, leading to higher energy bills and problems with cooling. Fortunately, cleaning the air vent on your fridge is easy and only requires a few simple steps!
In today’s blog post, we’ll walk you through exactly how to clean air vents in refrigerator so you can make sure you have an efficient appliance that will help keep all of your food fresh!
What Will You Need?
Before you start cleaning your refrigerator air vents, make sure you have these supplies on hand:
- A vacuum cleaner with a hose attachment
- A microfiber cloth or soft sponge
- Warm, soapy water (use mild detergent)
That’s it! These simple tools and materials are all you need to get started.
10 Easy Steps on How to Clean Air Vents in Refrigerator
Step 1. Unplug the Refrigerator:
Safety should always be your first concern. Unplug the refrigerator before you start cleaning to avoid any potential electric shocks. If it is a built-in refrigerator, turn off the circuit breaker.
Step 2. Locate the Air Vents:
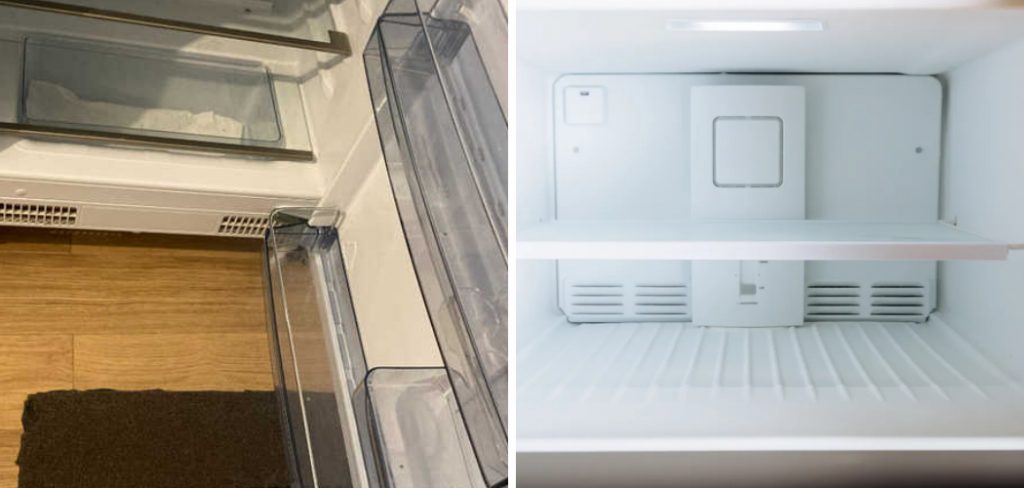
The air vents are usually located at the back of the refrigerator, but the exact location can vary depending on the model. In some models, vents might be on the sides or even in the freezer compartment. Check your refrigerator’s manual if you need help finding them. Remember, these vents are critical for air circulation, so it’s essential you identify them correctly.
Step 3. Remove any Obstructions:
Once you’ve identified the location of the vents, the next step is to remove any obstructions. This could be any items stored in front of the ducts or accumulated frost if the vents are in the freezer area. It’s essential to have clear access to the vents for thorough cleaning.
Step 4. Vacuum the Vents:
Next, use your vacuum cleaner with a hose attachment to suction any dust or loose debris from the vents. Be sure to do this gently to avoid damaging the vents. Vacuuming is the quickest way to remove most dirt without spreading it inside the refrigerator. If your vacuum has different power levels, use a lower setting to prevent any damage.

Step 5. Prepare Warm Soapy Water:
Now, prepare a bowl of warm, soapy water using a mild detergent. Avoid harsh chemicals, as they can leave a residue or smell that could affect your food. This warm soapy water will wipe down and disinfect the vents.
Step 6. Clean the Vents:
Dip your microfiber cloth or soft sponge into the warm soapy water. Gently clean the vents with a cloth or sponge, making sure to get into all the nooks and crannies. Be careful not to scrub too hard or use too much water, as this could damage the vents.
Step 7. Rinse the Vents:
After you have thoroughly cleaned the vents with soapy water, it’s important to rinse them to ensure no soap residue remains. You can do this by dipping a clean cloth or sponge in warm water, wringing it out thoroughly so it’s not soaking wet, and then gently wiping down the vents. Make sure to get into all the areas where soap could have accumulated.
Step 8. Dry the Vents:
Once the vents have been rinsed, use a dry microfiber cloth or towel to dry them off. Ensure the vents are completely dry before moving on to the next step. Any moisture left in the vents could cause operation problems or lead to mildew growth. Remember to dry the surrounding area as well.
Step 9. Inspect the Vents:
After drying the vents, inspect thoroughly to ensure all the dust, dirt, and grime is gone. Use a flashlight if necessary to look into crevices. If you still spot any residue or build-up, repeat the cleaning process. A clean vent should be clear of any obstructions to allow unrestricted airflow. Remember, a clean vent means a properly functioning refrigerator.
Step 10. Plug the Refrigerator Back In:
Once you are satisfied with the cleaning, it’s time to plug the refrigerator back in or turn the circuit breaker back on. Remember to adjust your refrigerator’s temperature settings if necessary. Congratulations, you have successfully cleaned your refrigerator’s air vents! Regularly repeating this process can help maintain the efficiency of your refrigerator and prolong its lifespan.
Following these simple steps, you can easily clean your refrigerator’s air vents and ensure your appliance is running at its best.

5 Additional Tips and Tricks
Tip 1: Regular Maintenance:
Cleaning your refrigerator’s air vents should be a part of your regular appliance maintenance routine. A bimonthly cleaning can prevent dust and dirt from accumulating and affecting the performance of your refrigerator.
Tip 2: Check for Broken Vents:
While cleaning, check for any broken or damaged vents. If you find any, replace them immediately to prevent further damage.
Tip 3: Keep the Area Around Your Refrigerator Clean:
Ensure the area around your refrigerator is clean and free of dust and debris. This can prevent dirt from getting into the vents and affecting their efficiency.
Tip 4: Use a Refrigerator Air Purifier:
Consider investing in a refrigerator air purifier to keep your fridge smelling fresh and prevent any odors from lingering. You can easily install These small, inexpensive devices in your refrigerator and replace every few months for optimal performance.
Tip 5: Don’t Forget the Coils:
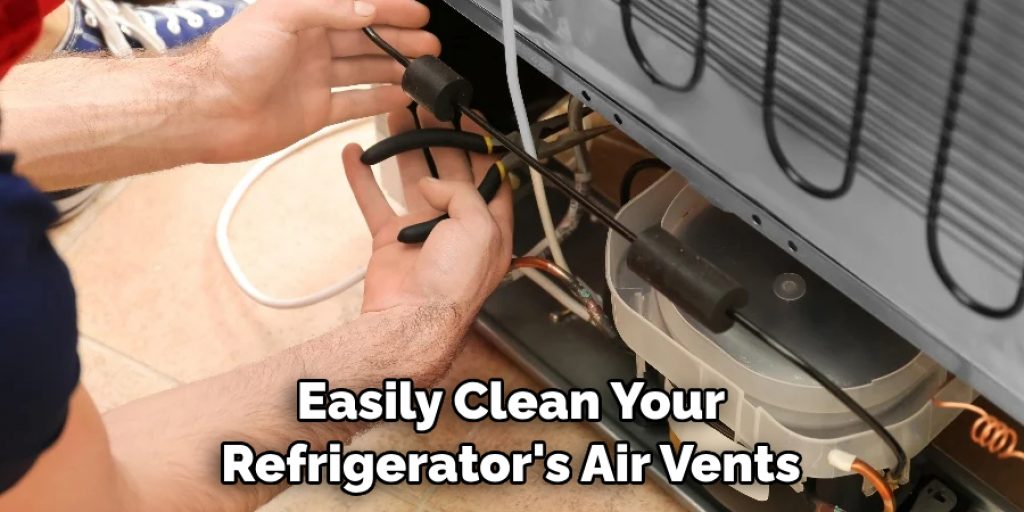
While cleaning your refrigerator’s air vents, don’t forget to vacuum the coils well. These are located at the back of the fridge and can accumulate dust and debris, affecting your appliance’s efficiency. Regularly cleaning them will help maintain optimal performance.
Now that you know how to clean air vents in your refrigerator, you can enjoy a clean and efficient appliance that will keep your food fresh for longer. With regular maintenance and cleaning, your fridge will continue providing you with the best cooling performance for years.
5 Things You Should Avoid
1. Avoid Cleaning with Harsh Chemicals:
Never use harsh chemicals like bleach or ammonia to clean your refrigerator’s air vents. These can leave a strong smell that can infiltrate your food and even damage the plastic components of your fridge.

2. Avoid Using Excessive Water:
When cleaning the air vents, avoid using a lot of water. Too much moisture can damage the electronics of the fridge and lead to problems down the line.
3. Avoid Neglecting Regular Maintenance:
Pay attention to the importance of regular maintenance. Refrain from cleaning the air vents regularly to prevent dust and grime from accumulating, which may hinder the performance of your refrigerator.
4. Avoid Ignoring Damaged Vents:
If you notice any damage to the air vents during cleaning, do not ignore it. Damaged vents can lead to decreased efficiency and need to be replaced as soon as possible.
5. Avoid Keeping the Fridge Too Full or Empty:
Try to avoid keeping your refrigerator too full or too empty. A fridge that is too full can block the air vents, impeding circulation. On the other hand, a fridge that is too empty has to work harder to maintain the right temperatures, which can put unnecessary strain on the appliance.
By avoiding these things, you can ensure your refrigerator’s air vents remain clean and functioning properly. With proper maintenance and care, your fridge will continue to provide you with fresh food for a long time.
How Often Should You Clean Your Fridge Vent?
The frequency of cleaning your fridge vents depends on several factors, such as how often you use the refrigerator and the environment it’s placed in. However, a general rule of thumb is to clean them at least once every two months. This will help prevent any build-up of dust or debris and ensure optimal performance from your appliance.
In addition, if you notice any visible dust or dirt on the vents, cleaning them immediately is a good idea. Regular cleaning will keep your fridge running smoothly and improve its overall efficiency and longevity.

Conclusion
In conclusion, how to clean air vents in refrigerator is essential for proper functioning. Removing dust, dirt, and debris will help ensure your refrigerator runs efficiently and reduce the risk of food spoilage, bacteria growth, and odors.
Additionally, cleaning your air vents regularly helps reduce energy costs and prevent more costly repairs. With these simple steps to clean the air vents of your refrigerator, you should now be able to keep it spic-and-span with ease.
Hopefully, this guide has helped you understand the importance of maintaining your refrigerator’s air vents and given you some valuable tips to keep it running at its best. So, grab your cleaning supplies and give your fridge the much-needed TLC it deserves!


