How to Make Melted Plastic Popcorn Decorations
DIY decorations bring a unique touch of personality and creativity to any space, allowing crafters to express their style in vibrant colors and textures.
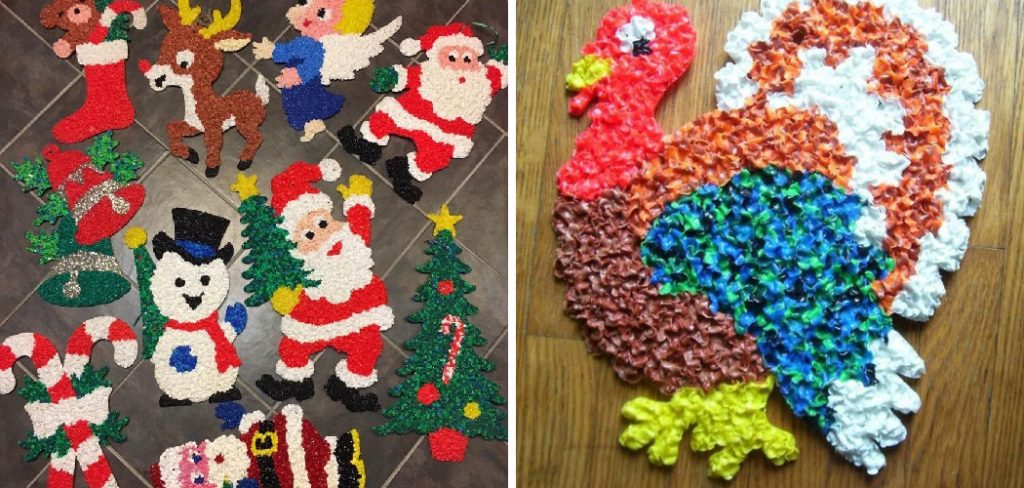
Among the myriad of DIY crafts, melted plastic popcorn decorations stand out for their whimsical charm and versatility. This guide dives into how to make melted plastic popcorn decorations, a fun and colorful project that appeals to crafters of all ages.
Whether you’re looking to add a festive pop to your holiday decor or searching for a creative handmade gift, melted plastic popcorn crafts offer a delightful solution.
The crafting process, which we’ll explore from gathering materials to the final touches, combines simple techniques with a dash of creativity, making it an accessible project for beginners and seasoned crafters alike.
Gathering Materials and Tools
Before starting your melted plastic popcorn decorations, it’s essential to gather all the necessary materials and tools to ensure a smooth crafting process. The success of your project depends largely on the readiness and quality of the supplies you use.
A. Required Materials:
- Plastic Pellets: These serve as the base for your decorations. Ensure you purchase pellets suitable for melting and crafting.
- Food Coloring: To add vibrant colors to your decorations, food coloring offers various hues. Gel food coloring works especially well as it blends seamlessly with plastic.
- Parchment Paper: This is crucial for laying out your melted plastic. It prevents sticking and allows for easy transfer of your decorations once they cool.
B. Tools:
- Microwave or Oven: Depending on your preference or availability, both appliances are suitable for melting the plastic pellets. The microwave offers a quicker process, while the oven provides more even heat distribution.
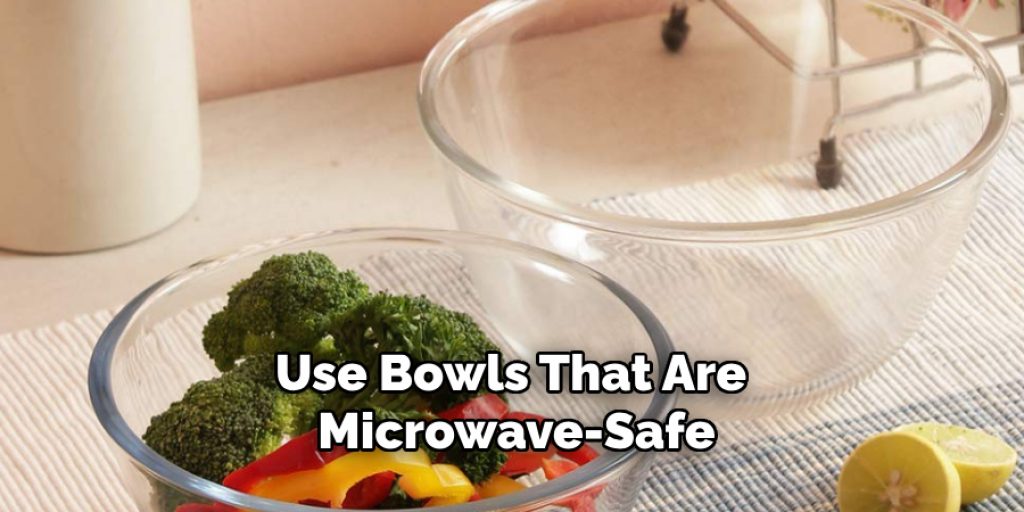
- Mixing Bowls: These are necessary for combining your plastic pellets with food coloring before melting. If you opt for that melting method, use bowls that are microwave-safe.
- Cookie Cutters: These are used to shape your decorations. Choose various sizes and shapes for versatility in your designs.
C. Safety Precautions:
- Ventilation: Melting plastic can produce fumes, so ensure your crafting area is well-ventilated, preferably near an open window or with an exhaust fan running.
- Heat-resistant Gloves: Protect your hands when handling hot materials. High-quality heat-resistant gloves are a must-have to prevent burns during the crafting process.
Gathering your materials and tools is the first step in bringing your melted plastic popcorn decorations to life. Each element plays a vital role in crafting, from the vibrant hues of the food coloring to the shapes created by the cookie cutters. Remember, safety first; ensure your crafting area is well-prepared to handle the temperature demands of this project.
How to Make Melted Plastic Popcorn Decorations: Melting the Plastic Pellets
Once you’ve moved past the preparation and into the melting phase, the art of making melted plastic popcorn decorations begins in earnest. This crucial step transforms the raw materials into a pliable form that embodies the essence of creativity and innovation in crafting.
A. Preparing the Plastic Pellets
Before introducing heat, the plastic pellets must be uniformly coated with your chosen food coloring. Start by distributing the pellets into a mixing bowl—use separate bowls for different colors to maintain clear, vibrant hues. Add a few drops of gel food coloring to the pellets. Because gel food coloring is more concentrated, it allows for intense colors with a smaller amount of the product.
Use a spoon or spatula to gently mix the pellets and food coloring, ensuring each pellet is evenly coated. This step is critical for achieving the rich, vivid colors that make melted plastic popcorn decorations truly pop.
B. Adding Food Coloring for Vibrant Colors
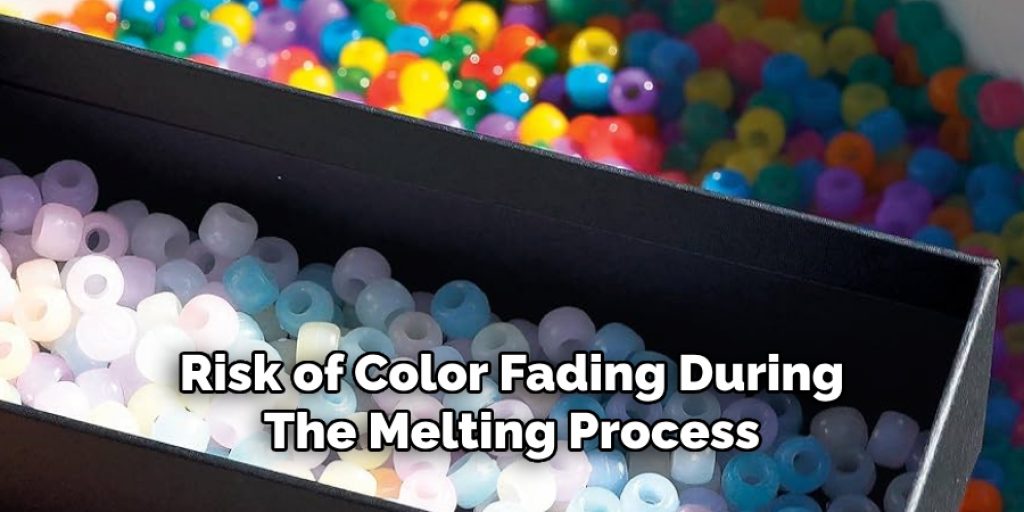
After the initial coating, allow the colored pellets to sit for a few minutes. This resting period helps the color to fully adhere to the pellets, reducing the risk of color fading during the melting process. If you desire more saturated colors, gradually add more food coloring and mix thoroughly.
However, avoid making the pellets too wet, as excess moisture can affect the melting process. Balancing color intensity and pellet dryness is key to preparing for a successful melt.
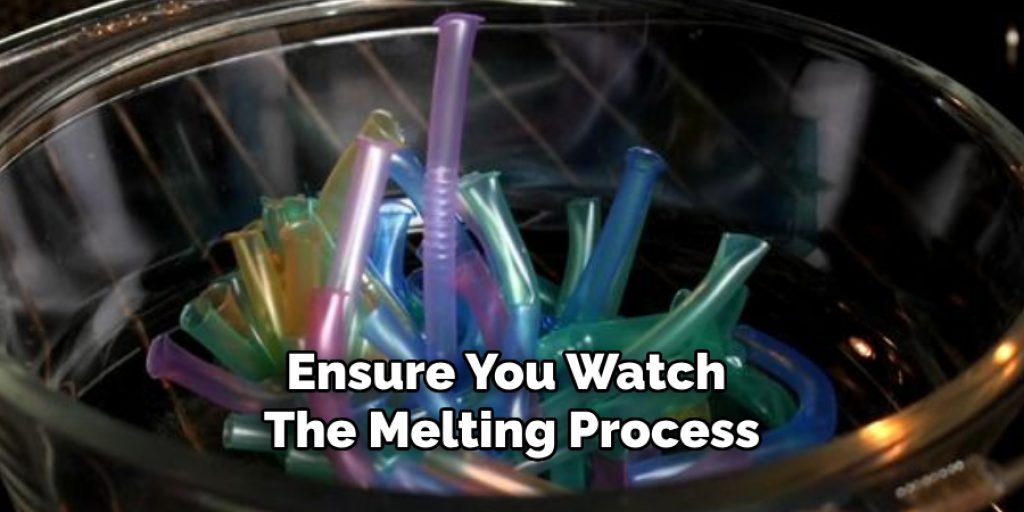
C. Melting Techniques: Microwave Method vs. Oven Method
Microwave Method: For crafters seeking a quicker method, the microwave offers an expedient way to melt plastic pellets. Spread the colored pellets evenly on a piece of parchment paper, ensuring they are in a single layer for uniform heating.
Place the parchment paper in a microwave-safe dish. Heat the pellets in short bursts of 15-20 seconds, checking after each interval. Stir gently between intervals to promote even melting. The total time varies depending on microwave strength and the amount of pellets, but it usually takes 1-2 minutes.
Oven Method: The oven method provides even heat distribution for those preferring a more controlled melt. Preheat your oven to a moderate temperature of around 200-250°F (93-121°C). Spread the pellets on parchment paper on a baking sheet, ensuring they are not overcrowded. Place the sheet in the oven and monitor closely.
Melting can take anywhere from 5 to 10 minutes, depending on oven performance and the thickness of the pellet layer.
Both methods effectively melt the plastic pellets, but the choice depends on the crafter’s preference for speed or control. Whichever you choose, ensure you watch the melting process closely to avoid overheating, which can lead to unwanted burning or sticking.
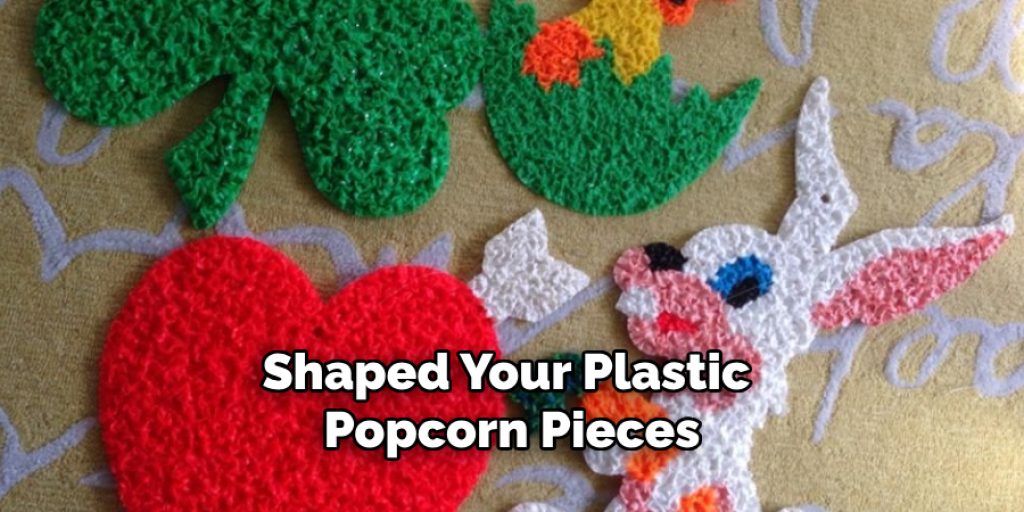
How to Make Melted Plastic Popcorn Decorations: Shaping the Popcorn Pieces
Once the plastic pellets have been melted into a malleable state, the next step is to shape them into your desired popcorn pieces. This stage allows for creativity and personalization, turning simple materials into unique decorations.
A. Pouring the Melted Plastic onto Parchment Paper
Begin by carefully pouring the melted plastic onto a sheet of parchment paper laid out on a flat surface. The parchment paper prevents the plastic from sticking and allows for easy manipulation and movement of the cooling plastic.
Pour slowly to control the thickness of the plastic layer, aiming for an even spread that will cool uniformly. The thickness of your pour will affect the final texture and appearance of your popcorn pieces, so consider your desired outcome when determining how much melted plastic to use.
B. Using Cookie Cutters for Uniform Shapes
Press cookie cutters into the layer to create uniform shapes once the plastic has cooled slightly but is still pliable. Cookie cutters can be found in various sizes and shapes, giving you the flexibility to craft various decoration styles.
Small to medium round shapes work best for a popcorn effect, but don’t hesitate to experiment with other forms to add interest to your collection.
Gently remove the excess plastic from around the cookie cutters before lifting the cutter away to reveal the shape. If the plastic sticks, wait a few more moments for it to set further before attempting to remove the shapes.
C. Creating Texture with Forks or Toothpicks
To achieve the characteristic texture of popcorn, use forks or toothpicks to add details to the still-pliable plastic shapes. This step should be done shortly after cutting the shapes while the plastic is warm enough to manipulate but cool enough to hold the texture.
Gently press the fork or toothpick into the surface of the plastic pieces, creating small indentations and crevices that mimic the look of real popcorn. This technique requires a delicate touch to avoid piercing through or overly distorting the shapes.
The shaping stage is crucial in breathing life into your melted plastic popcorn decorations. You transform simple materials into artistic representations of one of the most beloved snacks through careful pouring, precise cutting, and detailed texturing.
Each piece, unique in its contours and texture, contributes to your handmade creation’s overall charm and allure.
Adding Details and Accents
Once you have shaped your plastic popcorn pieces, adding finishing touches to bring your decorations to life is the next exciting step. Details and accents play a crucial role in transforming your crafts into dazzling pieces of art that capture the eye and spark the imagination.
A. Painting Details with Acrylic Paints
Acrylic paints are a versatile and accessible choice for adding color and details to your plastic popcorn pieces. Begin by choosing paints that complement or contrast beautifully with your base colors.
You can accentuate each piece’s unique texture with a fine paintbrush by highlighting the ridges and indentations, mimicking the light and shadow play found on real popcorn. For an authentic look, use white and yellow to create the illusion of butter topping, or go bold with unconventional colors for a whimsical effect.
Allow the paint to dry completely, which usually takes about an hour, depending on the thickness of the applied paint.
B. Adding Glitter or Sequins for Sparkle
For those who love a bit of sparkle, incorporating glitter or sequins can elevate your popcorn pieces from fun to fabulous. This step is particularly effective for decorations intended for festive occasions like Christmas or New Year’s Eve.
Apply a thin layer of clear craft glue to the areas where you want the sparkle to adhere. Sprinkle glitter evenly over the glue or place individual sequins for a more controlled design. Shake off any excess and allow the glue to dry. This touch of sparkle catches the light beautifully, giving your decorations an added dimension of glamour.
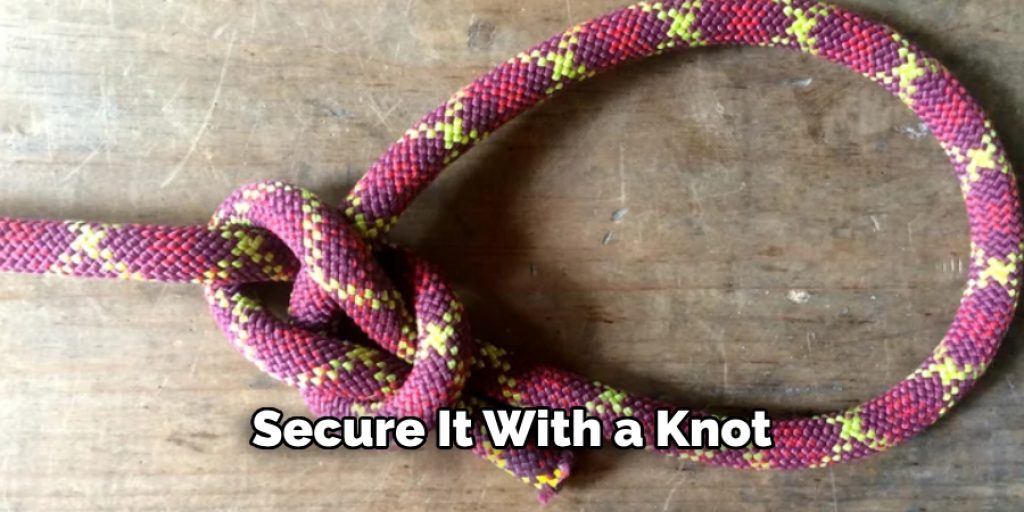
C. Attaching String or Hooks for Hanging
Finally, to display your popcorn decorations, you’ll need to attach a mechanism for hanging. Strings and hooks both offer viable options depending on where and how you intend to hang your crafts. For strings, use a fine drill or needle to create a small hole at the top of each piece, being careful not to crack the plastic.
Thread a thin, sturdy string through the hole and secure it with a knot. For hooks, specifically small craft or ornament hooks, you can directly insert the hook into the plastic piece while it’s still slightly pliable from the shaping process. Once inserted, allow the piece to cool completely, securing the hook in place.
You transform your melted plastic popcorn pieces into enchanting decorations ready to adorn any space or occasion by meticulously painting details, adding glitter or sequins, and attaching strings or hooks. Each step allows for personalization, ensuring your creations are as unique as they are beautiful.
Decorating Ideas and Inspirations
With your handmade plastic popcorn decorations complete, it’s time to explore how these delightful creations can enhance various spaces and occasions. Whether it’s the festive season, a special celebration, or crafting personalized gifts, these versatile pieces offer endless possibilities.
A. Christmas Ornaments: Popcorn Garland, Tree Decorations
Christmas provides a perfect opportunity to showcase your popcorn decorations. String them together with festive ribbons to create a charming popcorn garland that can grace mantelpieces, stair banisters, or even the Christmas tree itself.
Individual popcorn pieces, especially those painted in white and glittered, can be combined with other traditional decorations to hang on the tree. The unique texture and sheen of these decorations can add an appealing contrast against the tree’s green or the warmth of holiday lights.
B. Party Decor: Table Centerpieces, Wall Hangings
Popcorn decorations can bring a playful and creative touch to party décor. Fill glass vases or bowls with these lightweight pieces for table centerpieces, adding LED lights or colored beads for an extra sparkle. Wall hangings can be crafted by arranging popcorn pieces on strings or in frames, customized to match the party’s theme.
These decorations can be particularly delightful for movie-themed parties or a child’s birthday celebration, adding a whimsical element to the event.
C. Gifts and Favors: Personalized Keychains, Magnets
For a more personal touch, transform your plastic popcorn pieces into unique gifts and favors. Affixing small magnets to the back can serve as quirky fridge magnets, ideal for party favors or small gifts.
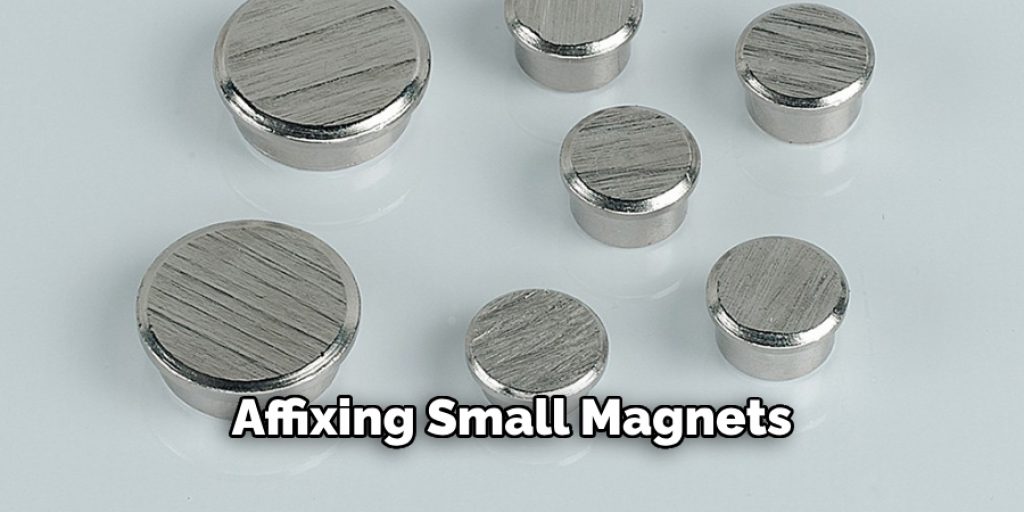
Personalized keychains can be created by attaching a key ring to a particularly well-crafted popcorn piece, making for a thoughtful and whimsical present. These customized items can be particularly appreciated by movie enthusiasts or anyone who enjoys a bit of novelty in their daily routine.
Troubleshooting and Tips
Crafting with melted plastic to create unique decorations, like popcorn pieces, can be as challenging as it is rewarding. Here are some essential troubleshooting tips and techniques to ensure the best outcomes.
A. Preventing Plastic from Burning or Overheating
Monitoring the temperature closely is the key to preventing your plastic from burning or overheating. If your melting setup allows, use a candy or oven thermometer to check the heat level. Different plastics melt at various temperatures, so adjust your heat source accordingly.
A low and slow approach is preferable, as it gives you more control and prevents the plastic from reaching a point where it emits harmful fumes. Always work in a well-ventilated area to avoid inhaling any potentially toxic gases.
B. Adjusting Color Intensity with Food Coloring
Integrating food coloring can be an effective method when working with clear plastic and aiming for vibrant colors. However, achieving the right color intensity requires a balance. Start with a small drop, mix thoroughly, and then gradually add more until the desired hue is reached. Remember that the color may appear slightly different once the plastic has cooled, so it may take a few trials to perfect this technique.
C. Storing Finished Decorations Properly
Proper storage is crucial for preserving the quality and appearance of your finished decorations. To prevent them from sticking together or warping, store them in a single layer on a flat surface, ideally between layers of parchment paper.
For longer-term storage, keep them in a cool, dry place out of direct sunlight, which can cause the colors to fade or the plastic to become brittle over time. This careful storage will ensure your decorations remain beautiful and ready for display year after year.

Creative Variations and Customization
In the pursuit of crafting truly unique decorations, experimentation is key. The versatility of melted plastic popcorn pieces opens up many possibilities for personalization and creativity. Here are some ideas to inspire your next project:
A. Experimenting with Different Shapes and Sizes
Unleash your creativity by experimenting with various shapes and sizes beyond the traditional popcorn piece. Consider molds or even hand-sculpting the plastic to create themed ornaments, such as stars for Christmas or hearts for Valentine’s Day. Playing with sizes adds depth and interest to your arrangements; tiny pieces can be delightful for jewelry, while larger, bold shapes are focal points in room decor.
B. Mixing Colors for Unique Patterns and Designs
Blending colors and crafting unique patterns bring an artistic touch to your decorations. Tie-dye effects, marble patterns, or even simple color gradients can be achieved by carefully controlling how different colored plastics are melted together.
A hint of white or metallic shades can add a sophisticated twist to your palette, ensuring your creations are as eye-catching as they are unique.
C. Incorporating Other Materials like Beads or Ribbons
Consider integrating other materials, such as beads or ribbons, to elevate your pieces even further. Embedding small beads within the plastic as it cools can add texture and sparkle while attaching ribbons can offer a soft, contrasting element that enhances the plastic’s glossy finish.
Such additions personalize your decorations and provide new textures and layers to your creative projects. These materials can significantly diversify your creation’s look and feel, whether it’s enhancing the aesthetic appeal or adding functionality—like turning a simple ornament into a chic keychain.
Sharing Your Creations
Sharing your artwork can bring additional joy and fulfillment once you’ve honed your skills and created unique melted plastic decorations. Here’s how to spread the beauty of your creations:
A. Showcasing on Social Media Platforms
Social media platforms like Instagram, Pinterest, and Facebook are ideal for showcasing your decorations. Use these platforms to post high-quality images of your work, share stories of your crafting process, or even create time-lapse videos of your creations coming to life. Hashtags can increase visibility, and engaging with crafting communities online can provide feedback, inspiration, and new ideas for future projects.
B. Hosting DIY Crafting Parties or Workshops
Organize crafting parties or workshops in your community room, at local libraries, or even online via webinar platforms. These gatherings can be fun for sharing your passion, teaching others your techniques, and inspiring creativity in a communal environment. They’re also an excellent opportunity for direct feedback on your work and the chance to refine your teaching skills.
C. Giving Decorations as Handmade Gifts
Handmade decorations make thoughtful and personalized gifts that are appreciated for their originality and the effort behind them. Whether it’s for holidays, birthdays, or special occasions, your unique creations can add a sentimental touch that commercial gifts often lack. Packaging them attractively can enhance their appeal and make your handmade gift even more special.
Conclusion
We’ve explored the intricacies of how to make melted plastic popcorn decorations, from choosing the right type of plastic to preventing it from burning or overheating. Key tips include monitoring the temperature closely, adjusting color intensity with care, and ensuring proper storage to preserve the decorations.
The essence of crafting lies in creativity and experimentation. We encourage you to push the boundaries of conventional designs, mix colors for unique patterns, and incorporate other materials to add depth and texture to your creations. Each piece is a reflection of your imagination and flair.
We wish all crafters success in their creative journeys with melted plastic popcorn decorations. May your projects bloom with vibrant colors, innovative designs, and personal touches that make each creation uniquely yours. Remember, the beauty of crafting lies not just in the finished product but in the joy of the creative process itself. Happy crafting!
Angela Ervin
Angela is the executive editor of DIY quickly. She began her career as an interior designer before applying her strategic and creative passion to lifestyle and home. She has close to 15 years of experience in creative writing and online content strategy for housekeeping, home decorations as well as other niche efforts. She loves her job and has the privilege of working with an extraordinary team. She lives with her husband, two sons, and daughter in Petersburg. When she's not busy working she spent time with her family.