
How to Decorate a Dough Bowl for Christmas
Are you looking for a festive way to decorate your home this holiday season? Consider using a dough bowl as the centerpiece of your Christmas decor!
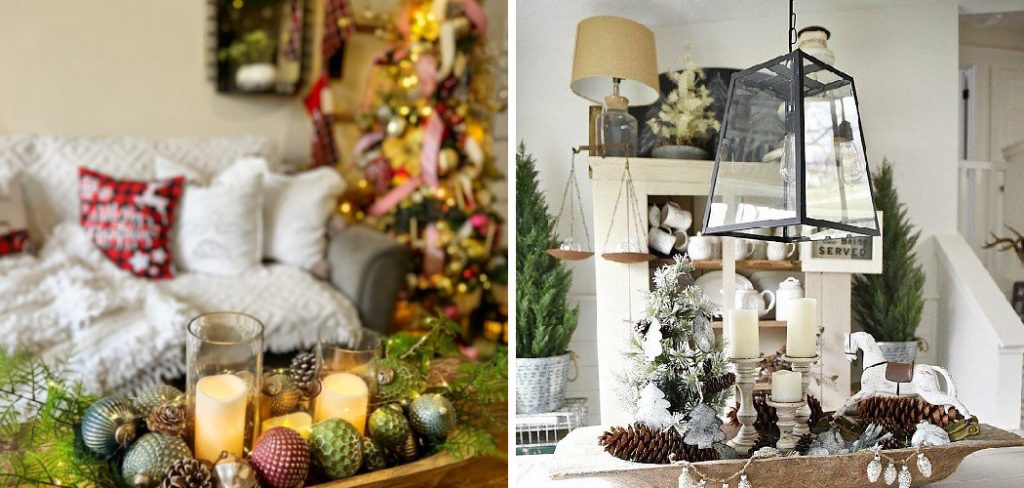
How to decorate a dough bowl for Christmas is a delightful and creative way to embrace the holiday spirit while adding a rustic charm to your home. This versatile decor piece can serve as a stunning centerpiece or an accent in any room, inviting warmth and festivity. By infusing seasonal elements like greenery, ornaments, and candles, you can transform a simple dough bowl into a beautiful display that captures the essence of the holiday season.
In this guide, we’ll explore various creative ideas and techniques to help you craft a one-of-a-kind dough bowl arrangement that reflects your style and enhances your holiday decor. The possibilities are endless, whether you prefer a traditional look or a more modern approach!
What Will You Need?
Before we dive into the different ways to decorate a dough bowl for Christmas, let’s gather all the necessary supplies. Here are some items that you may need:
- A large dough bowl (can be found at home decor stores or thrift shops)
- Seasonal greenery (pine branches, holly leaves, eucalyptus, etc.)
- Ornaments (balls, bells, mini trees, etc.)
- Candles (taper candles, pillar candles, tea lights)
- Faux snow or cotton batting
- Ribbon or twine
- Scissors and wire cutters
- Hot glue gun and glue sticks
Once you have all your supplies, it’s time to start decorating!
10 Easy Steps on How to Make Wood Pumpkins
Step 1: Gather Your Materials
Begin by collecting the planks of wood you’ll use for your pumpkins. You can repurpose old wooden pallets or purchase new wood from a craft store. Additionally, gather your paint, brushes, sandpaper, and any embellishments like ribbons or leaves that you want to use for decoration.

Step 2: Cut the Wood
Using your saw, cut the wooden planks into various sizes to create a collection of pumpkins. For a classic pumpkin shape, consider cutting pieces into rectangles that taper toward the top, resembling the iconic silhouette. Aim for at least three sizes to add visual interest to your arrangement. Remember to wear safety gear while cutting the wood to protect yourself.
Step 3: Sand the Edges
Once you’ve cut your wood, it’s essential to smooth out any rough edges or splinters. Take your sandpaper and gently rub it over the surfaces of the pumpkin pieces, ensuring a nice, safe finish, especially if children will be involved in your decorating process. A smooth surface also allows for better paint adhesion.
Step 4: Paint the Pumpkins
Choose your desired pumpkin colors—traditional orange, white, or even a trendy grey or black can work beautifully. Using a paintbrush, apply an even layer of paint, covering all visible areas. For a more rustic look, consider using multiple shades and layering them to give depth. Let the paint dry thoroughly before moving on to the next step.
Step 5: Add Embellishments
Personalize your wooden pumpkins by adding embellishments. You could use the ribbons and leaves you gathered earlier, attaching them to the top of the pumpkins to mimic the pumpkin stem. Hot glue is ideal for securing these decorative elements. This is your chance to let your creativity shine, so feel free to mix and match materials!
Step 6: Arrange the Pumpkins
Now that your pumpkins are beautifully decorated, it’s time to arrange them in your dough bowl or chosen display area. Layer the pumpkins to create a dynamic look; place larger ones at the back and the smaller ones in front to create depth. Don’t forget to incorporate some of the seasonal greenery and other decorative elements you gathered earlier to fill in any gaps and enhance the overall aesthetic.
Step 7: Fill the Dough Bowl with Greenery
To create a lush and festive base for your pumpkin arrangement, start by placing your seasonal greenery in the dough bowl. Begin with the larger branches or sprigs, positioning them around the edges to form a natural frame. Once the larger pieces are in place, fill the spaces with smaller greenery, such as eucalyptus or holly, ensuring the combination looks abundant and inviting. This greenery will add depth and texture to your display and enhance the rustic charm of the dough bowl, perfectly complementing the wood pumpkins you’ve created.

Step 8: Incorporate Ornaments and Candles
Once your base of greenery is established, it’s time to add ornaments and candles for extra festivity. Start by placing your ornaments strategically among the greenery—mix different sizes and textures for visual interest. You can cluster more miniature ornaments together while allowing larger ones to stand out. Next, include your candles to create a warm glow. If you’re using taper candles, place them in holders and secure them towards the back of the bowl, ensuring they are stable and not at risk of tipping. For pillar or tea lights, nestle them among the greenery and ornaments to create a cohesive look. This step will bring a radiant warmth to your dough bowl arrangement, enhancing the Christmas spirit.
Step 9: Add Faux Snow or Cotton Batting
Consider adding faux snow or cotton batting to bring a magical touch to your dough bowl arrangement. Gently fluff the cotton batting to create a soft, snowy effect, and layer it around your pumpkins, greenery, and decorations. This enhances the wintry aesthetic and provides a beautiful contrast against the wood and vibrant colors of the ornaments. For a more festive flair, sprinkle faux snow over the entire arrangement to mimic freshly fallen snow, ensuring a delightful holiday atmosphere.
Step 10: Finishing Touches
Finally, take a step back and assess your arrangement. Add any additional elements that might complete the look—perhaps a few acorns, cinnamon sticks, or freshly cut fruit for a rustic appeal. Adjust the placement of items as needed, ensuring that everything feels balanced and harmonious. Once satisfied, step back and admire your work; your beautifully decorated dough bowl is now ready to shine as a stunning centerpiece for your holiday festivities!
Following these ten steps, you can create a charming and unique addition to your holiday decor.
5 Different Theme Ideas for Your Wooden Pumpkin Arrangement
- Classic Fall: Stick to traditional fall colors like orange, yellow, and red for your pumpkins, and incorporate autumnal foliage like leaves and berries into your display.
- Rustic Chic: For a rustic farmhouse feel, use neutral shades such as white, grey, or brown for your pumpkins, and add burlap or twine accents.
- Glamorous Gold: For an elegant look, paint your pumpkins with a metallic gold finish and pair them with glittery ornaments and candles.
- Whimsical Wonderland: Create a winter wonderland by painting your pumpkins in cool tones like blue, purple, or silver and adding faux snow or icicle decorations.
- Harvest Harvest: Embrace the bountiful harvest season by incorporating dried corn, wheat stalks, and gourds into your dough bowl display and your wooden pumpkins.

These are just a few ideas to get you started, but feel free to let your imagination run wild! You can also mix and match elements from different themes for a unique, personalized arrangement that reflects your style.
5 Things You Should Avoid
- Overcrowding the Bowl: While filling your dough bowl to the brim with decorations may be tempting, overcrowding can lead to a cluttered look. Leave space for each item to breathe and be appreciated, creating a balanced and aesthetically pleasing arrangement.
- Ignoring Scale and Proportion: Using items of varying sizes is essential for visual interest, but be cautious of scale. Avoid placing too many large items together, as this can overwhelm the arrangement. Instead, mix different sizes thoughtfully to maintain harmony.
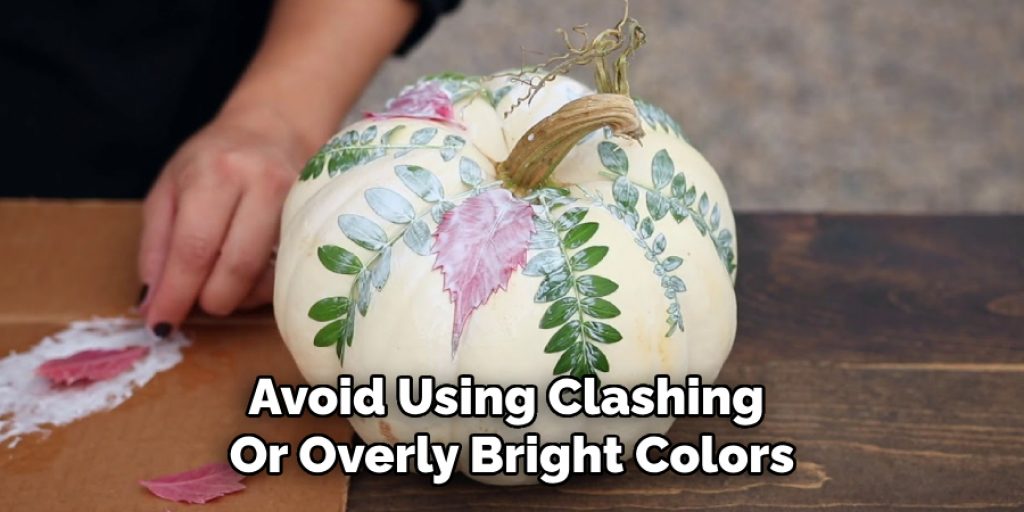
- Neglecting Colour Coordination: A cohesive color palette is essential for your holiday display. Avoid using clashing or overly bright colors that detract from the overall theme. Stick to a few complementary colors to ensure a harmonious look.
- Forgetting Textural Variety: A successful dough bowl arrangement benefits from different textures, but avoid using materials that are too similar, as they can make the display feel flat. To create depth and interest, incorporate a mix of textures—smooth ornaments, rustic greenery, and soft fabrics.
- Using Dried or Dying Elements: Be cautious when incorporating natural elements like dried branches or flowers. Avoid using wilted or unattractive items, as they can detract from the festive spirit. Opt for fresh or high-quality faux greenery to ensure your arrangement looks vibrant and inviting throughout the holiday season.
Conclusion
How to decorate a dough bowl for christmas is a delightful way to express your creativity and enhance your festive decor.
By carefully selecting and arranging seasonal elements like greenery, ornaments, and candles, you can create a stunning centerpiece that captures the spirit of the holiday. Remember to consider themes that resonate with your style, whether it’s a classic, rustic, or whimsical approach. Avoid common pitfalls such as overcrowding and neglecting color coordination to ensure your arrangement feels balanced and inviting.
With these tips in mind, your decorated dough bowl will elevate your holiday ambiance and serve as a warm and welcoming focal point for gatherings with family and friends. Embrace the season, enjoy the process, and let your unique style shine through in your creation!
Angela Ervin
Angela is the executive editor of DIY quickly. She began her career as an interior designer before applying her strategic and creative passion to lifestyle and home. She has close to 15 years of experience in creative writing and online content strategy for housekeeping, home decorations as well as other niche efforts. She loves her job and has the privilege of working with an extraordinary team. She lives with her husband, two sons, and daughter in Petersburg. When she's not busy working she spent time with her family.


