How to Sew a Pocket on a Dress
Are you tired of wearing dresses without pockets? Could you carry your phone, keys, or other small items with you without holding them in your hands? Well, the solution is simple – sew a pocket on your dress!
Sewing a pocket onto a dress can transform a simple garment into a practical and stylish piece. Pockets not only add functionality but can also serve as a design element, enhancing the overall aesthetic of the dress. Whether you want to add a concealed pocket for a sleek finish or a patch pocket for a more casual flair, mastering this technique is a valuable skill for any sewist.
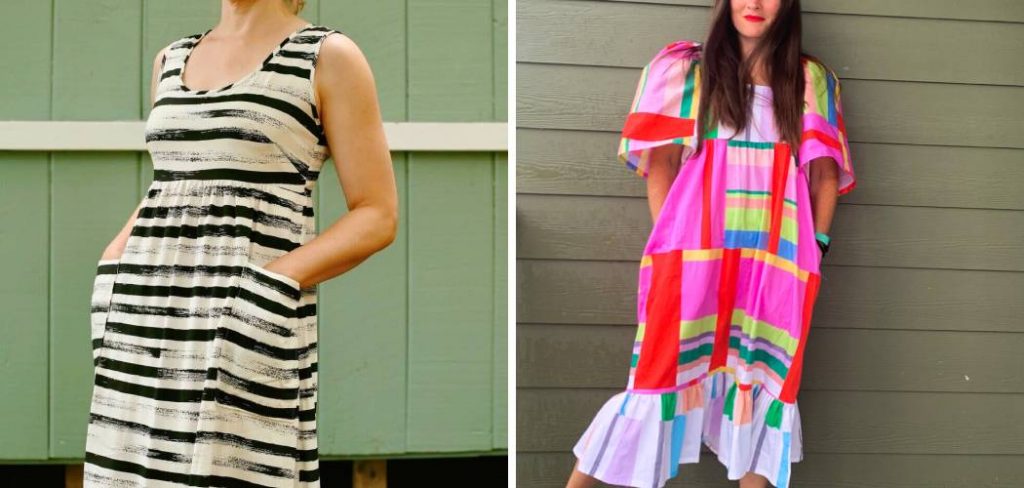
In this guide, we will walk you through the steps on how to sew a pocket on a dress, ensuring both ease and style. Let’s dive into the materials needed and the process involved in creating the perfect pocket!
What Will You Need?
Before we jump into the steps, let’s go over the materials and tools that you will need for this project:
- Dress fabric of your choice
- Pocket fabric (can be the same as dress fabric or a contrasting color)
- Interfacing (optional)
- Sewing machine or needle and thread
- Ruler
- Pins
- Scissors
10 Easy Steps on How to Sew a Pocket on a Dress
Step 1: Prepare Your Fabric and Cut Out the Pockets
First, prepare your dress fabric and cut out the pockets. Start by selecting a suitable pocket location for your dress. This can vary depending on personal preference, but a standard placement is on the side seam or just above the waistline. Once you have chosen a location, measure and mark the pocket size on your dress fabric. Cut out two identical pocket shapes from your dress and pocket fabric.
Step 2: Reinforce Your Pocket
To ensure your pocket holds up to everyday use, it’s essential to reinforce the edges. Start by interfacing the pocket fabric if you use it; this will provide additional structure and stability, especially if you’re working with lightweight materials. With your pocket pieces ready, take one pocket piece and fold the top edge down by about half an inch. Press the fold with an iron to create a crisp edge, then pin it in place. Repeat this process for the other pocket piece as well. This extra step enhances the aesthetic appeal and helps prevent fraying while making the pocket more durable during use.
Step 3: Position the Pockets on the Dress
Now that you have prepared and reinforced your pocket pieces, it’s time to position them on the dress fabric. Place the first pocket piece on the dress at your predetermined location, ensuring that the folded edge faces the top. Use pins to secure the pocket, aligning it carefully with the side seam or waistline. Repeat the process with the second pocket piece on the opposite side, making sure both pockets are evenly spaced for a balanced look.

Step 4: Sew the Pockets to the Dress
With the pockets positioned securely, it’s time to sew them onto the dress. Begin by using your sewing machine or a needle and thread to stitch around the sides and bottom of each pocket, leaving the top open. For added strength, consider using a straight stitch followed by a zigzag stitch along the edges to prevent fraying. Ensure that your stitches are even and consistent for a polished look. Take your time to sew each pocket carefully, making sure to pivot at the corners to create sharp angles.
Step 5: Finish the Top Edge of the Pocket
Now that the pockets are securely sewn onto the dress, it’s time to finish the top edge for a clean and professional look. Fold the top edge of each pocket down towards the dress to create a neat hem. Use an iron to press the fold in place, which will help maintain a crisp edge as you sew. Pin the hem down to keep it secure while you sew. Make a straight stitch close to the folded edge with either your sewing machine or hand sewing machine to hold the hem in place.
Step 6: Trim Excess Fabric
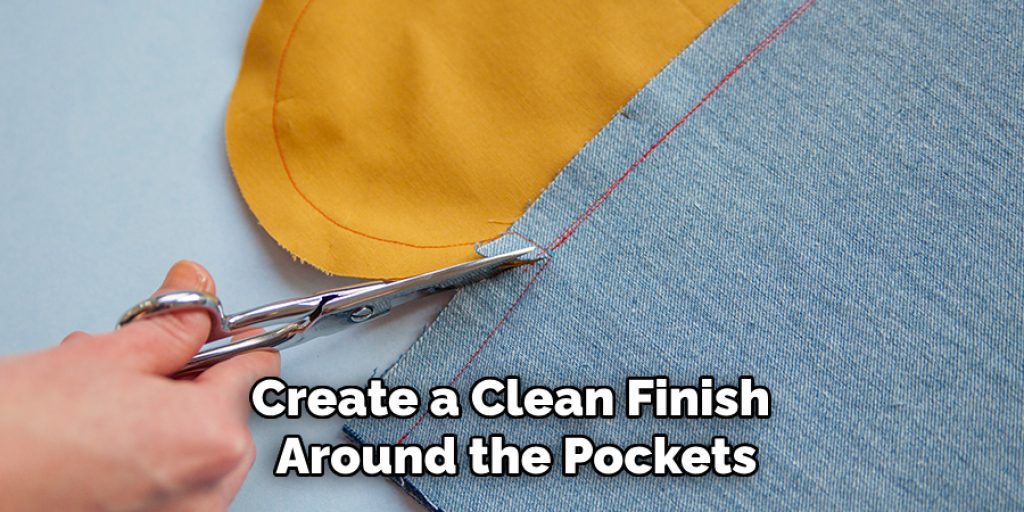
After finishing the top edge of the pocket, it’s essential to trim any excess fabric that may be sticking out from the seams or pocket edges. Carefully cut away loose threads and fabric to create a clean finish around the pockets. This enhances the appearance and reduces bulk, ensuring that the pockets lie flat against the dress. Be cautious not to cut into the pocket seams, maintaining the structure you’ve created. A neat workspace will also make it easier to see your progress and the outcome of your project.
Step 7: Press the Pockets
Once you have trimmed any excess fabric, giving the pockets a good press is important. Using a steam iron, gently press around the pockets to ensure they lay flat and the seams are sharp. This will enhance the overall appearance of your dress and provide a polished finish. Be careful not to distort the shape of the pockets as you press.
Step 8: Topstitch the Pocket Edges
To add a professional touch and ensure durability, consider topstitching along the sides and bottom edges of the pockets. Choose a thread that complements your fabric and set your sewing machine to a straight stitch. Start from one side, sew just outside the pocket seam, and continue around, ending at the same point. This step adds a decorative element while also reinforcing the pocket edges.
Step 9: Check for Any Final Adjustments
Once you have completed the topstitching, it’s essential to take a moment to inspect your work carefully. Check that the pockets are securely attached, ensuring no loose threads or uneven stitching. Gently pull on the edges of the pockets to verify their strength and stability. If any areas appear weak or poorly sewn, reinforce them with an additional stitch. Additionally, the overall alignment and positioning of the pockets on the dress should be assessed; they should be symmetrical and sit at a comfortable height. Making any necessary adjustments at this stage will enhance your dress’s overall look and functionality, ensuring that your pockets not only serve their purpose but also contribute beautifully to the garment’s design.

Step 10: Final Touches and Style Your Dress
With everything securely in place, it’s time for the final touches. First, give your entire dress a good steam or press to eliminate wrinkles and ensure all seams and pockets maintain a crisp look. Next, consider accessorizing your new dress to enhance its appeal; try adding a belt to cinch the waist, or choose complementary accessories that match the fabric’s colors. Lastly, take a moment to admire your work—your newly added pockets provide functionality and contribute to your creation’s overall aesthetics.
By following these steps, you can easily add pockets to any dress and customize them to your liking.
5 Things You Should Avoid
- Neglecting Fabric Types: Avoid using incompatible fabrics together. For example, don’t pair stretchy fabrics with stiff materials for pockets, as this can lead to puckering and misalignment.
- Inaccurate Measurements: Ensure you measure and mark pocket placements accurately. Avoid the temptation to eyeball the positions, as this can result in uneven or lopsided pockets that affect the overall look of the dress.
- Skipping Reinforcement: Remember to use reinforcement at pocket areas, especially if you plan to use them frequently. Failing to reinforce the seams can lead to tearing or pulling, rendering the pockets unusable.
- Overlooking Thread Tension: Check the thread tension on your sewing machine. Poor tension can cause messy stitches and may even compromise the durability of the pocket construction.
- Ignoring Style Cohesion: Avoid choosing a pocket style that doesn’t match the overall aesthetic of your dress. The pocket design should complement the garment, whether it’s casual or formal, to create a harmonious look.
By avoiding these common mistakes, you can ensure that your pockets not only serve their purpose but also enhance the appearance and functionality of your dress.
How Can You Personalize Your Pockets?
- Choose Different Pocket Styles: Experiment with different pocket styles, such as patch pockets, side seam pockets, or even hidden inseam pockets. This will add a unique touch to your dress and can be customized based on your preferences.
- Add Embellishments: For added visual interest, consider adding embellishments like buttons, embroidery, or fabric appliques to your pockets. These details can make the pockets stand out and add a personalized touch to your dress.
- Play with Pocket Placement: Instead of sticking with traditional pocket placements, try playing with different positions and sizes. You could create asymmetrical pocket designs or incorporate multiple smaller pockets into one garment.
- Mix and Match Fabrics: Feel free to mix and match fabrics for your pockets. You could use a contrasting or complementary fabric to add an exciting element to your dress.
- Create Customized Pocket Sizes: Instead of using standard pocket sizes, try creating unique sizes based on what you plan to use the pockets for. For example, more oversized pockets can hold bulkier items, while smaller ones are perfect for small essentials like keys or lip balm.

By personalizing your pockets, you can make them not only functional but also reflect your individual style and creativity in the final look of your dress.
Conclusion
How to sew a pocket on a dress is a rewarding process that enhances both the functionality and aesthetic appeal of your garment.
By carefully selecting pocket styles, accurately measuring placements, and reinforcing seams, you can ensure that your pockets are not only practical but also seamlessly integrated into the dress’s design. Remember to put your personal touch on the pockets through embellishments and unique fabric choices to reflect your style.
With these steps and tips, you can confidently add pockets to any dress, enriching its versatility and charm while enjoying the satisfaction of your crafting skills. Now, with your newly modified dress, you can effortlessly embrace both fashion and function!


