How to Knit Two Together
Are you a beginner in knitting and want to know how to knit two together? This is a simple technique that can be used to decrease the number of stitches on your needles, creating a more tapered shape in your knitting project.
Knitting is a delightful craft that allows you to create a variety of beautiful garments and accessories. One of the essential techniques every knitter should master is “knit two together” (k2tog). This method is beneficial for decreasing stitches in a project, helping shape your work, and creating a more polished finish. Whether you’re looking to refine your skills or are a beginner aiming to expand your knitting repertoire, understanding how to knit it will enhance your ability to confidently tackle various patterns.
In this guide, we’ll provide the steps and tips to successfully execute this technique, ensuring your knitting journey is enjoyable and rewarding.
What Will You Need?
To get started, you will need the following items:
- Yarn
- Knitting Needles in a suitable size for your yarn
- A knitting pattern that includes k2tog instructions
Once you have these materials, you can begin knitting two together.
10 Easy Steps on How to Knit Two Together
Step 1. Prepare Your Stitches:
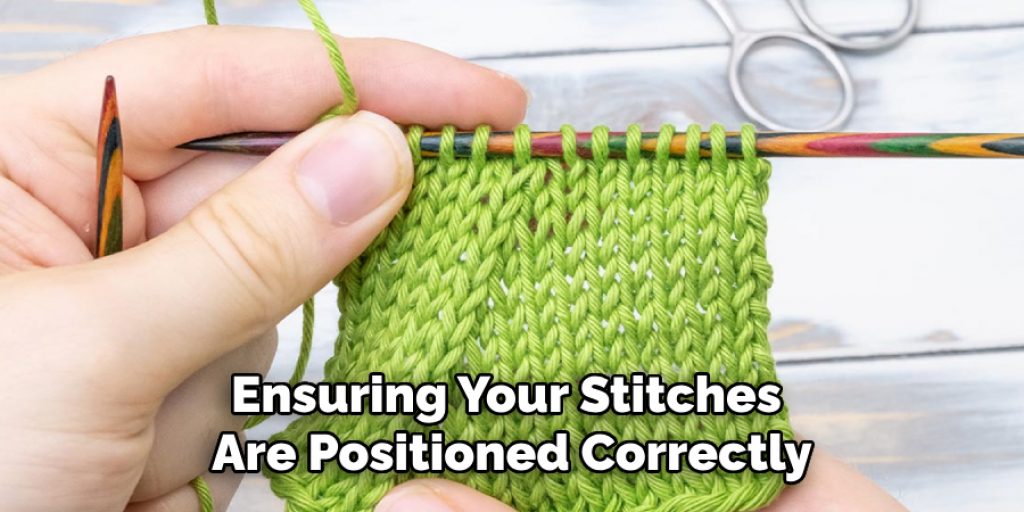
Before diving into the k2tog technique, ensuring your stitches are positioned correctly on the needle is essential. Hold your knitting project with the working yarn in your right hand and the stitches to be decreased on your left needle. As you prepare to knit two together, take a moment to count your stitches, ensuring that you have the required number to perform the decrease. This step helps reduce the stitch count effectively and keeps your project aligned with the pattern you are following.
Step 2. Inserting the Needle:
Once your stitches are prepared, the next step is to insert your right needle into the first two stitches on the left needle. Make sure to insert it from front to back, going through both stitches simultaneously. This technique differentiates a standard knit stitch from the k2tog method, as you will be working with both stitches simultaneously to create the decrease.
Step 3. Execute the Knit:
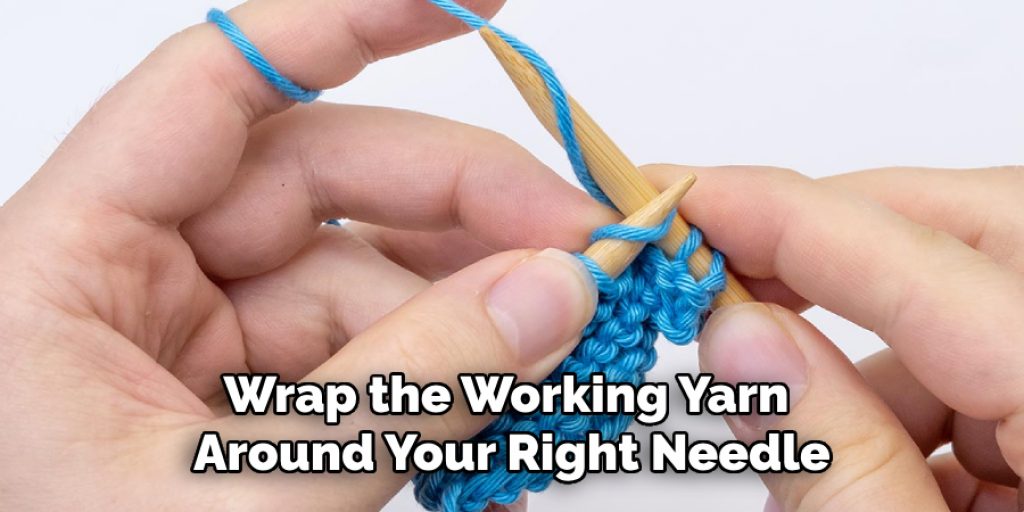
With your right needle inserted through both stitches, wrap the working yarn around your right needle as you would for a regular knit stitch. Pull the yarn through the two stitches, bringing it back around the front. Keep tension on the yarn to avoid any looseness in your work.
Step 4. Slide Off the Stitches:
Once you have pulled the yarn through the two stitches, you will have three loops on your right needle. Carefully slide the first two stitches off the left needle. This action completes the k2tog technique, reducing the stitch count by one. It’s essential to perform this step gently to avoid losing any stitches or accidentally unraveling your work. Removing these two stitches allows your knitting project to take on a more defined shape, which is particularly useful when creating decreases for sleeves, waistlines, or any textured element that requires tailoring. Always check the pattern after this step to ensure you are on track, as each project may have specific guidelines that influence how and when to perform decreases.
Step 5. Check Your Work:
After completing the knit two together, you must check that your stitches are aligned correctly. Examine your work to ensure that the decrease has been executed neatly and that there are no gaps. Don’t hesitate to unravel the last few rows and try again if you notice any inconsistencies. A clean finish will not only enhance the appearance of your project but also maintain the integrity of the overall design.
Step 6. Continue Knitting:
After successfully knitting two together, it’s time to proceed with your project. Maintain the same working tension as you move into the following stitches, ensuring the decrease blends seamlessly into your overall pattern. You may encounter further k2tog instructions in subsequent rows depending on your knitting project. Always refer to your pattern to confirm the required number of stitches remaining and determine when to execute additional decreases.
This step is crucial, as it helps maintain the shape and dimension of your work, whether you’re crafting a fitted garment or a decorative accessory. Continue to keep track of your stitch count as you progress, and enjoy the rhythmic flow of the needles as you create your masterpiece.
Step 7. Repeat as Needed:
As you advance further into your knitting project, you should continue using the k2tog technique for repeat times, depending on the pattern’s requirements. Pay close attention to the instructions in your knitting pattern, as it will dictate when and how many times to perform this decrease. Consistently monitor your stitch count, adjusting as necessary to maintain the desired shape of your work. Each repetition of this step will contribute to achieving a well-fitted and beautifully crafted piece, allowing you to refine your skills and gain confidence in your knitting practice.
Step 8. Finishing Techniques:
Once you have completed all necessary k2tog decreases, it’s time to finish your project. Use a tapestry needle to weave in any loose ends from the yarn, ensuring that they are securely tucked away for a clean finish. This step is vital as it prevents any unraveling and maintains the visual integrity of your work. If your project requires blocking, prepare it by carefully dampening the fabric and shaping it according to your pattern instructions. This process will help even out any stitches and enhance the overall appearance of your knitted item.
Step 9. Review and Adjust:
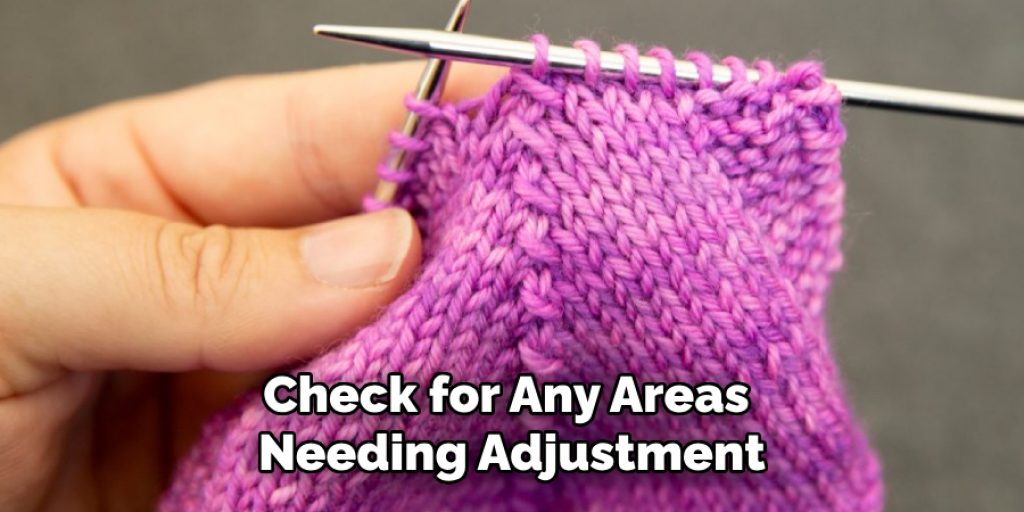
After finishing your piece, take a moment to review your work. Check for any areas needing adjustment, such as uneven tension or misplaced decreases. If necessary, don’t hesitate to make minor tweaks to refine your work further. This is also an excellent opportunity to assess whether the shape and fit met your expectations based on the original pattern.

Step 10. Show Off Your Work:
Finally, take pride in your completed project! Share your finished piece with fellow knitters or on social media to inspire others. Documenting your knitting journey can provide valuable insights for yourself and others seeking to improve their skills. Plus, receiving feedback from the knitting community can motivate you to embark on your next project with renewed enthusiasm. Enjoy the process and the beautiful creations you’ve made!
By following these steps and practicing the k2tog decrease method, you can easily incorporate decreases into your knitting projects and achieve a professional finish.
5 Things You Should Avoid
- Skipping the Check on Tension: Failing to maintain consistent tension can lead to uneven stitches. Always ensure that your tension is even throughout, as this will help your k2tog decrease and look neat and professional.
- Not Watching Your Stitch Count: Keeping track of your stitches before and after performing the k2tog is crucial. Ignoring this can lead to unintentional increases or decreases in your stitch count, throwing off the entire pattern.
- Using Incorrect Stitch Techniques: Ensure you know the correct way to execute the k2tog method. Using an improper technique can result in sloppy decreases or even laddering between stitches.
- Neglecting Gaps in the Work: If you notice gaps or holes after completing a k2tog, it’s a sign that your technique may need refinement. Pay attention to this issue, as it can detract from the overall appearance of your project.
- Forgetting to Refer to the Pattern: Each knitting project may have unique requirements for decreases. Failing to consult your pattern can lead to mistakes regarding where and how often to perform k2tog, ultimately affecting the shape and fit of your finished piece.
By avoiding these common pitfalls and carefully following the steps outlined above, you can confidently incorporate the k2tog decrease into your knitting repertoire.
How to Knit With 2 Balls of Yarn?
Knitting with two balls of yarn can be helpful in specific knitting projects, mainly when working with multiple colors or large amounts of yarn. Here’s a step-by-step guide on how to knit with 2 balls of yarn:
- Prepare Your Yarn: Begin by preparing your two balls of yarn. If you’re using different colors, ensure they are wound into separate balls with the working end accessible.
- Hold the Yarns Together: Hold one ball of yarn in each hand, with the working end of both towards the back of your work. Use your fingers to hold both strands together and prevent them from tangling.
- Make a Slip Knot: Create a slip knot on one strand of yarn and place it onto one of your knitting needles. This will serve as the first stitch for your project.
- Start Knitting: With both strands held together, begin knitting according to your pattern instructions. The two strands will create a thicker, more textured fabric, adding dimension to your work.
- Switch Yarns: When switching yarns, drop one ball of yarn and pick up the other, keeping both strands taut. Continue knitting with the new strand as if it were the only one being used.
- Alternate Between Yarns: As you continue knitting, alternate between the two balls of yarn as needed according to your pattern instructions.
- Finishing Off with Both Strands: When you’re ready to finish your project, use both strands of yarn together for a consistent appearance throughout.
By following these steps, you can successfully knit with two balls of yarn and create unique and eye-catching pieces.
Conclusion
How to knit two together is a fundamental technique that opens the door to various shaping options in your knitting projects.
Mastering this decrease method can enhance your skills and achieve professional-looking finishes. Remember that consistency in tension and careful stitch counting is critical to executing k2tog flawlessly. Whether you’re creating garments, accessories, or decorative pieces, incorporating k2tog allows for refined shaping and textural creativity.
As you continue to practice this technique and explore different patterns, you’ll develop greater confidence in your knitting abilities, leading to even more impressive creations. Embrace the learning journey, and enjoy the satisfaction of each completed project!


