How to Sew Shirring
Are you tired of wearing plain, simple tops? Do you want to add some texture and detail to your clothing? Look no further than shirring!
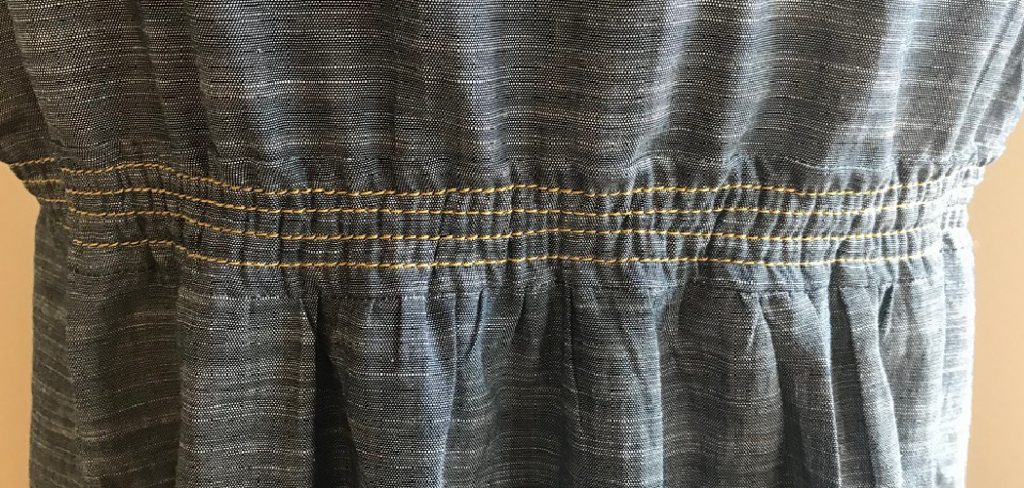
How to sew shirring is a delightful way to add volume and elasticity to your projects, creating beautiful gathered effects that are both functional and stylish. This technique involves sewing rows of gathered stitches, allowing the fabric to create a soft, ruffled look that can enhance garments, home decor items, and accessories. Whether new to sewing or looking to expand your skill set, mastering shirring opens up a world of creative possibilities.
In this guide, we’ll explain the essential materials, tools, and steps needed to achieve perfect shirring, ensuring that your sewing projects are both eye-catching and expertly crafted.
What are the Benefits of Shirring?
Before we dive into the step-by-step process, let’s quickly cover why shirring is an excellent technique to add to your sewing repertoire.
- Adds Texture and Dimension: Shirring adds texture and dimension to fabric by creating rows of gathered stitches, making it more visually exciting and unique. This is especially useful for solid-colored or simple patterned fabrics.
- Provides Stretch and Comfort: Unlike traditional gathered fabric, shirring provides elasticity and stretch, making it more comfortable to wear while maintaining a fitted look.
- Elevates Your Design: Shirring can take your sewing projects to the next level by adding a touch of elegance and femininity. It’s perfect for creating delicate details on clothing such as sleeves, necklines, or waistbands.
- Versatile and Easy to Customize: Shirring can be used on various fabrics and in different ways, allowing you to customize the technique to fit your needs. You can alter the width and depth of the shirring rows, creating various levels of fullness and gathering.
What Will You Need?
Before you get started, make sure you have the following materials and tools on hand:
- Fabric: Any lightweight or medium-weight fabric will work for shirring. Cotton, voile, rayon, and silk are all great options.
- Matching Thread: Use a matching thread color to ensure your stitches blend seamlessly into the fabric.
- Elastic Thread: This is the crucial ingredient for shirring. It’s a particular type of thread that contracts when heated, creating the gathered effect.
- Sewing Machine: While it is possible to sew shirring by hand, using a sewing machine will give you more control and precision.
- Bobbin with Regular Thread: You’ll need to use regular thread in your bobbin, as elastic thread is too thick and can cause tension issues.
- Scissors: Sharp scissors are crucial for clean cuts and accurate trimming.
- Pins: Pins will help keep your fabric in place while sewing, ensuring neat and even stitches.
Once you have all your materials, you can start sewing shirring!
10 Easy Steps on How to Sew Shirring
Step 1: Wind the Bobbin
Begin by winding your bobbin with regular thread. To do this, place a spool of matching thread on the spool pin of your sewing machine and thread it through the bobbin winder. Make sure to follow your machine’s specific instructions for winding, as this can vary by model. Once the bobbin is filled, secure it by pulling it off the winder and ensure that it’s tightly wound to prevent any snags during sewing.

Step 2: Prepare the Elastic Thread
Next, you’ll need to prepare your elastic thread. Place the elastic thread onto the spool pin and thread it through the machine, ensuring it runs through the tension disc without getting tangled. Unlike regular thread, elastic thread requires a gentle touch—avoid pulling it too tightly to maintain its elasticity. Leave a tail several inches after threading, as this will help you secure it later.
Step 3: Set Your Sewing Machine
Before sewing, adjust your sewing machine’s stitch length to a more extended setting, typically around 3.0 to 4.0. This longer stitch will allow the fabric to gather when the elastic thread contracts. You should also set your machine to a straight stitch, as this will allow you to create consistent rows of shirring effectively.
Step 4: Mark Your Fabric
Using fabric chalk or a fabric marking pen, mark the lines on your fabric where you intend to sew your shirring rows. It’s helpful to space them evenly, depending on how gathered you want the final effect. Standard spacing is around 1/4 to 1/2 inch apart, but you can adjust this based on your design.
Step 5: Pin Your Fabric
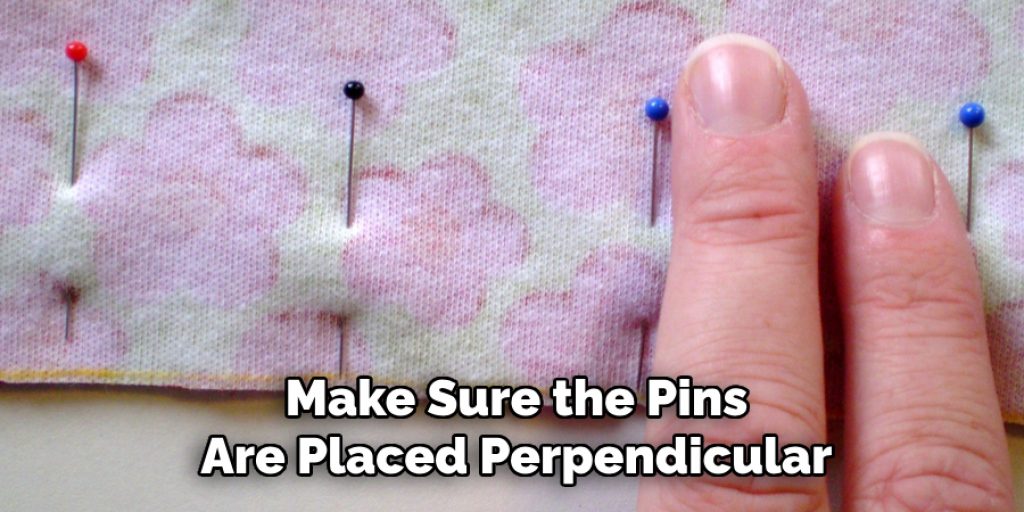
Once you’ve marked your fabric, it’s time to pin the layers together. Take your fabric pieces and align them according to the markings you’ve made. Use your pins to secure the fabric, ensuring that the marked lines are visible and easily accessible for sewing. This step is crucial as it prevents any shifting during the sewing process, which could lead to uneven gathers or misaligned rows. Make sure the pins are placed perpendicular to the sewing line, making removing them easier as you sew.
For added accuracy, consider using a quilting ruler to double-check that the layers are correctly aligned before moving on. Pinning well sets a solid foundation for achieving a professional-looking shirred effect, so take your time with this step!
Step 6: Sew the Shirring Rows
Now that your fabric is pinned, it’s time to sew the shirring rows. Begin by carefully feeding the fabric under the presser foot of your sewing machine. Start sewing along the marked lines, making sure to keep your stitches consistent and straight. As you sew, the elastic thread will gather the fabric automatically. It’s important to sew steadily; rushing may cause uneven gathers or stitch irregularities. If you notice that the gathers are not forming as expected, check your threads to ensure they are set correctly and that you’re using the right stitch length.
Step 7: Set the Gathers
Once you’ve sewn your shirring rows, it’s time to set the gathers. This can be accomplished by gently steaming the fabric with an iron set to the appropriate temperature for your chosen material. Make sure to use the steam function—avoid direct contact with the elastic thread, as it can shrink or damage the gathers. Instead, hold the iron a few inches above the fabric to allow the steam to penetrate and help the gathers form beautifully.
Step 8: Secure the Ends
To prevent the shirring from unraveling, it’s essential to secure the ends of your rows. You can achieve this by backstitching a few stitches at the beginning and end of each row. Alternatively, you can also tie off the threads at the end of each row if you prefer a more traditional approach. This will help maintain the gathered effect and stabilize the stitches in place.
Step 9: Remove the Pins
After securing the ends, carefully remove the pins from your fabric. Take your time doing this, as it’s easy to accidentally pull on the gathered threads. Removing the pins gently ensures that your work remains intact and the gathers maintain their shape.
Step 10: Finish Your Project
Finally, once all your shirring is in place, it’s time to finish your project. Trim any excess threads and give your fabric a final press with the iron to smooth everything out. You can incorporate your newly shirred fabric into garments, accessories, or home decor pieces. Whether you choose to sew a new top, create a lovely skirt, or embellish a cushion cover, the addition of shirring will undoubtedly enhance your creation with texture and character. Enjoy the fruits of your labor and wear or display your unique project with pride!
By following these ten easy steps, you’ll be able to create beautiful gathered effects that add a touch of elegance and dimension to your sewing projects. With some practice and experimentation with different fabrics and spacing, you can customize the look of your shirring to suit any style or design.
5 Things You Should Avoid
- Using Too Much Tension on the Elastic Thread: Over-tightening the tension on the elastic thread can lead to uneven gathers and can even break the thread. Constantly adjust the tension to a lower setting for elastic threads to maintain their stretch.
- Skipping the Marking Step: Neglecting to mark your fabric can result in misaligned rows and uneven gathers. Take the time to accurately mark your sewing lines to ensure a uniform and professional-looking finish.
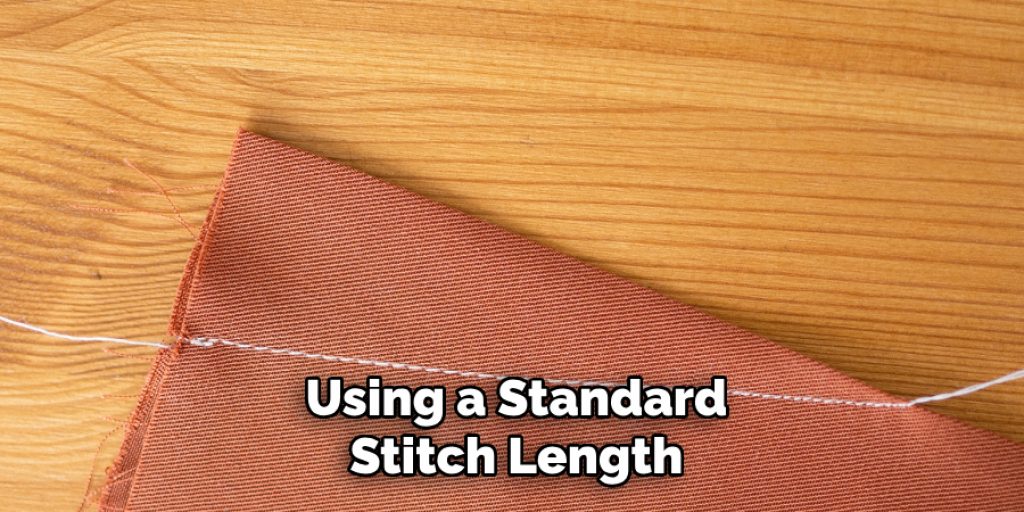
- Sewing with the Wrong Stitch Length: Using a standard stitch length instead of a longer stitch (3.0 to 4.0) will prevent the fabric from gathering correctly. Adjust your stitch length accordingly to achieve the desired shirred effect.
- Lack of Testing on Scrap Fabric: Diving straight into your main project requires testing on a scrap piece to avoid unforeseen issues. Always do a test run to ensure your settings and technique yield satisfactory results.
- Forgetting to Secure the Thread Ends: Failing to backstitch or tie off your threads at the ends of each row can lead to unraveling over time. Make sure to secure your stitches properly to maintain the integrity of your shirring.
By avoiding these common mistakes, you can achieve beautiful and consistent shirring effects every time.
Conclusion
In conclusion, mastering the art of shirring enhances your sewing skills and allows you to add unique texture and depth to your projects.
By following the outlined steps on how to sew shirring—from preparing your fabric and marking your lines to securing your ends and finishing your piece—you can achieve a professional and polished look. Remember that practice is key; don’t hesitate to experiment with different fabrics and thread tensions to find what works best for your designs.
With patience and creativity, shirring can transform your sewing projects into charming and elegant creations that showcase your individual style. Happy sewing!

