How to Make Wooden Shrub Protectors
Wooden shrub protectors are an excellent solution for safeguarding young plants from harsh weather conditions and potential damage from wildlife. By creating a physical barrier, these protectors not only help to ensure the healthy growth of your shrubs but also add an aesthetic touch to your garden.
In this guide, we will explore the materials needed and the step-by-step process of how to make wooden shrub protectors that can stand the test of time while providing your plants the shelter they need.
What Are Wooden Shrub Protectors?
Wooden shrub protectors are specially designed enclosures intended to shield young shrubs from environmental stressors. Made primarily from durable wood, they create a protective barrier that deters animals and minimizes damage caused by wind, frost, and heavy rainfall. These structures can vary in design, from simple wooden frames to more intricate designs with added features like trellises.
Besides their functional benefits, wooden shrub protectors can also enhance the visual appeal of outdoor spaces, blending seamlessly with nature while providing essential care for your plants.
Why Choose Wood for Shrub Protectors?
Wood is a popular choice for shrub protectors due to its natural aesthetic, durability, and versatility. Being a renewable resource, wood offers an environmentally friendly option that can blend seamlessly into any garden setting. Its natural appearance complements the greenery of plants and enhances the overall beauty of outdoor spaces. Moreover, wood has inherent strength that can withstand various weather conditions, providing a sturdy barrier against harsh elements. Different types of wood, such as cedar or redwood, are naturally resistant to decay and pests, making them suitable for long-term use.

Additionally, wood is easy to work with, allowing for custom designs that can accommodate specific garden needs and preferences. By choosing wood for shrub protectors, gardeners can achieve both functionality and an attractive appearance, ensuring their plants are well-protected.
10 Methods How to Make Wooden Shrub Protectors
1.Planning and Designing
The initial step in making wooden shrub protectors is planning and designing them to meet both functional and aesthetic needs. Begin by assessing the size and type of shrubs you need to protect. Measure the height and spread of the shrubs, considering their mature size to ensure adequate coverage. Sketch a design for the protectors that includes dimensions, shape, and style.
Common designs include cylindrical guards, open slatted panels, or square enclosures. Your design should account for the growth of the shrub and allow for easy access for maintenance and watering. The design phase is crucial, as it sets the stage for the entire project and ensures that the protectors will be both effective and visually appealing.
2.Selecting the Right Wood
Choosing the appropriate type of wood is vital for creating durable and functional shrub protectors. Opt for hardwoods like cedar, oak, or maple, which are known for their durability and resistance to decay. Cedar, in particular, is favored for its natural resistance to rot and insects, making it ideal for outdoor use. Ensure that the wood you select is free from defects such as knots or cracks, which could compromise the strength of the protectors.
For a more eco-friendly option, consider reclaimed wood or sustainable timber sources. The wood should be treated or sealed to withstand outdoor conditions, ensuring longevity and maintaining the visual appeal of your shrub protectors.

3.Measuring and Cutting Wood
Accurate measurements and precise cutting are essential for crafting well-fitting and functional shrub protectors. Start by measuring the dimensions of your design, including the height, width, and depth of the protectors. Transfer these measurements onto the wood using a pencil or chalk, marking out where you will cut. Use a saw appropriate for the type of wood you are working with—such as a circular saw for straight cuts or a jigsaw for curved cuts.
Ensure that your cuts are straight and clean to avoid any gaps or misalignment when assembling the protectors. Proper measuring and cutting are fundamental to achieving a professional-looking finish and ensuring that the protectors fit securely around your shrubs.
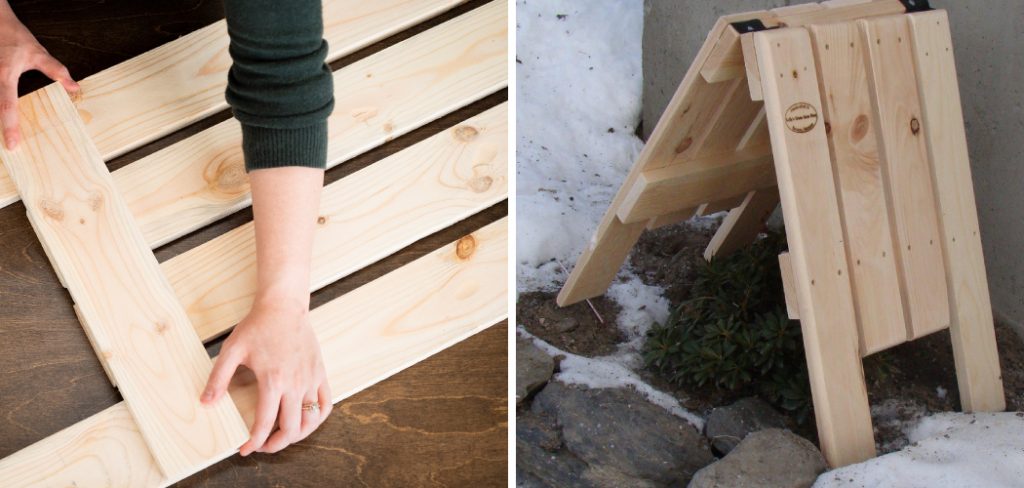
4.Assembling the Frame
Assembling the frame of your wooden shrub protectors is a critical step in ensuring stability and functionality. Start by laying out the cut pieces of wood on a flat surface, arranging them according to your design. For a simple cylindrical protector, you’ll need vertical slats and horizontal rings or bands. Attach the slats to the rings using wood screws or nails, ensuring that they are evenly spaced and securely fastened.
For a more complex design, such as an open panel protector, use wood glue and screws to join the pieces together, creating a robust frame. Use a level to check that the frame is straight and adjust as necessary before securing all connections. A well-constructed frame will provide the necessary support and durability for your shrub protectors.
5.Adding Support and Stability
To ensure that your wooden shrub protectors remain stable and upright, it’s important to add support elements. If your design includes a base or stakes, attach these components to the frame to anchor the protectors securely in the ground. For cylindrical protectors, consider using ground stakes or pegs that can be driven into the soil to hold the structure in place.
For panel-style protectors, you may need to add additional bracing or cross supports to prevent wobbling or leaning. Ensure that the support elements are made from durable materials and are securely attached to the frame. Proper support and stability are crucial for the effectiveness of the protectors and for preventing them from tipping over or becoming dislodged.
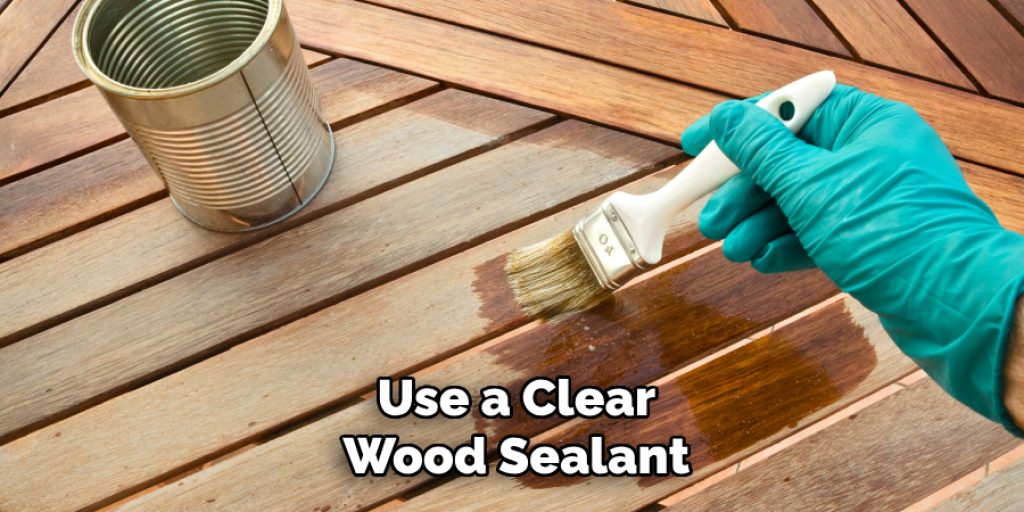
6.Sealing and Finishing
Sealing and finishing your wooden shrub protectors enhances their durability and appearance. Apply a wood preservative or sealant to protect the wood from moisture, insects, and decay. For a natural look, use a clear wood sealant that highlights the grain and texture of the wood. Alternatively, you can stain or paint the protectors to match your garden’s aesthetic or to provide additional protection against the elements.
Ensure that the sealant or finish is applied evenly and that all surfaces, including the edges and undersides, are covered. Allow the finish to dry completely before installing the protectors. Proper sealing and finishing extend the lifespan of the protectors and contribute to their visual appeal.
7.Installing the Protectors
Once the protectors are finished and dried, it’s time to install them around your shrubs. Begin by clearing the area around each shrub, removing any debris or weeds. Position the protectors carefully around the base of the shrubs, ensuring that they are centered and aligned properly. For protectors with stakes, drive the stakes into the ground to secure the structure in place. If you are using panel-style protectors, you may need to dig small holes or trenches to anchor the base.
Adjust the protectors as necessary to ensure that they are level and securely positioned. Proper installation is key to providing effective protection for your shrubs and ensuring that the protectors function as intended.
8.Maintaining the Protectors
Regular maintenance is essential for keeping your wooden shrub protectors in good condition and ensuring their effectiveness over time. Inspect the protectors periodically for any signs of damage or wear, such as loose fittings, cracks, or rot. Repair any issues promptly to prevent further deterioration. Reapply sealant or finish as needed to maintain the protectors’ resistance to moisture and decay. Additionally, clean the protectors regularly to remove dirt and debris that may accumulate. Keeping the protectors well-maintained ensures their longevity and continued protection for your shrubs.
9.Adjusting for Shrub Growth
As your shrubs grow, you may need to adjust the protectors to accommodate their changing size and shape. Monitor the growth of the shrubs and check that the protectors are providing adequate space and support. For adjustable designs, you can modify the height or width of the protectors as needed. If your design does not allow for easy adjustments, consider incorporating removable panels or extensions that can be added or removed as the shrubs grow. Ensuring that the protectors can adapt to the growth of the shrubs helps maintain their effectiveness and prevents damage to the plants.
10.Enhancing Aesthetics
In addition to their functional benefits, wooden shrub protectors can enhance the aesthetics of your garden. Consider adding decorative elements such as carvings, latticework, or ornamental trim to the protectors to complement your garden’s design. You can also incorporate features like climbing supports or integrated planters to add visual interest and functionality.
Experiment with different finishes and colors to match the protectors with your garden’s overall look. Enhancing the aesthetics of the protectors not only improves their visual appeal but also integrates them seamlessly into your garden design.
Conclusion
In conclusion, making wooden shrub protectors involves a combination of thoughtful design, precise craftsmanship, and practical installation. By following these detailed methods, you can create protectors that not only safeguard your shrubs but also add a charming and functional element to your garden. From planning and selecting materials to assembling and installing the protectors, each step is crucial for achieving a successful outcome. Thanks for reading, and we hope this has given you some inspiration on how to make wooden shrub protectors!
Elizabeth Davis
Elizabeth is a creative writer and digital editor based in the United States. She has a passion for the arts and crafts, which she developed from a young age. Elizabeth has always loved experimenting with new mediums and sharing her work with others. When she started blogging, she knew that DIYquickly would be the perfect platform to share her tutorials and tips. She's been writing for the blog from the beginning, and her readers love her helpful advice and easy-to-follow instructions. When she's not writing or editing, Elizabeth enjoys spending time with her family and friends.