How to Use a Yarn Swift
A yarn swift is an essential tool for knitters and crocheters, designed to simplify the process of winding yarn into neat and manageable balls or skeins. This handy device makes it easier to prepare yarn for use, preventing tangles and ensuring an even tension as you work on your projects.
Whether you’re working with freshly dyed skeins or unraveling a vintage find, understanding how to use a yarn swift effectively can enhance your crafting experience and save time, allowing you to dive straight into your creative pursuits. In this guide, we’ll explore the different types of yarn swifts, their setup, and the proper techniques for winding yarn efficiently.
Why Use a Yarn Swift?
Before we dive into the specifics of how to use a yarn swift, let’s first understand why it’s such an important tool for yarn enthusiasts. A yarn swift can make the process of winding yarn much faster and more efficient compared to other methods such as using your hands or chairs.
Firstly, a yarn swift is designed to hold your yarn in place while you wind it, preventing tangles and ensuring a smooth winding process. This is especially useful when working with delicate or slippery yarns that can easily become tangled or stretched.
Additionally, using a yarn swift allows you to create uniform tension as you wind the yarn onto your ball or skein. This ensures that your finished product will have consistent density, which is crucial for achieving the desired results in your projects.
Types of Yarn Swifts
There are various types of yarn swifts available on the market, each with its own unique features and advantages. Here are some common types of yarn swifts to consider:
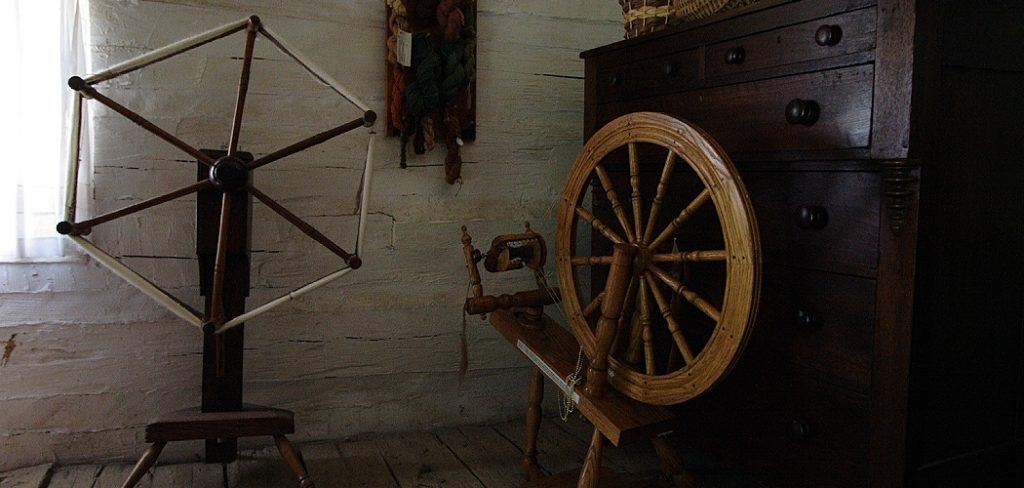
Umbrella Swift:
This is one of the most popular and traditional types of yarn swifts, consisting of a central metal rod with arms that extend outwards like an umbrella. The skein of yarn is placed over the arms, and as you turn the handle on the top, the arms spin around, allowing for easy winding.

Amish Swift:
The Amish swift is another widely used type of yarn swift, which features a wooden frame with pegs along its length. The skein of yarn is looped around these pegs, and as you turn the crank at the bottom, the entire frame rotates to wind up the yarn.
Tabletop Swift:
As its name suggests, this type of yarn swift is designed to sit on a tabletop or surface, making it easier to use and transport. It typically consists of a wooden frame with pegs for holding the yarn and can be adjusted to accommodate different sizes of skeins.
8 Step-by-step Guidelines on How to Use a Yarn Swift
Step 1: Prepare Your Swift
Before you start winding your yarn, it’s crucial to set up your yarn swift properly. Begin by selecting a flat, stable surface to place your swift on, ensuring it is secure and won’t tip over during use. If you’re using an umbrella swift, hold the central rod and gently pull the arms outward until they click into place, forming a circle.
For an Amish or tabletop swift, make sure all pegs are correctly positioned and that the frame is properly assembled. Once your swift is in position, adjust the height if necessary to accommodate your skein of yarn and ensure everything is tightened for a smooth winding process.
Step 2: Prepare Your Yarn
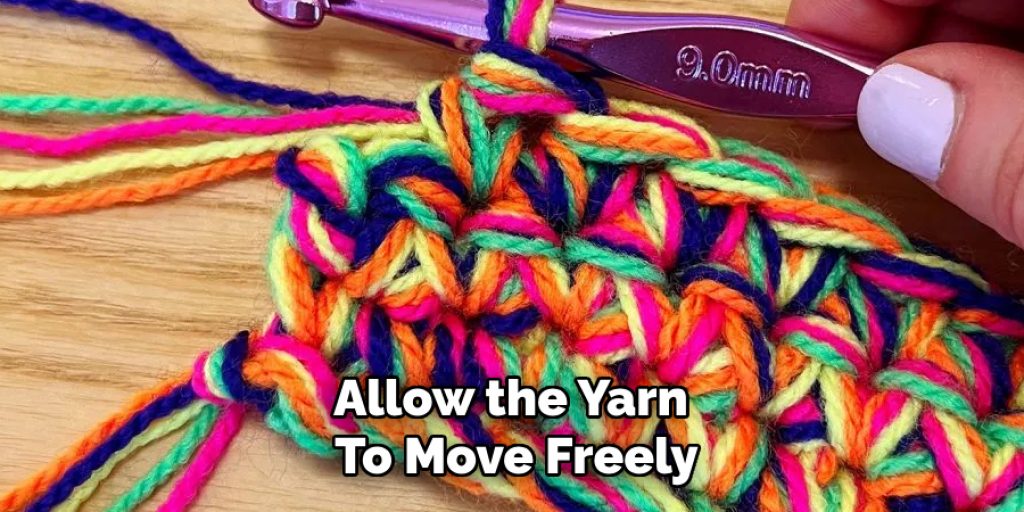
Once your yarn swift is set up, it’s time to prepare your yarn for winding. Start by taking your skein of yarn and removing any ties or packaging that may be securing it. This will allow the yarn to move freely and will help prevent any tangling during the winding process. If your yarn is particularly tightly wound or has been sitting for a while, gently stretch it out to help it regain its shape and ensure a smoother winding experience.
If you’re working with multiple skeins, consider laying them out in the order you’ll be using them, making it easy to switch between colours or textures as you craft. With your yarn prepped and ready to go, you’re now primed for efficient winding!
Step 3: Secure the Beginning of Your Yarn
Before you start winding, it’s important to secure the starting end of your yarn. You can do this by tying a loose knot around one of the pegs on your swift or by using a clothespin to attach it to the frame. This will prevent any slipping or movement of the yarn as you wind and ensure an even tension in your finished product.
The method you use will depend on the type and thickness of your yarn, so experiment to find what works best for you.
Step 4: Begin Winding Your Yarn
Now that your yarn is secured and ready, it’s time to start winding. For an umbrella swift, gently turn the handle at the top to begin spinning the arms. As the arms rotate, guide the yarn onto the swift, ensuring it wraps evenly around the arms without overlapping. If you’re using an Amish or tabletop swift, start cranking the handle at the bottom while maintaining a gentle tension on the yarn to avoid any slack or tangling.
As you wind, keep an eye on the tension; it should be firm yet not overly tight, allowing for a smooth winding process. If you notice the yarn beginning to tangle or twist, pause briefly to adjust it before continuing. It’s essential to maintain an even flow of yarn as you work, which will help ensure that your finished ball or skein is uniform in shape and tension. Continue winding until you have your desired amount of yarn wound, then move on to the next step!
Step 5: Remove the Yarn from the Swift
Once your yarn is wound, it’s time to remove it from the swift. Carefully lift the arms or frame of your swift while holding onto the starting end of your yarn to prevent any slipping or tangling. If you opted for a knot or clothespin, carefully untie or remove them before proceeding. The yarn may be slightly twisted at this point, so gently straighten it out to allow for easier use in your project.
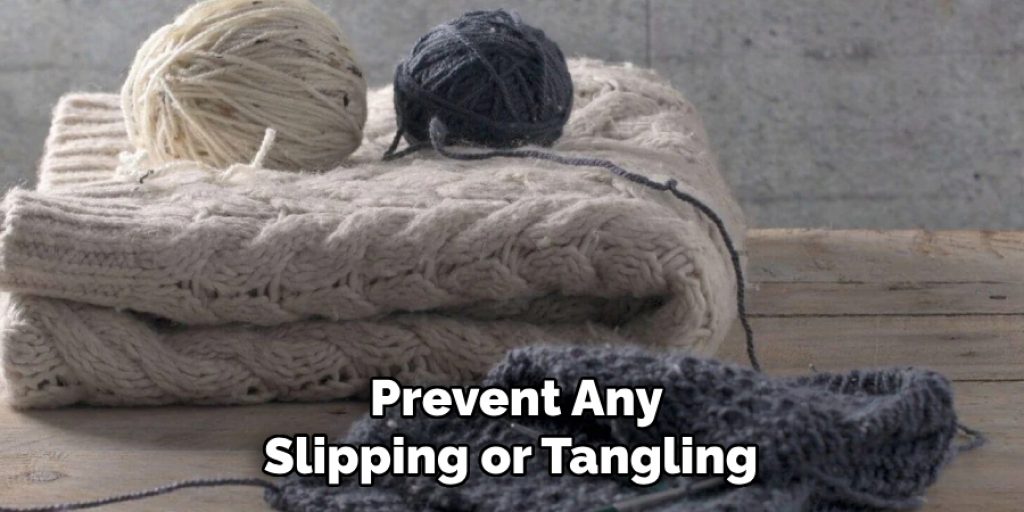
It’s crucial to handle your yarn carefully at this stage to prevent any unwanted snags or tangles, which can be frustrating and time-consuming to fix.
Step 6: Create a Centre Pull Ball
To create a centre pull ball from your wound yarn, start by placing the unsecured end of the yarn between your thumb and index finger. Then, begin wrapping the yarn around these fingers in a figure-eight pattern until you have a small bundle of yarn formed.
Carefully slide this bundle off your fingers and continue wrapping it with the remaining loose end, forming a ball shape. This method of winding will allow for an easy pull from the center as you work on your project, avoiding any tangles or knots that may occur with traditional outside-pull balls.
Step 7: Store Your Yarn
If you’re not planning on using your yarn immediately, it’s important to store it properly to prevent any damage or tangling. One option is to place the yarn in a sealed plastic bag and remove any excess air before sealing. This will help keep out dust and other potential hazards while preserving the shape of your yarn wound.
Alternatively, you can use a yarn bowl or storage container specifically designed to keep yarn neat and organized. Whichever method you choose, be sure to label your skeins with key information such as color, weight, and dye lot, if applicable, for easy reference in future projects.
Step 8: Clean and Maintain Your Yarn Swift
After you’ve completed your project, it’s crucial to clean and maintain your yarn swift properly to ensure its longevity. Start by removing any remaining yarn from the arms or pegs of the swift, being careful not to damage the wood or metal parts.
You can use a gentle cleaning solution or simply warm, soapy water to clean the swift, wiping it down with a soft cloth and allowing it to air dry completely before storing.
Regular maintenance and cleaning will help keep your yarn swift in top condition for future use, making your winding process smoother and more efficient each time. With these simple steps on how to use a yarn swift, you’ll be able to use your yarn swift like a pro and enjoy creating beautiful projects without any hassle! Happy Crafting!
Additional Tips
- If you’re working with delicate or easily tangled yarns, consider using a mesh bag or fabric netting over your swift to prevent snagging during the winding process.
- For a more portable option, consider using a hand-held yarn winder or a nostepinne to wind your yarn into a ball while on the go.
- When storing multiple skeins of the same yarn, try to keep them in the same direction to avoid any confusion when switching between them for different projects.
- Keep an eye out for any knots or tangles in your yarn as you work; these can be easily fixed by gently teasing them out with your fingers before continuing to wind.
- Don’t be afraid to experiment with different methods and techniques when using your yarn swift; what works best for one type of yarn may not work well for another.
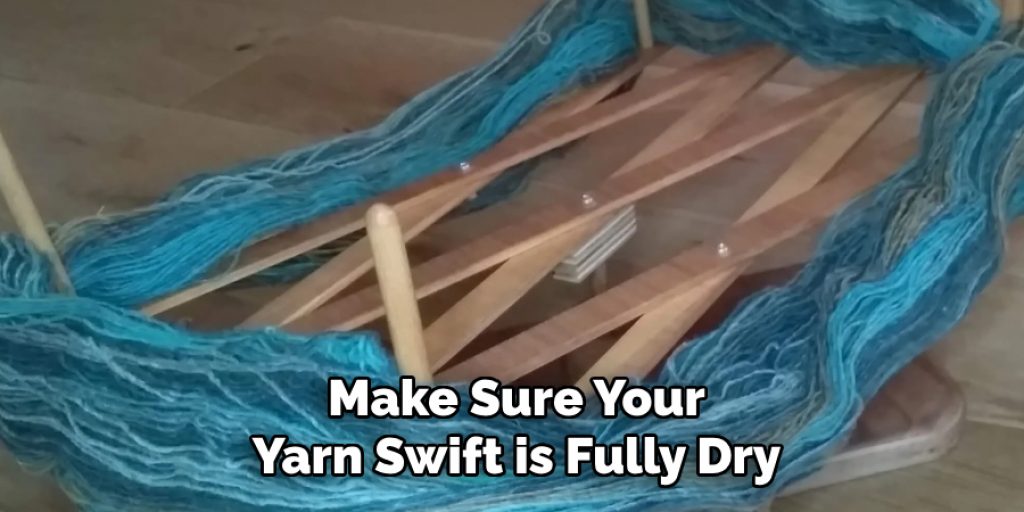
- Always make sure your yarn swift is fully dry before storing it to prevent any potential damage or warping of the wood or metal components.
- If you find yourself frequently working with larger skeins of yarn, consider investing in a larger size swift to accommodate them comfortably. Happy Winding!
Conclusion
In conclusion, mastering the use of a yarn swift can significantly enhance your crafting experience, making the winding process more efficient and enjoyable. By following the steps outlined in this guide on how to use a yarn swift, from securing your yarn to creating a center pull the ball, you’ll ensure that your yarn is well-prepared for any project.
Remember to prioritize proper storage and maintenance of both your yarn and your swift, as these practices will contribute to the longevity of your supplies. With a little practice and patience, you’ll soon become adept at using your yarn swift, allowing for a smoother workflow and more productive crafting sessions. Happy crafting and may your creative endeavors be filled with wonderfully wound yarn!
Elizabeth Davis
Elizabeth is a creative writer and digital editor based in the United States. She has a passion for the arts and crafts, which she developed from a young age. Elizabeth has always loved experimenting with new mediums and sharing her work with others. When she started blogging, she knew that DIYquickly would be the perfect platform to share her tutorials and tips. She's been writing for the blog from the beginning, and her readers love her helpful advice and easy-to-follow instructions. When she's not writing or editing, Elizabeth enjoys spending time with her family and friends.