How to Make a Mosaic Crochet Pattern
Creating a mosaic crochet pattern is a rewarding way to explore the art of crochet while producing vibrant, intricate designs. This technique combines various colours and stitches to create a striking visual effect, reminiscent of traditional mosaic art. Whether you’re a beginner eager to learn new skills or an experienced crocheter looking to challenge yourself, mosaic crochet offers endless possibilities for creativity. In this guide, we will walk you through the basics of how to make a mosaic crochet pattern, including selecting materials, understanding necessary stitches, and following a pattern to bring your design to life.
Benefits of Creating Your Own Mosaic Crochet Patterns
Designing your own mosaic crochet patterns offers numerous advantages that extend beyond the simple joy of crafting. Firstly, it allows for personal expression, enabling you to create unique designs that reflect your individual style and preferences. This freedom can lead to a more rewarding and engaging crochet experience. Additionally, creating your own patterns fosters creativity and problem-solving skills, as you must consider colour combinations, stitch choices, and overall design cohesiveness. Moreover, the process enhances your understanding of crochet techniques, ultimately leading to improved skills and confidence in your craft. Finally, sharing your original designs with others can build a sense of community and inspire fellow crocheters to embark on their own creative journeys.
Understanding Mosaic Crochet
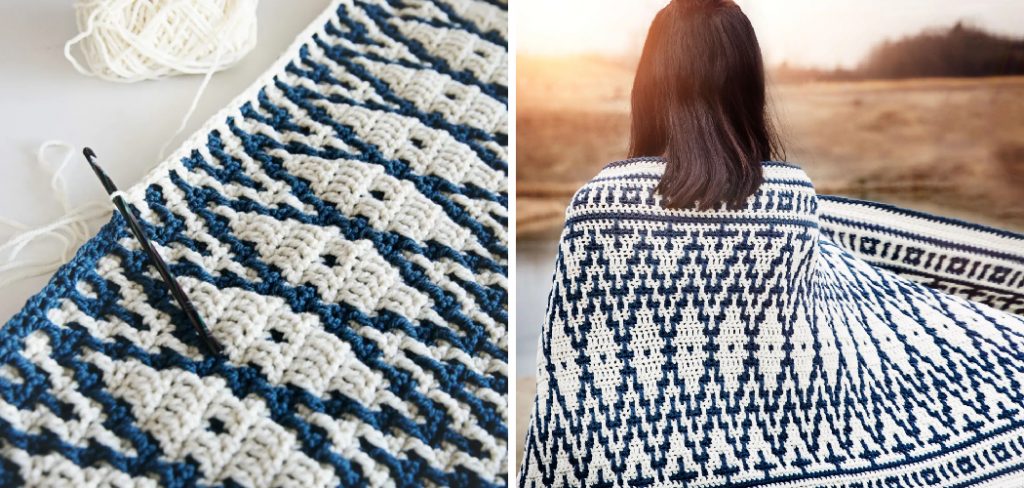
Mosaic crochet is a technique that allows crafters to create intricate patterns using just two colours of yarn. By strategically positioning stitches and alternating between the two colours, you can achieve a stunning visual contrast, creating the illusion of depth and texture in your work. This method often utilizes simple stitches, such as single crochet and double crochet, making it accessible for crocheters of all skill levels. The foundational aspect of mosaic crochet lies in the concept of slip stitches and chain stitches, which are used to create the unique, interlocking designs. Understanding the flow of these stitches is crucial, as it determines how the colours interact and form the overall pattern. With practice, mosaic crochet can open up a world of artistic possibilities, allowing you to transform basic stitches into an elaborate tapestry of colour and form.
10 Methods How to Make a Mosaic Crochet Pattern
1. Choosing Your Design
The first step in making a mosaic crochet pattern is to choose a design that inspires you. Mosaic crochet patterns range from simple geometric shapes to complex motifs, so select a design that matches your skill level and the project you have in mind. You can find patterns in crochet books, online resources, or create your own. For beginners, it’s advisable to start with a basic design featuring repetitive shapes and fewer color changes. As you gain confidence, you can explore more intricate patterns with detailed motifs and multiple color changes. The design you choose will serve as the blueprint for your mosaic crochet project, so take time to select one that aligns with your vision.
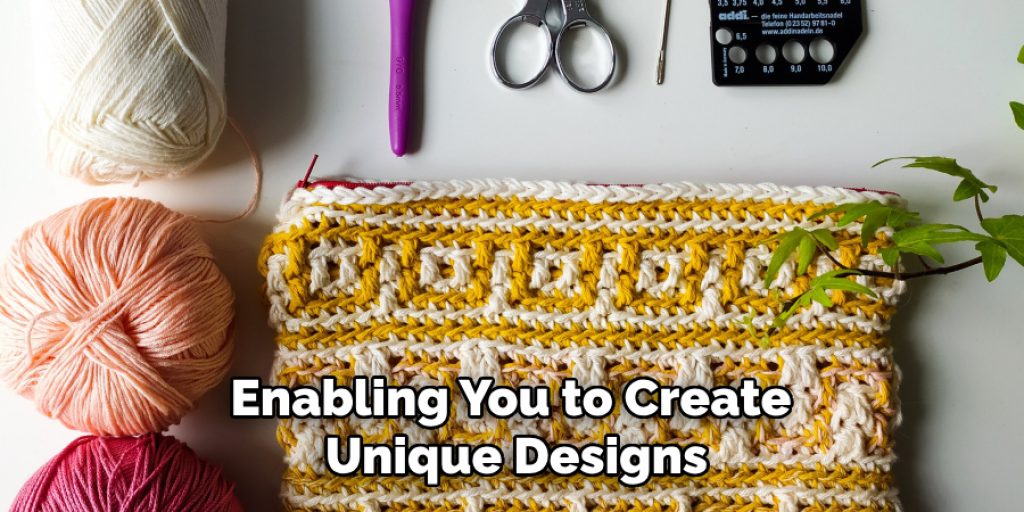
2. Selecting Yarn and Colors
Choosing the right yarn and colors is crucial for bringing your mosaic crochet pattern to life. Opt for yarns with good stitch definition, such as cotton or acrylic, as they help to showcase the pattern’s details. When selecting colors, consider a color palette that complements each other and enhances the design. Typically, mosaic crochet patterns use two or more contrasting colors to create a striking visual effect. Test your color choices by making small swatches to ensure that the colors work well together and highlight the pattern effectively. Proper color selection will significantly impact the overall appearance of your finished project, so choose hues that align with your design and personal preferences.
3. Creating a Graph for Your Pattern
A graph or chart is essential for visualizing and following your mosaic crochet pattern. Start by creating a grid that represents the stitches and rows of your project. Each square on the grid corresponds to a stitch in the pattern. Use graph paper or a digital graphing tool to plot your design, assigning colors to different sections of the grid according to the pattern. Label each row and column to keep track of your progress. A well-drafted graph will help you visualize the pattern, making it easier to follow as you crochet. This method provides a clear reference for color changes and stitch placement, ensuring accuracy in your finished piece.

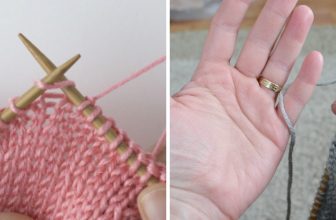
4. Starting with a Foundation Chain
To begin your mosaic crochet project, start with a foundation chain that matches the width of your pattern. The foundation chain should be a multiple of the pattern’s repeat plus any additional stitches required for the edges. For example, if your pattern repeat is 10 stitches, your foundation chain should be a multiple of 10 plus the necessary stitches for the edges. Ensure that your foundation chain is evenly tensioned to avoid uneven edges in your finished project. This foundation forms the base upon which you will build the mosaic crochet pattern, so accuracy in this step is crucial for achieving a neat and consistent result.
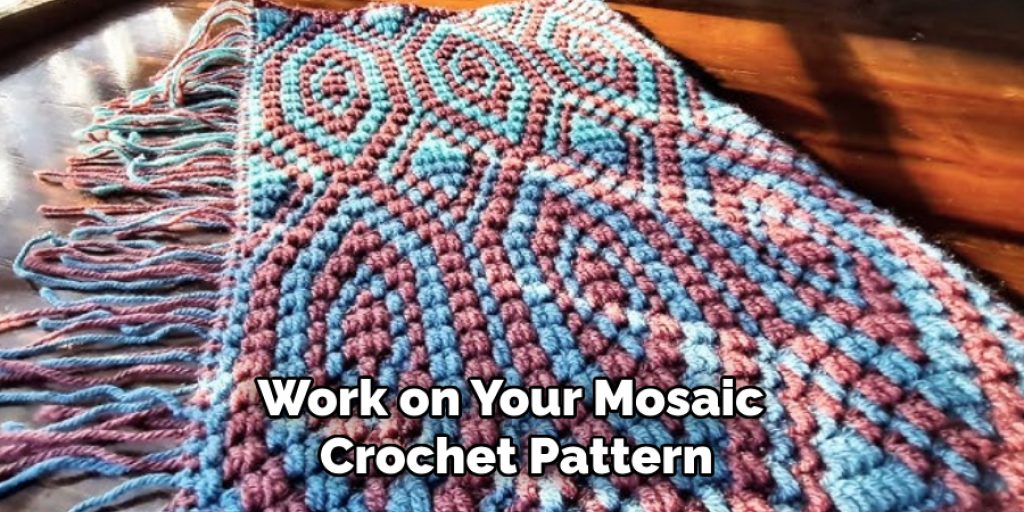
5. Following the Mosaic Crochet Technique
Mosaic crochet is characterized by its use of simple stitches and color changes to create complex patterns. The primary technique involves working two rows of single crochet or double crochet stitches in one color and then changing to a second color for the next two rows. Follow the graph or chart to work the stitches according to the pattern, using slip stitches, chains, and color changes to create the desired design. Pay attention to the color placement and stitch count to maintain the pattern’s accuracy. This technique allows for the creation of intricate designs without the need for complicated stitches, making it accessible for crocheters of various skill levels.
6. Managing Color Changes
Effective color management is key to achieving a clean and professional-looking mosaic crochet pattern. When changing colors, make sure to do so at the end of a row to avoid visible color transitions within a row. Carry the unused color along the edge of the project, keeping it loosely threaded behind the stitches. Use a yarn needle to weave in any loose ends or carry threads as you progress to prevent them from showing through the finished design. By managing color changes carefully, you will ensure that your mosaic crochet pattern has a smooth and seamless appearance.
7. Ensuring Even Tension
Maintaining even tension is essential for achieving a uniform and professional finish in your mosaic crochet project. Pay attention to your stitch tension as you work, ensuring that each stitch is consistent in size and that the yarn is neither too tight nor too loose. Uneven tension can result in a distorted pattern and affect the overall appearance of your project. To practice even tension, consider using a stitch marker or a row counter to keep track of your progress and make adjustments as needed. Consistent tension will help you achieve a well-defined and accurate mosaic crochet pattern.
8. Blocking Your Finished Piece
Blocking is a crucial step in finishing a mosaic crochet project, as it helps to shape and set the pattern. Once you have completed your project, gently wash it according to the yarn’s care instructions. Lay the piece flat on a towel or blocking mat, shaping it to match the pattern’s dimensions. Use rust-proof pins to secure the edges and ensure that the pattern is evenly stretched. Allow the project to dry completely before removing the pins. Blocking helps to even out any inconsistencies, set the stitch definition, and enhance the overall appearance of your mosaic crochet pattern.
9. Troubleshooting Common Issues
As you work on your mosaic crochet pattern, you may encounter common issues such as misaligned stitches or uneven color changes. To troubleshoot these problems, refer to your graph or chart to verify stitch placement and color changes. If you notice mistakes, use a yarn needle or hook to carefully unravel and correct the errors. For uneven color changes, ensure that you are changing colors at the end of rows and carrying unused yarn properly. Regularly checking your work and addressing issues as they arise will help you maintain the accuracy and quality of your mosaic crochet pattern.

10. Experimenting and Customizing
Once you are comfortable with the basics of mosaic crochet, consider experimenting with different designs and techniques to customize your patterns. You can create your own graphs or modify existing ones to suit your preferences. Try using multiple colors, incorporating different stitch types, or adding textured elements to create unique and personalized patterns. Experimenting allows you to explore new creative possibilities and develop your own signature mosaic crochet style. By pushing the boundaries of traditional mosaic crochet, you can create one-of-a-kind projects that reflect your individual taste and creativity.
Conclusion
Creating a mosaic crochet pattern involves careful planning, color management, and attention to detail. From choosing a design and selecting yarn to following the technique and managing color changes, each step plays a crucial role in achieving a beautiful and accurate finished piece. By employing these ten methods, you can master the art of mosaic crochet and produce stunning patterns that showcase your creativity and skill. Thanks for reading, and we hope this has given you some inspiration on how to make a mosaic crochet pattern!
Elizabeth Davis
Elizabeth is a creative writer and digital editor based in the United States. She has a passion for the arts and crafts, which she developed from a young age. Elizabeth has always loved experimenting with new mediums and sharing her work with others. When she started blogging, she knew that DIYquickly would be the perfect platform to share her tutorials and tips. She's been writing for the blog from the beginning, and her readers love her helpful advice and easy-to-follow instructions. When she's not writing or editing, Elizabeth enjoys spending time with her family and friends.