How to Build Scrapbook Paper Storage
Creating a dedicated storage solution for scrapbook paper is essential for any crafting enthusiast looking to keep their materials organized and easily accessible. With an array of beautiful patterns and textures available, having a well-structured storage system allows for efficient use of your creative resources.
In this guide, we will explore various methods and ideas on how to build scrapbook paper storage so that not only protects your precious papers but also enhances your overall crafting experience. Whether you have a small collection or an extensive stash, this project will help you tailor a storage system to fit your needs perfectly.
Importance of Organizing Scrapbook Paper
Organizing scrapbook paper is crucial for maximizing creativity and efficiency in your crafting process. A well-organized system not only saves time by allowing you to quickly find the right paper for a project but also reduces frustration when searching through piles of materials. Additionally, proper organization helps preserve the quality of the papers, preventing them from becoming damaged or bent.
By categorizing your scrapbook papers by colour, theme, or size, you can easily access the materials that inspire you, leading to more innovative and enjoyable crafting sessions. Ultimately, an effective storage solution contributes significantly to enhancing your overall productivity and satisfaction as a crafter.
Planning Your Scrapbook Paper Storage
Before diving into building your scrapbook paper storage, it’s important to take some time to plan the layout and design that will best suit your crafting needs. Start by assessing the size of your paper collection and the types of storage solutions that will accommodate different sizes and formats. Consider whether you prefer vertical or horizontal storage, as this will impact how much space your station requires.

Next, think about the location of your storage system; it should be easily accessible while working on projects. Take into account the materials you already have on hand, such as boxes, bins, or shelves, and identify any additional supplies you might need, such as decorative dividers or labels.
Lastly, determine an organizational scheme that aligns with your style; whether by colour, theme, or project type, establishing a system that resonates with you will enhance your crafting experience. A clear plan not only streamlines the building process but also ensures that your storage solution will remain functional and aesthetically pleasing in the long run.
10 Methods How to Build Scrapbook Paper Storage
1. Modular Cubes
Modular cubes are a versatile and customizable solution for scrapbook paper storage. These cubes can be arranged and stacked to fit any space, making them perfect for crafting rooms of all sizes. Start by purchasing modular storage cubes from a craft or home improvement store. Assemble the cubes according to the instructions, then arrange them in a configuration that suits your needs.
Each cube can hold different types or sizes of scrapbook paper, and you can label the cubes for easy identification. Modular cubes allow you to expand your storage as your collection grows, providing a flexible and scalable solution.
2. Rolling Cart
A rolling cart is a mobile and convenient storage option for scrapbook paper. Choose a cart with multiple shelves or drawers to accommodate your paper collection. Organize your paper by size, color, or theme, placing each category on a separate shelf or drawer. The mobility of the cart allows you to move your supplies to different work areas easily.
Additionally, many rolling carts come with adjustable shelves, enabling you to customize the storage space to fit your needs. This method is ideal for crafters who like to work in various locations or need a portable storage solution.

3. Vertical Paper Holders
Vertical paper holders are an excellent way to maximize space and keep your scrapbook paper organized. These holders, often made of plastic or metal, are designed to store paper vertically, similar to file folders. To build a vertical paper holder system, start by purchasing a set of holders that fit your paper size, such as 12×12 inches. Label each holder by color, pattern, or theme, and place your paper inside.
Arrange the holders on a shelf or in a drawer for easy access. Vertical paper holders keep your paper flat and visible, making it simple to find what you need without rifling through stacks.
4. Hanging File System
A hanging file system provides a neat and organized way to store scrapbook paper. Use a filing cabinet or a portable file box with hanging file folders. Label each folder according to your preferred organization method, such as by color, pattern, or brand. Place your scrapbook paper in the folders, ensuring that the papers are well-supported and not bent. This method keeps your paper easily accessible and protected from damage.
A hanging file system is particularly useful for those who have a large collection and need a structured way to keep everything in order.
5. Repurposed Bookshelves
Repurposing bookshelves for scrapbook paper storage is an efficient and cost-effective method. Choose a sturdy bookshelf with adjustable shelves to accommodate various paper sizes. Use magazine holders, file folders, or plastic bins to organize your paper on the shelves. Label each container for easy identification and arrange them by size, color, or theme.

Bookshelves provide ample storage space and can be easily integrated into your existing crafting area. This method is ideal for those who want a permanent, stationary storage solution that also adds to the aesthetic of their craft room.
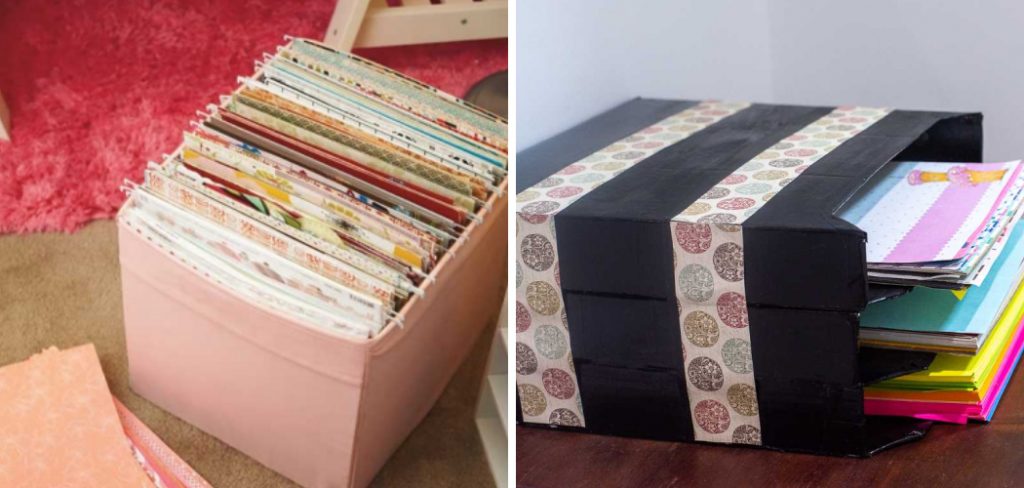
6. DIY Paper Storage Bins
Creating DIY paper storage bins is a fun and customizable way to organize your scrapbook paper. Start by measuring your paper dimensions and constructing bins using a cardboard, foam board, or wood. Decorate the bins with paint, paper, or fabric to match your crafting space. Label each bin and arrange them on a shelf or in a drawer.
DIY bins allow you to tailor the storage to your specific needs and preferences, ensuring that your paper is well-organized and easily accessible. This method is perfect for crafters who enjoy hands-on projects and want a personalized storage solution.
7. Stackable Trays
Stackable trays provide a simple and efficient way to store scrapbook paper. Purchase trays that are designed to stack securely, ensuring that they can hold the weight of the paper without tipping over. Organize your paper by placing different colors, patterns, or themes in separate trays. Stack the trays in a convenient location, such as on a shelf or desk. This method keeps your paper flat and protected while allowing you to easily access each tray. Stackable trays are a great solution for crafters who want a straightforward and scalable storage system.
8. Pegboard Storage
Pegboard storage is a creative and flexible way to store scrapbook paper. Install a pegboard on a wall in your crafting area and use hooks, baskets, and shelves to create a customized storage system. Hang vertical paper holders or clipboards with your scrapbook paper on the pegboard. This method keeps your paper visible and within reach, making it easy to find and select what you need.
Pegboard storage is highly adaptable, allowing you to rearrange and expand your storage as your collection grows. It also adds a functional and decorative element to your craft room.
9. Drawer Dividers
Using drawer dividers is an excellent way to keep your scrapbook paper organized within a drawer. Purchase or create dividers that fit the dimensions of your drawer. Organize your paper by size, color, or theme, placing each category in a separate section. Label the dividers for easy identification. This method keeps your paper neatly arranged and protected from dust and damage. Drawer dividers are ideal for crafters who want a concealed storage solution that keeps their workspace tidy and clutter-free.
10. Magazine Racks
Magazine racks are a practical and space-saving solution for scrapbook paper storage. Choose racks that can hold the size of your paper, such as 12×12 inches. Place your paper in the racks, organizing them by color, pattern, or theme. Label each rack for easy identification. Arrange the racks on a shelf, desk, or wall-mounted holder. This method keeps your paper accessible and visible, allowing you to quickly find what you need. Magazine racks are an affordable and effective way to store and organize your scrapbook paper.
Conclusion
Building an efficient scrapbook paper storage system enhances your crafting experience and keeps your materials in top condition. By experimenting with these ten methods—modular cubes, rolling cart, vertical paper holders, hanging file system, repurposed bookshelves, DIY paper storage bins, stackable trays, pegboard storage, drawer dividers, and magazine racks—you can find the techniques that work best for you. Each method offers unique advantages and can be adapted to suit different spaces, collections, and personal preferences.
Developing an organized and accessible storage system will make your crafting more enjoyable and productive, allowing you to focus on creating beautiful scrapbook projects. Now that you know how to build scrapbook paper storage. While it does take a few steps each time, hopefully now you understand the process and why it’s worth taking the extra step to make sure your floor is properly cared for. So don’t wait any longer, take action today!
Elizabeth Davis
Elizabeth is a creative writer and digital editor based in the United States. She has a passion for the arts and crafts, which she developed from a young age. Elizabeth has always loved experimenting with new mediums and sharing her work with others. When she started blogging, she knew that DIYquickly would be the perfect platform to share her tutorials and tips. She's been writing for the blog from the beginning, and her readers love her helpful advice and easy-to-follow instructions. When she's not writing or editing, Elizabeth enjoys spending time with her family and friends.