
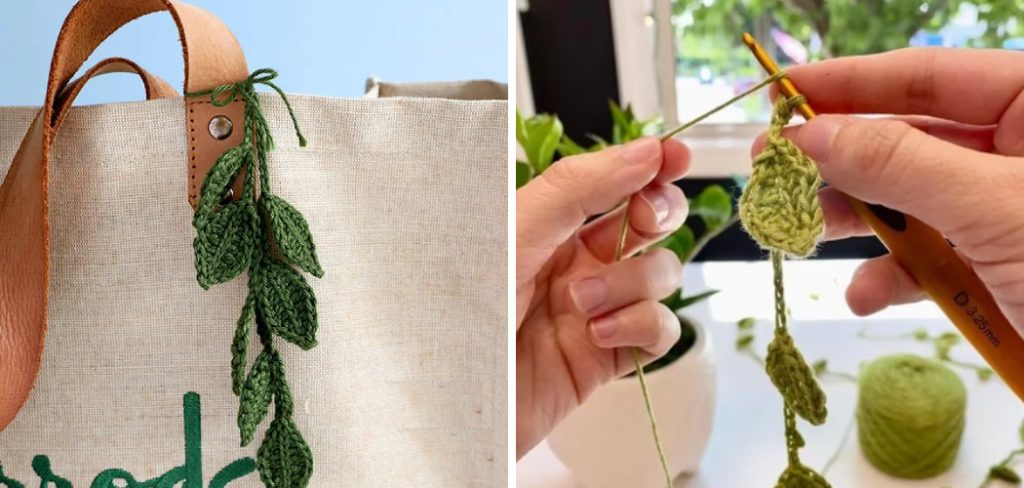
How to Crochet Leaf Garland
Crocheting a leaf garland is a delightful and versatile way to add a touch of natural beauty to your home decor. Whether you’re preparing for a seasonal celebration or simply seeking a charming way to adorn your living space, a leaf garland can serve various purposes—from accentuating your mantelpiece to embellishing a doorway. Beyond their aesthetic appeal, leaf garlands crafted through crocheting are durable and can easily be reused for years, making them a sustainable choice for decorations. In this article, we will guide you through the process of how to crochet leaf garland, outlining the materials needed, the crochet techniques, and tips for personalizing your creation. By the end, you’ll feel inspired to create your own unique garland that reflects your style and creativity.
Materials and Tools Needed
To start your crochet leaf garland, you’ll need a few essential materials and tools. First, gather yarn in various colors; cotton yarn is highly recommended for its durability and ease of use, but you can also opt for acrylic or wool based on your preference. A crochet hook sized appropriately for your chosen yarn is crucial, along with a pair of scissors for cutting your yarn. A tapestry needle will also be necessary for weaving in ends and attaching embellishments.
For tools, a measuring tape will help you determine the length of your garland, while stitch markers can aid in keeping track of your stitches as you work. Optional embellishments such as beads, glitter, or small faux flowers can add a personal touch to your garland, allowing you to create a decorative piece that showcases your unique style.
Choosing the Right Yarn and Hook
Selecting the perfect yarn and hook size is essential for creating a beautiful crochet leaf garland. There are several types of yarn to consider:
- Cotton: This is the most popular choice for garlands, as it is durable, holds its shape well, and comes in a wide variety of colours. It is also easy to wash and maintain.
- Acrylic: A budget-friendly alternative, acrylic yarn is lightweight and available in countless vibrant colors. However, it may not hold its form as effectively as cotton.
- Wool: While softer and warmer, wool yarn can be more challenging for beginners and may require gentle washing to prevent shrinkage.
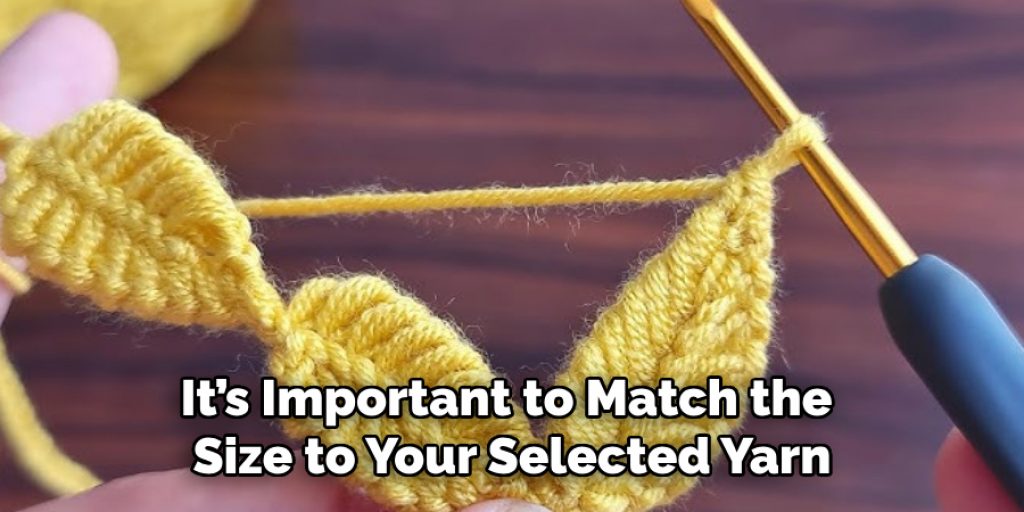
When choosing your crochet hook, it’s important to match the size to your selected yarn. Check the yarn label for recommended hook sizes, and consider adjusting slightly for your personal tension. For example, opt for a slightly larger hook if you prefer a looser pattern.
Consider the theme of your garland when selecting colors. Earthy tones like greens and browns work well for a natural look, while bright, bold colors can create a more whimsical, festive ambiance. Mixing different yarn types and shades can also add depth and interest to your garland design.
How to Crochet Leaf Garland: Basic Crochet Stitches
Understanding the fundamental crochet stitches is crucial for any beginner creating a leaf garland. The most commonly used stitches include the chain stitch, single crochet, double crochet, and slip stitch.
- Chain Stitch (ch): Start with a slip knot on your hook, then yarn over and pull through the loop on your hook. Repeat this process for the desired number of chains. This stitch forms the foundation of your crochet work.
- Single Crochet (sc): Insert your hook into the stitch, yarn over it, and pull up a loop. You will have two loops on your hook. Yarn over again and pull through both loops to complete the stitch.
- Double Crochet (dc): Yarn over, insert your hook into the stitch, and pull up a loop. You will have three loops on your hook. Yarn over again, pull through the first two loops, yarn over once more, and pull through the remaining two loops.
- Slip Stitch (sl st): Insert your hook into the stitch, yarn over, and pull through both the stitch and the loop on your hook to join pieces together.
To practice these stitches, create small swatches, focusing on maintaining consistent tension and forming even stitches. Mastering these basics will provide a solid foundation for more intricate patterns as you progress in your crocheting journey.
How to Crochet Leaf Garland: Making the Leaf Pattern
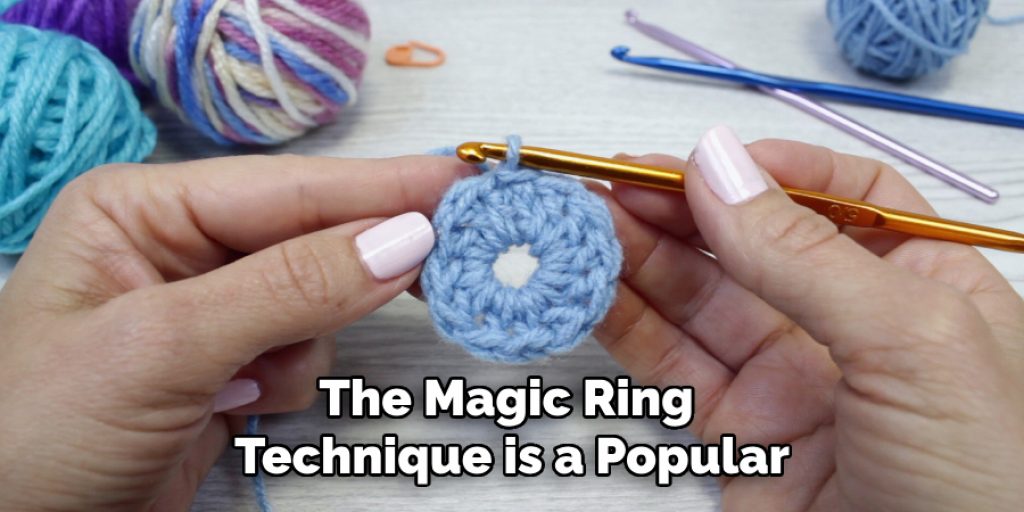
Starting with a Magic Ring
The magic ring technique is a popular starting point for crocheting circular designs, as it allows for a tightly closed center. To create a magic ring, begin by looping the yarn around your index and middle fingers, crossing it over itself. Use your crochet hook to grab the working yarn from behind the ring and pull it through, creating a slip knot. Next, ensure the knot is loose enough to slide but secure enough to hold its shape. From this point, crochet the desired number of stitches into the ring, which will form the base of your leaf. To tighten the ring, gently pull the tail yarn until the center closes completely, ensuring no gaps remain. This technique provides a seamless starting point for your crochet projects, ensuring a neat and professional finish.
Crocheting the Leaf
After establishing the magic ring, it’s time to begin crocheting the leaf shape. Start by working a series of single and double crochet stitches into the magic ring to create the initial rows of your leaf. Use increases—adding extra stitches in the same space—to create wider leaf sections, and employ decreases to shape the tip and edges more delicately. Typically, you might work around 6-10 stitches in the first round. As you progress, alternate between single and double crochet stitches to form the leaf’s texture, keeping your tension consistent. When you reach the desired leaf size, finish off the last stitch and cut the yarn, leaving a tail for weaving in. Finally, thread the tail through a tapestry needle and weave it along the back of the leaf, ensuring all ends are secure to maintain the neat appearance of your crochet piece.
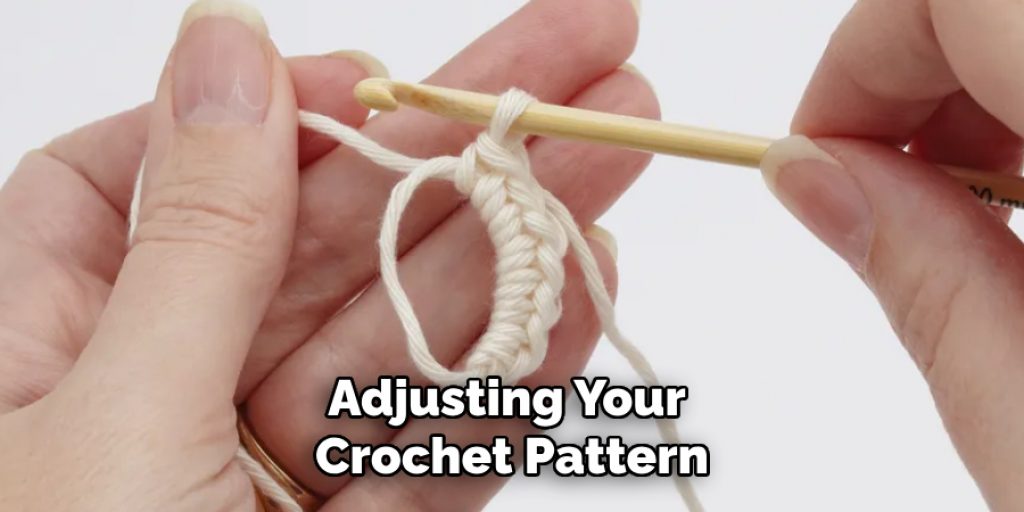
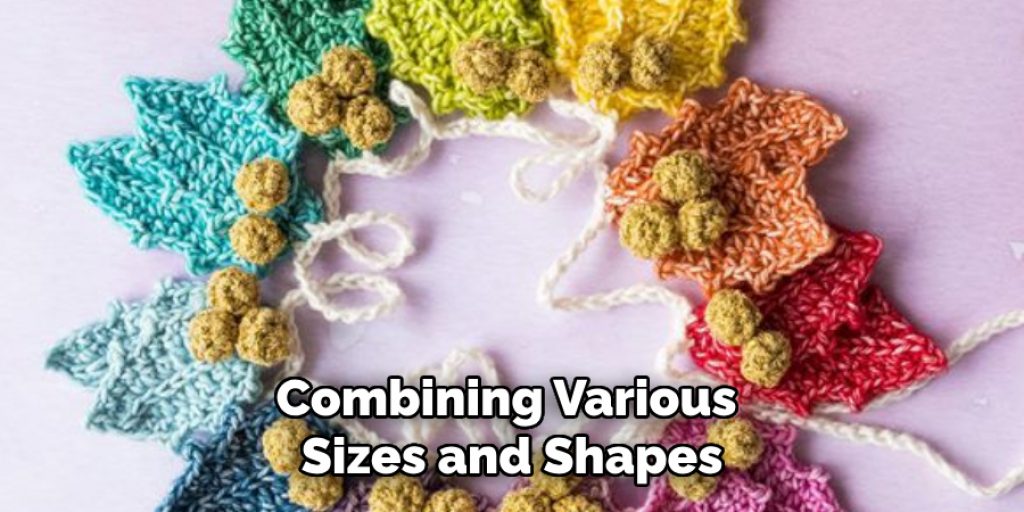
Creating Different Leaf Sizes and Shapes
Adjusting your crochet pattern allows you to create leaves of various sizes, which can add visual interest to your garland. To make larger leaves, simply increase the number of stitches worked into your magic ring or add additional rows of single and double crochet stitches. For smaller leaves, reduce the initial stitch count and limit the number of rows, ensuring each leaf maintains a proportionate shape.
Experimenting with different leaf shapes can yield delightful results. For instance, to create a maple leaf, you can use a combination of chain stitches for the pointed tips and a single crochet for the broader sections, while an oak leaf can be achieved by working simple curves with careful stitch placement. You may also want to incorporate techniques like puff stitches or lacework to enhance the texture and complexity of your leaf designs.
Combining various sizes and shapes will give your garland a more dynamic appearance. Alternate between large, bold leaves and smaller, intricate ones to create a layered effect that captures attention. Additionally, interspersing different leaf shapes can evoke a sense of natural diversity, making your crochet garland a truly unique and personal decoration.
Assembling the Garland
Once you’ve created your beautiful crochet leaves, it’s time to assemble your garland. Start by determining the desired length of your garland. Consider where you will display it—whether it’s for a mantelpiece, a special event, or around a tree—and measure the space accordingly. A typical garland can range from a few feet to several yards, depending on your needs.
Next, lay out your leaves in the order you’d like them to appear on the garland. This allows you to visualize the final arrangement and adjust colors or leaf sizes for a balanced aesthetic. To create an inviting appearance, it’s essential to space the leaves evenly. This can be achieved by leaving equal distances between each leaf, ensuring a harmonious flow throughout the design.
When you’re satisfied with the layout, it’s time to attach the leaves to a base chain or string. You can use either slip stitches or sewing for this process. If using slip stitches, simply position a leaf against the chain and insert your hook through the base of the leaf, pulling through a loop of the chain and fastening it with a slip stitch. Alternatively, you can sew the leaves onto the chain using a tapestry needle and yarn. This method allows for extra security and can create a more polished finish. Whichever attachment method you choose, ensure that all leaves are securely fastened and positioned as desired to create a stunning garland you’ll be proud to display.
Adding Embellishments
Enhancing your crochet garland with embellishments can elevate its visual appeal and add a personal touch. Consider incorporating beads, small fabric flowers, or even pom-poms to create a playful, textured effect. Beads can be threaded onto the yarn before attaching the leaves, while fabric flowers can be sewn or glued directly onto the finished leaves. For a cohesive look, choose embellishments that complement your color scheme and overall theme.
When attaching embellishments, ensure they are secured tightly. If using beads, double-check that they will not slip off by knotting the yarn tightly at both ends. For flowers, use a sturdy thread and make several stitches to anchor them firmly to the leaf without compromising its shape. To personalize your garland further, consider adding unique touches like initial charms or small themed decorations that resonate with your style. This will showcase your creativity and make each piece a cherished keepsake.
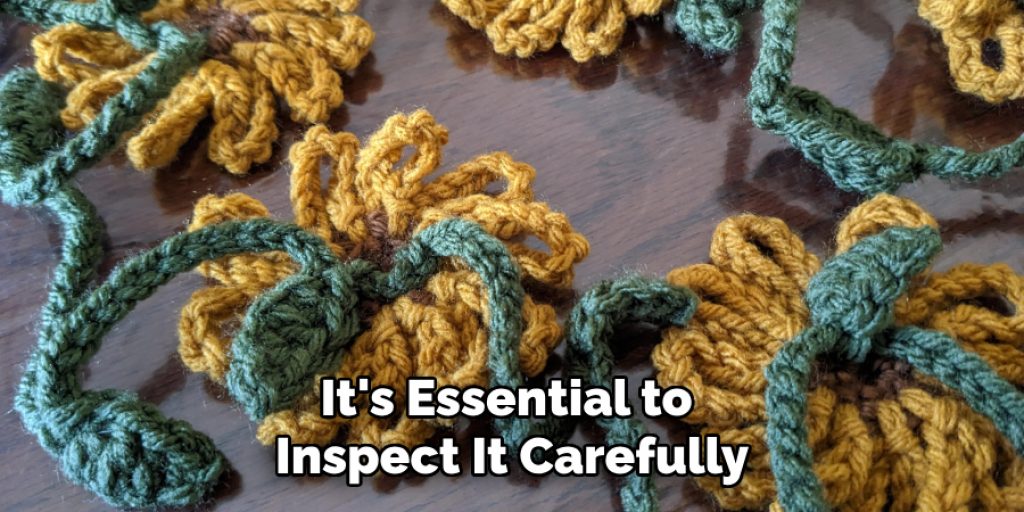
Final Touches and Adjustments
Once you have assembled your crochet garland and added any embellishments, it’s essential to inspect it carefully. Check for any loose ends or gaps that may detract from the overall appearance. Tuck in any stray yarn tails and secure them with a few needle stitches to prevent unraveling.
Evaluate the spacing between your leaves; ensuring they are evenly distributed is key to achieving a polished look. Make minor adjustments by gently rearranging the leaves or shifting them along the base string if necessary.
For a final touch, consider blocking or steaming your garland to enhance its shape and give it a crisp, finished look. Lay it flat on a clean, smooth surface and lightly mist it with water, or use a steam iron held at a distance to avoid direct contact. This helps to set the stitches and achieve a neat, professional finish that you’ll proudly display in your home.
Displaying Your Crochet Leaf Garland
Displaying your crochet leaf garland is a great way to enhance your home decor. Consider hanging it above a mantelpiece, draping it over a doorway, or using it as a focal point on a wall. You can also creatively incorporate the garland into various seasons and occasions by coordinating the colors with seasonal themes—warm, earthy tones for autumn, vibrant greens for spring, or festive hues for holidays. Ensure the garland is securely hung to prevent falling; command strips or decorative hooks can offer reliable support without damaging your walls.
Conclusion
In recap, learning how to crochet leaf garland involves creating diverse leaves, assembling them thoughtfully, and adding embellishments for that personal touch. The joy of crafting such handmade decorations lies in the ability to tailor your design to your taste and style. Don’t hesitate to experiment with different patterns and colors to make your garland reflect your unique aesthetic. The charm and versatility of crochet leaf garlands ensure they can enhance your home all year round, making them a delightful addition to any space.
Elizabeth Davis
Elizabeth is a creative writer and digital editor based in the United States. She has a passion for the arts and crafts, which she developed from a young age. Elizabeth has always loved experimenting with new mediums and sharing her work with others. When she started blogging, she knew that DIYquickly would be the perfect platform to share her tutorials and tips. She's been writing for the blog from the beginning, and her readers love her helpful advice and easy-to-follow instructions. When she's not writing or editing, Elizabeth enjoys spending time with her family and friends.


