
How to Cut Basswood
Due to its exceptional properties, Basswood is a highly regarded material in the crafting and woodworking community. Known for its softness and lightweight nature, it is easy to cut, making it an ideal choice for beginners and seasoned woodworkers. The versatility of basswood allows it to be used in a variety of projects, from intricate carvings to larger constructions, giving creators the freedom to explore their artistic visions. In this article, we will delve into how to cut basswood effectively, detailing essential tools and techniques to achieve precise cuts. We will discuss the types of basswood available, cutting methods such as hand saws, table saws, and jigsaws, and safety measures to ensure a successful crafting experience. Working with basswood can be both enjoyable and rewarding with the right approach.

Materials and Tools Needed
To successfully cut basswood, it’s essential to gather the appropriate materials and tools.
Basswood: Various types and grades of basswood are suitable for cutting. For novice projects, choose a lower grade that is more affordable and readily available, while higher grades, which feature fewer knots and defects, are ideal for intricate designs and fine detailing.
Cutting Tools: Various cutting tools can be employed, depending on the complexity of your project. Hand saws, such as coping saws and back saws, allow for precise and controlled cuts, while table saws offer efficiency for straight cuts in larger pieces. Jigsaws are perfect for intricate shapes due to their ability to navigate curves, and carving knives are useful for detailed work and finishing touches.
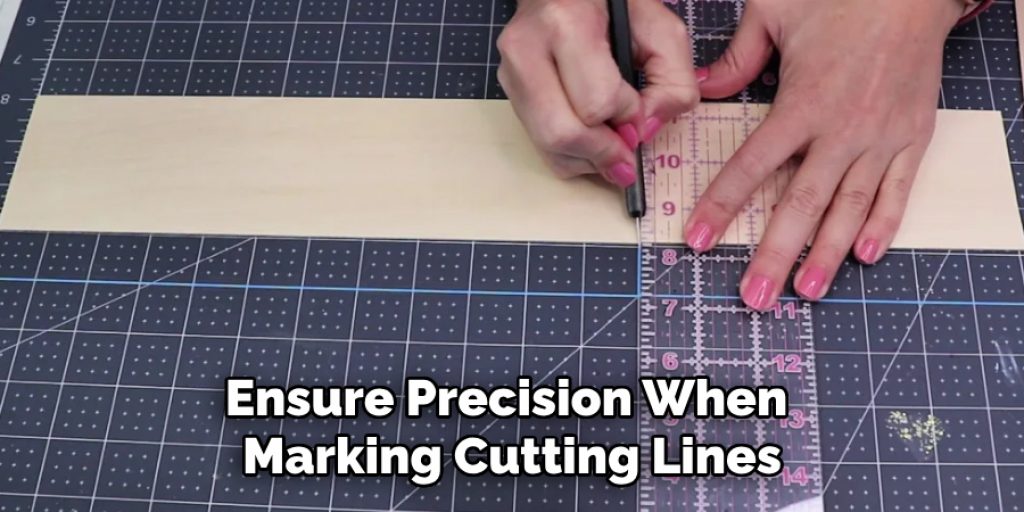
Measuring Tools: Accurate measurements are vital. Utilize rulers, measuring tapes, and squares to ensure precision when marking cutting lines.
Safety Equipment: Always prioritize safety during your work. Equip yourself with safety glasses to protect your eyes, gloves to safeguard your hands, and dust masks to avoid inhaling sawdust. These safety measures are essential for a secure and effective crafting experience.
Preparing for Cutting
Selecting the Right Basswood
Choosing the appropriate thickness and quality of basswood is crucial for achieving the desired outcome in your project. Opt for a thickness that aligns with the needs of your work—whether it be for carving, model making, or furniture crafting. Thinner pieces may be more suitable for finer details, whereas thicker boards can provide sturdiness for larger structures. Before committing to a piece of basswood, inspect it thoroughly for defects, such as knots, splits, or warping, as these imperfections can affect the cutting process and final appearance of your work. Additionally, taking the time to measure and mark your cutting lines accurately using a pencil will ensure precision in your cuts, allowing for a smoother workflow as you proceed.
Setting Up Your Workspace
A well-organized workspace is essential for safe and efficient cutting. Begin by clearing your work area of any unnecessary items and distractions to create a focused environment. Ensure that the basswood is secured to a stable surface or workbench to prevent movement during the cutting process—this stability is key to achieving precise cuts and minimizing accidents. Adequate lighting is also vital; establish bright, even light over your working area to help identify fine details and markings on the basswood. Finally, ensure proper ventilation in your workspace to mitigate any dust and debris generated during cutting, creating a healthier environment and enhancing your overall experience.
Measuring and Marking
Accurate measurement and marking are foundational steps in cutting basswood effectively. Use measuring tools such as rulers, measuring tapes, and squares to mark precise cutting lines on the wood. When drawing these lines, employing a sharp pencil will produce clearer markings that are easier to follow with your cutting tools. Techniques for achieving straight and accurate lines include using a straight edge or a clamp to guide your cuts, ensuring that your tools follow the intended path. Additionally, if you are working from plans or templates, take care to transfer measurements accurately from those documents onto the basswood to avoid any discrepancies that could impact the fit and finish of your final piece.

How to Cut Basswood: Cutting Techniques
Using a Hand Saw
Hand saws are a dependable choice for cutting basswood, particularly for those who appreciate the precision and tactile experience they offer. Among the most suitable varieties are the back saw and coping saw. The back saw, characterized by its reinforced back for stability, is excellent for making straight cuts and is often employed for joinery. With its thin, flexible blade, the coping saw excels at navigating curves and intricate shapes, making it ideal for detailed work and decorative cuts.
To achieve straight cuts with a hand saw, it’s essential to mark a clear, straight line along the desired cut path. Begin the cut with gentle pressure to establish a groove, then gradually increase your force as you see. This method helps maintain control and precision. For curved cuts, particularly with the coping saw, start by drilling a small hole at the beginning of the curve. Insert the blade through the hole, then follow the marked line, using smooth, steady movements to prevent the blade from bending or breaking.
Maintaining control and precision while sawing involves keeping your hands steady and your body aligned with the saw’s path. Take your time, as haste can lead to mistakes. For a cleaner cut, frequently check your progress against your markings and adjust your angle if necessary, ensuring you follow your intended lines closely.
Using a Table Saw
Setting up the table saw correctly is crucial for successful basswood cutting. Begin by ensuring the blade is sharp and adjusted to the desired height, typically just above the thickness of the basswood you are cutting. Align the fence parallel to the blade to guarantee straight cuts, guiding the wood and preventing it from shifting during the operation.
For straight cuts, simply feed the basswood through the table saw, using the fence to maintain accurate distances. When performing crosscuts, employ a crosscut sled or a miter gauge to ensure precise angles and keep your hands safe from the blade. Always maintain a firm grip on the stock and a steady pace while pushing it through the saw, allowing the blade to do the work without forcing it.

Working with a table saw also comes with safety considerations. Always wear safety glasses to protect your eyes from flying debris and use push sticks or a push block to keep your hands at a safe distance from the blade. Never attempt to remove cut pieces or clear debris while the saw is still running, and make sure to keep your workspace free of hazards that could cause tripping or accidents.
Using a Jigsaw
A jigsaw is perfect for cutting basswood, especially when intricate shapes or curved designs are involved. Selecting the right blade is crucial—look for fine-toothed blades designed specifically for wood, as these will help achieve smooth cuts without splintering the surface of the basswood. A blade with a higher TPI (teeth per inch) is generally preferable for thinner basswood, ensuring finer detail.
When cutting curves and intricate shapes, begin by drilling a hole near the starting point of your cut, allowing you to insert the jigsaw blade and get started. Follow your marked lines closely, maintaining a steady hand and allowing the jigsaw to move at its own pace. Avoid forcing the tool, as this can lead to uneven cuts or breakage.
To achieve smooth and accurate cuts with a jigsaw, consider using a slower speed setting, particularly for more delicate sections of your project. This adjustment allows for better control and minimizes vibrations, which can lead to inaccuracies. Additionally, using a foam or cloth pad underneath the basswood can help reduce tear-out on the underside of your cuts, ensuring a cleaner finish. Regularly pausing to check progress against your markings can also enhance precision, allowing you to make minor adjustments as needed.
Employing these techniques with hand saws, table saws, and jigsaws allows you to effectively cut basswood to suit your project’s requirements, allowing you to be creative and precise in your woodworking endeavors.
Finishing Cuts and Cleaning Up
Sanding and Smoothing
After making your cuts in basswood, the finishing process begins with sanding and smoothing the edges and surfaces to eliminate any rough spots and splinters. Start by selecting the appropriate grit sandpaper; for initial smoothing, a medium grit (around 120-150) is effective, allowing you to remove significant imperfections. Gradually progress to finer grits, such as 220-320, for a smooth, polished finish that enhances the wood’s natural beauty. When sanding, use a light, consistent pressure and work with the wood grain to avoid scratching the surface. Consider using sanding sponges or small hand blocks for hard-to-reach areas or intricate designs to achieve a uniform finish. Regularly check your progress by running your fingers over the surfaces to feel for any remaining roughness or splinters, ensuring a polished outcome that is pleasant to the touch.

Checking for Accuracy and Adjustments
Once the sanding is complete, it’s crucial to inspect your cuts for accuracy. Lay a square along the edges and use a level to verify that cuts are straight and even, ensuring the structural integrity of your project. If you notice any misalignments or imperfections, take the time to address them promptly. Minor discrepancies can often be corrected with additional sanding or by carefully trimming the edges with a utility knife. For more significant issues, you may need to re-make certain sections and measure and mark carefully. This methodical approach guarantees that your finished piece maintains a professional appearance and functions as intended.
Cleaning Up
A clean workspace is essential for your finished project’s safety and quality. Begin by thoroughly removing sawdust and debris from your working area using a vacuum or a dust broom. Pay close attention to corners and crevices where dust may accumulate. Proper disposal or recycling of wood scraps and waste is also important; check with local guidelines to determine the best practices for your area. Consider setting aside larger pieces of basswood for potential future projects. Finally, make sure to safely store your tools and materials when the task is complete. Organize your workspace to prevent accidents, and keep items stored in a dry, appropriate location to prolong their lifespan. A tidy environment enhances safety and prepares you for a productive next session.

Conclusion
In summary, mastering how to cut basswood involves a variety of techniques and tools tailored to meet your project’s specific needs. From utilizing table saws and jigsaws for straight and intricate cuts to ensuring safety through proper methods, each step enhances precision and creativity. Basswood is celebrated for its versatility, making it an ideal choice for hobbyists and professionals alike, whether you are crafting detailed models or larger pieces of furniture. As you explore and practice these cutting techniques, remember that the key to success lies in patience and attention to detail. Don’t hesitate to experiment with different approaches to fully appreciate the natural beauty and workability of basswood. Embrace the learning process, and soon, you will find yourself confidently creating impressive wooden projects that showcase your skills.
Elizabeth Davis
Elizabeth is a creative writer and digital editor based in the United States. She has a passion for the arts and crafts, which she developed from a young age. Elizabeth has always loved experimenting with new mediums and sharing her work with others. When she started blogging, she knew that DIYquickly would be the perfect platform to share her tutorials and tips. She's been writing for the blog from the beginning, and her readers love her helpful advice and easy-to-follow instructions. When she's not writing or editing, Elizabeth enjoys spending time with her family and friends.


