How to Cut Dovetail Ribbon
Dovetail ribbons are an elegant and practical way to add a decorative touch to various projects, from gift wrapping to artisan crafts. This unique style not only enhances the visual appeal of an item but also serves functional purposes, such as securing items together or providing a finishing touch to handmade creations.
In this guide on how to cut dovetail ribbon, we will explore the techniques involved in cutting dovetail ribbons, ensuring that you achieve clean, precise cuts for a polished finish. Whether you are a crafting novice or an experienced artisan, mastering this technique will elevate your ribbon work and inspire you to incorporate it into your future projects.
Why Choose Dovetail Ribbons?
Before diving into the cutting process, it is essential to understand why dovetail ribbons are a popular choice among crafters. Unlike traditional ribbon cuts where both ends are cut at an angle, creating a sharp and pointed edge, dove tailing involves cutting one end at an angle and the other in a v-shape. This creates a unique leaf-like or feather-like look that adds depth and dimension to any project.
Not only do dovetail ribbons offer an eye-catching finish, but they also provide practical benefits. The angled cut allows for easier threading through small holes or loops, making them ideal for sewing projects or attaching tags to gifts. Additionally, the v-shape cut provides a secure grip and prevents the ribbon from fraying, making it perfect for tying bows or securing items together.
Tools Required
To achieve clean and precise dovetail cuts, you will need the following tools:
Sharp Scissors:
Make sure to use sharp scissors to ensure a clean and smooth cut without any jagged edges. Dull scissors may result in frayed or uneven edges, compromising the overall look of your project.
Ruler:
A ruler will help you measure and mark the desired length of your ribbon. It also serves as a guide for creating straight and uniform cuts.
Cutting Mat:
Using a cutting mat to lay your ribbon on while cutting will protect your work surface and prevent damage to your blades.
7 Step-by-Step Guidelines on how to cut dovetail ribbon
Step 1: Measure and Mark
Begin by determining the desired length of your dovetail ribbon. Using the ruler, measure the length and make a small mark on the ribbon. Ensure that the mark is clear and easily visible, as this will guide your cutting.
For a classic dovetail, it’s best to cut lengths of at least 12 inches to allow for the decorative cut on both ends. Once you’ve marked the length, double-check to ensure accuracy before proceeding. A precise measurement sets the foundation for a clean and professional-looking finish.
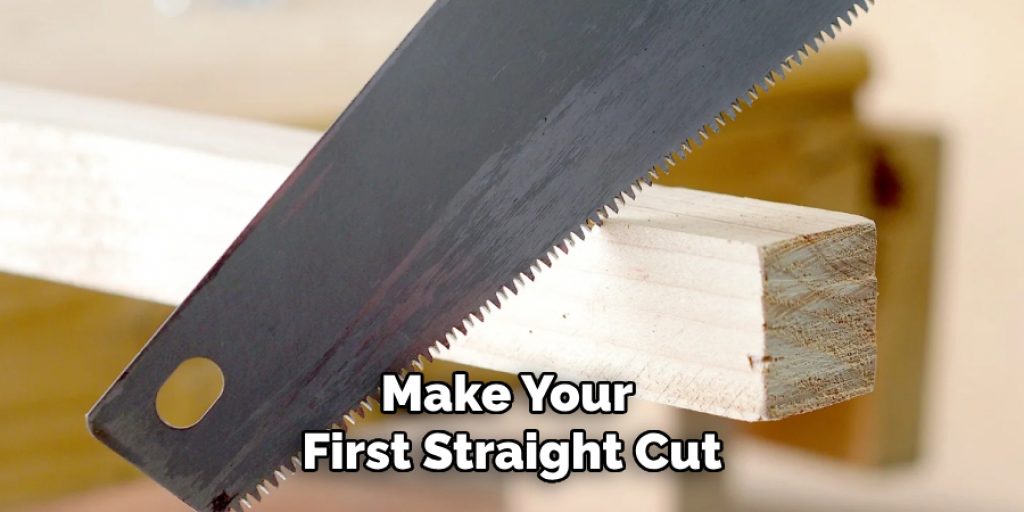
Step 2: Cut Straight
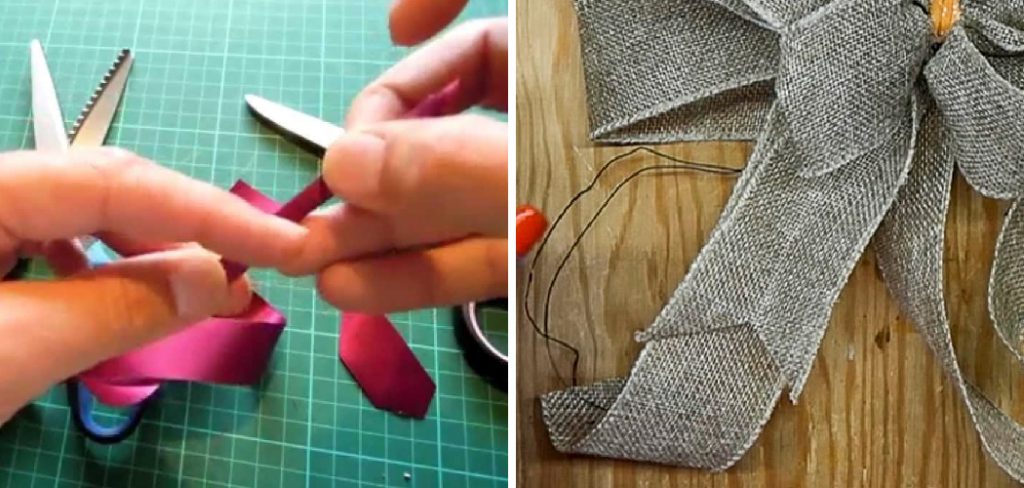
Once you have measured and marked the desired length of your ribbon, it’s time to make the initial straight cut. Position your ruler along the marked line to ensure accuracy, providing support and stability as you cut. With your sharp scissors, cut the ribbon along the marked line in a smooth, straight motion.
It’s important to cut in one fluid motion rather than trying to see back and forth, as this will help maintain clean edges. This straight cut will serve as the starting point for creating the dovetail shape, ensuring a polished look as you continue with the next steps.
Step 3: Cut at an Angle
With one end of your ribbon now cut straight, it’s time to create the angled edge. To do this, use the ruler as a guide and position it diagonally across the ribbon at a 45-degree angle. This will create the distinctive pointed tip of a dovetail ribbon. Carefully cut along the ruler, starting from the bottom corner and moving towards the top where you have made your first straight cut.
As you make this cut, keep in mind that longer angles will result in a more pronounced and elongated dovetail shape, while shorter angles will give a subtle effect. Experiment with different lengths to find what works best for your project.
Step 4: Cut the V-Shape
With one end of your ribbon now cut into a pointed tip, it’s time to move onto the other end and create the v-shape. This end will look like an inverted triangle with a slight angle on each side.
To achieve this shape, measure and mark the center point of your ribbon’s width. Then, use your ruler to draw two lines diagonally from each side towards the center mark. The intersecting points where these lines meet will be where you make your cuts. Using sharp scissors, carefully cut along these lines to create the v-shape.
Step 5: Cut Between Points
Once you’ve created both angled and v-shaped ends, it’s time to join the two. Place your ribbon flat on the cutting mat with the angled end facing up. Using sharp scissors, make a straight cut from the bottom of the angled point towards the center mark where you made your v-shaped cuts. Repeat this step on the other side, making sure to keep your cuts as clean and precise as possible.
It’s essential to cut straight and avoid any jagged edges as this will compromise the overall look of your dovetail ribbon.
Step 6: Repeat
To ensure consistency and mastery of the dovetail ribbon-cutting technique, it’s beneficial to repeat the process with additional lengths of ribbon. Start by measuring and marking your next piece, following the same guidelines as before. By practicing on multiple ribbons, you will build confidence and improve your precision with each cut.
This repetition not only sharpens your skills but also allows you to experiment with different ribbon types, widths, and colors, further enhancing your crafting repertoire. Remember, the key to achieving clean and beautiful dovetail cuts lies in patience and practice.
Step 7: Admire Your Work
Congratulations, you have now successfully mastered the art of cutting dovetail ribbons! Take a moment to appreciate your finished product and experiment with different ways to incorporate them into your projects. From gift wrapping to scrapbooking, sewing to hair accessories, the possibilities are endless.
Following these simple guidelines on how to cut dovetail ribbon will enable you to create professional-looking dovetail ribbons with ease. With a little practice and patience, you can add a touch of sophistication and elegance to any project with this timeless decorative technique. Happy crafting!

Additional Tips and Ideas
- Try using different types of scissors to achieve different effects. For example, pinking shears will create a zig-zag edge, which can add an interesting twist to your dovetail ribbon.
- Experiment with different ribbon widths and lengths to achieve unique looks.
- Dovetail ribbon looks beautiful when layered with other ribbons or used as decorative accents on gift wrapping, cards, or invitations.
- Use contrasting colors or patterns for a fun and vibrant look, or stick to monochromatic tones for a more elegant and classic feel.
- Don’t be afraid to play around with the angle and length of your cuts. Each slight variation can result in a distinct look!
Incorporating dovetail ribbons into your crafting projects adds a touch of sophistication and elegance. With these step-by-step guidelines and additional tips, you can easily master the art of cutting dovetail ribbons and elevate your creations to the next level. Happy crafting!
Frequently Asked Questions
Q: What is the Purpose of Cutting Dovetail Ribbons?
A: Dovetail ribbons are often used to craft an elegant and professional-looking finish for projects such as gift wrapping, scrapbooking, sewing, or hair accessories. They add a touch of sophistication and can elevate the overall appearance of any project.
Q: What Type of Ribbon is Best for Cutting Dovetail?
A: Thin, silky ribbons work best for cutting dovetails as they are easier to manipulate and create clean cuts. However, you can also use thicker ribbons depending on your desired look and project type.
Q: Can I Use Dovetail Ribbons for Other Purposes Besides Crafting?
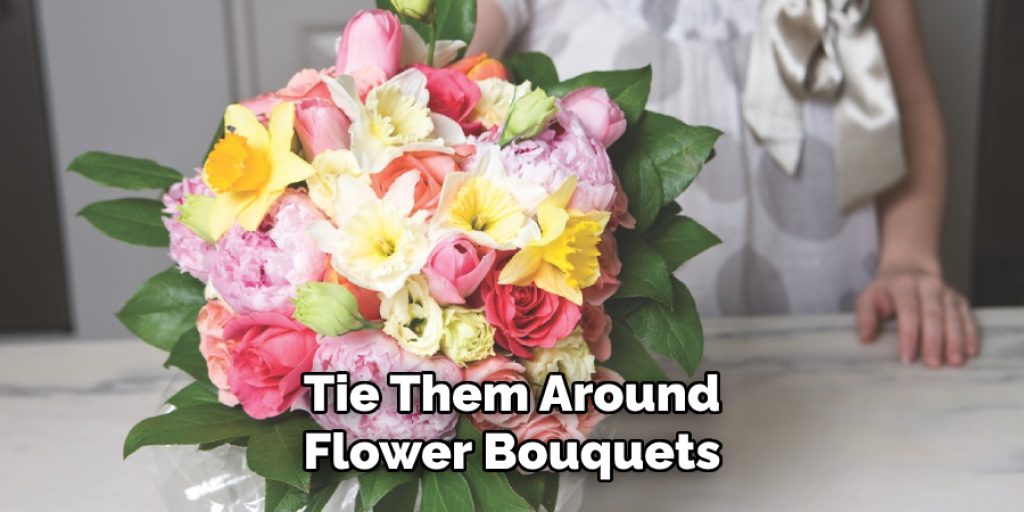
A: Yes! While dovetail ribbons are commonly used in crafting, they can also be incorporated into fashion and home decor. For example, you can use them as decorative accents on clothing or curtains, or even tie them around flower bouquets for a unique touch. The possibilities are endless!
Q: Are There Different Variations of Dovetail Cut?
A: Yes, there are various ways to cut dovetail ribbons, such as straight-edge, angled-edge or double v-shape. You can also experiment with different angles and lengths to achieve different effects.
Conclusion
Dovetail ribbon cuts may seem intimidating at first, but with the right tools and techniques, anyone can achieve professional-looking results. The angled and v-shaped ends offer both aesthetic appeal and practical benefits, adding a unique touch to any project.
With these step-by-step guidelines on how to cut dovetail ribbon, you will be able to confidently create beautiful dovetail ribbons and elevate your crafting skills to the next level. Don’t be afraid to experiment with different ribbon types, colors, and widths to find what works best for you. Happy crafting!
Elizabeth Davis
Elizabeth is a creative writer and digital editor based in the United States. She has a passion for the arts and crafts, which she developed from a young age. Elizabeth has always loved experimenting with new mediums and sharing her work with others. When she started blogging, she knew that DIYquickly would be the perfect platform to share her tutorials and tips. She's been writing for the blog from the beginning, and her readers love her helpful advice and easy-to-follow instructions. When she's not writing or editing, Elizabeth enjoys spending time with her family and friends.