
How to Do Multi Color Iron on Cricut
Multi-color iron-on designs offer a vibrant way to express creativity on various fabrics, making them a popular choice for DIY enthusiasts. Blocking different hues allows for unique customization, transforming ordinary items into eye-catching pieces. The Cricut machine stands out in this realm, and it is known for its precision and versatility in cutting materials such as heat transfer vinyl (HTV). With its user-friendly design software, Cricut Design Space, users can easily create intricate multi-color patterns that cater to individual tastes. In this guide on how to do multi color iron on cricut, we will walk you through the essential steps, from preparing your design and cutting the vinyl to applying the layers with a heat press or iron. By the end, you’ll have the skills to create stunning multi-color projects that make a statement.

Materials and Tools Needed
Gathering the right materials and tools is essential to embarking on your multi-color iron-on project with Cricut.
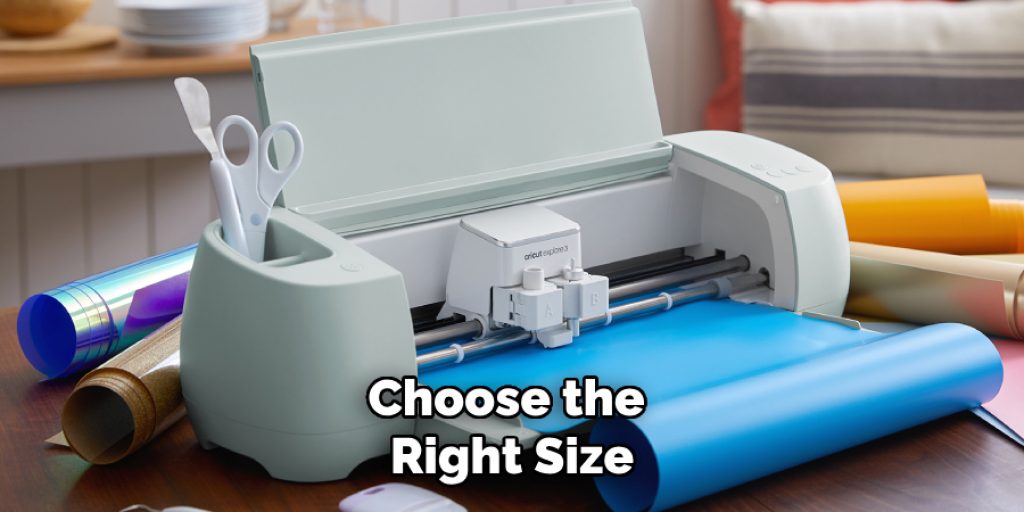
- Cricut Machine: Selecting the right model is crucial for your project’s success. The Cricut Explore series is great for beginners with its simplicity, while the Maker offers advanced capabilities suitable for intricate designs. The Joy is an excellent choice for smaller projects and limited spaces, providing versatility and ease of use.
- Iron-On Vinyl (HTV): There are various types of HTV, including standard, glitter, and metallic finishes. Recommended brands like Siser EasyWeed and Cricut Iron-On offer durability and vibrant colors that adhere well to fabric.
- Cutting Mat: Choose the right size and type of cutting mat for your Cricut machine. A standard grip mat is suitable for most projects, while a light grip mat benefits delicate materials.
- Weeding Tools: Essential for removing the excess vinyl from your designs, weeding tools such as tweezers, weeding forks, or hooks help ensure clean and precise results.
- Heat Press or Iron: It is vital to select the proper tool for applying the vinyl. A heat press delivers consistent pressure and temperature, while a household iron can suffice for simpler projects but may require more manual effort.
- Design Software: Using Cricut Design Space allows for easy design manipulation and customization, facilitating a smooth workflow from concept to creation.
Preparing Your Design
Creating a Multi-Color Design
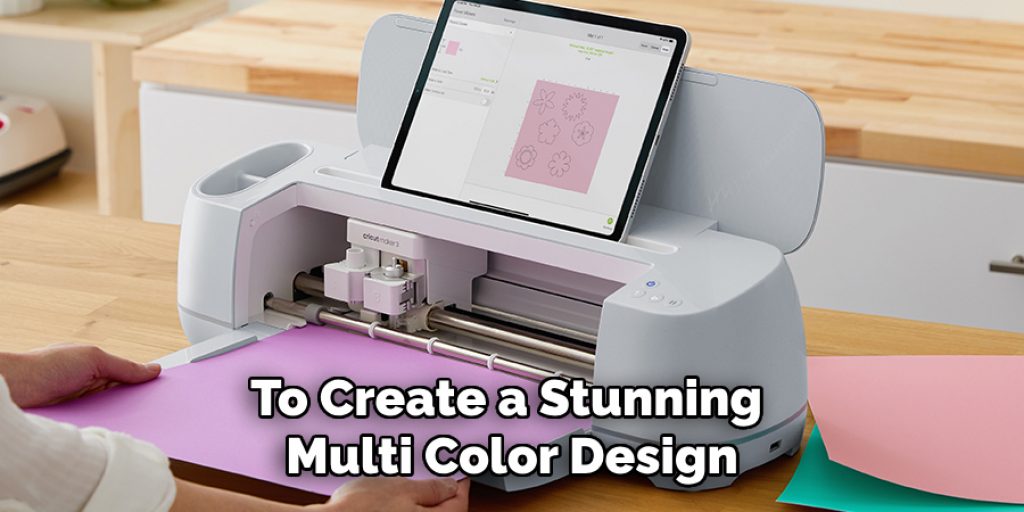
To create a stunning multi-color design using Cricut Design Space, start by designing your image from scratch or importing an existing one. When designing, consider the overall dimensions to ensure each element fits within your chosen canvas size. Use the “Layers” panel to adjust and align different colors, ensuring each layer is properly positioned for an attractive outcome. Layering tips include using contrasting colors to highlight specific design elements and previewing the design in full-color mode to spot any inconsistencies before finalizing the design. Paying attention to details at this stage is crucial because it sets the foundation for a successful project.
Cutting the Design
Once your design is ready, it’s time to set up your Cricut machine for cutting heat transfer vinyl (HTV). First, select the appropriate cut material settings based on the type of vinyl you are using; Cricut Design Space offers preset options for different materials, which can facilitate accurate cuts. Load your HTV onto the cutting mat with the shiny side facing down, and then insert the mat into the machine, ensuring it is aligned properly. After confirming that your design is set and the right settings are selected, initiate the cut. Carefully monitor the cutting process to prevent any errors, as a malfunction can lead to user frustration. Once the cutting is completed, gently unload the mat and peel the vinyl away, being cautious to avoid any accidental tears.
Weeding and Preparing the Vinyl
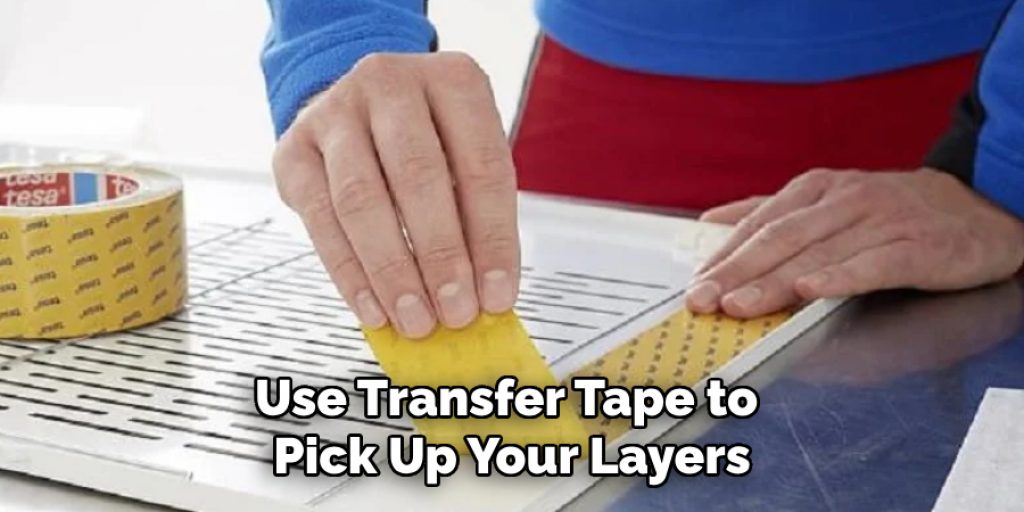
Weeding is an essential step in preparing your multi-color vinyl design. Begin by gently peeling back the excess vinyl using a weeding tool, removing only the unwanted vinyl while preserving your design elements. It may be helpful to work slowly and methodically for intricate designs to ensure that all the fine details are intact. After weeding, use transfer tape to pick up your layers. Cut a piece of transfer tape slightly larger than your design and place it over the layer you will apply first. Press down firmly to ensure a good bond, and then peel the backing off the vinyl to transfer it onto the tape. Align this layer on your fabric or surface carefully, ensuring it is positioned correctly before applying pressure. This careful preparation ensures a clean and professional application of each color layer.
How to Do Multi Color Iron on Cricut: Applying Multi-Color Iron-On Vinyl
Prepping the Fabric or Surface
Before applying your multi-color iron-on vinyl, selecting the right fabric or surface is crucial for achieving the best results. Cotton, polyester, or cotton/polyester blends work well and offer excellent adhesion to heat transfer vinyl (HTV). It’s important to pre-wash your fabric to remove any finishes or residues that may interfere with the vinyl’s adhesion. After washing, dry the fabric to eliminate any moisture, and pre-heat it with an iron or heat press to remove wrinkles that can create uneven surfaces. Position your design on the fabric in the desired location, ensuring it’s centered and aligned properly, taking care to consider any elements that may require special placement, such as text or intricate graphics. This preparation sets the stage for successful layering and application of the vinyl.
Layering and Heat Application
When applying the multi-color design, each color layer needs to be applied separately for the best results. Begin with the bottom layer, using a heat press or iron to apply heat and pressure according to the vinyl manufacturer’s recommendations. Set the temperature and time as specified for a heat press, ensuring an even application across the layer. If using an iron, place it on the design without sliding, pressing firmly to allow heat to penetrate the vinyl. After applying the first layer, allow it to cool slightly before carefully peeling back the transfer tape. This process ensures the vinyl adheres well without damaging the previous layer. When adding subsequent layers, be cautious in aligning each layer accurately and allow adequate cooling time between applications. This attention to detail will result in a durable and visually appealing design.
Finalizing the Design
Once all the layers have been applied, allow the design to cool completely before removing the transfer tape to prevent any damage. Inspect the adhesive bond carefully; if any edges are lifting, reapply heat and pressure to those areas, smoothing them down. This step ensures that each layer is fully secured and enhances the longevity of your design. After removing the transfer tape, make any necessary adjustments to smooth out imperfections, ensuring your design looks polished and professional.
Remember to follow washing instructions specific to heat transfer vinyl to care for your newly created item. Generally, it is recommended to wash in cold water on a gentle cycle and avoid fabric softeners, as they can affect adhesion. By taking these steps, you can maintain the vibrant colors and quality of your multi-color iron-on project for years to come.
Troubleshooting Common Issues
Vinyl Not Adhering Properly
If the vinyl is not adhering well, several factors might be at play. Ensure the fabric or surface is clean, dry, and free from residues. Rewash your fabric if necessary, and consider increasing the application time or temperature as per the vinyl manufacturer’s recommendations. Additionally, applying firm and even pressure during heating can significantly improve adhesion.
Design Misalignment
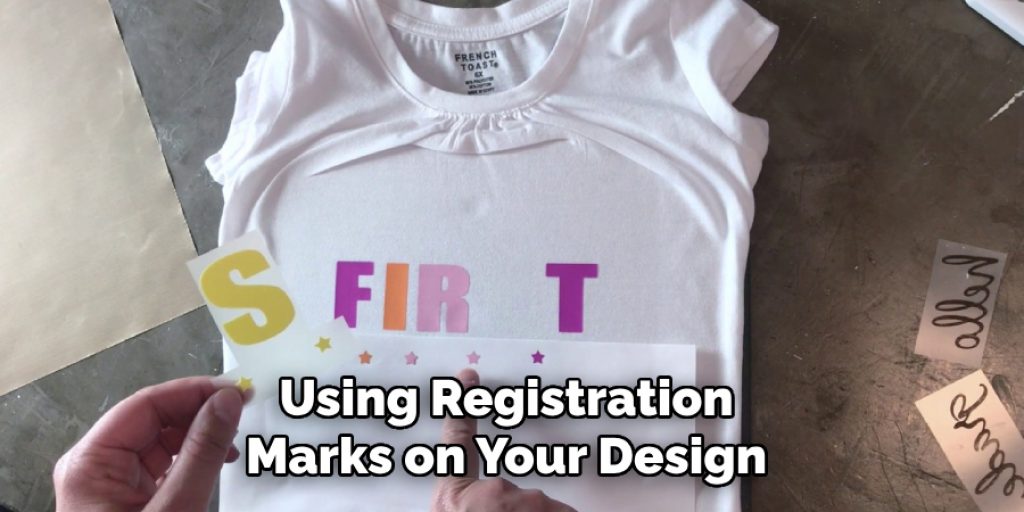
Misalignment of your design can lead to a less professional appearance. To prevent this, mark the placement area before applying any layers. Using registration marks on your design can help in aligning each layer accurately. If misalignment occurs, you can gently peel back the vinyl to reposition. Be careful not to stretch or tear the vinyl in the process.
Peeling or Lifting Vinyl
If you experience vinyl peeling or lifting after application, it may be due to insufficient heating or cooling time. Identify lifting areas and carefully apply heat directly to that spot using a heat press or an iron. If the issue persists, it may be necessary to re-weed and reapply the affected areas, ensuring the correct temperature and pressure settings are used. Regularly inspecting and caring for your project will help maintain its longevity.
Creative Ideas and Variations
Layering Techniques
Experimenting with different layering methods can add depth and uniqueness to your designs. Consider using techniques such as shadow layering, where a contrasting color is applied underneath the main design to create a shadow effect, or using translucent vinyl to create a layered, multi-dimensional look. Combining textures by mixing HTV with specialty materials like glitter or metallic vinyl can also enhance visual appeal.
Customizing Designs
Personalizing your projects is key to making them truly one-of-a-kind. Add text in creative fonts, incorporate patterns through vinyl prints, or use additional colors to complement your design theme. Try integrating graphics that hold personal significance, such as monograms or meaningful quotes, to make your items resonate even more with the intended audience.
Project Ideas
The versatility of multi-color designs allows for application on a variety of items. T-shirts are classic choices, but don’t overlook tote bags, home décors such as pillow covers, or wall art. Consider creating seasonal decorations or custom gifts for special occasions. With a little creativity, you can transform everyday items into vibrant, personalized pieces that reflect your style and flair.
Conclusion
Creating a multi-color iron-on design with Cricut involves a series of enjoyable and rewarding steps. First, prepare your fabric by ensuring it is clean and dry, which sets the foundation for successful adhesion. Next, layer each color separately, applying heat correctly to ensure every layer adheres well. After all layers are in place, cool down the design before removing the transfer tape, inspecting the bond, and making final adjustments.
As outlined, understanding how to do multi color iron on Cricut opens the door to limitless creative possibilities. Embrace the versatility of multi-color projects, whether you personalize clothing, accessories, or home décor. Don’t hesitate to experiment with different techniques, materials, and designs. Enjoy the process of crafting and let your creativity shine through in every project you undertake!
Elizabeth Davis
Elizabeth is a creative writer and digital editor based in the United States. She has a passion for the arts and crafts, which she developed from a young age. Elizabeth has always loved experimenting with new mediums and sharing her work with others. When she started blogging, she knew that DIYquickly would be the perfect platform to share her tutorials and tips. She's been writing for the blog from the beginning, and her readers love her helpful advice and easy-to-follow instructions. When she's not writing or editing, Elizabeth enjoys spending time with her family and friends.


