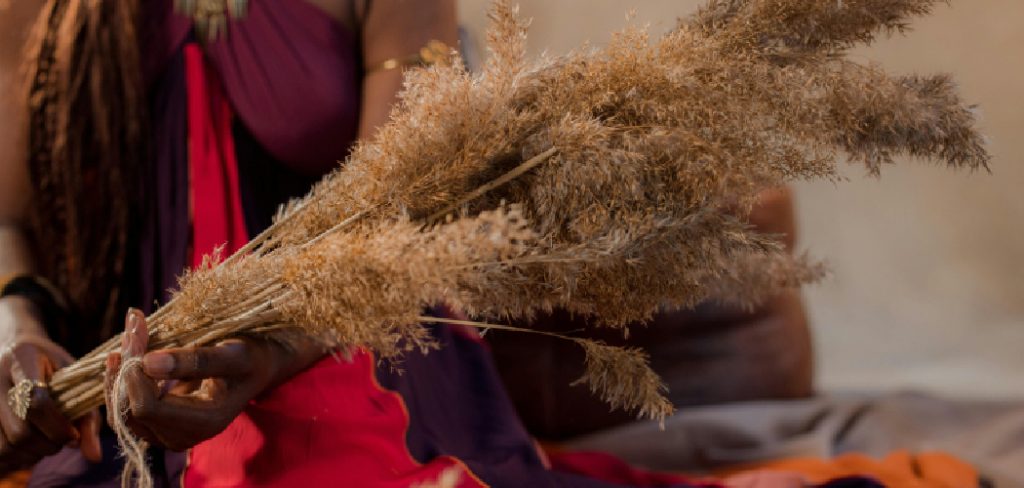
How to Dye Pampas Grass
Are you looking for a unique and beautiful way to add some color to your home decor? How to dye pampas grass might just be the perfect solution! With its tall feathery plumes, Pampas grass has become increasingly popular in home decorating.

Dyeing pampas grass is an innovative and creative way to enhance its natural beauty and incorporate it into your home decor. This popular ornamental grass, known for its tall, feathery plumes, can be easily transformed with a splash of color to fit your aesthetic preferences. Whether you want to create a stunning centerpiece, add a pop of color to a floral arrangement, or simply wish to personalize your space, dyeing pampas grass offers endless possibilities.
In this guide, we’ll explore the steps required to achieve vibrant and lasting colors, ensuring your pampas grass becomes a unique and eye-catching addition to your decor.
What Will You Need?
Before we get started, here’s a list of supplies you’ll need to dye pampas grass:
- White or light-colored pampas grass
- Fabric dye in your choice of color(s)
- Large pot or container for soaking the grass
- Protective gloves
- Tongs or spoon for handling the grass
- Paper towels or old cloth for blotting and drying the grass
10 Easy Steps on How to Dye Pampas Grass
Step 1: Preparing Your Pampas Grass
To begin the dyeing process, preparing your pampas grass properly is essential. Start by selecting white or light stems, as these will absorb the dye more efficiently. Take your pampas grass and trim the stems to your desired length; typically, a length between 24 to 36 inches works best for various decor styles.
After cutting, gently shake the plumes to remove any dust or debris. For optimal dye saturation, consider soaking your pampas grass in warm water for about 30 minutes. This will help open up the fibers of the grass, allowing for better dye absorption. Ensure you handle the grass delicately to prevent any damage to the feathery plumes.

Step 2: Preparing the Dye Bath
Now that your pampas grass is prepped, it’s time to create your dye bath. Fill a large pot or container with enough water to submerge the stems fully. Heat the water to a simmer, ensuring it’s warm but not boiling, as this will help the dye dissolve more effectively. Once the water is heated, add the fabric dye according to the manufacturer’s instructions. Stir the mixture thoroughly to ensure the dye is completely dissolved and evenly distributed in the water.
If you’re using multiple colors, you can prepare separate dye baths for each hue or mix them for a unique blend. Wear protective gloves during this process to avoid staining your hands. After preparing the dye, you’ll be all set to immerse your pampas grass in your chosen vibrant colors!
Step 3: Dyeing the Pampas Grass
With your dye bath ready, it’s time to immerse the prepared pampas grass into the mixture. Carefully place the trimmed stems into the dye bath, fully submerging the plumes. Depending on the intensity of color you desire, you can let the pampas grass soak for anywhere from 10 to 30 minutes. Keep an eye on the grass as it absorbs the dye; you can gently stir the stems with tongs or a spoon to ensure even coverage. If you prefer a lighter shade, check the color frequently, as the dye will continue to darken the grass while it soaks.
Step 4: Rinsing the Pampas Grass
After your pampas grass has reached your desired color intensity, it’s time to remove it from the dye bath. Carefully lift the stems out of the dye using tongs or a spoon, allowing any excess dye to drip back into the pot. Next, rinse the pampas grass gently under cold running water. This step is crucial as it helps to remove any leftover dye, preventing it from staining other surfaces once the grass is dry. Continue rinsing until the water runs clear, indicating that the excess dye has been washed away.
Step 5: Blotting and Drying
Once rinsed, lay the dyed pampas grass on a flat surface lined with paper towels or an old cloth. Gently blot the plumes to remove excess water; be careful not to crush or damage the delicate feathery parts. After blotting, allow the pampas grass to air dry completely, ideally in a shaded area away from direct sunlight to maintain the vibrancy of the color. This drying process usually takes several hours, so be patient to ensure the best results.

Step 6: Styling Your Dyed Pampas Grass
Once your dyed pampas grass is dry, it’s time to incorporate it into your home decor. Consider arranging the stems in a stylish vase or incorporating them into floral arrangements to create a stunning focal point. The vibrant colors can complement your existing decor or be used to create a striking contrast. Mix dyed and natural pampas grass for a more eclectic look. Experiment with different arrangements to discover what brings you the most joy!
Step 7: Maintaining Your Dyed Pampas Grass
Proper maintenance is essential to ensure your dyed pampas grass remains beautiful and vibrant. Avoid placing the grass in direct sunlight, as prolonged exposure can cause the colors to fade. Instead, display it in areas with indirect light or shaded locations. If dust accumulates, gently clean the plumes using a soft brush or a cloth to preserve their texture and appearance. Additionally, consider using a spray sealant designed for dried flowers to help protect the dye and add a subtle sheen to the grass.
Step 8: Troubleshooting Common Issues
You may encounter some challenges while dyeing your pampas grass despite following the previous steps. If you find that the color could be more vibrant, this can be due to several factors. Firstly, ensure that you use the correct fabric dye type, as some dyes work better on natural materials than others.
Additionally, soaking the pampas grass for a more extended period can help achieve a more intense color. If the dye is bleeding during rinsing, be sure to rinse thoroughly until the water runs clear, and allow the grass to dry entirely before placing it in arrangements. Lastly, if you experience uneven coloring, consider stirring the dye bath gently while the grass is submerged to promote more uniform absorption.

Step 9: Experimenting with Techniques
Now that you have mastered the basics of dyeing and maintaining pampas grass consider experimenting with different techniques to create unique textures and patterns. One method is the ombre effect, where you gradually dip the stems into the dye of varying concentrations, allowing the color to fade from dark to light.
Another technique involves using sponges or brushes to apply dye selectively, enabling you to create artistic designs on the plumes. You can also explore using natural dyes, such as those derived from fruits and vegetables, for a more eco-friendly approach. Whichever method you choose, remember to document your process so you can replicate your favorite techniques in future projects!
Step 10: Showcasing Your Masterpiece
Now that you’ve successfully dyed and styled your pampas grass, it’s time to show off your beautiful creation! Choose a prominent spot in your home where the arrangement can thrive, such as a living room table, an entryway, or a kitchen countertop. Position the vase to catch the eye and complement the surrounding decor.
If you want to make it a conversational piece, consider adding a small placard that provides insight into your dyeing process or the inspiration behind your color choices. Sharing your experience on social media can also inspire others to try their hand at this creative endeavor, encouraging a community of fellow crafting enthusiasts.
By following these steps, you can quickly and effectively dye pampas grass to add a unique touch to your home decor.
5 Things You Should Avoid
- Using Inappropriate Dyes: Avoid using synthetic dyes that are not specifically designed for use on natural materials. This can lead to poor color absorption and unexpected results. Stick to fabric dyes that are known to work well with dried grasses.
- Skipping the Pre-soak: Do not skip pre-soaking your pampas grass in water before dyeing. This crucial step helps the stems absorb the dye more evenly and can enhance the richness of the final color.
- Neglecting Safety Precautions: Always wear gloves and protective clothing when working with dyes. This will prevent skin staining and protect your clothes from potential spills or splashes.
- Rushing the Drying Process: Avoid placing your dyed pampas grass in the sun to speed up drying. Direct sunlight can cause fading and diminish the vibrancy of the color. Always air dry in a shaded area.
- Forgetting to Test the Dye: Never skip testing your dye on a small piece of pampas grass before proceeding with the entire batch. This can help you gauge the resulting color and adjust your dyeing process accordingly, avoiding disappointment with the outcome.

Conclusion
How to dye pampas grass is a rewarding craft that allows you to infuse your home decor with vibrant colors and personal touches.
You can create stunning arrangements that enhance your living space by following the outlined steps—from selecting the suitable dye and preparing your materials to styling and maintaining your dyed grass. Remember to embrace creativity by experimenting with various techniques, and don’t hesitate to document your journey.
With patience and practice, your dyed pampas grass will reflect your artistic flair and become a cherished part of your home decor. Enjoy the process and let your unique style shine through in every arrangement!


