How to Emboss Cards
Are you seeking a unique and personalized way to send greetings or invitations? Embossing cards is the perfect solution.
Embossing cards is a creative technique that adds depth and texture, making your projects stand out with a professional touch. This process involves creating raised designs or text on the card’s surface, which can enhance both the aesthetic appeal and tactile experience. Whether crafting invitations, greeting cards, or decorative tags, learning how to emboss can elevate your designs to the next level.
In this guide on how to emboss cards, we will explore the materials and tools needed for embossing, as well as step-by-step instructions to help you achieve stunning results. Get ready to unleash your creativity and make your cards truly memorable!
What Will You Need?
Before you start embossing, gathering all the necessary materials and tools is essential. Here is a list of items you will need:
- Cardstock paper or pre-made cards
- Embossing powder (in your desired color)
- Embossing ink
- Heat gun
- Stamps or stencils (optional)
- Adhesive tape
It’s important to note that there are different types of embossing techniques, including dry embossing, heat embossing, and paste embossing.
10 Easy Steps on How to Emboss Cards
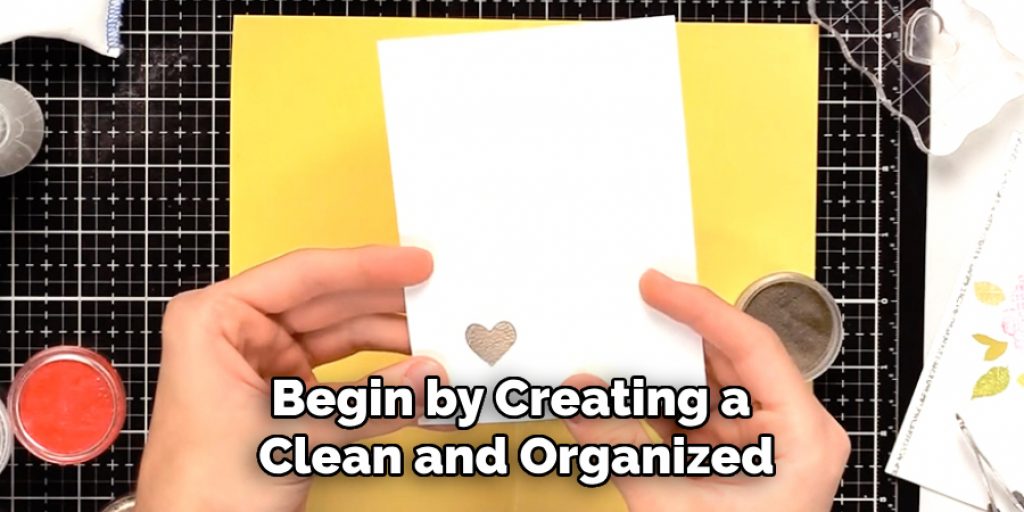
Step 1. Prepare Your Workspace:
Begin by creating a clean and organized workspace to ensure smooth embossing. Choose a well-lit area where you can comfortably work without distractions. Lay down a protective covering, such as an old newspaper or craft mat, to catch any stray embossing powder that may spill. Assemble all your materials within reach, including the cardstock, embossing powder, ink, and heat gun. It might also be helpful to have a pair of tweezers on hand, as they can assist in holding the card while you apply heat, protecting your fingers from burns. Taking the time to prepare your workspace effectively will not only enhance your efficiency but also contribute to the overall enjoyment of your crafting experience.
Step 2. Choose Your Design:
Decide on the design or pattern you wish to emboss onto your card. This could be a simple text message, a decorative border, or a more intricate graphic. If you’re using stamps, select the one that resonates with your theme. For those opting for stencils, make sure they are securely held in place to ensure a clean embossing result. Once you’ve chosen your design, sketch it lightly on the cardstock if necessary, as a guide to help you position your embossing accurately. This step is crucial for achieving the desired effect and will set the foundation for your embossed card.
Step 3. Apply Embossing Ink:
Carefully apply the embossing ink to the area of the card where you want the design to appear. If you’re using a stamp, press it firmly into the ink pad and stamp it onto the cardstock, ensuring even coverage. Use a sponge or brayer to dab the embossing ink evenly over the stencil openings for stencils. It’s essential to work quickly, as embossing ink remains wet for a short period, allowing the embossing powder to adhere correctly. Make sure to cover the entire area where you want to create the raised effect; any dry spots may result in patchy embossing later on.
Step 4. Apply Embossing Powder:
Once you have applied the embossing ink, it’s time to add the embossing powder. Lightly sprinkle the powder over the inked area, ensuring the entire design is covered. You can use a spoon or your fingers to control the amount of powder you apply. If there are any areas with excess powder, gently tap the card to shake off the surplus. This step is crucial, as it will determine the uniformity and quality of your embossed design. After removing the excess powder, inspect the card closely to ensure that every part of your design is well-coated, as this will significantly impact the outcome.
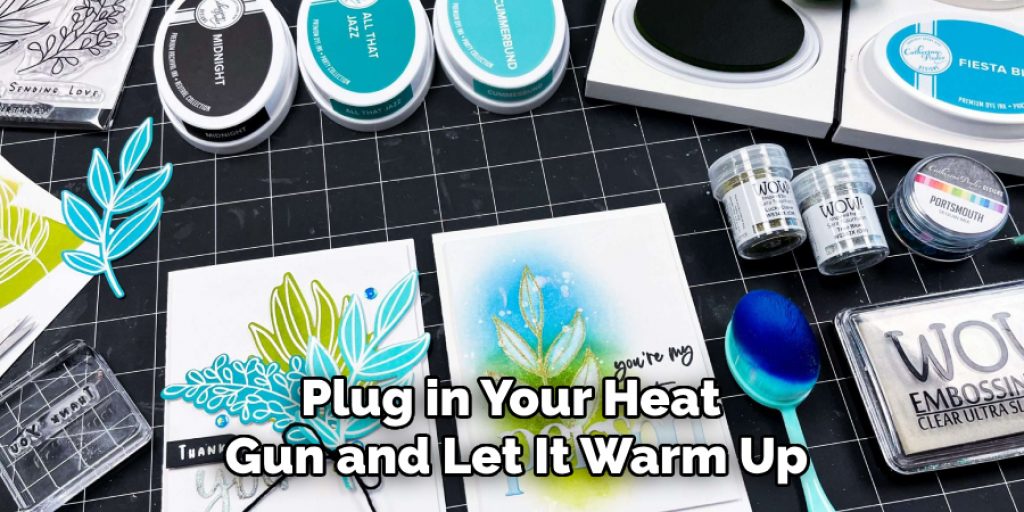
Step 5. Heat the Embossing Powder:
Now that the embossing powder is applied, it’s time to transform your card into a beautifully embossed masterpiece. Plug in your heat gun and let it warm up for a few moments. Holding your card securely (you can use tweezers as mentioned earlier), gently move the heat gun back and forth over the powdered area, keeping it a few inches away to prevent scorching. You’ll notice the powder transitioning from a textured, grainy form into a smooth, glossy finish as it melts and adheres to the paper. Keep an eye on the edges of your design, ensuring that the heat is evenly distributed and that the powder dissolves completely. Be careful not to overheat any particular area, as this can lead to bubbling or scorching of the cardstock. Once the embossing powder has melted and formed a raised design, remove the heat source and allow your card to cool for a few moments.

Step 6. Inspect Your Work:
After the card has cooled, take a step back and inspect your embossed design closely. Look for any uneven areas or spots where the embossing may have yet to take hold. If you notice any imperfections, consider reapplying embossing ink and powder to those areas, repeating the heating process as needed. This step is essential for achieving that professional look you desire. Proper inspection ensures that your final product meets your expectations and reflects your crafting skills.
Step 7. Add Finishing Touches:
With your embossed design complete, it’s time to enhance the overall appearance of your card. Consider adding embellishments like ribbons, gems, or other decorative elements to your card. You can also write a heartfelt message inside, complimenting the exterior design. If you’ve opted for a specific theme, ensure that your added elements align with it for a cohesive look. Finishing touches can significantly increase the visual appeal and personal connection of your card, making it truly special for the recipient.
Step 8. Clean Up:
Once you’ve finished crafting, it’s essential to take a moment to tidy up your workspace. Carefully gather any leftover embossing powder and return it to its container to avoid waste. Wipe down your tools and workspace to keep everything in good condition for your next crafting session. Cleaning up not only helps maintain an organized environment but also allows you to reflect on your creative process, inviting inspiration for future projects.
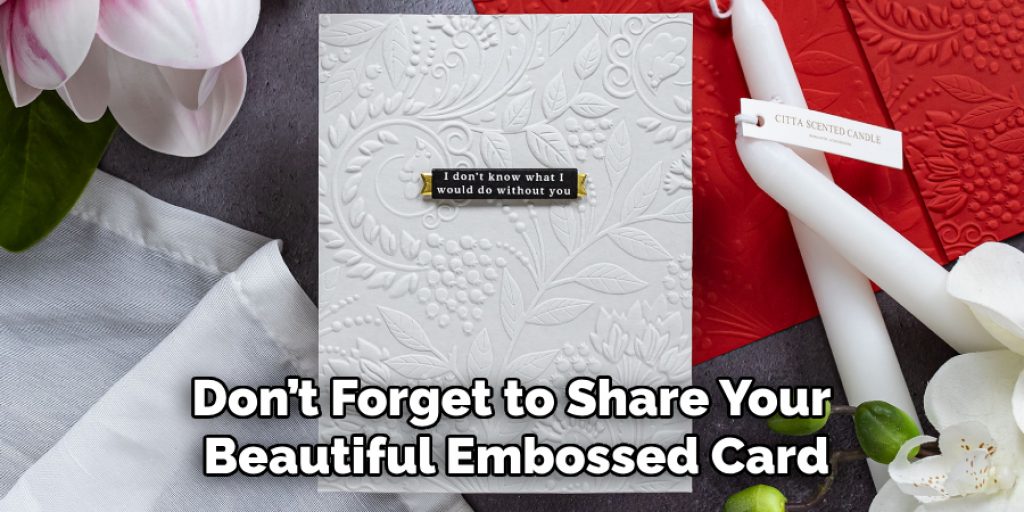
Step 9. Share Your Creation:
Finally, don’t forget to share your beautiful embossed card with friends or family. Whether it’s a greeting card, an invitation, or a thoughtful note, presenting your handcrafted item can bring joy to others. Consider taking pictures of your work to showcase on social media or in crafting groups; sharing your creations can inspire fellow crafters and spread the joy of handmade artistry!
Step 10. Experiment and Explore:
Embossing is a versatile technique that can lead to endless creative possibilities. Take the time to experiment with different designs, colors, and materials. Try various embossing methods or tools to find what resonates with your personal style. The more you practice, the more skilled you’ll become, opening up new avenues for your artistic expression. Embrace the learning process, and let your imagination guide your future embossing projects!
By following these simple steps, you can achieve stunning embossed designs that add a touch of elegance and personalization to your handmade cards.
5 Things You Should Avoid
- Skipping the Testing Phase: Always test your embossing on a scrap piece of cardstock before applying it to your main project. This helps you understand how your materials interact and prevents mistakes that may ruin your work.
- Using Too Much Embossing Powder: While it’s essential to cover the design adequately, over-sprinkling can lead to a caked appearance and uneven embossing. Remember to tap off the excess to achieve a clean finish.
- Overheating or Undercooking the Powder: Failing to monitor the heating process can cause bubbling, scorching, or uneven melting of the embossing powder. Keep the heat gun moving and at an appropriate distance to ensure even application.
- Neglecting to Clean Your Tools: Not cleaning stamps, stencils, or tools after use can result in residue buildup, affecting future projects. Take the time to maintain your tools to ensure optimal performance for each use.
- Rushing the Process: Embossing requires patience—rushing through steps like applying ink or heat can lead to mistakes. Take your time to ensure each step is completed thoroughly for the best results.
By avoiding these common mistakes, you can elevate your embossing technique and create beautiful, professional-looking designs.
Conclusion
In summary, How to emboss cards is a delightful creative process that enhances the visual appeal of your handmade creations.
By following the outlined steps—from preparing your materials, applying embossing powder, and adding finishing touches to cleaning up your workspace—you can achieve stunning and professional results. Remember to take your time, experiment with various techniques, and perfect your skills to make each card truly unique.
The joy of crafting lies not just in the final product but also in the journey of creativity that allows you to express yourself and bring smiles to those who receive your thoughtful, embossed designs. Happy crafting!
Elizabeth Davis
Elizabeth is a creative writer and digital editor based in the United States. She has a passion for the arts and crafts, which she developed from a young age. Elizabeth has always loved experimenting with new mediums and sharing her work with others. When she started blogging, she knew that DIYquickly would be the perfect platform to share her tutorials and tips. She's been writing for the blog from the beginning, and her readers love her helpful advice and easy-to-follow instructions. When she's not writing or editing, Elizabeth enjoys spending time with her family and friends.