How to Hang Ceramic Art
Hanging ceramic art can elevate the aesthetic of any space, adding a touch of elegance and personality to your walls. Whether it’s a handmade piece from a local artist or a treasured item from your travels, displaying ceramic art properly is essential to showcase its beauty.
This guide will walk you through how to hang ceramic art, ensuring that your display not only looks stunning but also remains secure and intact. From selecting the right location to choosing suitable hanging hardware, you’ll find everything you need to create a captivating exhibition in your home.
Importance of Properly Hanging Ceramic Art
Properly hanging ceramic art is crucial for several reasons. First and foremost, it preserves the integrity of the piece; incorrect hanging can lead to damage, such as chipping or breaking, particularly for heavier items that are not securely fastened. Additionally, a well-hung ceramic piece enhances the overall aesthetic appeal of the space, allowing it to be appreciated to its fullest potential. It ensures that the artwork is displayed at an optimal height and angle, attracting attention without overwhelming the surrounding decor.
Lastly, thoughtful placement can contribute to the narrative of your interior design, creating a cohesive look that reflects your style and personality. By taking the time to hang ceramic art correctly, you not only protect your investment but also enhance the beauty of your home.
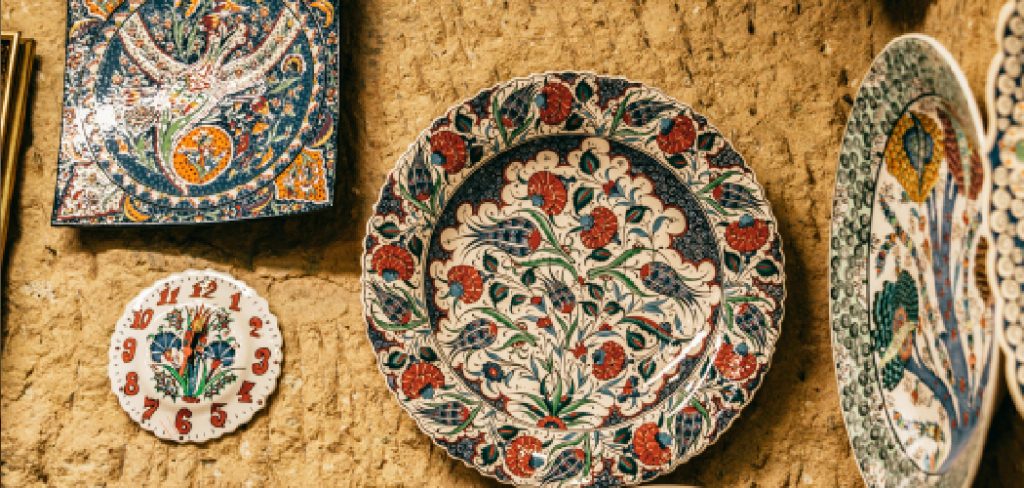
Types of Ceramic Art
Ceramic art encompasses a diverse range of styles and techniques, each with its own unique charm and character. Here are some popular types of ceramic art:
- Stoneware: Known for its durability and versatility, stoneware is often used for both functional and decorative pieces. It is fired at high temperatures, making it less porous and ideal for dinnerware.
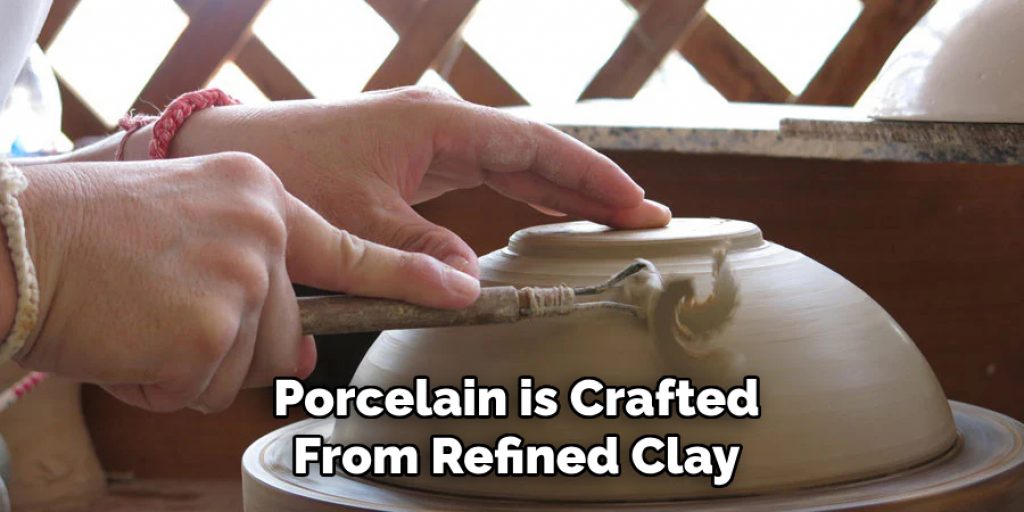
- Porcelain: Renowned for its delicate appearance and strength, porcelain is crafted from refined clay and fired at extremely high temperatures. Its translucent quality and smooth finish make it a favorite for intricate decorative items and fine china.
- Earthenware: This type of ceramic is typically fired at lower temperatures, resulting in a more porous and softer material. Earthenware is often characterised by its rich, earthy tones and is commonly used for pottery, flower pots, and rustic home décor.
- Raku: A traditional Japanese technique, raku involves removing ceramics from the kiln while they are still hot and placing them in combustible materials, creating unique surface effects and crackle patterns. Raku pieces often have an unpredictable and striking quality.
- Terracotta: A type of earthenware, terracotta is made from unrefined clay that is fired at a low temperature. Its characteristic reddish-brown color makes it popular for pots, tiles, and sculptures, often reflecting a rustic aesthetic.
By understanding the various types of ceramic art, you can make informed choices that enhance your display and complement your interior design style.
10 Methods How to Hang Ceramic Art
1. Assess the Wall Type
Understanding the type of wall you’re working with is fundamental. Different wall materials such as drywall, plaster, brick, or concrete each require specific hanging techniques. Drywall is the most common in modern homes and is relatively easy to work with using standard anchors and screws. Plaster, which is often found in older homes, can be more brittle and may require special anchors.
For brick or concrete walls, masonry screws or anchors are essential. Conduct a thorough assessment of your wall type to choose the appropriate hardware, ensuring that your ceramic art is both secure and safely displayed.
2. Choose the Right Hardware
Ceramic art is often heavier than canvas paintings or photographs, necessitating robust hardware. Wall anchors, screws, and picture hangers designed to support substantial weight are crucial. For drywall, consider using toggle bolts or molly bolts, which expand behind the wall to distribute the weight more evenly.
For plaster walls, self-drilling plastic anchors or masonry screws with wall plugs can provide the needed support. On brick or concrete walls, use masonry screws or expansion anchors. Select hardware rated for at least double the weight of your ceramic piece to ensure safety and stability.
3. Use a Stud Finder
A stud finder is an invaluable tool when hanging heavy ceramic art. Studs are vertical framing members behind your drywall that offer a more secure anchor point than the drywall alone. Locate the studs in your wall and mark their positions. Whenever possible, align your mounting hardware with these studs. This technique significantly increases the weight capacity and stability of your installation. If aligning with studs is not possible, ensure you use heavy-duty anchors rated for the weight of your ceramic piece.
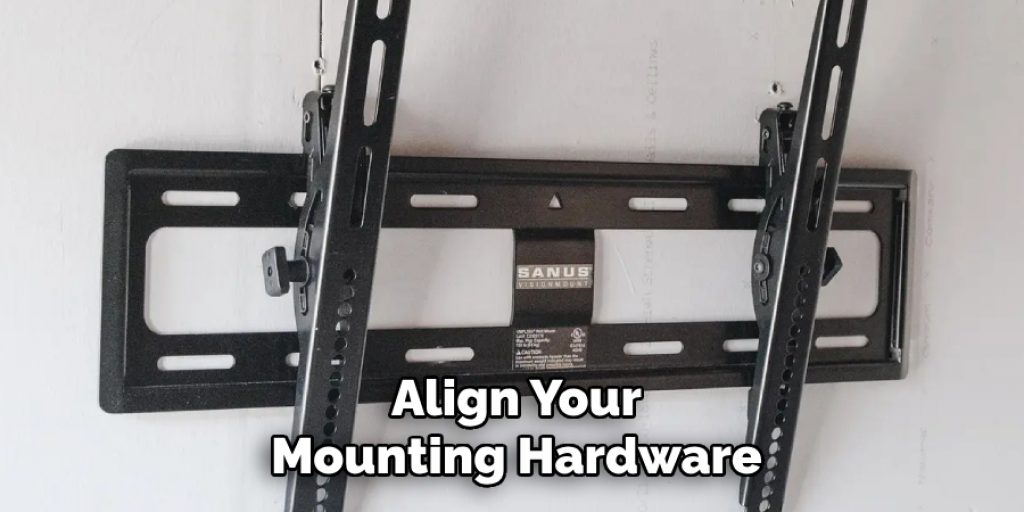
4. Measure and Mark
Accurate measurement is key to a balanced and visually pleasing display. Use a tape measure to determine the exact position where your ceramic art will hang. Measure the height from the floor, keeping the center of the artwork at eye level, typically around 57-60 inches. Mark the position lightly with a pencil. Additionally, measure the distance between the mounting points on the back of your ceramic piece. Transfer these measurements to the wall to ensure precise placement of your anchors or screws.
5. Drill Pilot Holes
Drilling pilot holes can prevent cracking and splitting of your wall material. Using a drill bit slightly smaller than your screws or anchors, drill holes at your marked points. For drywall, a standard twist drill bit works well. For plaster, use a masonry bit to avoid crumbling. When drilling into brick or concrete, a hammer drill with a masonry bit is necessary. Pilot holes guide your screws or anchors, making the installation process smoother and more secure.
6. Install the Anchors or Screws
Once the pilot holes are ready, it’s time to install your chosen anchors or screws. For drywall, insert the anchor into the hole and gently tap it flush with the wall surface. Screw in the mounting screw, leaving a small portion protruding to hang your art. For plaster, carefully screw in self-drilling anchors. On brick or concrete walls, insert expansion anchors into the pilot holes and then drive the screws into these anchors. Ensure that the screws are securely fixed but do not overtighten, which can compromise the integrity of the wall or anchor.
7. Use a Hanging Wire
A hanging wire can distribute the weight of the ceramic art more evenly and provide additional security. Attach D-rings or eye screws to the back of the ceramic piece, ensuring they are level and secure. Thread a heavy-duty picture hanging wire through the rings or screws, leaving enough slack to create a gentle arc. Twist the ends of the wire securely. When hanging the piece, use a picture hook rated for the weight of your ceramic art, ensuring that the wire hangs over the hook evenly. This method also allows for minor adjustments to the level of the piece.

8. Employ French Cleats
French cleats offer a robust and stable mounting option for heavier or irregularly shaped ceramic art. A French cleat consists of two interlocking pieces: one attached to the wall and the other to the artwork. The wall-mounted piece has an upward-facing bevel, while the artwork-mounted piece has a downward-facing bevel, allowing them to lock together securely. Measure and cut the cleats to size, attach one to the back of your ceramic art, and the other to the wall at the desired height. This method provides excellent support and allows for easy removal and repositioning of the artwork.
9. Consider a Plate Hanger
For ceramic art in the form of plates or shallow bowls, a plate hanger can be an ideal solution. Plate hangers come in various sizes and consist of metal arms that grip the edges of the plate, with hooks for hanging. Choose a hanger that fits your ceramic piece snugly but without putting undue pressure on it. Place the hanger on the plate and ensure it’s secure. Hang the plate on a wall hook or nail, ensuring the hook is rated for the weight of your ceramic piece. Plate hangers are designed to be unobtrusive, allowing the art to be the focal point.
10. Seek Professional Installation
For particularly valuable, large, or complex ceramic art pieces, seeking professional installation might be the best course of action. Professional installers have the expertise and tools necessary to ensure a secure and aesthetically pleasing display. They can handle any wall type and provide solutions for pieces with unusual shapes or mounting challenges. Additionally, professionals are often insured, providing an extra layer of protection for your valuable artwork. While this option may be more costly, it guarantees peace of mind and a flawless result.

Conclusion
Hanging ceramic art involves a combination of careful planning, appropriate tools, and precise execution. By understanding your wall type, selecting the right hardware, and employing suitable hanging methods, you can ensure that your ceramic pieces are securely and beautifully displayed. Whether you opt for traditional picture hooks, heavy-duty anchors, or professional installation, the end result will be a stunning addition to your space that showcases your unique taste and artistic appreciation. Thanks for reading our blog post on how to hang ceramic art! We hope you found it helpful and informative.
Elizabeth Davis
Elizabeth is a creative writer and digital editor based in the United States. She has a passion for the arts and crafts, which she developed from a young age. Elizabeth has always loved experimenting with new mediums and sharing her work with others. When she started blogging, she knew that DIYquickly would be the perfect platform to share her tutorials and tips. She's been writing for the blog from the beginning, and her readers love her helpful advice and easy-to-follow instructions. When she's not writing or editing, Elizabeth enjoys spending time with her family and friends.