How to Hold Yarn for Continental Knitting
Continental knitting is a popular technique that involves holding the yarn in the left hand, allowing for greater efficiency and speed in knitting compared to other methods. This method can be particularly advantageous for those looking to create intricate designs or work on larger projects without tiring out their hands.
In this guide, we will explore the essential steps for how to hold yarn for continental knitting, ensuring that you can confidently create beautiful knitted pieces with ease and flair. Whether you’re a beginner or an experienced knitter looking to refine your technique, mastering this aspect of continental knitting will enhance your overall experience and results.
What is Continental Knitting?
Continental knitting, also known as “picking,” is a knitting style where the yarn is tensioned in the left hand, enabling quicker and more efficient stitch creation. This technique differentiates itself from the English method, where the yarn is held in the right hand and wrapped around the needle. Continental knitting is often praised for its potential to reduce hand fatigue, as the yarn is manipulated with minimal movement, allowing for a smoother and faster workflow.
This method is especially favoured by those who wish to produce knitting patterns with fine details, as it facilitates better control over the yarn. Embracing continental knitting can open up a world of creativity, helping knitters to achieve stunning results in their projects.
Why Learn Continental Knitting?
Learning continental knitting can significantly transform your knitting experience for several reasons. First and foremost, it enhances speed and efficiency, allowing knitters to complete projects more quickly than with traditional methods. As the yarn remains in the left hand, the motion of creating stitches becomes more streamlined, which is especially beneficial for larger projects or intricate patterns.
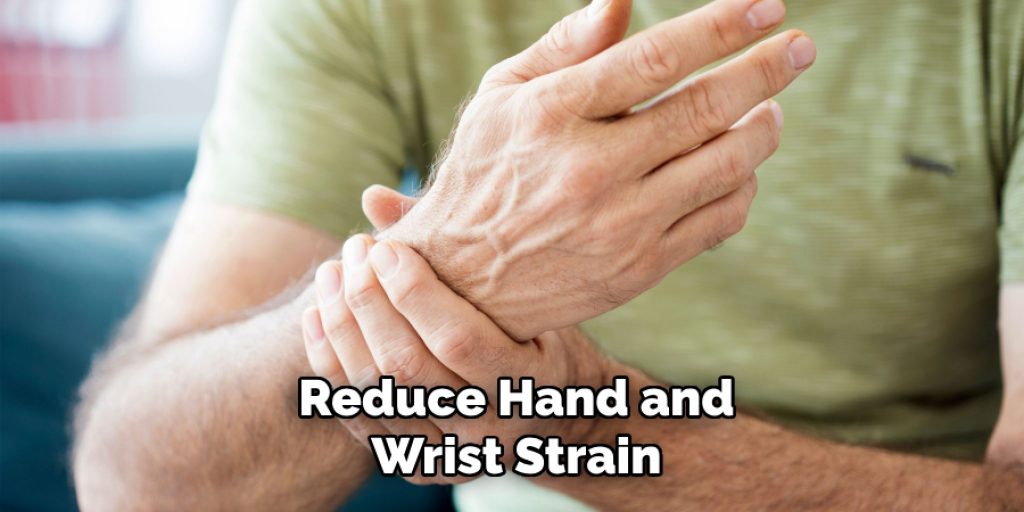
Additionally, this technique often reduces hand and wrist strain, making it a more comfortable option for extended knitting sessions. Furthermore, mastering continental knitting opens up new avenues for creativity, enabling knitters to experiment with unique patterns and styles with greater ease. Embracing this technique can lead to improved skills, increased confidence, and ultimately, a more enjoyable knitting journey.
10 Methods How to Hold Yarn for Continental Knitting
1. Basic Continental Hold
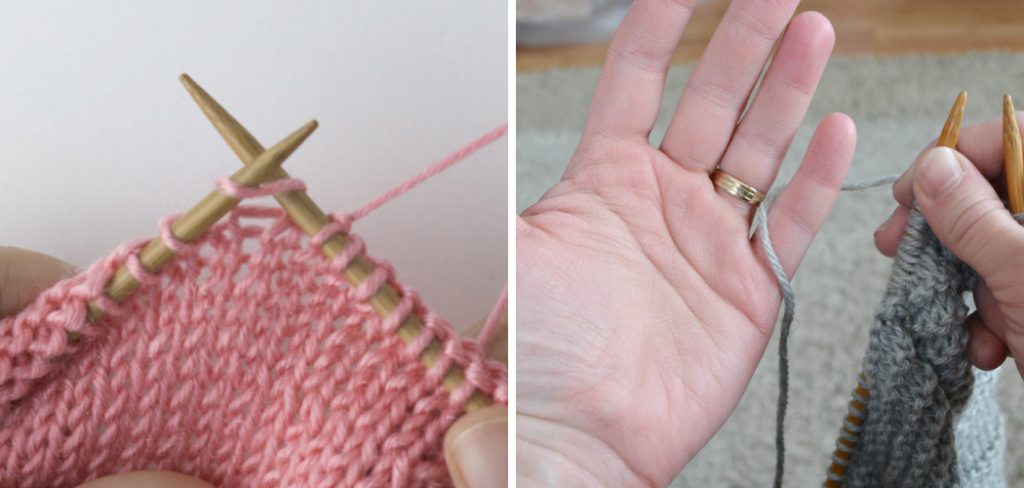
The basic continental hold is the foundation for all variations. To start, drape the yarn over your left index finger. The yarn should come from the ball over the back of your hand and loop around your index finger, then flow down to your project. Use your middle, ring, and pinky fingers to control the tension by holding the yarn loosely or tightly. This basic hold allows for smooth and efficient knitting, as the yarn is easily picked by the right needle.
2. Over the Index Finger
One common method is to wrap the yarn around your left index finger only. Drape the yarn over the top of the finger, letting it hang down towards your work. Your other fingers can remain relaxed. This method provides excellent control over the yarn tension, as the distance between your finger and the knitting needles can be adjusted to achieve the desired tightness. It’s a straightforward technique, making it ideal for beginners learning continental knitting.
3. Over the Index and Middle Fingers
For more tension control, try wrapping the yarn over both the index and middle fingers of your left hand. The yarn should go over the top of the index finger, under the middle finger, and then flow down to your project. This method helps maintain a more consistent tension, as the yarn’s path is slightly longer and allows for better control. This technique is beneficial for knitters who find their tension varies too much with just the index finger.
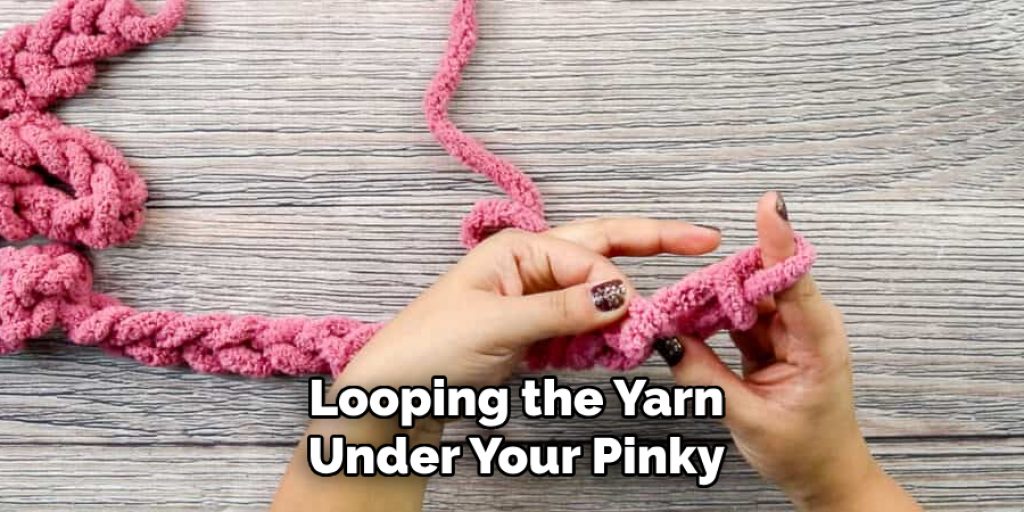
4. Under the Pinky and Over the Index Finger
To achieve a tighter tension, you can wrap the yarn under your pinky and over your index finger. Begin by looping the yarn under your pinky, then bring it over the back of your hand to drape it over your index finger. This method helps to create a tighter tension because the yarn has to travel a longer distance, making it ideal for projects that require more precise stitch definition.
5. Weaving Through Fingers
Weaving the yarn through your fingers can provide a more stable tension. Start by threading the yarn under your pinky, over your ring finger, under your middle finger, and finally over your index finger. This weaving technique distributes the tension more evenly across multiple fingers, which can help maintain a consistent tension throughout your knitting. It’s particularly useful for knitters who struggle with uneven stitches.
6. Around the Whole Hand
For a unique approach, try wrapping the yarn around your entire left hand. Begin by wrapping the yarn around your pinky, then across the palm, and over your index finger. The yarn should then flow down to your project. This method provides significant tension control and can be adjusted easily by spreading or closing your fingers. It’s a versatile technique that can help achieve a balance between tight and loose tension.
7. Looping Around the Thumb
Some knitters prefer to loop the yarn around their thumb. To do this, start by holding the yarn in your left hand, then loop it around your thumb before bringing it over your index finger. The thumb acts as an anchor, providing extra tension control. This method is especially helpful for knitters who have trouble maintaining consistent tension with just the index finger. The thumb loop adds stability and can help reduce hand fatigue.
8. Using a Yarn Guide
A yarn guide can be a helpful tool for maintaining consistent tension. These small devices fit over your finger and have slots to guide the yarn. To use a yarn guide, place it on your left index finger and thread the yarn through the slots. The guide helps control the tension and keeps the yarn from slipping. This method is particularly useful for knitters who experience discomfort or difficulty holding the yarn for extended periods.
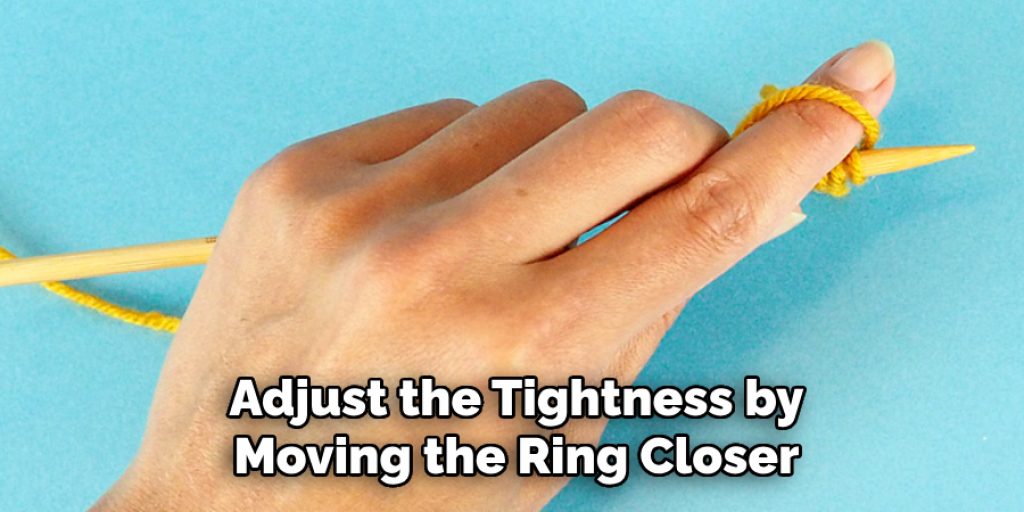
9. Adjustable Ring Hold
An adjustable ring hold involves using a tension ring, which is worn on your finger to control the yarn. To use this method, place the ring on your left index or middle finger and thread the yarn through the ring. The ring provides a stable point of tension, allowing you to adjust the tightness by moving the ring closer to or further from your fingertip. This technique offers precise tension control and can be a comfortable alternative for knitters with hand strain.
10. Two-Handed Continental Knitting
Two-handed continental knitting combines elements of both continental and English styles. Hold the yarn in your left hand as you would for continental knitting, but use your right hand to help guide the yarn and control tension. This method can be particularly useful for colorwork, where you hold one yarn in each hand. The right hand helps manage the yarn flow, providing additional control and reducing the strain on your left hand. This technique can improve efficiency and consistency, especially in complex patterns.
Troubleshooting Common Issues
Even experienced knitters face challenges from time to time. Here are some common issues you might encounter during your knitting journey, along with helpful solutions.
1. Uneven Tension
If your stitches vary in tightness, revisit your yarn hold. Ensure you are consistently using the same finger techniques discussed previously and pay attention to how you control the yarn tension. Practicing with different methods may help you find the one that offers the most consistent results.
2. Stitches Falling Off the Needle
This can occur if your stitches are too loose or if the needles are too slick. Check your grip on the yarn, and consider switching to a different type of needle, such as those with a textured surface, to help keep stitches secure.
3. Twisted Stitches
Twisted stitches often happen at the beginning of a row or when joining the round. To prevent this, ensure your work is not inadvertently twisted around itself before you begin knitting. Take a moment to check your initial cast-on and, if you notice any twists, carefully unpick the stitches and start again.
4. Yarns Getting Tangled
Yarn tangles can be frustrating, especially when working from a center-pull skein. Keep your working yarn and any leftovers organized by securing the skein in a bowl or yarn bag. This also helps to maintain an even tension as you knit.

5. Difficulty Introducing New Yarn
When introducing a new color or type of yarn, the transition can cause bulkiness or gaps. To avoid this, always join the new yarn at the beginning of a row and make sure to knit the first couple of stitches loosely. This will help blend the two yarns together more seamlessly.
Remember, troubleshooting is part of the learning process in knitting. Don’t hesitate to experiment with different techniques and solutions to find what works best for you!
Conclusion
Mastering how to hold yarn for continental knitting is essential for achieving consistent tension and comfortable knitting. By experimenting with these ten methods—basic continental hold, over the index finger, over the index and middle fingers, under the pinky and over the index finger, weaving through fingers, around the whole hand, looping around the thumb, using a yarn guide, adjustable ring hold, and two-handed continental knitting—you can find the techniques that work best for you. Thanks for reading, and we hope this has given you some inspiration on how to hold yarn for continental knitting!
Elizabeth Davis
Elizabeth is a creative writer and digital editor based in the United States. She has a passion for the arts and crafts, which she developed from a young age. Elizabeth has always loved experimenting with new mediums and sharing her work with others. When she started blogging, she knew that DIYquickly would be the perfect platform to share her tutorials and tips. She's been writing for the blog from the beginning, and her readers love her helpful advice and easy-to-follow instructions. When she's not writing or editing, Elizabeth enjoys spending time with her family and friends.