How to Install Shiplap on Wall Without Nails
Are you tired of having plain walls that need something a little extra? If so, then installing shiplap on your walls may just be the perfect solution! Shiplap is an easy-to-install and cost-effective material that can easily transform any wall into an eye-catching feature.
Not only does it add style, but it also adds texture and character to the room as well. Plus, with some careful planning you can even do this without using any nails! Here, we’ll provide step by step instructions on how to install shiplap on wall without nails. So grab yourself a few supplies and get ready to take your interior design game up a notch!
Shiplap is an interior design trick that has been around for centuries and is gaining popularity in modern home decor. Installing shiplap can transform any room with its traditional coastal farmhouse appearance, but there is no need to resort to hammers and nails! So read on as we take you through what it takes to apply shiplap without using nails!
Why May You Want to Install Shiplap on Wall Without Nails?
1. To Avoid Having Visible Nail Holes on Your Wall
One of the major advantages of installing shiplap on wall without nails is that it eliminates the need to drill nail holes into your walls. This means that you can keep your walls looking clean and pristine without having to worry about unsightly nail holes detracting from their overall appearance.
2. To Prevent Damage to Your Walls from Nails
Another major benefit of installing shiplap on wall without nails is that it helps to protect your walls from the damage that can be caused by metal nails. Nails can cause damage over time, as they may rust or become loose and start to tear into your drywall. By using an adhesive instead, you can help ensure that no such damage is caused.
3. To Make Installation Easier
Installing shiplap on walls without nails can also be much easier than using nails. You don’t have to worry about hitting studs or making sure your nail placement is even and secure – all you need to do is apply the adhesive and stick the pieces into place. This can make installation much faster and easier, allowing you to complete the project in a fraction of the time it would take with nails.
How to Install Shiplap on Wall Without Nails in 6 Easy Steps
Now that you know why you may want to install shiplap on wall without nails, let’s discuss how to do it.
1. Gather Your Materials
The first step is to gather your materials. You will need shiplap boards, a tape measure, a level, glue, screws or nails, and a drill. So you have to make sure you have all the necessary supplies before starting.
2. Measure and Cut

After you have all of your materials, measure each wall to fit the boards correctly. Once you know how long and high they need to be, use a saw or jigsaw to cut them to size. You have to be extra careful while measuring because if you don’t get it right the first time, you could end up wasting a lot of material.
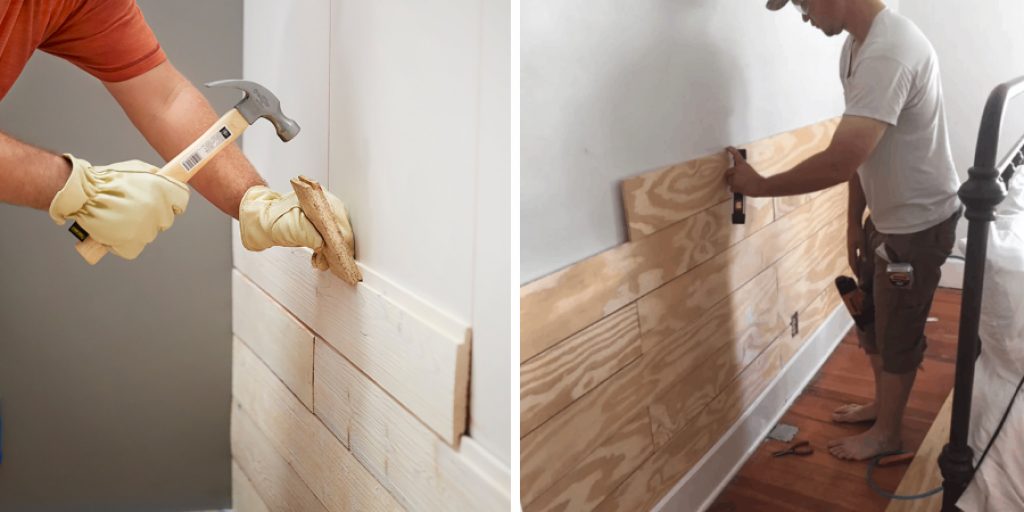
3. Attach the Boards
Then, attach each board to the wall using glue and screws or nails. Make sure to use enough glue so that the boards stay in place. If you want an extra sturdy fix, you can use a drill and screws.
4. Add the Level
Next, take your level and make sure that each board is even with the one beside it. This will ensure that your shiplap wall looks great when it’s done. Make any adjustments needed using the glue or screws if necessary.
5. Secure the Edges
Once all your boards are in place, go around the edges and add extra glue or nails to make sure everything is secure. This is an important step that will help you avoid having any problems with the wall once it’s finished.
6. Double Check
The very last step is to go back over the wall and do a double check. Make sure all of the boards are secure and that there aren’t any gaps or holes that need to be filled. If everything looks good, you can give yourself a pat on the back for a job well done!
With these easy steps, you can now install shiplap on wall without nails! You can now enjoy the beautiful look of a shiplap wall in your home and know that it was installed correctly. Have fun, and happy decorating!
Some Extra Tips to Install Shiplap on Wall Without Nails
1. Do Not Forget to Measure
Before you start cutting and fitting the shiplap, make sure that you measure the wall accurately. It is important to be accurate with the measurements so that you don’t end up having too much or too little material for installation.
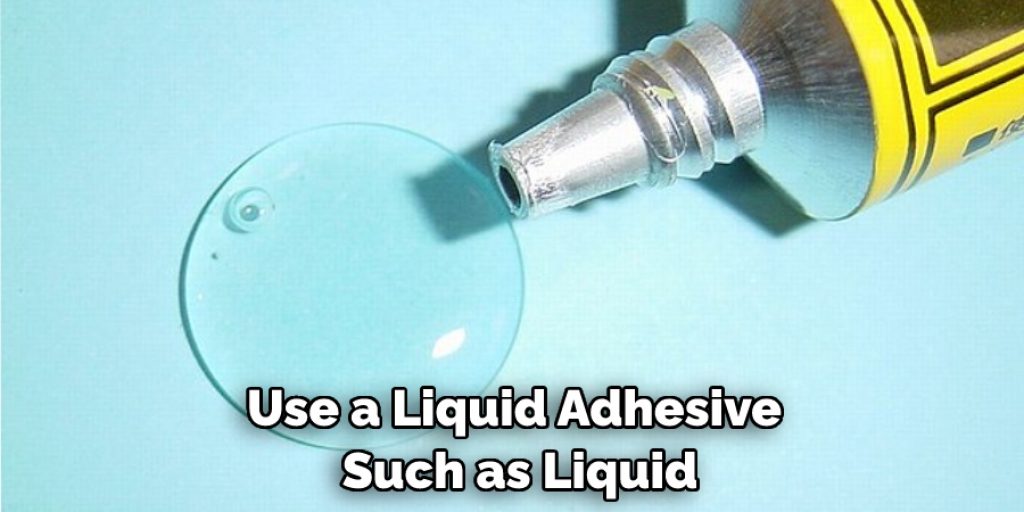
2. Use Liquid Nails
To ensure that your shiplap stays firmly in place, you can use a liquid adhesive such as Liquid Nails to adhere the pieces together. This is especially important for shiplap that will be exposed to moisture or humidity.
3. Caulk or Seal Any Gaps
Once your shiplap is installed, make sure to fill any gaps between the boards with caulk or a sealant. This will help protect your wall from water damage and keep moisture out, which can lead to mold growth or other issues.
4. Use Spacers
When installing a shiplap on a wall without nails, it is important to use spacers between each piece of wood. This will help ensure that the boards are evenly spaced and that the installation will look aesthetically pleasing.
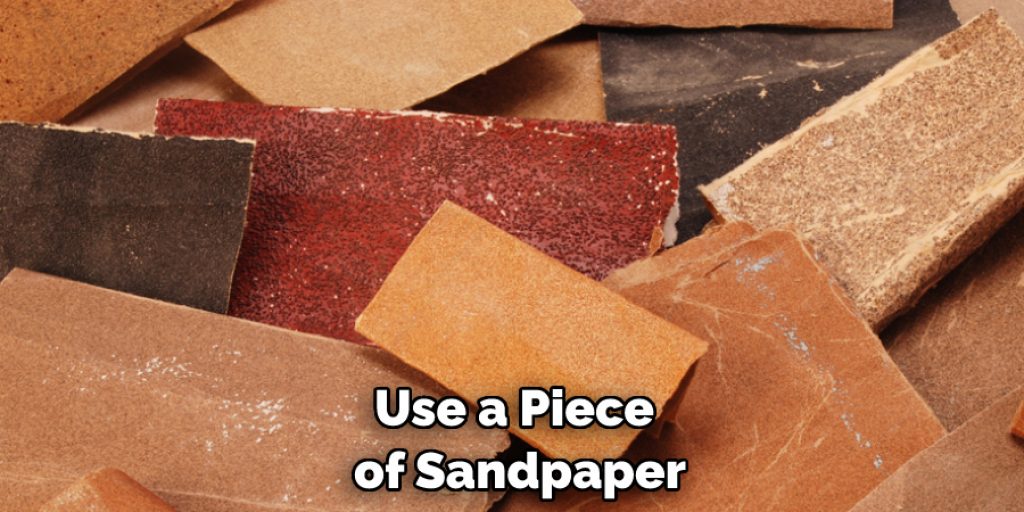
5. Use Sandpaper for Smooth Finish
After your shiplap is installed, use a piece of sandpaper to make sure that all the edges are smooth and even. This will give your wall a finished look and help prevent any splinters or rough patches.
Follow these tips when installing shiplap on the wall without nails and you’ll be sure to get a great-looking finish that will last for years. Good luck!
Frequently Asked Questions
What Precautions Should I Take Before Installing Shiplap on a Wall?
Before installing shiplap on your wall, it is important to make sure that the wall is structurally sound and free of any mold or mildew. Additionally, be sure to check for any hidden wires or wiring in the wall before you begin drilling holes. It’s also important to note the location and size of any wall outlets before you begin to install the shiplap.
What Types of Adhesives Are Suitable For Installing Shiplap Without Nails?
When installing shiplap on a wall without nails, it’s best to use an adhesive that is designed specifically for woodworking projects. A strong construction adhesive, such as Liquid Nails or PL Premium, can be used to ensure a secure bond between the shiplap and the wall.
What Types of Tools Will I Need To Install Shiplap Without Nails?
In addition to a measuring tape and level for accurate placement, you’ll need an electric drill with a screwdriver attachment to attach the shiplap to the wall. You may also need a circular saw or miter saw for cutting the shiplap boards, as well as a hammer and nails or screws if you choose to use them. Additionally, an adhesive applicator such as a caulking gun can help make the job easier. Finally, a jigsaw may be necessary in order to make any specific cuts or shapes.

How Much Time Will It Take To Install Shiplap on a Wall Without Nails?
The amount of time it takes to install shiplap on a wall without nails will depend on the size and complexity of the project. Generally, however, it should take between two and four hours to complete. When working with large projects or intricate designs, you may need to allow more time. Additionally, it’s important to factor in the extra time needed for measuring and cutting your shiplap boards.
Conclusion
Installing shiplap is a great way to add character and a touch of farmhouse charm to any room. With the proper tools and knowledge, it can be done in less time than you may think. We hope this tutorial helped you learn how to install shiplap on wall without nails safely and confidently.
Remember to plan ahead, use glue where necessary, measure twice before making cuts, never let the saw blade travel backward while cutting, use caulk for a tight seal around the edges when attaching the boards and ensure that each board is snug against the other ones. With these guidelines on how to install shiplap on wall without nails in hand, you will be sure to have your own DIY shiplap wall finished looking fantastic in no time!