How to Knit Shorts
Knitting Shorts is a creative and rewarding project that combines the art of knitting with practical clothing design. Whether you’re looking to make a stylish addition to your summer wardrobe or seeking a cozy pair to wear indoors, knitting your own shorts allows for customization in terms of style, color, and fit.

This guide on how to knit shorts will walk you through the essential materials, techniques, and steps needed to create a comfortable and fashionable pair of knitted shorts, perfect for both beginners and experienced knitters alike. Get ready to unleash your creativity and enjoy the satisfaction of wearing a handmade garment!
Why Knit Shorts?
Knitting shorts not only allows for customization, but it also provides an opportunity to use different stitches and techniques, making each pair unique. Additionally, knitting your own shorts allows for a better fit as you can adjust the measurements to your body shape and preferences. You also have the freedom to choose from a variety of yarns and colors, giving you endless possibilities for creating one-of-a-kind garments.
Moreover, knitting is a relaxing activity that has been known to reduce stress levels and improve mental well-being. It’s a great way to unwind after a long day or spend quality time with friends and family while creating something beautiful together.
Materials Needed
Before diving into the process of knitting shorts, it’s essential to gather all necessary materials in advance. Here are some items you will need:
Yarn:
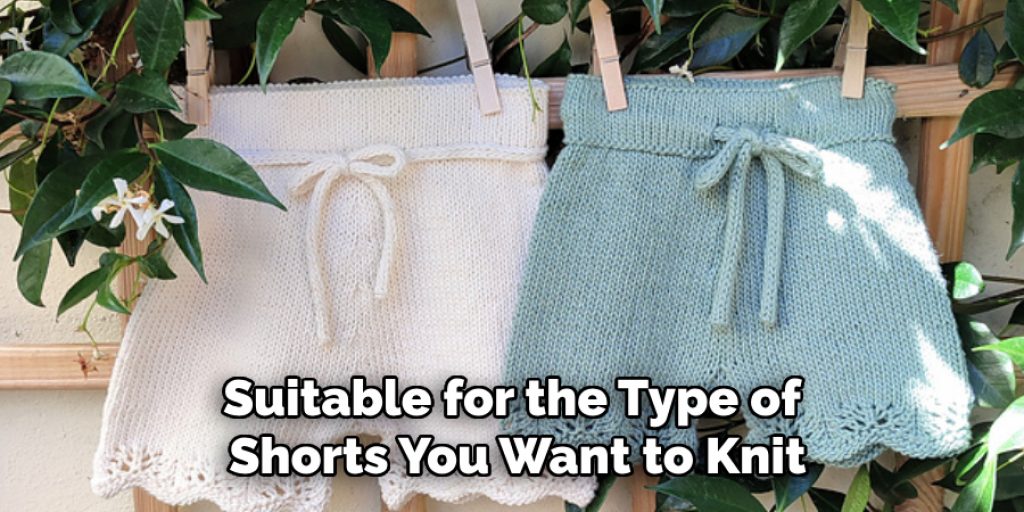
Choose a yarn that is suitable for the type of shorts you want to knit. For lightweight summer shorts, cotton or bamboo yarn is ideal. For warmer and cozier shorts, opt for wool or acrylic blends.
Knitting Needles:
The size of your needles will depend on the thickness of your yarn and the desired tension. Generally, a US 6-8 (4mm-5mm) needle works well with worsted weight yarn.
Stitch Markers:
These are helpful to mark specific stitches or sections in your knitting.
Scissors:
Cut the yarn and weave in ends when finishing off your project.
Measuring Tape:
This will come in handy when taking measurements for a proper fit.
8 Step-by-step Guidelines on How to Knit Shorts
Step 1: Take Measurements
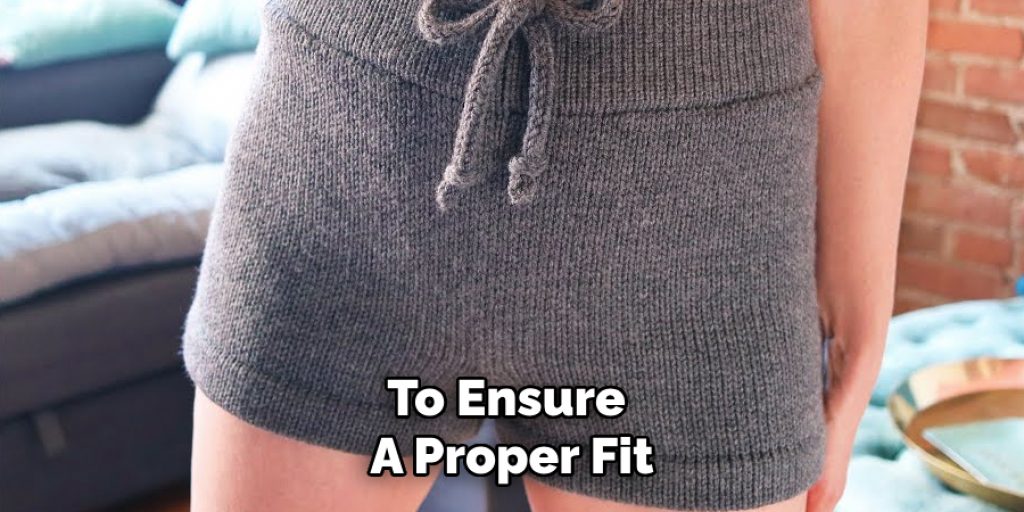
Before you start knitting your shorts, it’s crucial to take accurate measurements to ensure a proper fit. Begin by measuring your waist circumference and hip width, as these are vital for creating shorts that are comfortable and flattering. Additionally, measure the inseam (the length from the crotch to the desired hemline) to determine how long you want your shorts to be.
If you prefer a looser fit, consider adding an extra inch or two to these measurements. Write down your measurements, as they will guide you in choosing the right stitch counts and shaping your design as you progress.
Step 2: Gauge Swatch
To ensure that your shorts fit well, make a gauge swatch using the yarn and needles you’ve chosen. Knit a small square, following the stitch pattern you intend to use for your shorts. Measure the number of stitches and rows per inch and compare them to your desired measurements. If they don’t match, adjust your needle size until you get the right gauge.
You may also choose to wash and block your swatch before taking measurements, as this can change the gauge slightly.
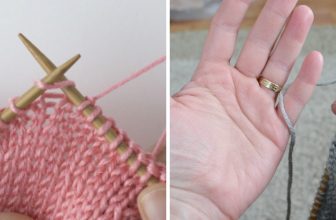
Step 3: Cast On
Once you have your measurements and gauge, it’s time to cast on for your shorts. Using a long-tail cast-on method, cast on the number of stitches needed for the waist circumference. Start with a smaller needle size (US 6 or 4mm) and switch to larger ones as necessary.
It’s essential to have an even number of stitches to make the ribbed waistband, so adjust your cast on if needed.
Step 4: Knit the Waistband
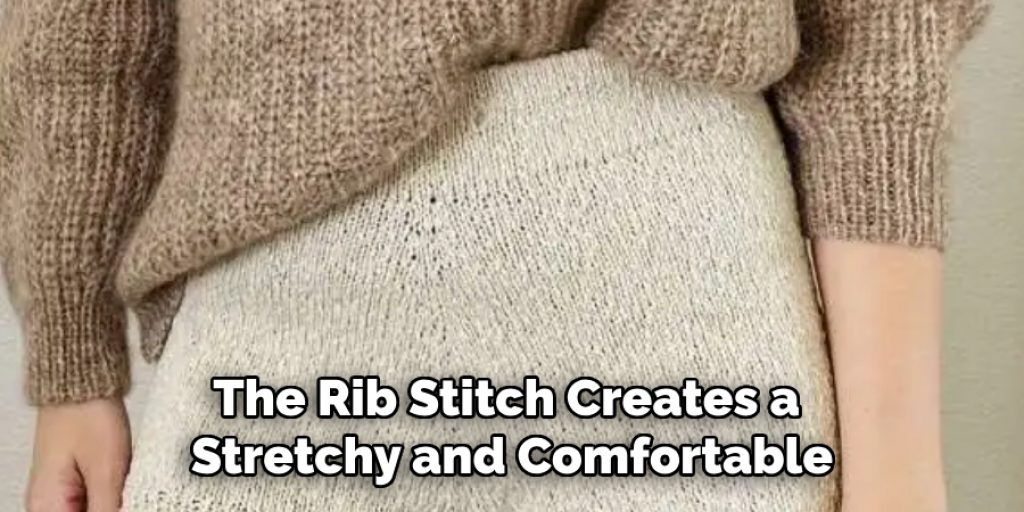
Using a knit one purl one (K1P1) rib stitch, work in rounds until the waistband reaches your desired height. The rib stitch creates a stretchy and comfortable waistband that hugs the body nicely. Use stitch markers to keep track of where you start and end each round.
But before closing the waistband, try it on to ensure it fits comfortably. If needed, add or decrease stitches in the next round to adjust for a proper fit.
Step 5: Knit the Body of the Shorts
After completing the waistband, switch to your desired stitch pattern and continue working in rounds until you reach the desired length for your shorts. You may also incorporate shaping techniques like increasing or decreasing stitches at specific points to achieve a closer fit towards the hips or legs.
It’s important to try on your shorts periodically as you knit to make sure they fit comfortably and to adjust accordingly.
Step 6: Create the Leg Openings
Once the body of your shorts is complete, it’s time to create the leg openings. Depending on your stitch pattern, you may need to bind off stitches in specific sections or use a separate set of needles for each leg opening. For a clean finish, consider using a stretchy bind-off method such as Jeny’s Surprisingly Stretchy Bind-Off (JSSBO).
There are also various techniques for creating a hem at the leg openings, such as using a rib stitch or turning the edge and sewing it down.
Step 7: Finishing Touches
Once you’ve created the leg openings, it’s time to add the finishing touches that will enhance your knitted shorts. Begin by weaving in any loose ends with your tapestry needle to create a clean finish. This is crucial for avoiding any unruly yarn tails that could unravel over time. Next, block your shorts to ensure they maintain their shape and fit properly.
This involves soaking them in lukewarm water, gently squeezing out excess water, and laying them flat to dry in the desired shape. If you’d like, consider adding decorative elements such as buttons or embroidery to personalize your shorts further. Finally, give your shorts a good try-on once more to ensure everything feels comfortable and fits as intended before you proudly wear your handmade creations!
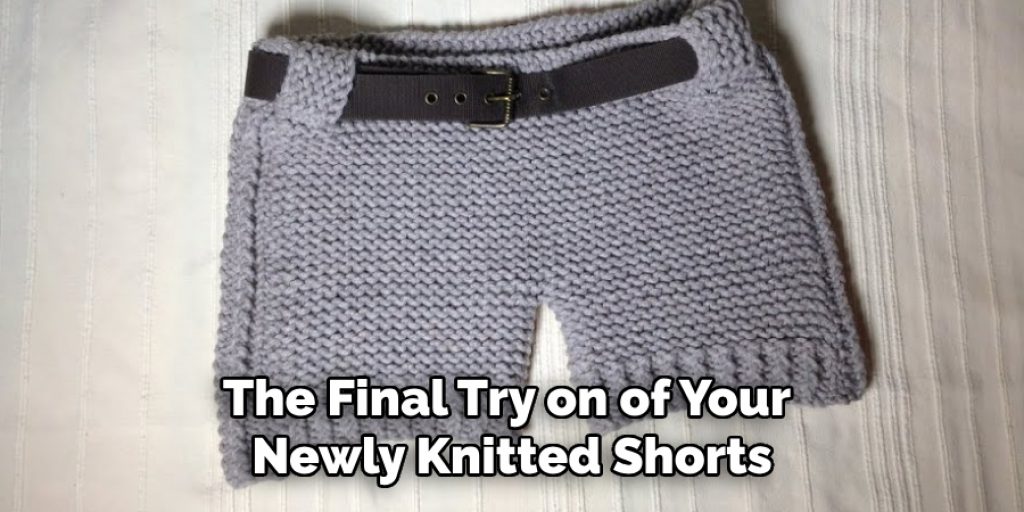
Step 8: Final Try-On
After completing the finishing touches, it’s time for the final try-on of your newly knitted shorts. This crucial step allows you to assess the overall fit and comfort of the garment. Slip into your shorts and carefully evaluate how they feel across the waist, hips, and leg openings. Pay attention to any areas that might feel too tight or loose and make mental notes of any adjustments that might be necessary.
If you find that the fit is not as expected, consider making minor alterations, such as adjusting the waistband or refining the leg openings. Once satisfied with the fit, you can take pride in wearing your unique, handmade shorts, showcasing your creative skills and personal style!
Frequently Asked Questions
Q: Can I Use Any Yarn for Knitting Shorts?
A: Yes, you can use any type of yarn to knit shorts. However, it’s essential to consider the weight and thickness of the yarn and how it will affect the fit and drape of your shorts. A thicker yarn may create a sturdier fabric, while a thinner yarn can result in a more delicate garment. It’s also crucial to choose a yarn that is suitable for warm weather if you plan on wearing your shorts during the summer.
Q: Do I Need to Use Circular Needles for Knitting Shorts?
A: While circular needles are highly recommended for seamless knitting in the round, they are not necessary for knitting shorts. You can use straight needles or double-pointed needles, depending on your preference and comfort level. However, keep in mind that using circular needles allows you to try on your shorts as you knit, making it easier to adjust the fit and make any necessary changes.
Q: Is Knitting Shorts Difficult?
A: Knitting shorts may seem like a daunting project at first, but with the right tools and instructions, it can be an enjoyable and rewarding experience. As with any knitting project, it’s essential to take accurate measurements, choose the right yarn and needle size, and follow the stitch pattern carefully. With practice and patience, you can create a beautiful pair of knitted shorts that fit your body perfectly.
Q: Can I Alter the Pattern to Fit My Body Measurements?
A: Yes, you can modify the pattern to fit your specific body measurements. It’s essential to take accurate measurements and adjust the number of stitches accordingly when casting on for the waistband and shaping the body and leg openings. You can also incorporate shaping techniques such as increasing or decreasing stitches to achieve a closer fit in certain areas.
Q: How Long Will It Take to Knit Shorts?
A: The timeline for knitting shorts will vary depending on several factors, such as your knitting speed, chosen stitch pattern, and the complexity of alterations made. However, with consistent effort and dedication, you can complete a pair of knitted shorts within a few days to a couple of weeks. Remember to take breaks and enjoy the process, as knitting is also about relaxation and creativity!
With these steps and tips on how to knit shorts in mind, you are now ready to embark on your knitting journey towards creating a pair of stylish and comfortable shorts.
Conclusion
Knitting your own shorts can be a fulfilling and creative experience, allowing you to express your personal style while crafting a unique garment. The combination of selecting appropriate materials, mastering techniques, and customizing fit enables you to create a piece that is not only functional but also tailored to your preferences.
Remember to be patient with yourself throughout the process—every stitch brings you closer to a beautifully crafted pair of shorts. Embrace the journey of knitting, and enjoy the satisfaction of wearing your handmade creation with pride. Thanks for reading this article on how to knit shorts.
Elizabeth Davis
Elizabeth is a creative writer and digital editor based in the United States. She has a passion for the arts and crafts, which she developed from a young age. Elizabeth has always loved experimenting with new mediums and sharing her work with others. When she started blogging, she knew that DIYquickly would be the perfect platform to share her tutorials and tips. She's been writing for the blog from the beginning, and her readers love her helpful advice and easy-to-follow instructions. When she's not writing or editing, Elizabeth enjoys spending time with her family and friends.