How to Make a Carpet Bag
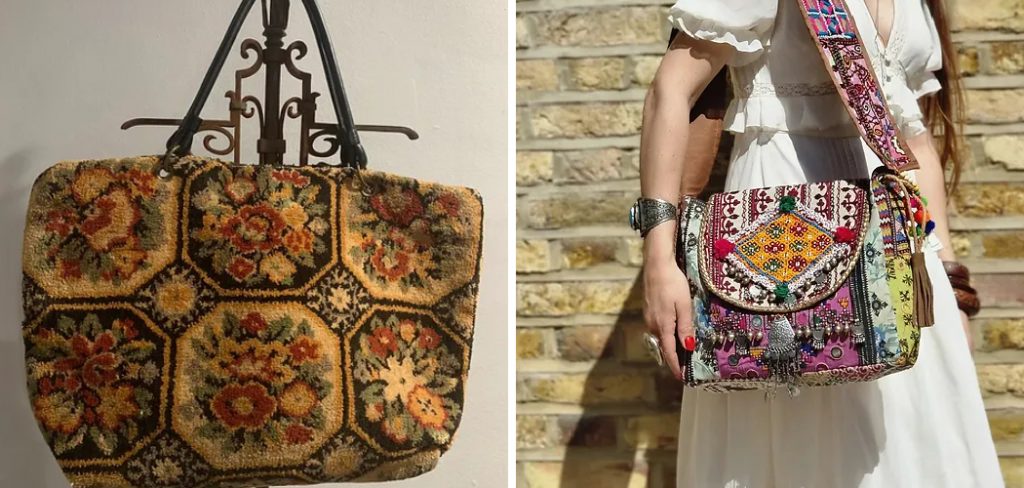
A carpet bag is not only a functional accessory for carrying personal items but also a unique fashion statement that showcases creativity and resourcefulness. Traditionally made from outdated or leftover carpets, this bag brings a touch of nostalgia and warmth, often featuring beautiful patterns and textures.

Whether you’re looking to make a stylish statement or simply want a sturdy bag for your travels, crafting a carpet bag can be a rewarding project. In this guide on how to make a carpet bag, we’ll walk you through the materials needed and the step-by-step process to create your very own carpet bag, blending practicality with artistic flair.
Why Make a Carpet Bag?
Carpet bags have been around for centuries, often associated with the Victorian era when they were made from luxurious carpets. In modern times, making your own carpet bag allows you to repurpose old or unused carpets and turn them into something useful and unique. Plus, with the right materials and techniques, you can create a sturdy and durable bag that will last for years.
It’s also a great project for those who enjoy DIY and want to add a personal touch to their wardrobe or accessories. With a variety of designs and patterns available in carpets, you can create a bag that truly reflects your individual style.
Materials You’ll Need
- Carpet (preferably with a thick pile)
- Lining fabric
- Sewing machine
- Thread
- Scissors
- Tape measure
- Ruler or straight-edge
- Pins
8 Step-by-step Guidelines on How to Make a Carpet Bag
Step 1: Preparing the Pattern
Before you begin crafting your carpet bag, it’s essential to create a pattern that will serve as the blueprint for your design. Start by measuring the dimensions of the bag you want to make, considering its height, width, and depth. Use these measurements to draw the shapes on paper; typically, you’ll need a main body piece, a base, and any additional pockets or flaps you wish to include.

Once your design is complete, cut out the pattern pieces and pin them to the carpet, ensuring that the pile direction is consistent for a professional finish. Make sure to leave a seam allowance of about 1/2 inch around each piece for sewing. Carefully cut out the fabric pieces, and you’ll be ready for the next steps in your carpet bag creation!
Step 2: Sewing the Lining
Your lining fabric should be a lightweight and durable material that can handle the weight of items inside the bag. Cut out your lining pieces using the same pattern as your carpet fabric, but this time you’ll need to include seam allowances for both sewing and finishing edges.
Next, fold over one edge of each lining piece by 1/4 inch and sew along it, creating a neat edge. When all pieces are ready, pin them together with their right sides facing inwards and stitch around three edges, leaving one side open for turning inside out later.
Step 3: Assembling the Carpet Bag Exterior
Now it’s time to bring your carpet bag to life! With the right sides of the fabric facing each other, start by sewing the base piece to the main body piece. Make sure to leave a small opening on one side for turning inside out later.
Once the base is attached, pin and sew any additional pockets or flaps onto the main body, ensuring that they are securely attached and aligned correctly.
Step 4: Attaching Handles
To add handles to your carpet bag, begin by selecting a durable material that complements your carpet fabric. This could be additional carpet, leather, or another sturdy fabric. Cut two pieces to your desired length, typically between 18 to 24 inches, depending on how long you want the handles to be.

Next, fold each handle piece in half lengthwise with the right sides facing in, then sew along the long edge and one end to create a tubular handle. Turn the handle inside out to hide the seam. Once both handles are prepared, position them evenly on the top opening of your bag, ensuring they are securely pinned in place. Stitch across the top of the bag, reinforcing the area where the handles attach to provide extra strength. This robust attachment will ensure your carpet bag can hold all your belongings comfortably.
Step 5: Finishing the Bag Exterior
With your handles securely attached, it’s time to complete the exterior of your carpet bag. Start by turning the bag right side out through the opening you left earlier. Gently push out the corners to ensure they are well-defined. Once the bag is turned, take a moment to smooth out any wrinkles or creases in the fabric. Next, fold in the raw edges of the opening to create a clean finish, pinning them in place.
Carefully stitch around the top edge of the bag to secure the opening and give your bag a polished look. This is also an excellent opportunity to add any decorative elements, such as a trim or embellishments, to give your carpet bag a personal touch. After securing the opening, your bag will already be taking shape, combining functionality and style beautifully!
Step 6: Adding the Lining
With both the bag exterior and lining ready, it’s time to bring them together. Start by placing the carpet bag inside the lining piece with their right sides facing each other. Align the top edges and pin them in place before sewing around the opening, leaving a small gap for turning inside out.

Once you’ve sewn around the top edge, carefully turn your bag inside out through the gap and push out all corners to make sure they are well-defined. Then hand-stitch or machine-stitch along the opening to close it up.
Step 7: Finishing Touches
With your carpet bag fully assembled, it’s time to add those finishing touches that will make it truly unique. Start by inspecting the entire bag for any loose threads or unfinished edges and trim them as necessary. You might want to consider adding a magnetic snap or zipper closure for added security; this can be sewn into the top opening of the bag before finalising the stitching.
Additionally, adding a decorative button or a patch can enhance the overall aesthetic of your bag. If you’re inclined, consider using a waterproof spray to protect your bag from spills or weather elements, ensuring its longevity. Lastly, give your carpet bag a good press with an iron on the appropriate setting for the fabric, which will help set the shape and ensure it looks its best. Your one-of-a-kind carpet bag is now ready for use, showcasing your personal style and craftsmanship!
Step 8: Maintenance and Care
To keep your carpet bag in top condition, consider giving it a light vacuum from time to time to remove any dust or debris that may have accumulated. If your bag gets wet, make sure to dry it out thoroughly before storing it away. For tougher stains, spot clean with a mild detergent and water, then let air dry completely.
With proper maintenance and care, your carpet bag can become a lasting accessory that you can take pride in making yourself. So enjoy using your unique bag for all occasions, knowing that you’ve put your creativity and skills into its creation. Who knows? Your love for crafting might inspire others to pick up their needles, too!
Following these steps on how to make a carpet bag, you’ll have a sturdy, stylish carpet bag that will be the envy of all your friends. So go ahead and make one for yourself or as a thoughtful gift for someone special. Happy sewing!
Frequently Asked Questions
Q1: Can I Use Different Fabrics for a Carpet Bag?
A: Yes, you can use various materials for your carpet bag, such as canvas, denim, or leather. However, make sure to choose a durable fabric that can withstand the weight of items inside the bag. You can also mix and match fabrics for a unique look.
Q2: Do I Need to Use Carpet Fabric for My Bag?
A: No, you don’t have to use carpet fabric specifically. Any sturdy and durable fabric can work well for a carpet bag. However, using carpet fabric can add a unique texture and durability to your bag.
Q3: Can I Customize My Carpet Bag with Pockets?
A: Yes, you can customize your carpet bag with pockets to suit your needs. You can add interior or exterior pockets in various sizes and shapes to store different items. Just make sure to securely attach them to the main body of the bag.

Conclusion
Creating your own carpet bag not only serves as a practical skill but also allows you to express your individuality and creativity. By following the steps outlined in this guide on how to make a carpet bag, you’ve crafted a stylish and functional accessory that combines durability with personal flair.
Remember that the journey doesn’t stop here—embrace the opportunity to experiment with different fabrics, embellishments, and techniques to further enhance your sewing repertoire. Whether it becomes your go-to bag for daily use or a cherished gift for someone special, your handmade carpet bag will always remind you of the effort and creativity invested in its making. Happy crafting!


