How to Make a Origami Crow
Origami, the ancient art of paper folding, has its roots in Japan and has since spread across the globe, symbolizing creativity and precision. Each fold tells a story steeped in cultural significance and patience, making this craft a meditative practice for many. Among the beginner-friendly projects, learning how to make a origami crow stands out due to its striking appearance and modest complexity.
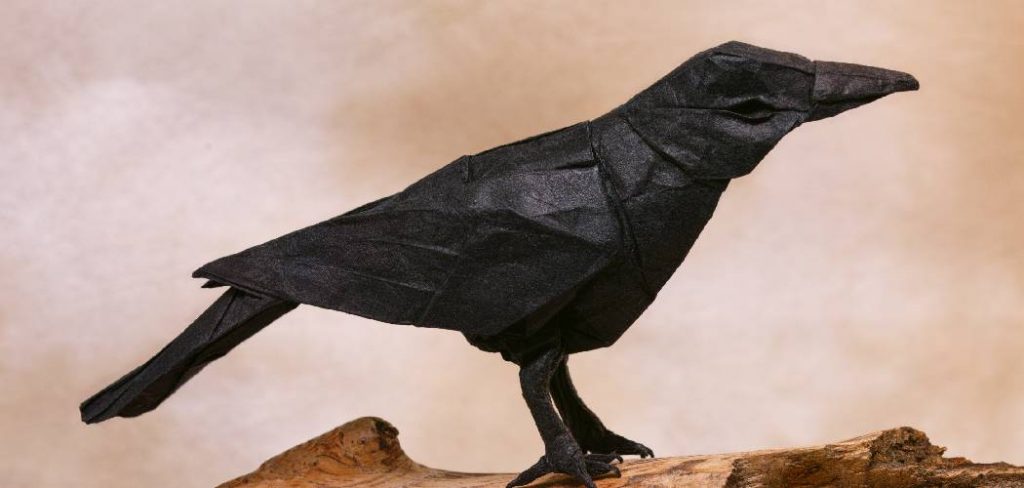
In this article, we will guide you through the entire process, from understanding the essential folds to displaying your finished creation. You’ll gain insight into the needed materials and step-by-step instructions for crafting your own elegant origami crow.
Materials Needed
To begin your project, you’ll need a square piece of origami paper, ideally measuring 6 inches by 6 inches for easy handling. For best results, choose paper specifically designed for origami, as it is lightweight and easy to fold. Optional tools, such as a bone folder for creating precise creases or a ruler for measuring, can enhance your folding experience, ensuring clean lines and sharp folds.
How to Make a Origami Crow: Step-by-Step Instructions
1.Preparing the Paper
To start your origami crow, select a square piece of origami paper, preferably 6 inches by 6 inches. Begin by placing the paper flat with the colored side facing down. The first fold will be to create a preliminary base: fold the paper in half diagonally to form a triangle, then unfold it. Next, fold the opposite corners to the center crease, forming a smaller triangle. This base will serve as the foundation for shaping your crow. Remember, the key to success in origami lies in making clean and precise folds, so take your time and ensure each crease is sharp.
2.Forming the Body and Wings
Now that you have your base ready, it’s time to shape the crow’s body. Begin by folding the top point of the triangle down a little, creating a flattened head. Then, make a valley fold along the bottom edges of the triangle, bringing them towards the center line; this will create the body. As you pinch the sides together, ensure that the body’s width is balanced—this will provide a stable structure for your crow.

Next, we’ll create the wings. Start by taking the upper layers of the triangle and folding them downwards, at a slight angle, to form the wings. You can play with the angle of the folds; wider wings give a more majestic look while shorter wings create a sleeker appearance. Make sure both sides are evenly folded to maintain symmetry. A good tip is to hold the model up to eye level and make adjustments as needed to ensure the wings protrude proportionately from the body.
3.Shaping the Head and Beak
Having formed the body and wings, your next step is to shape the head and beak of your crow. To refine the head, adjust the top fold you made initially—fold it down slightly more or less depending on how prominent you want the head to appear. Once you’re satisfied with the head’s shape, it’s time to form the beak. Fold the tip of the head downwards, then create a pinching fold to give the beak a pointed appearance.
For a more realistic look, make a small reverse fold on the tip of the beak to give it a 3D effect. This involves folding the tip back up slightly after pinching it down, creating depth. Always refer back to visual references of crows while shaping, as this can help you capture the essence of a crow more accurately.
4.Creating the Tail and Final Adjustments
The final step in your origami crow is to create the tail and make any necessary adjustments. To form the tail feathers, take the bottom point of the triangle and fold it upwards to your desired length. You can refine the appearance of the tail by making smaller folds on each side to mimic the feather shape.
Once the tail is shaped, it’s important to ensure that the entire model is balanced. Set your crow down briefly and check if it stands upright without toppling over. If it leans to one side, make minor adjustments to the wings or tail.
In terms of finishing touches, go over all of your folds, making sure they are crisp and defined. You can use a bone folder, if available, to sharpen the creases further. Lastly, take a moment to admire your creation and consider whether you’d like to add any embellishments, like drawing on eyes or even a small foot structure. This can personalize your crow while showcasing your unique style in origami.

5 Benefits of Origami
- Enhances Fine Motor Skills: The precise folding required in origami helps to develop and improve fine motor skills and hand-eye coordination. This is particularly beneficial for children and those in rehabilitation, as it encourages dexterity and control.
- Promotes Patience and Focus: Origami requires concentration and a methodical approach, fostering a sense of patience as practitioners follow complex instructions and techniques. This meditative process can help reduce stress and promote mindfulness.
- Boosts Cognitive Development: Engaging in origami challenges the mind, enhancing spatial reasoning and problem-solving skills. As individuals navigate patterns and folds, they improve their ability to visualize and conceptualize three-dimensional objects.
- Encourages Creativity: The versatility of origami allows for countless variations and personalization. As creators explore their artistic side, they can experiment with colors, patterns, and designs, which encourages imaginative thinking.
- Provides a Social Activity: Origami can be a communal craft, bringing people together through workshops, clubs, and online communities. Sharing techniques and creations fosters social connections and enhances communication skills among enthusiasts.
Common Mistakes and How to Avoid Them
1. Rushing Through the Folds
Origami requires concentration and patience, so it’s important to take your time with each step. Rushing through folds can result in imprecise creases or misshapen components, ultimately affecting the overall appearance of your crow.
2. Not Starting with a Square Paper
Using rectangular paper instead of square paper can make achieving symmetrical folds and balanced shapes difficult. Before starting your project, make sure you have a square piece of origami paper or trim a rectangle into a square.

3. Skipping Steps
Origami is a precise art form that relies on each fold to create the final shape. Skipping steps can lead to an incomplete or unstable model. Always follow the instructions carefully and refer back to visual aids if needed.
Displaying Your Origami Crow
Once you have completed your origami crow, you’ll likely want to display it proudly. Depending on its size and the materials used, you can showcase your creation in various ways. If using thin paper, glue a small magnet onto the back and display it on your refrigerator or other magnetic surfaces. Alternatively, attach a string or fishing line to the top of the crow’s head and hang it from a hook or mobile for a unique decoration piece.
Origami is not only an enjoyable hobby but also a relaxing and mindful activity that allows for creative expression. With this guide, you now have all the necessary tools and instructions to successfully create your own origami crow.
Frequently Asked Questions (FAQs)
Q1: What Type of Paper Is Best for Origami?
A1: While traditional origami paper is ideal because of its lightweight and ability to hold creases, you can use any square-shaped paper. Some people prefer using scrapbook paper or even recycled paper for a more personal touch. Just ensure it is flexible enough to fold easily.
Q2: Is Origami Suitable for Beginners?
A2: Absolutely! Many simple origami patterns are available for beginners. Starting with easier designs, such as cranes or boats, can help build confidence and skills before tackling more complex projects like the origami crow.
Q3: How Long Does It Take to Learn Origami?
A3: The time it takes to learn origami can vary greatly depending on the individual and the complexity of the attempted designs. Basic models can be completed in just a few minutes, while intricate designs may take several hours. Regular practice is key to improvement.
Q4: Can I Use Patterned Paper for Origami?
A4: Yes, patterned paper can add a unique flair to your origami creations. Remember that the pattern may affect how folds align and how the final model looks. Experimenting with different patterns can lead to fun and surprising results.

Q5: How Do I Fix a Mistake in My Origami?
A5: If you make a mistake, gently unfold the section and check to see where the error occurred. Be patient as you re-fold and adjust. It’s often best to take your time rather than forcing folds back into place, as this can damage the paper.
Conclusion
Reflecting on the detailed process of how to make a origami crow brings a sense of satisfaction and achievement. Each step you’ve followed results in a beautiful piece of art and provides insights into the patience and skill involved in origami. As you become more confident in your folding abilities, don’t hesitate to explore other origami designs, expanding your repertoire of creations. Ultimately, origami is not just a craft but an artistic journey promoting mindfulness and creativity. Enjoy your journey in this intricate and rewarding art form!

