
How to Make a Porch Sign
Are You ready to make a beautiful porch sign that will add a touch of personality and charm to your home? Follow these simple steps to create your personalized porch sign.
How to make a porch sign is a delightful and creative way to enhance the entrance of your home while showcasing your personal style. Whether you want to greet guests with a warm message, display your house number, or add a decorative touch, a porch sign can serve multiple purposes.
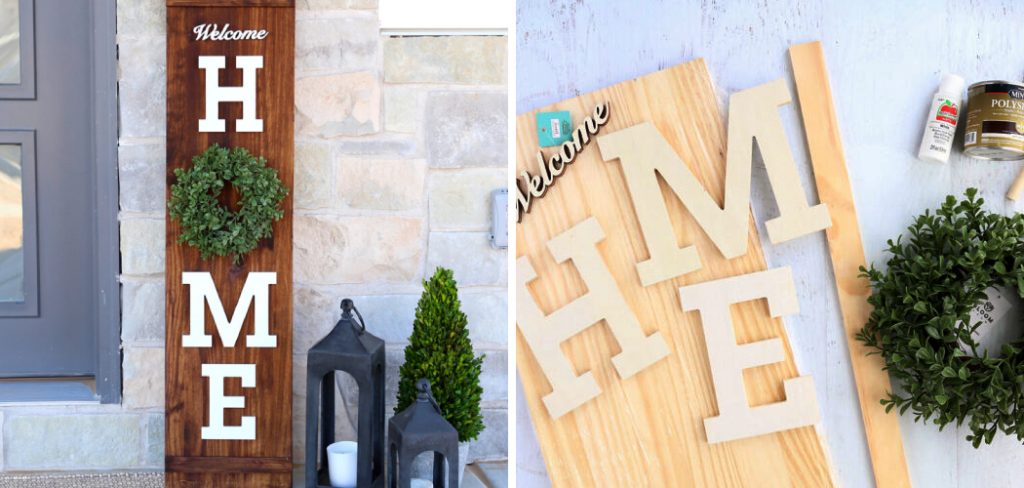
In this guide, we will walk you through the necessary steps and materials to create a stunning porch sign that reflects your personality and complements your home’s exterior. From choosing the right design to finishing touches, embark on a fun DIY project that will elevate your porch’s charm!
What Will You Need?
Before starting your porch sign project, gather all the necessary materials to avoid any delays or interruptions. Here’s a list of things you will need:
- A wooden board or plaque (preferably weather-resistant for outdoor use)
- Paint or stain in your preferred color(s)
- Stencils or lettering templates
- Paintbrushes and/or foam brushes
- Painter’s tape
- Sandpaper
- Clear sealant (optional)
Once you have all the materials, it’s time to choose a design for your porch sign.
10 Easy Steps on How to Make a Porch Sign
Step 1: Choose Your Design
Start by deciding on the design of your porch sign. Consider your home’s style, your personal preferences, and the message you want to convey. You can sketch your ideas on paper or search for inspiration online. Once you have a clear vision, you can begin to plan the layout and dimensions of your sign. Considering that simplicity often works best, choose a design that will be eye-catching and easy to read from a distance.

Step 2: Prepare the Wooden Board
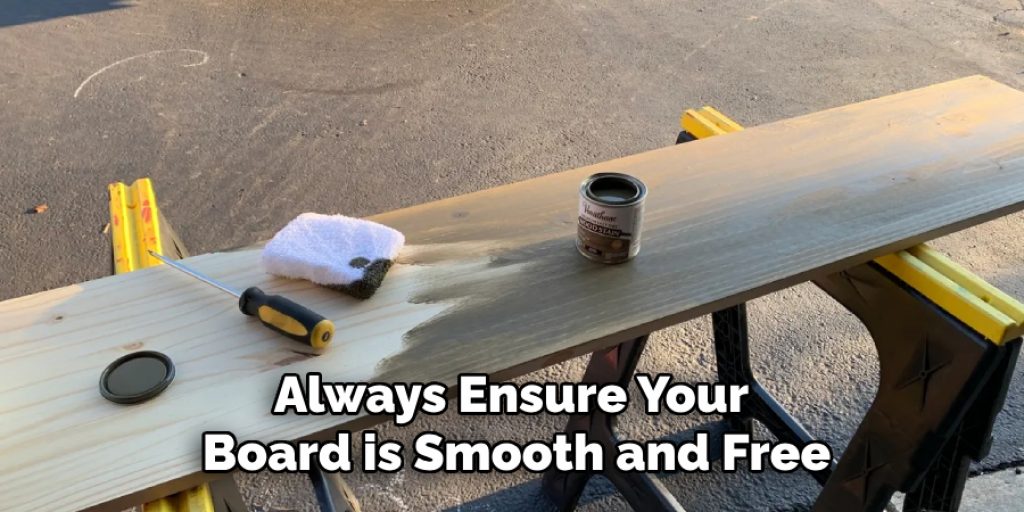
Before starting the painting process, it’s essential to prep your wooden board. Start by sanding the surface of the board with sandpaper to ensure it’s smooth and free of any rough areas. This will help the paint adhere better and result in a more polished finish. After sanding, wipe down the board with a damp cloth to remove any dust or debris, and allow it to dry completely. Once dry, your board is ready to bring your porch sign design to life.
Step 3: Paint the Base Coat
Now, it’s time to apply the base coat to your wooden board. Choose a paint color that complements your overall design and home’s exterior. Using a paintbrush or foam brush, evenly coat the board’s surface, ensuring you cover all areas. If you’re using a lighter color, you may need two coats for better coverage. Allow the first coat to dry completely before applying the second coat if needed. This step will create a solid foundation for your stencils or lettering, enhancing the overall look of your porch sign.

Step 4: Apply Stencils or Lettering
Once the base coat is completely dry, it’s time to add your stencils or lettering to the porch sign. Carefully position your stencils on the board, ensuring they are centered and straight. Use painter’s tape to hold them in place and prevent movement as you work. If you’re using lettering templates, trace around them with a pencil to mark where the paint will go. When you’re satisfied with the placement, apply paint using a small brush or a sponge applicator for a smoother finish. Be sure to apply the paint evenly, filling in all areas of the stencil or lettering. Once finished, carefully remove the stencils or templates while the paint is still wet to avoid peeling or smudging.
Step 5: Add Decorative Elements
After your stencils or lettering have dried completely, it’s time to get creative and add decorative elements to your porch sign. Consider incorporating designs such as flowers, vines, or other thematic shapes that align with your concept. You can use additional stencils for these designs or freehand them if you feel confident in your painting skills. When painting these embellishments, use a smaller brush for finer details and ensure your colors complement the existing palette. Take time to perfect these accents, as they will add depth and charm to your sign, making it truly unique.
Step 6: Apply a Clear Sealant
To protect your porch sign from the elements and ensure its longevity, it’s essential to apply a clear sealant once all the paint and decorative elements have dried completely. Choose a weather-resistant sealant that’s suitable for outdoor use. Using a clean paintbrush, apply an even coat over the entire surface of the sign, covering all painted areas thoroughly. This step will help to safeguard your artwork against fading, peeling, and moisture damage. Depending on the sealant’s instructions, you may need to apply a second coat for optimal protection.
Step 7: Attach Hardware for Display
Once your clear sealant has dried, it’s time to prepare your porch sign for display. Decide where you want to hang or mount your sign on your door, wall, or free-standing in your porch area. If you’re hanging the sign, attach sturdy hooks or brackets to the back. For a more rustic approach, consider using jute twine or wire to create a loop for hanging. If your sign will stand alone, you may use a stake or an easel stand. Ensure all hardware is securely fastened to prevent your sign from falling or becoming damaged outdoors. With this step complete, your porch sign is ready to be showcased!
Step 8: Find the Perfect Location
Choosing the right spot for your porch sign is crucial to its visibility and overall impact. Look for a location easily seen from the street or your front yard while complementing your home’s architecture. Ensure the area is free from obstructions such as bushes or furniture that might block the view. Additionally, consider the height at which the sign should be placed; it should be at eye level for maximum effect. Once you’ve determined the ideal location, step back and visualize how your sign enhances the overall aesthetic of your porch. After confirming the perfect spot, it’s time to mount or hang your sign to complete your project securely.

Step 9: Maintain Your Porch Sign
Regular maintenance is key to preserving the beauty and longevity of your porch sign. Start by inspecting it periodically for any signs of wear, fading, or damage from the elements. If you notice the paint discoloring or peeling, consider applying a fresh coat to keep it looking vibrant. Additionally, check for any loose hardware and ensure everything is secure. Cleaning the sign with a mild soap solution and soft cloth can also help remove dirt and debris without damaging the paint.
Step 10: Personalize Your Design
Consider adding personal touches that reflect your personality or family heritage to make your porch sign unique. This could include including your family name, date, or a meaningful quote that resonates with you. You might also explore different fonts and lettering styles to find one that complements the overall theme of your sign. Personalizing your design will enhance its aesthetic appeal and make it a one-of-a-kind representation of your home, inviting warmth and character to your porch space.
Following these ten simple steps, you can easily create a beautiful, personalized porch sign that adds charm and character to your home’s exterior.
5 Things You Should Avoid
- Neglecting Surface Preparation: Skipping the step of adequately sanding and cleaning your wood surface can lead to poor paint adhesion and an uneven finish. Always ensure your board is smooth and free of dust or debris before starting your project.
- Overloading with Text: Overcrowding your porch sign with too much text can make reading difficult. Stick to short, impactful messages or quotes that can be easily understood from a distance.
- Ignoring Weather Conditions: Failing to consider local weather conditions when selecting materials can damage your sign. Use weather-resistant paints and sealants to ensure your design withstands rain, sun, and wind.
- Forgetting to Plan: Jumping into the creation without a clear plan can lead to mistakes in design and placement. Take the time to sketch out your ideas and choose a visually appealing layout.
- Rushing the Process: Hurrying through the painting and drying stages can result in smudges and an overall messy look. Allow adequate drying time between coats and be patient with decorative elements to achieve the best results.
Conclusion
How to make a porch sign is a rewarding project that allows you to express your style and enhance your home’s curb appeal.
By carefully following the steps outlined, from selecting suitable materials and personalizing your design to ensuring proper maintenance, you’ll craft a sign that is not only beautiful but also durable and unique. Remember to embrace your creativity throughout the process, infusing personal touches that reflect your family’s personality.
With patience and attention to detail, your finished porch sign will welcome guests and provide a charming focal point for your outdoor space, making it an accurate representation of your home.
Elizabeth Davis
Elizabeth is a creative writer and digital editor based in the United States. She has a passion for the arts and crafts, which she developed from a young age. Elizabeth has always loved experimenting with new mediums and sharing her work with others. When she started blogging, she knew that DIYquickly would be the perfect platform to share her tutorials and tips. She's been writing for the blog from the beginning, and her readers love her helpful advice and easy-to-follow instructions. When she's not writing or editing, Elizabeth enjoys spending time with her family and friends.


