
How to Make a Silicone Doll
Silicone dolls have gained popularity as versatile creations that serve various purposes, including collectibles, artistic expressions, and therapeutic tools. These dolls can provide comfort and companionship in therapeutic settings, making them valuable for individuals seeking emotional support. The artistry involved in crafting silicone dolls is significant; precise craftsmanship ensures the dolls are both aesthetically pleasing and durable.
Understanding how to make a silicone doll requires attention to detail, skill, and patience, as each step in the process contributes to the final product’s quality. This guide outlines the essential steps involved in creating your own silicone doll, from designing and sculpting the prototype to casting and finishing the doll, allowing you to appreciate the intricate work that goes into this unique art form.
Materials and Tools Needed
To create a silicone doll, you will need the following materials and tools:
Materials:
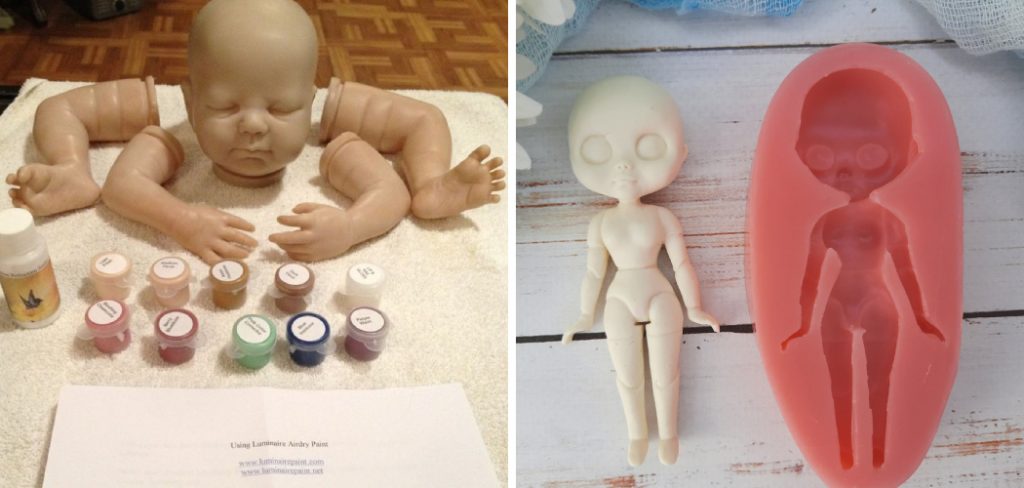
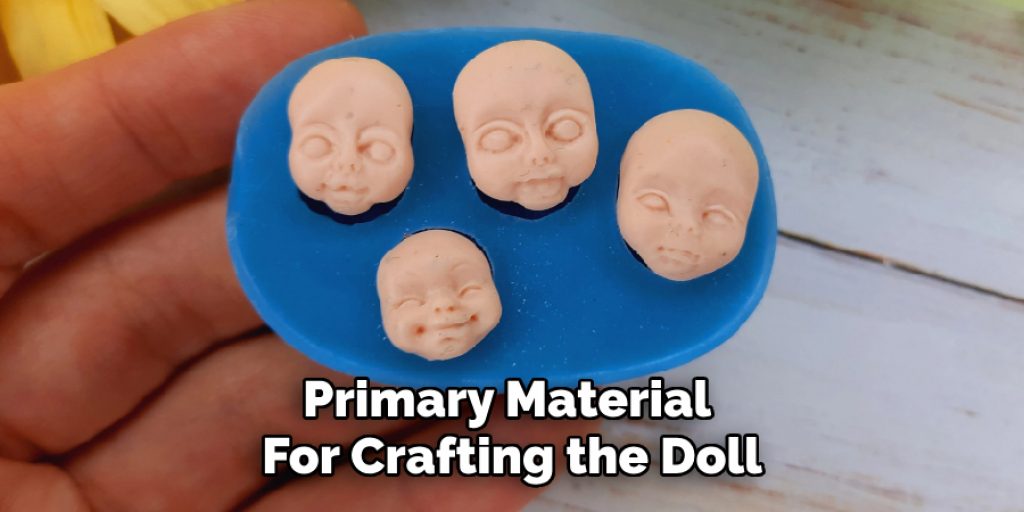
- Silicone Rubber: The primary material for crafting the doll.
- Mold release agent: Prevents the silicone from sticking to the mold.
- Pigment: Used to achieve the desired skin tone or coloration of the doll.
Tools:
- Molds: Pre-made or custom molded shapes to form the silicone doll.
- Mixing containers: These are used to combine silicone components thoroughly.
- Scale: To ensure accurate measurements of materials.
- Stir sticks: These are used to mix silicone and pigments effectively.
Safety Gear:
- Gloves: Protect your hands from chemicals and silicone.
- Safety glasses: Shield your eyes from splashes during mixing.
- Respirator mask: Essential when working with certain silicones and chemicals to ensure safe inhalation.
Having the right materials and tools at your disposal will facilitate a smooth and successful doll-making process.
Designing and Sculpting the Prototype
The first step in creating a silicone doll is to develop a clear vision through sketching or concept art. Before committing to the sculpting process, this allows you to explore various design elements, such as facial features, body proportions, and clothing styles. Once the design is finalized, you can begin sculpting the prototype using materials such as clay or polymer clay, which is ideal due to its manageable consistency and detail retention. During this phase, it is crucial to ensure that every detail is represented accurately, from the intricate facial expressions to the body’s contours. Refining the sculpture is an essential part of the process; this might involve smoothing surfaces, adding textures, or adjusting proportions to achieve the desired look.
Making the Mold
Preparing the Prototype
Before creating the mold, it’s important to clean and finish the prototype thoroughly. Use a soft cloth to remove any dust or clay particles that may have accumulated during sculpting, as these can affect the final mold’s quality. Once the prototype is clean, apply a mold release agent evenly over its surface. This agent is crucial for preventing the silicone from sticking to the prototype, ensuring a clean separation after the mold has cured.

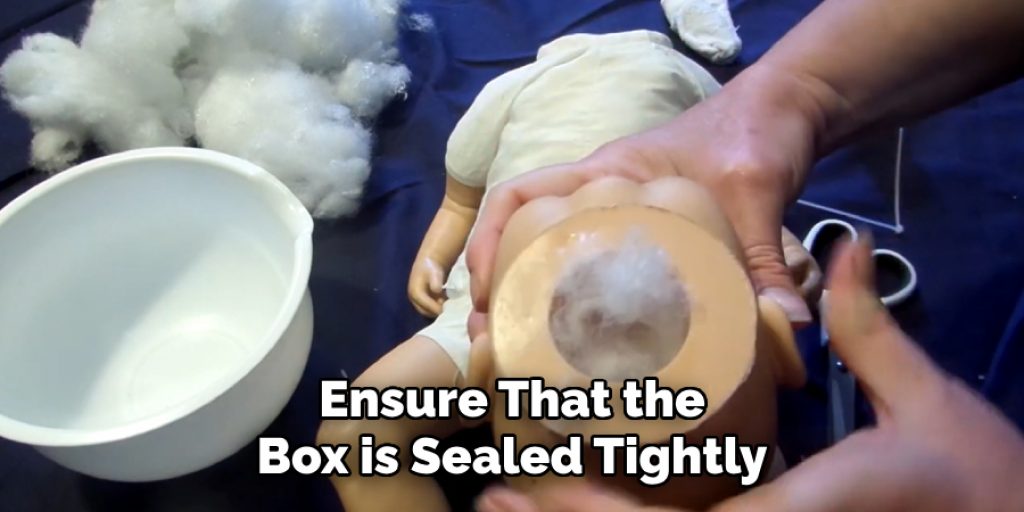
Creating the Mold Box
Next, construct a mold box to contain the prototype and silicone. The box should be made from a sturdy material, such as plastic or wood, and should be slightly larger than the prototype to allow for adequate spacing around it. This extra space is crucial, as it helps to withstand the pressure of pouring silicone and prevents mold distortion during curing. Ensure that the box is sealed tightly to avoid any leaks during the pouring phase.
Pouring the Silicone Mold
With the prototype and mold box prepared, mix the silicone rubber according to the manufacturer’s instructions, taking care to accurately measure all components. Pour the silicone mixture over the prototype within the mold box, ensuring that it fills all areas without leaving any air pockets. Tapping the box or using a vacuum chamber can help eliminate trapped air bubbles. Allow the silicone to cure completely as per the manufacturer’s guidelines, which typically takes several hours to ensure that the mold sets firmly and retains all the fine details of the prototype.
How to Make a Silicone Doll: Casting the Silicone Doll
Preparing the Mold
Remove it from the prototype after allowing the silicone mold to cure completely. Gently peel back the mold’s edges to ensure no damage occurs to either the mold or the doll. Once the mold is free, take a moment to clean it thoroughly, using a soft brush or cloth to remove any debris. After cleaning, a light application of mold release agent will enhance the ease of demolding the completed doll, ensuring that the silicone does not adhere to the mold’s surface during the casting process.
Mixing and Coloring the Silicone
With the mold prepared, it’s time to mix the silicone rubber components. Following the manufacturer’s instructions, precisely measure the silicone and catalyst to ensure optimal curing. In this step, the formulation must be blended thoroughly to achieve a consistent mixture. Once combined, add pigment to achieve the desired skin tone or color, mixing it incrementally to get the right shade. Stir the mixture gently but thoroughly, taking care to avoid incorporating too many air bubbles, as these can affect the final appearance of the doll. It’s helpful to do this in a well-ventilated area while wearing appropriate safety gear to protect against any fumes.
Pouring the Silicone
Now that your silicone mixture is ready, carefully pour it into the prepared mold. Start at one corner to allow the liquid silicone to flow into all aspects of the mold, ensuring that it fills every contour and detail. To further prevent air pockets, gently tap the sides of the mold box or use a vacuum chamber to remove any trapped bubbles. Filling the mold is crucial, as any gaps may result in a malformed doll. Once poured, leave the silicone to cure undisturbed as per the manufacturer’s guidelines, which can vary in curing time. This step is fundamental, as it will determine the quality and durability of your final product.
Demolding and Assembling the Doll
Removing the Doll from the Mold
After the cure time has elapsed, it’s time to de-mold your silicone doll. Carefully peel the mold apart, starting from one edge and working your way around, taking care not to stretch or tear the mold. With gentle movements, coax out the cured silicone doll from its shell. Occasionally, this might involve slight wiggling to ease the silicone-free process. Once removed, inspect the doll for any excess silicone or flash–thin, unwanted residual bits. Using a fine pair of scissors or hobby knives, trim away any excess material, ensuring that your doll has clean lines and an appealing finish.
Assembling the Parts
It’s time to assemble the parts with the doll, which is now free from the mold. If your design includes articulated movements, attach the limbs and head to the body using silicone adhesive. Apply the adhesive generously to the joints, ensuring that all connections are secure and properly aligned for a stable finish. Taking your time in this step is crucial; any misalignment can impact the doll’s posture and movement abilities. After the limbs are fixed in place, consider adding further details, such as eyes, hair, and clothing, to bring your doll to life.
For doll hair, you can use various materials, like mohair or synthetic fibers, styled and attached to the head with adhesive. Dressing your doll can involve sewing or crafting outfits specifically designed for its proportions, adding a personal touch to your creation. The final result will be a unique silicone doll that reflects your artistic vision and dedication to craftsmanship.
Finishing Touches
Once the assembly of your silicone doll is complete, it’s time to focus on painting and detailing to enhance its realism. Begin by selecting high-quality paints specifically designed for silicone surfaces to ensure proper adhesion and durability. Use fine brushes to add skin tone variations, facial features, and other intricate details. This step is essential for transforming your doll into a lifelike character. After achieving the desired look, consider applying a matte or gloss finish based on your preference; a matte finish will provide a more natural look, while gloss can offer a healthy sheen often associated with childhood dolls.

Adding accessories or clothing completes the overall appearance of your creation. Crafting or sourcing outfits that fit well and enhance your doll’s character will add to its charm. Jewelry, shoes, and other accessories can also personalize the doll, making it truly unique. A thoughtful combination of these elements will ensure your silicone doll looks stunning and captures the imagination of anyone who sees it.
Safety and Maintenance Tips
When working with silicone and other chemicals, it’s vital to prioritize safety. Always wear appropriate safety gear, including gloves and masks, to prevent skin and respiratory irritation. Ensure that your workspace is well-ventilated to minimize exposure to potentially harmful fumes during mixing and curing.
Proper storage of materials and tools is essential for maintaining their longevity and safety. Keep silicone and adhesives in a cool, dry place away from direct sunlight, sealing them tightly to prevent contamination. As for your completed doll, it’s important to handle it gently to avoid damaging delicate details.
For maintenance, avoid exposing the doll to extreme temperatures or harsh cleaning agents. Instead, use a soft cloth to dust off any dirt and keep it looking pristine. Regularly inspect for any wear and tear, addressing repairs promptly to preserve the beauty and integrity of your creation.
Troubleshooting Common Issues
While creating silicone dolls can be rewarding, it’s not challenging. One common issue is the formation of air bubbles in the silicone mixture. To address this, ensure thorough mixing and consider using a vacuum chamber to eliminate trapped air. If bubbles do occur in the final product, they can sometimes be repaired with a small amount of additional silicone applied to the affected area. Mold imperfections may also arise; these can be corrected by carefully trimming excess material or filling in gaps with silicone adhesive. If parts become damaged or misaligned during assembly, gently detach and realign them, reapplying adhesive as needed. Patience and attention to detail are key to overcoming these obstacles.

Conclusion
In summary, learning how to make a silicone doll involves several key steps: preparing your materials, pouring and curing the silicone, demolding, assembling the parts, and adding finishing touches. Practicing these techniques will enhance your skills and improve your results over time. Each doll you create uniquely expresses your artistic vision, allowing you to experiment and refine your craft. The process can be challenging, but the satisfaction that comes from bringing a custom silicone doll to life is incredibly rewarding, making every effort worth it. Embrace the journey and let your creativity flourish!
Elizabeth Davis
Elizabeth is a creative writer and digital editor based in the United States. She has a passion for the arts and crafts, which she developed from a young age. Elizabeth has always loved experimenting with new mediums and sharing her work with others. When she started blogging, she knew that DIYquickly would be the perfect platform to share her tutorials and tips. She's been writing for the blog from the beginning, and her readers love her helpful advice and easy-to-follow instructions. When she's not writing or editing, Elizabeth enjoys spending time with her family and friends.


