How to Make Felt Garland
Felt garland has emerged as a beloved addition to home décor, celebrated for its vibrant colors and versatility. This charming decoration is perfect for various occasions—from festive celebrations to everyday home accents—and can transform any space. One of the key benefits of creating your own felt garland is the opportunity for customization; you can choose colors, shapes, and designs that reflect your personal style and fit your specific theme.

Additionally, making your own garland is often more cost-effective than buying pre-made options. In this guide, you’ll learn how to make felt garland by gathering the necessary materials and tools, including felt sheets, thread, needles, scissors, and string. We will provide insights into the crafting process and offer tips for creating a garland that looks stunning and carries a personal touch, making it a delightful project for both novice and experienced crafters alike.
Materials and Tools Needed
To craft your own felt garland, you’ll need several key materials. Begin with felt sheets in your chosen colors; typically, a combination of coordinating hues works best. You’ll also need a sturdy thread and a needle to sew the felt shapes together, as well as scissors to cut out your designs. A strong string or twine will serve as the base for hanging your garland.
Essential tools include fabric glue for extra stability, a ruler for measuring, a pencil for marking, and a cutting mat to protect your workspace during the cutting process. Additionally, consider optional embellishments like beads, glitter, or buttons to add extra flair to your garland, allowing for even greater personalization and creativity in your designs.
Choosing the Right Felt and Design
When it comes to creating your felt garland, selecting the appropriate type of felt is crucial. There are three main types: wool, synthetic, and blended. Wool felt offers a luxurious texture and durability, making it ideal for high-quality projects. Synthetic felt, which is often more affordable, comes in a vibrant array of colors and is suitable for various occasions. Blended felt combines the best attributes of both, balancing affordability and quality.

Once you’ve chosen your felt, focus on selecting colors and patterns that align with your theme or occasion; for instance, pastel colors might be perfect for a baby shower, while bold hues can liven up a party. Next, create a design plan that details your garland’s shapes, sizes, and sequence. Sketching out your ideas can help visualize the final outcome and ensure a harmonious design.
How to Make Felt Garland: Cutting the Felt Shapes
1.Creating Templates
To achieve uniform and precise shapes for your felt garland, start by creating templates. You can draw your desired shapes directly on paper or print out templates online. Using cardboard or sturdy paper will allow you to craft reusable templates that maintain their form over time. Ensuring that the templates are uniform in size; this consistency will contribute to a cohesive look in your finished garland. Once your templates are ready, you can trace and cut the felt.
2.Cutting the Felt
Carefully trace your templates onto the felt sheets using a fabric pencil or a ruler to maintain straight lines. Opt for sharp scissors or a rotary cutter to achieve clean edges when cutting out the felt shapes. For precision, take your time and avoid rushing through the cutting process. If working with multiple layers of felt at once, ensure that they are properly aligned to avoid any discrepancies in shape. Following these tips will help you create beautifully crafted felt shapes that are ready for assembly.
How to Make Felt Garland: Assembling the Felt Garland
1.Arranging the Shapes
The first step in assembling your felt garland is to lay out the felt shapes in the desired order. Start by placing the shapes on a flat surface and experimenting with different arrangements until you find one that appeals to you. Aim for a balanced distribution of colors and shapes to create visual harmony.
Ensure that there is even spacing between each piece; this can be easily adjusted by moving the shapes closer or farther apart. Once you are satisfied with the layout, consider taking a photo for reference during the assembly process. If necessary, make any final adjustments to the arrangement to achieve a cohesive look that reflects your personal style.

2.Attaching Shapes to String
To attach the felt shapes, thread your needle with sturdy thread and secure one end to the string or twine. Begin sewing from the back of the felt shape, returning the needle to the front and back to create a secure stitch. As you attach the shapes, you can choose how much spacing to leave between them; options include knotting, gluing, or sewing directly for a tighter fit. For instance, if you prefer a more relaxed appearance, allowing for more space between each shape can be effective.
Ensuring the felt shapes are securely attached is crucial for durability, so take your time stitching and double-check that each piece is firmly in place before moving on to the next.
3.Adding Embellishments
Consider incorporating embellishments such as beads, buttons, or sequins to elevate your felt garland. These decorative additions can provide a fun pop of color and texture, enhancing the overall aesthetic of your creation. When attaching embellishments, ensure you securely sew or glue them in place to prevent them from falling off over time. It’s important to create a balanced design, so position your decorations thoughtfully, paying attention to color coordination and placement symmetry.
For example, distribute larger embellishments evenly among the felt shapes to maintain visual interest without overwhelming the design. With careful consideration and creativity, these embellishments can add a unique charm to your handmade felt garland, making it truly one-of-a-kind.
Final Touches and Adjustments
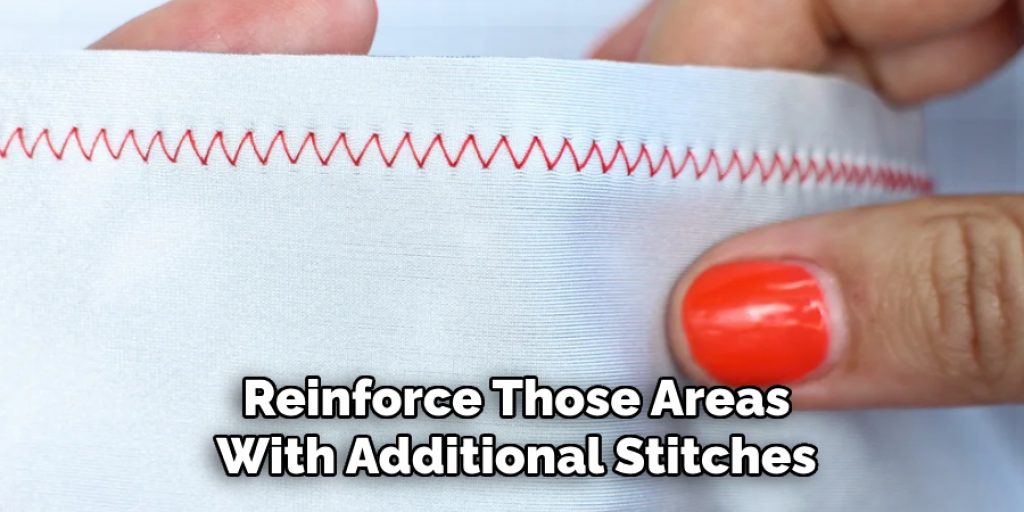
Before finalizing your felt garland, take a moment to inspect the entire piece for any loose threads or gaps. Carefully handle the string to check that each felt shape is firmly attached; if you notice any inconsistencies, reinforce those areas with additional stitches or glue. It’s also essential to assess the spacing between the shapes to ensure an even distribution along the string. If any adjustments are required, gently slide the pieces to create a balanced alignment.
For added refinement, lightly press the felt shapes with a warm iron (using a pressing cloth) to help them lie flat and remove creases. These final touches will enhance the overall appearance of your garland, allowing your creativity to shine through.
Displaying Your Felt Garland
Once your garland is complete, consider the best spots to showcase your handiwork. It can beautifully adorn a mantel, grace a doorway, or serve as an eye-catching wall decoration. Consider tailoring the garland’s theme and colors for seasonal celebrations, allowing it to fit various occasions—from festive holidays to seasonal decorations.
Securely hang your garland using removable hooks or decorative tacks to ensure it remains in place, avoiding any slips or sagging. With thoughtful placement, your felt garland will become a delightful focal point in your home, bringing warmth and charm to any space.
Maintenance and Storage Tips
To keep your felt garland looking vibrant, gently clean it with a lint roller or a soft cloth to remove any dust. Avoid washing it directly in water, as this may cause shrinkage or damage. When storing your garland, place it in a breathable fabric bag or wrap it in tissue paper to prevent crushing and preserve its shapes.
Keeping it in a cool, dry place will help avoid fading and maintain the integrity of the felt. Following these tips will ensure your handmade creation remains beautiful and can be enjoyed for many future celebrations.
Frequently Asked Questions (FAQs)
Q1: Can I Use Different Types of Felt for My Garland?
A1: Yes, you can use various types of felt, such as wool, acrylic, or eco-friendly felt. Each type may provide a different texture and appearance, allowing you to achieve the desired look for your garland.
Q2: How Long Will My Felt Garland Last?
A2: A felt garland can last many years with proper care and maintenance. To prevent fading, avoid exposing it to direct sunlight for extended periods and store it correctly when not in use.
Q3: Can I Wash the Felt Garland if It Gets Dirty?
A3: It’s best to avoid washing your felt garland in water, as this may cause shrinkage or damage. Instead, gently clean it with a lint roller or a soft cloth to remove any dust or dirt.

Q4: What Embellishments Work Best with Felt?
A4: Popular embellishments include beads, buttons, sequins, and fabric flowers. When selecting embellishments, consider their size, color, and how they complement the felt shapes to create a balanced design.
Conclusion
In summary, creating your own felt garland involves several enjoyable steps: designing, cutting, assembling, and embellishing, each contributing to the final product’s charm. Armed with the knowledge of how to make felt garland, you can freely experiment with various colors and shapes tailored to your personal style or seasonal themes. Handmade decorations bring a unique warmth and character to your home, making every occasion special. Don’t hesitate to let your creativity flourish—explore diverse designs that reflect your personality and celebrate the joy of crafting. Each felt garland you create will illuminate your space and serve as a cherished reminder of your artistic expression.

