How to Make Jewellery with Polymer Clay
Jewellery making with polymer clay is a delightful and creative hobby that allows individuals to express their personal style and craftsmanship. This versatile material is not only easy to work with but also comes in a vast array of colours and finishes, making it perfect for crafting unique pieces ranging from earrings and necklaces to bracelets and rings.
Whether you’re a beginner or an experienced artisan, this introduction will guide you through the how to make jewellery with polymer clay. Embrace the joy of making your own jewellery and discover the satisfaction of wearing something truly one-of-a-kind!
Why Make Jewellery with Polymer Clay?
Creating jewellery with polymer clay offers numerous advantages that attract both beginners and seasoned crafters alike. Firstly, the affordability of polymer clay makes it an accessible option for those looking to explore their creativity without a significant financial investment. Additionally, its versatility allows for endless design possibilities, enabling artisans to experiment with different shapes, patterns, and textures. Polymer clay is also lightweight, making the finished pieces comfortable to wear, and it can be baked at home, eliminating the need for special equipment or facilities.
Materials and Tools
To embark on your jewellery-making journey with polymer clay, you’ll need a variety of materials and tools that will help you bring your creative visions to life. Here’s a list of essential items to gather:
- Polymer Clay: Choose a selection of colours that inspire you. Popular brands include Sculpey, Fimo, and Cernit.
- Rolling Pin: A small rolling pin or an acrylic block is ideal for rolling out the clay to an even thickness.
- Cutting Tools: Use a craft knife or clay cutting tools to shape and slice your clay pieces.
- Molds and Texture Sheets: These can create unique shapes and designs. Silicone molds are particularly effective.
- Baking Tray: A flat, oven-safe surface for baking your clay creations. You can also use parchment paper to prevent sticking.
- Oven: Polymer clay needs to be baked in a conventional oven to harden. Follow the manufacturer’s instructions for temperature and baking time.
- Jewellery Findings: Beads, jump rings, earring hooks, and clasps are necessary for assembling your final pieces.
- Adhesives: In some cases, you may need glue to attach decorations or findings to your clay pieces.
- Sanding Tools: Fine sandpaper or sanding blocks can help smooth out rough edges after baking.
- Paints and Sealants (optional): If you want to add extra decoration or a glossy finish, acrylic paints and sealants can enhance your jewellery’s appearance.
Gathering these materials will set the foundation for your creative journey in polymer clay jewellery making!
10 Methods How to Make Jewellery with Polymer Clay
1.Simple Beads:
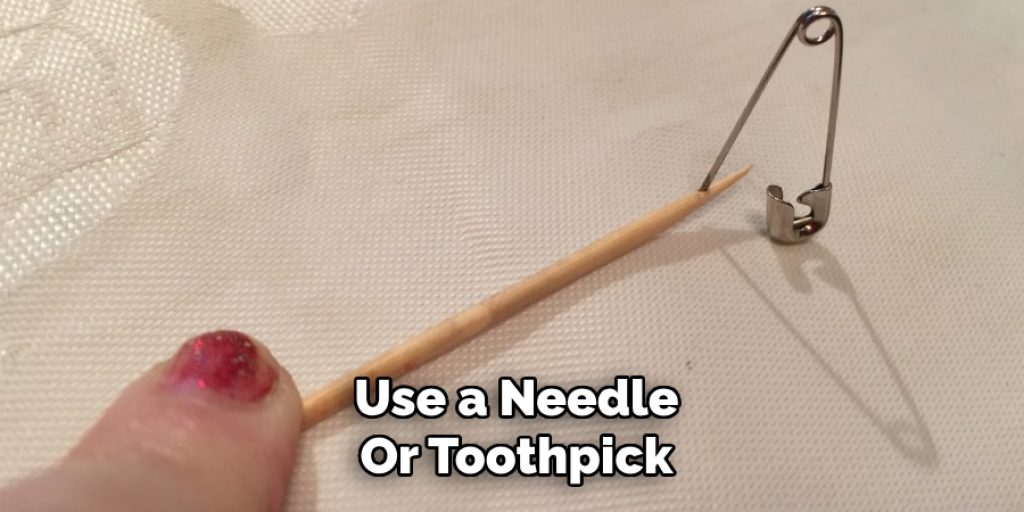
Making simple beads is a foundational technique for creating polymer clay jewelry. Begin by conditioning the clay, kneading it until it is soft and pliable. Roll the clay into small, uniform balls using your hands. Use a needle or toothpick to pierce a hole through the center of each bead, ensuring it is large enough for your stringing material. Bake the beads according to the manufacturer’s instructions.
Once baked and cooled, you can leave them as is or add designs using paint, glitter, or other embellishments. String the beads onto a cord or chain to create necklaces, bracelets, or anklets. This method allows you to experiment with different colors and patterns, creating a variety of personalized jewelry pieces.
2.Marbled Effect Beads:
Creating marbled effect beads adds a sophisticated touch to your polymer clay jewelry. Start by selecting two or more colors of clay. Roll each color into a thin snake, then twist the snakes together. Fold and twist the combined clay several times to create a marbled effect. Roll the marbled clay into a ball, then shape it into beads as described in the simple beads method. After baking and cooling, the beads will have a unique, swirling pattern that resembles natural marble. String the beads onto a piece of jewelry wire or cord to complete your elegant marbled jewelry.
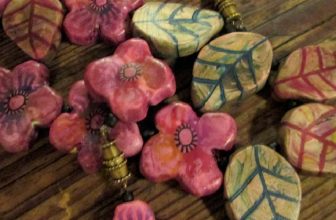
3.Textured Pendants:
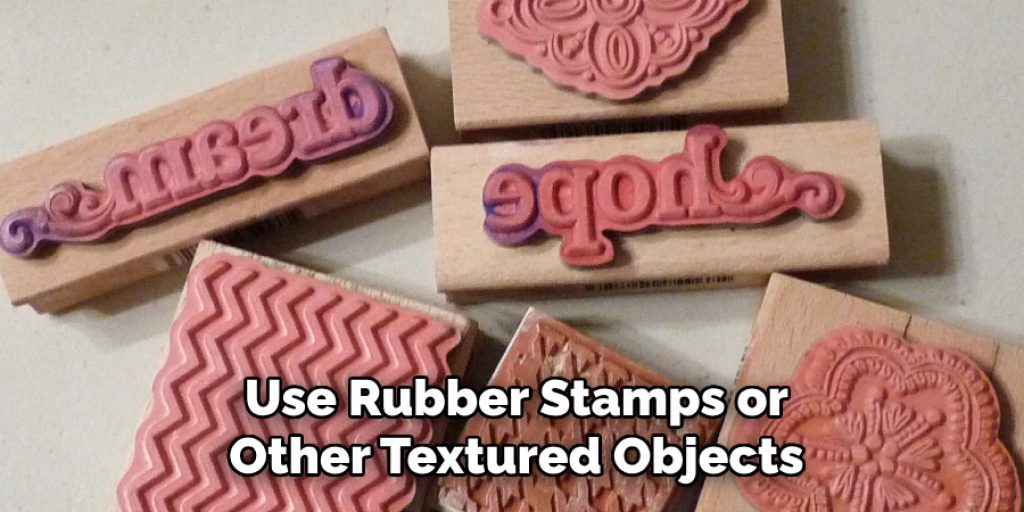
Adding texture to pendants can create visually interesting and tactile jewelry pieces. Begin by rolling out a sheet of clay to your desired thickness. Use texture tools, stamps, or household items like lace, leaves, or fabric to imprint patterns onto the clay. Cut the clay into shapes using cookie cutters or a craft knife. Make a hole at the top of each pendant for hanging. Bake the pendants according to the manufacturer’s instructions. Once cooled, you can enhance the texture with metallic powders, paints, or patinas. Attach a jump ring and chain to each pendant to create beautiful, textured necklaces.
4.Caning Technique:
The caning technique allows you to create intricate patterns within your polymer clay jewelry. Start by conditioning several colors of clay. Shape each color into long, thin rolls (snakes). Arrange the rolls in a desired pattern, pressing them together to form a single, large roll. Slice the roll into thin cross-sections to reveal the pattern inside. Use these slices to decorate beads, pendants, or other jewelry pieces. Bake the pieces as usual. The caning technique can be used to create detailed floral designs, geometric patterns, and other intricate motifs, adding a professional touch to your jewelry.
5.Stamped Clay Earrings:
Stamping designs onto clay is a quick and easy way to create beautiful earrings. Begin by rolling out a sheet of clay to a uniform thickness. Use rubber stamps or other textured objects to press designs into the clay. Cut the clay into earring shapes using small cookie cutters or a craft knife. Make holes for the earring findings before baking.
Once baked and cooled, attach jump rings and earring hooks. You can leave the earrings as is or add a coat of varnish or paint to highlight the stamped design. This method allows for endless creativity with different stamps and color combinations.
6.Layered Clay Jewelry:
Layering different colors of clay can create stunning, multi-dimensional jewelry pieces. Start by conditioning several colors of clay. Roll each color into a thin sheet. Stack the sheets on top of each other, then use a rolling pin to gently press them together. Cut out shapes for pendants, earrings, or bracelets. You can also create interesting effects by cutting out parts of the top layers to reveal the colors beneath. Bake the pieces according to the instructions. The layered technique allows you to create complex, colorful designs that stand out as unique works of art.
7.Mokume Gane Technique:
The Mokume Gane technique, inspired by traditional Japanese metalworking, creates a woodgrain or marbled effect in polymer clay. Start by layering thin sheets of different colored clays. Press the layers together, then use a blade to shave off thin slices from the top, revealing the colors beneath in a woodgrain pattern.
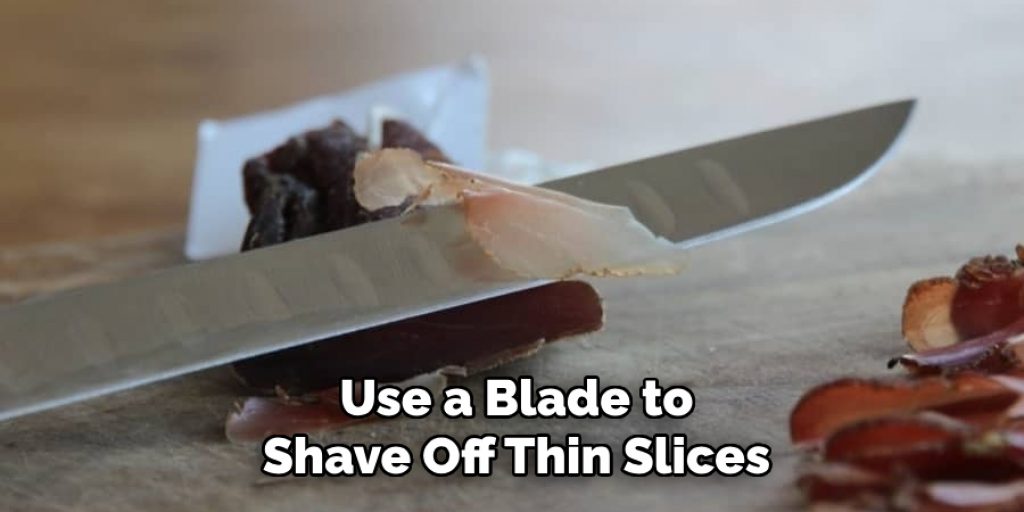
These slices can be used to cover beads, pendants, or other jewelry components. After baking and cooling, the Mokume Gane pieces will have a rich, organic appearance that resembles natural materials. This technique is perfect for creating sophisticated and visually striking jewelry.
8.Imitation Stone Jewelry:
Polymer clay can be used to mimic the appearance of natural stones such as turquoise, jade, or marble. To create an imitation stone effect, start by conditioning the clay. Mix different colors of clay to achieve the desired stone-like appearance, incorporating small bits of translucent clay for added realism. Roll the mixed clay into beads or shape it into pendants.
For a more realistic texture, add tiny impressions or streaks with a needle or toothpick. Bake the pieces according to the instructions. Once cooled, sand and polish the pieces to give them a smooth, stone-like finish. This method allows you to create beautiful jewelry that looks like real gemstones.
9.Mica Shift Technique:
The mica shift technique utilizes the reflective properties of mica particles in metallic polymer clay to create a three-dimensional effect. Start by conditioning metallic clay, then roll it out into a sheet. Impress a design into the clay using texture tools or stamps. Use a sharp blade to shave off the raised portions of the design, leaving a smooth surface with a ghost image of the texture. Cut out shapes for jewelry pieces such as pendants or earrings. Bake the pieces as usual. The mica shift technique creates a stunning, shimmering effect that adds depth and elegance to your jewelry.
10.Sculpted Clay Jewelry:
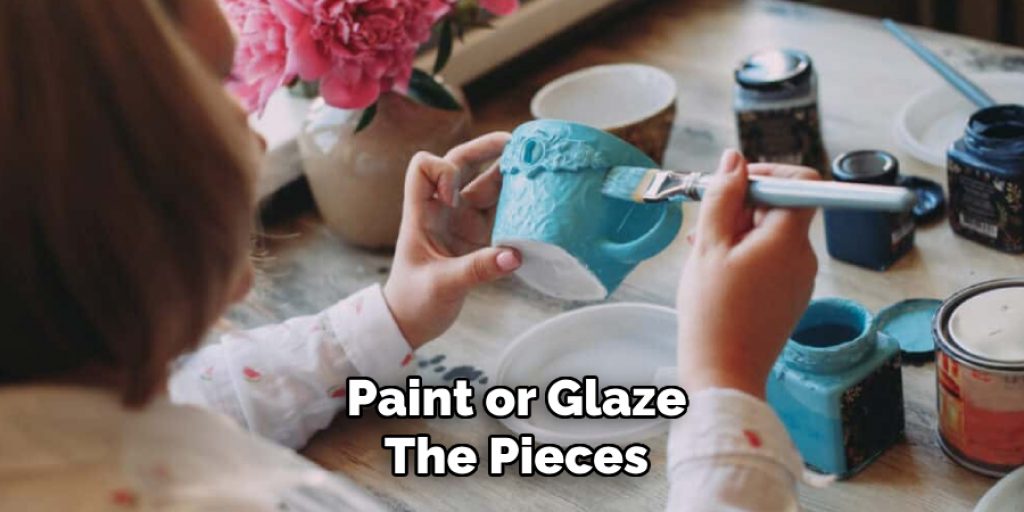
Sculpting polymer clay allows for the creation of intricate, detailed jewelry pieces. Start by conditioning the clay and shaping it into the desired form. Use sculpting tools to add details, such as carving patterns, adding texture, or creating raised designs. For example, you can sculpt flowers, leaves, animals, or abstract shapes to create unique pendants, earrings, or rings. Bake the sculpted pieces according to the instructions. Once cooled, you can paint or glaze the pieces to enhance the details. Sculpted clay jewelry showcases your artistic skills and results in one-of-a-kind pieces that are sure to impress.
Conclusion
Creating jewelry with polymer clay offers endless possibilities for creativity and personalization. Whether you prefer the simplicity of basic beads, the intricate patterns of caning, the sophisticated look of the Mokume Gane technique, or the realistic appearance of imitation stone, there is a method to suit every style and skill level. Thanks for reading, and we hope this has given you some inspiration on how to make jewellery with polymer clay!
Elizabeth Davis
Elizabeth is a creative writer and digital editor based in the United States. She has a passion for the arts and crafts, which she developed from a young age. Elizabeth has always loved experimenting with new mediums and sharing her work with others. When she started blogging, she knew that DIYquickly would be the perfect platform to share her tutorials and tips. She's been writing for the blog from the beginning, and her readers love her helpful advice and easy-to-follow instructions. When she's not writing or editing, Elizabeth enjoys spending time with her family and friends.