
How to Make Open Shelving
Open shelving has become an increasingly popular choice in modern interior design, offering both functionality and aesthetic appeal. Unlike traditional closed cabinets, open shelves allow you to display your favorite dishware, plants, and decor items, transforming your kitchen or living space into a showcase of personal style.

This guide will walk you through how to make open shelving, helping you maximise storage while maintaining a clean and inviting atmosphere in your home. Whether you’re looking to implement a few simple shelves or a more extensive shelving system, the process can be both rewarding and creative.
Benefits of Open Shelving in Home Decor
Open shelving not only enhances the visual appeal of your home but also offers several practical advantages. First, it creates an illusion of more space, making smaller areas feel larger and more airy. By removing bulky cabinet doors, open shelves can make a room appear more open and accessible. Additionally, they encourage a sense of organisation and cleanliness, as items are easily visible and can be arranged in an aesthetically pleasing manner.
Open shelving also allows for personal expression; you can curate your display with cherished items, adding character and warmth to the space. Lastly, it promotes convenience, making kitchen or living essentials readily accessible without the need to rummage through closed cabinets.
Planning Your Open Shelving Project
Before embarking on your open shelving project, careful planning is essential to ensure a successful and cohesive design. Start by assessing the space where you intend to install the shelves. Consider the measurements of the area, including the height, width, and depth available. It’s crucial to visualize how the shelving will complement existing furniture and decor, so take note of the style — whether it be modern, rustic, or minimalist. Next, think about the items you wish to display.
Make a list of the dishware, books, or decorative pieces you want to showcase, as this will help determine the number and size of shelves needed. Finally, establish a budget, factoring in materials, tools, and any additional decor you may want to incorporate. By taking these steps, you can create a tailored shelving solution that enhances both functionality and aesthetics in your home.

10 Methods How to Make Open Shelving
1.Planning and Design
The first step in making open shelving is to plan and design your shelving unit. Begin by assessing the space where you intend to install the shelves. Consider the dimensions of the wall or area, and think about how much shelving you need based on the items you plan to store. Sketch a design that includes the number of shelves, their spacing, and their width and length.
The design should reflect both your storage needs and your personal style. For example, in a kitchen, you might design shelves to hold dishes and glassware, while in a living room, you might design shelves for books and decorative items. Pay attention to the overall aesthetic you want to achieve, and ensure that the design complements the existing decor of the room.
2.Choosing Materials
Selecting the right materials for your open shelving is crucial for durability and appearance. Common materials for open shelving include wood, metal, and glass. Wood is a popular choice for its warmth and versatility; it can be stained, painted, or left natural to suit various styles. For a more industrial or modern look, consider using metal brackets and shelves. Metal shelves are sturdy and can support heavy items, but they might require additional treatments to prevent rust.
Glass shelves can create a sleek, contemporary appearance and are ideal for displaying decorative items, though they may require more frequent cleaning. Choose materials that match your design vision and are appropriate for the weight and type of items you plan to place on the shelves.
3.Measuring and Cutting
Accurate measurements and cutting are essential for a precise and secure installation. Use a tape measure to determine the dimensions of the shelves and the spacing between them. If you are using pre-cut shelving materials, measure the wall and adjust the placement of the brackets accordingly.

For custom shelves, measure and mark the dimensions on your chosen material, then cut the shelves to size using a saw. For wood, a circular saw or jigsaw is typically used, while a metal cutting saw or glass cutter may be necessary for other materials. Ensure that your cuts are straight and accurate to ensure a proper fit and a professional finish.
4.Preparing the Wall
Before installing the shelves, it’s important to prepare the wall to ensure a secure and stable mounting. Start by locating the wall studs using a stud finder. Shelves should be anchored into the studs for maximum support, especially if they will hold heavy items. Mark the locations of the studs and use a level to ensure that your markings are straight. If you’re installing shelves on drywall without studs, use wall anchors to provide additional support. Clean the wall surface to remove any dust or debris that could interfere with the installation process.
5.Installing Brackets
Brackets provide the support structure for your open shelving and must be installed securely to ensure that the shelves remain stable. Start by positioning the brackets on the wall according to your design. Use a level to ensure that the brackets are aligned properly and mark the screw holes. Drill pilot holes into the wall where you’ve marked the holes, then insert wall anchors if necessary.
Attach the brackets to the wall using screws, ensuring that they are securely fastened and level. For added stability, you might want to use multiple screws for each bracket or choose heavy-duty brackets designed to support more weight.
6.Attaching the Shelves
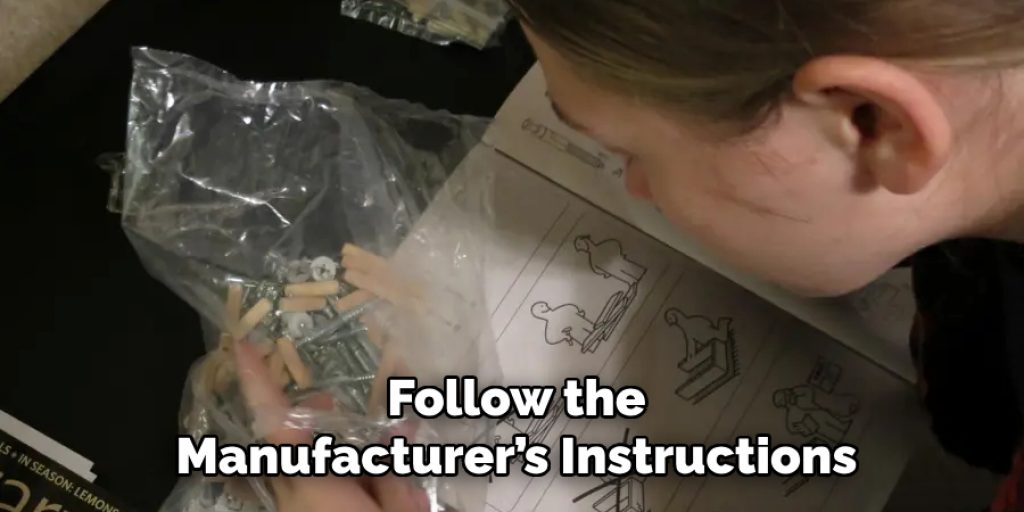
With the brackets in place, it’s time to attach the shelves. Carefully place each shelf onto the installed brackets, ensuring that it is level and properly supported. If your design includes adjustable shelves, follow the manufacturer’s instructions to secure them at the desired height. For fixed shelves, you may need to use additional screws or brackets to secure them in place. Check that each shelf is level and that there are no gaps or wobbling. Proper attachment is essential for ensuring that the shelves can hold the intended weight and function effectively.
7.Finishing Touches
Once the shelves are installed, focus on the finishing touches to enhance their appearance. For wooden shelves, you may want to sand the edges and surfaces to create a smooth finish. Apply a stain, paint, or sealant as desired, following the manufacturer’s instructions for drying times and application methods.
For metal or glass shelves, ensure that all surfaces are clean and free of fingerprints or smudges. Adding decorative elements such as shelf liners or trim can also enhance the overall look and add a personal touch to your open shelving unit.
8.Styling and Organizing
Styling and organizing your open shelving can make a significant impact on the overall appearance of the space. Start by arranging items on the shelves in a visually appealing manner. Group similar items together and create a balanced arrangement that incorporates both functionality and aesthetics.
Consider using decorative containers, trays, or baskets to organize smaller items and add visual interest. Incorporate a mix of items such as books, plants, and artwork to create an inviting and personalized display. Regularly rearrange and update the items on your shelves to keep the look fresh and dynamic.
9.Maintaining and Cleaning
Proper maintenance and cleaning are essential for keeping your open shelving looking its best. Regularly dust the shelves to prevent buildup and ensure that your display remains attractive. For wooden shelves, use a soft, dry cloth or a mild cleaner specifically designed for wood to maintain their finish.
Metal shelves may require occasional cleaning with a non-abrasive cleaner to remove fingerprints or grime, and glass shelves should be cleaned with a glass cleaner to ensure a streak-free finish. Inspect the shelves periodically for any signs of damage or wear, and address any issues promptly to maintain their functionality and appearance.

10.Considering Safety and Functionality
Ensuring the safety and functionality of your open shelving is crucial for avoiding accidents and maximizing usability. Make sure that the shelves are securely attached to the wall and that the brackets and hardware are capable of supporting the intended weight. Avoid overloading the shelves with heavy items, as this can strain the brackets and cause instability.
Additionally, consider the placement of the shelves in relation to other elements in the room, such as appliances or furniture, to ensure that they do not obstruct movement or access. By addressing safety and functionality, you can enjoy the benefits of open shelving while minimizing potential issues.
Conclusion
In summary, creating open shelving involves a thoughtful approach to design, material selection, and installation. From planning and measuring to choosing materials and installing the shelves, each step plays a vital role in achieving a successful and stylish result. Thanks for reading, and we hope this has given you some inspiration on how to make open shelving!
Angela Ervin
Angela is the executive editor of DIY quickly. She began her career as an interior designer before applying her strategic and creative passion to lifestyle and home. She has close to 15 years of experience in creative writing and online content strategy for housekeeping, home decorations as well as other niche efforts. She loves her job and has the privilege of working with an extraordinary team. She lives with her husband, two sons, and daughter in Petersburg. When she's not busy working she spent time with her family.
