
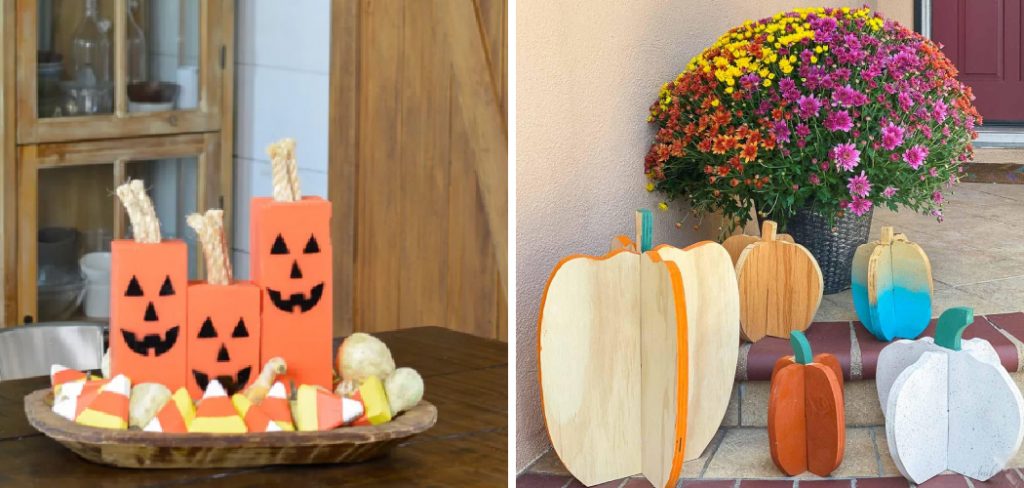
How to Make Wood Pumpkins
Are you looking for a fun and creative fall decoration? Look no further than these DIY wood pumpkins! Made from simple materials and easy to assemble, they are the perfect addition to any autumn decor.
How to make wood pumpkins is a delightful and engaging craft that brings a touch of seasonal charm to your home décor. Perfect for fall and Halloween, these rustic decorations can be customized in various shapes, sizes, and finishes to suit your style. Whether you’re a seasoned woodworker or a beginner looking to start a fun project, this guide will walk you through the materials and steps needed to make your charming wooden pumpkins.
With a bit of creativity and some basic tools, you can craft a festive display that adds warmth and character to your autumn celebrations.
What Will You Need?
To make your own wood pumpkins, you will need the following materials:
- Wood pieces (such as pine or plywood)
- Saw (hand saw or power saw)
- Sandpaper
- Paint or wood stain
- Brushes
- Drill and drill bits
- Screws and screwdriver
- Twine or ribbon
Once you have gathered all the materials, you can begin creating your wood pumpkins.
10 Easy Steps on How to Make Wood Pumpkins
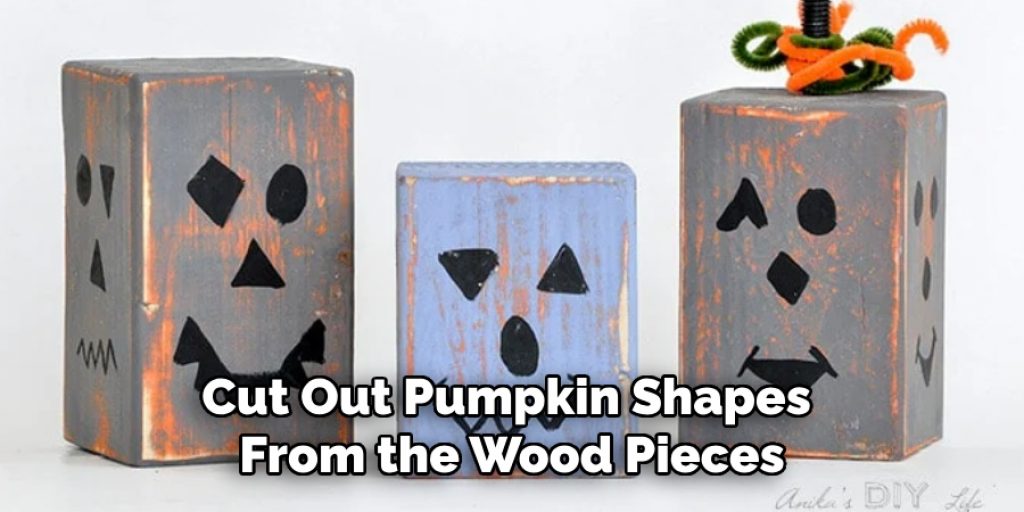
Step 1: Cut Out the Pumpkin Shapes
Using your saw, cut out pumpkin shapes from the wood pieces. By adjusting the size of your cuts, you can choose to have different sizes for each pumpkin. If you’re not confident using a saw, you can also ask for pre-cut wooden pieces at your local hardware store.
Step 2: Sand the Edges
After cutting out your pumpkin shapes, take your sandpaper and smooth out the edges of each piece. This step is crucial as it not only helps to eliminate any rough spots or splinters, making the pumpkins safe to handle but also prepares the surface for painting or staining. Be sure to sand the edges thoroughly, and you can also choose to round off the corners for a softer, more finished look. Once you’re satisfied with the smoothness, dust off any sawdust to ensure a clean surface for the next step.
Step 3: Apply Paint or Wood Stain
Now it’s time to add some color to your pumpkins! Choose your desired paint or wood stain and apply it evenly across the surface of each pumpkin shape using a brush. You can opt for traditional orange for a classic look or get creative with colors matching your autumn decor. If you’re using paint, allow it to dry completely before moving on to the next step. For a more rustic appearance, consider using wood stain; this can enhance the wood’s natural grain while giving your pumpkins an elegant finish. Once dried, you can apply a second coat for a richer color.
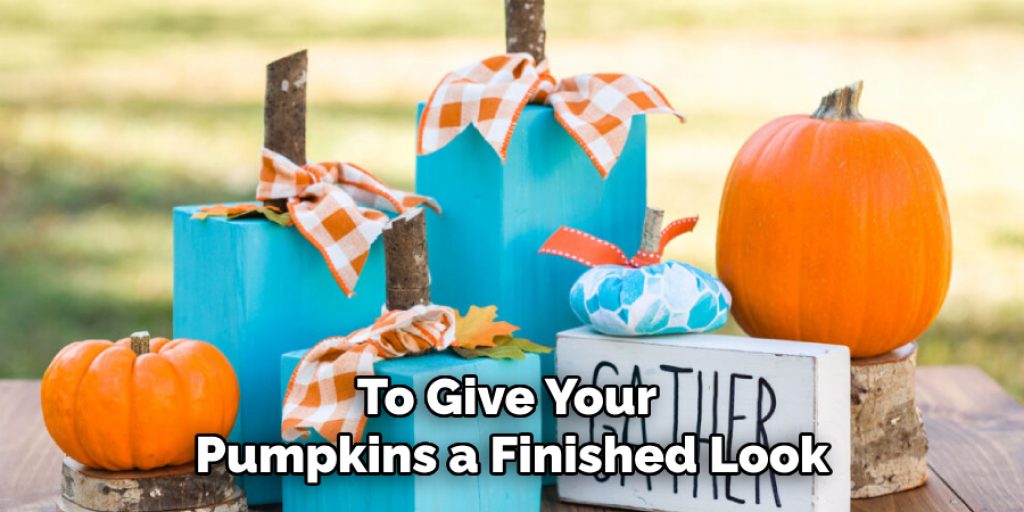
Step 4: Create the Pumpkin Stem
To give your pumpkins a finished look, it’s time to add the stems. You can cut small wood or branches or use dowels to create the stems. Take one of your pre-cut pieces and use your drill to make a hole at the top center of your pumpkin shape. Insert the stem into the hole, securing it in place with screws, glue, or by ensuring a snug fit. If you’re using twine or ribbon, fashion a decorative bow around the stem’s base for an added charm touch. Ensure that the stems are sturdy enough to stand upright and enhance the overall aesthetic of your wood pumpkins.
Step 5: Add Decorative Accents
Consider adding decorative accents that reflect your style to give your wood pumpkins a unique flair. This can include painting facial features to create spooky or cheerful expressions or applying embellishments such as sequins, glitter, or fabric leaves. You could also wrap twine around the base of the stem or attach small gourds to the pumpkins to enhance their autumnal appeal. Take your time creatively designing each pumpkin, ensuring that the decorations complement the overall look while adding to the festive spirit. Once satisfied with your decorative touches, allow any adhesive or paint to dry completely before handling your pumpkins further.
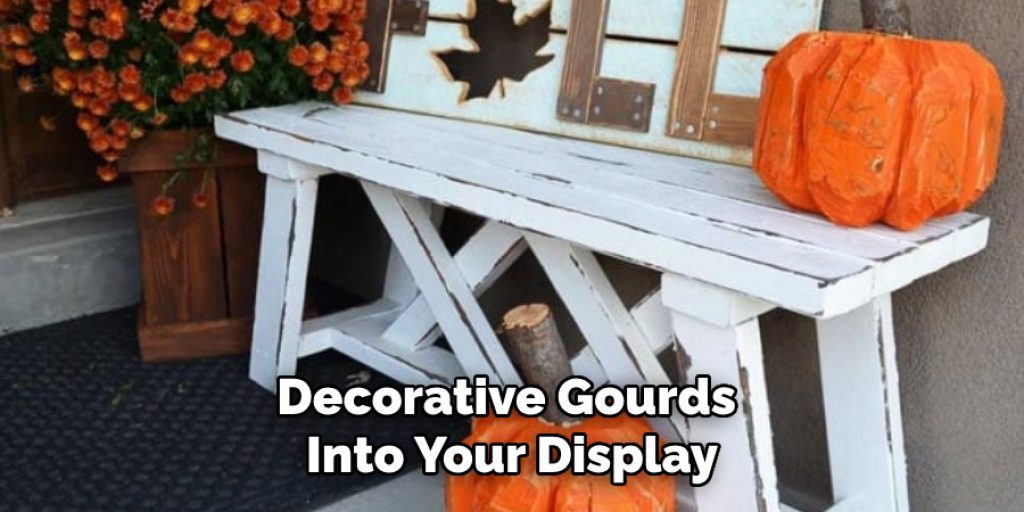
Step 6: Arrange Your Pumpkins
Once your wood pumpkins are complete, it’s time to think about how you’ll display them. Consider grouping different sizes and colors together to create an eye-catching arrangement. You can place them on your porch, around a fireplace, or as a centerpiece on your dining table. For an added layer of charm, consider incorporating natural elements such as hay bales, corn stalks, or decorative gourds into your display. Feel free to experiment with various layouts until you find one that brings out the warmth and charm of your homemade wood pumpkins.
Step 7: Seal Your Pumpkins
To ensure that your wood pumpkins withstand the elements, especially if displayed outdoors, it’s important to seal them. Apply a clear wood sealer or weatherproof spray over the painted or stained surfaces to protect against moisture and fading. Use a brush or spray can to cover every side evenly, paying close attention to any edges or crevices where water might collect. Allow the sealant to dry completely as per the manufacturer’s instructions before placing your pumpkins outside. This protective layer will help maintain their vibrant colors and extend their life throughout the fall season.
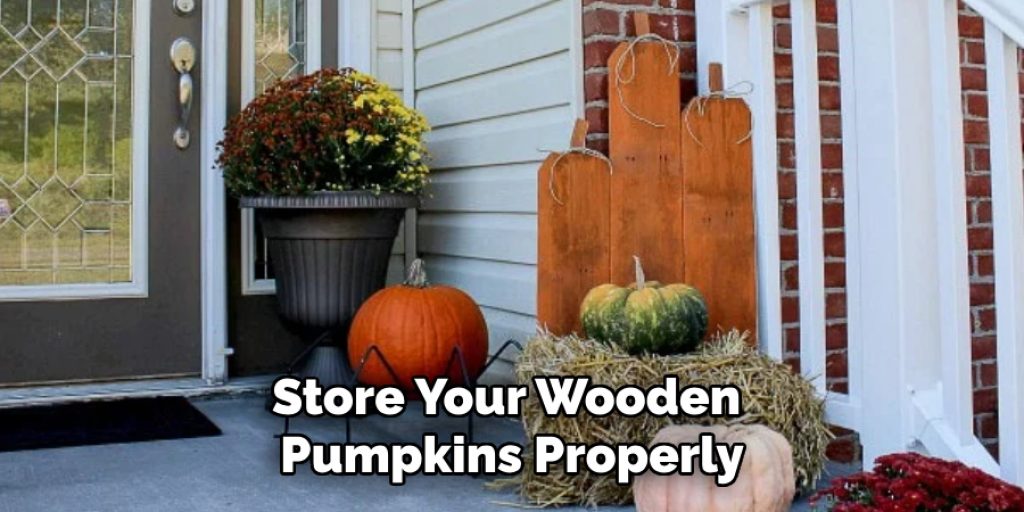
Step 8: Store Your Pumpkins Properly
After the fall season comes to an end, it’s essential to store your wooden pumpkins properly to ensure they remain in good condition for years to come. Clean any dirt or debris from their surfaces with a soft cloth. Once clean, consider wrapping each pumpkin in a layer of bubble wrap or soft cloth to protect them from scratches and damage during storage. Place them in a sturdy box or storage bin, preferably in a cool, dry place away from direct sunlight, as prolonged exposure can fade their colors. Label the box clearly so you can easily find and enjoy your charming wood pumpkins when autumn rolls around again.
Step 9: Personalize Your Pumpkins
To truly make your wood pumpkins stand out, consider personalizing them with names, dates, or particular messages. You can use paint, wood-burning tools, or stickers to add these personal touches. This step enhances their uniqueness and can turn them into memorable gifts or keepsakes for friends and family. Ensure that any added designs are securely attached and dry thoroughly before displaying or gifting your pumpkins. Personalized wood pumpkins can become a cherished part of your autumn decor, evoking fond memories for years.
Step 10: Enjoy Your Creations
With your personalized wood pumpkins beautifully displayed, it’s time to sit back and enjoy the fruits of your labor! Incorporate them into your seasonal decorations, setting the scene for a cozy gathering or Halloween festivities. Take photos to capture the charm of your handiwork, and share them with friends and family to inspire their crafting adventures. Remember, the joy of creating your wood pumpkins lies in the final product and the memories made during the crafting process. Celebrate your creativity and the beauty of autumn with these delightful decorations!
Following these simple steps, you can create gorgeous wood pumpkins that will add warmth and charm to your fall decor.
5 Things You Should Avoid
- Skipping the Sanding Process: Neglecting your wood pieces properly can lead to rough surfaces that affect the finish. Always take the time to sand each piece to ensure a smooth and polished surface before painting or staining.
- Using Low-Quality Materials: Opting for inferior wood or paint can result in a product that deteriorates quickly. Invest in high-quality materials to enhance durability and achieve a professional-looking finish.
- Ignoring Safety Precautions: Always prioritize safety when working with tools. To avoid wearing protective eyewear or gloves can result in injuries. Adhere to safety standards when cutting, drilling, or painting.
- Overloading with Decorations: While it’s great to personalize and embellish your pumpkins, overcrowding them with too many decorations can create a cluttered look. Aim for balance to keep your designs visually appealing.
- Lack of Planning for Display: Failing to consider how and where you plan to display your pumpkins can lead to improper sizing or lack of cohesion in your decorative scheme. Take the time to envision your arrangement before finalizing your designs.
By avoiding these common mistakes, you can create beautifully crafted wood pumpkins that will elevate your fall decor and bring joy to your home.
Conclusion
How to make wood pumpkins is a delightful way to welcome the autumn season while adding a personal touch to your home decor.
By following the outlined steps—from selecting quality materials and personalizing your designs to ensuring proper storage and maintenance—you can craft unique pieces that will bring joy for many fall seasons. Remember to embrace creativity throughout the process and make each pumpkin reflect your style. Whether you choose to display them indoors or outdoors, these charming decorations will undoubtedly enhance the warm atmosphere of your autumn celebrations.
Now, gather your supplies, let your imagination run wild, and enjoy the rewarding experience of making your very own wood pumpkins!
Elizabeth Davis
Elizabeth is a creative writer and digital editor based in the United States. She has a passion for the arts and crafts, which she developed from a young age. Elizabeth has always loved experimenting with new mediums and sharing her work with others. When she started blogging, she knew that DIYquickly would be the perfect platform to share her tutorials and tips. She's been writing for the blog from the beginning, and her readers love her helpful advice and easy-to-follow instructions. When she's not writing or editing, Elizabeth enjoys spending time with her family and friends.


