
How to Put Pictures on Wood Slices
Are you looking for a creative and unique way to display your favorite photos? Why not try putting them on wood slices?
Transforming wood slices into unique art pieces by adding pictures is a delightful and creative project. This technique lets you personalize home décor, create memorable gifts, or craft stunning centerpieces for special occasions. Whether you’re looking to preserve cherished memories or showcase favorite images, this guide will walk you through the essential steps and methods of how to put pictures on wood slices.
With a few simple materials and techniques, you can achieve beautiful, lasting results that highlight the natural beauty of the wood while displaying your chosen images.
What Will You Need?
Before you begin, gather all the necessary materials to ensure a smooth and successful project. Here’s a list of items you will need:
- Wood Slices: You can purchase pre-cut wood slices from a craft store or cut them from a fallen tree branch.
- Pictures: Choose high-quality images appropriate for the size and shape of your wood slice.
- Paintbrushes: Use a small brush to apply Mod Podge and a larger one to paint the edges of the wood slice.
- Scissors or X-ACTO Knife: These tools will help you trim your images to fit the wood slice.
- Mod Podge: This all-in-one glue, sealer, and finisher is essential for attaching the pictures to the wood slice and giving them a glossy finish.
- Sandpaper: Use fine-grit sandpaper to smooth out rough areas on the wood slice before applying the picture.
- Spray Varnish (Optional): Spray varnish gives your finished project an extra layer of protection and shine.
Now that you have gathered all your materials follow these simple steps to put pictures on wood slices.
8 Easy Steps on How to Put Pictures on Wood Slices
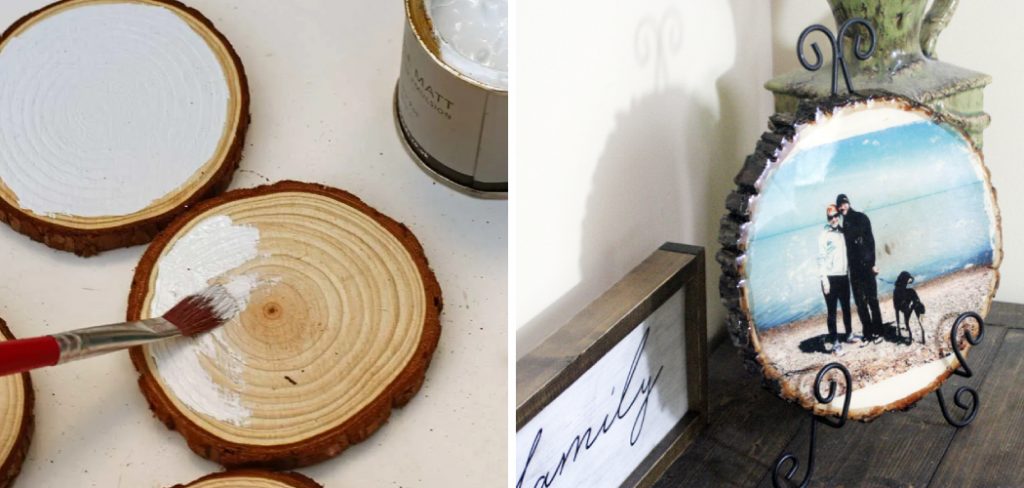
Step 1. Prepare Your Wood Slice:
Start by ensuring your wood slice is clean and dry. If you use a natural slice with bark, consider whether you want to keep it on or remove it for a smoother finish. Using fine-grit sandpaper, gently sand down the surface and edges of the wood slice to eliminate any rough spots, splinters, or imperfections. This helps create a more even surface for your photos and allows the Mod Podge to adhere better. After sanding, wipe the slice with a damp cloth to remove any dust. If you want a more polished look, you can apply a coat of clear wood finish at this stage and let it dry completely. This additional step enhances the wood’s natural color and grain, providing a beautiful backdrop for your pictures.
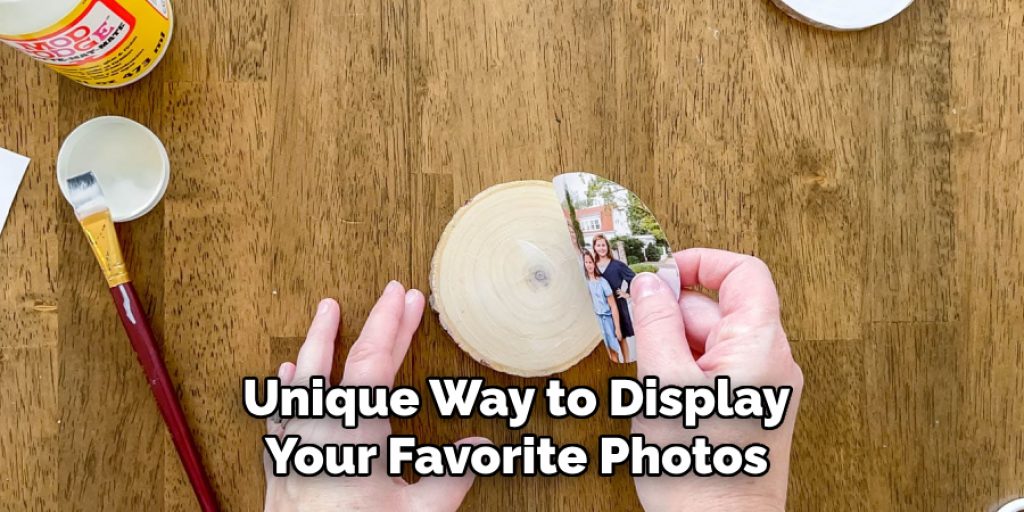
Step 2. Trim Your Pictures:
Once your wood slice is prepared and dry, it’s time to work on your chosen pictures. Carefully cut out the images, ensuring they fit well within the dimensions of the wood slice. You can use scissors for simpler shapes or an X-ACTO knife for more intricate designs. It’s a good idea to leave a small border around the edges to help the picture blend seamlessly with the wood. Take your time with this step, as precise trimming will enhance the final appearance of your project. Once trimmed, arrange the pictures on the wood slice to find the best placement before moving on to the next step.
Step 3. Apply Mod Podge:
Now, it’s time to adhere your trimmed pictures to the wood slice. Using a small paintbrush, apply a generous layer of Mod Podge onto the surface of the wood slice where the image will be placed. Make sure to cover the entire area thoroughly to ensure proper adhesion. It’s essential to work quickly but carefully, as Mod Podge can start to dry if left too long. Once the Mod Podge is applied, position your picture onto the slice, gently pressing it down to eliminate any air bubbles or wrinkles. For best results, start from the center and work your way outwards. After the picture is firmly in place, apply another thin layer of Mod Podge over the top to seal the image and increase durability. Allow the wood slice to dry completely; this usually takes about 15-20 minutes.
Step 4. Allow to Dry:
After applying the final layer of Mod Podge, it’s crucial to let your wood slice dry completely. Set it aside in a well-ventilated area, away from direct sunlight, as this can distort the finish. Aim for a drying time of at least 30 minutes to ensure that the Mod Podge has adequately adhered to the picture and the wood surface. You can check the dryness by gently touching the edge of the image; if it feels tacky, give it more time. Once thoroughly dried, your wood slice is ready for the next step to enhance its appearance and durability.
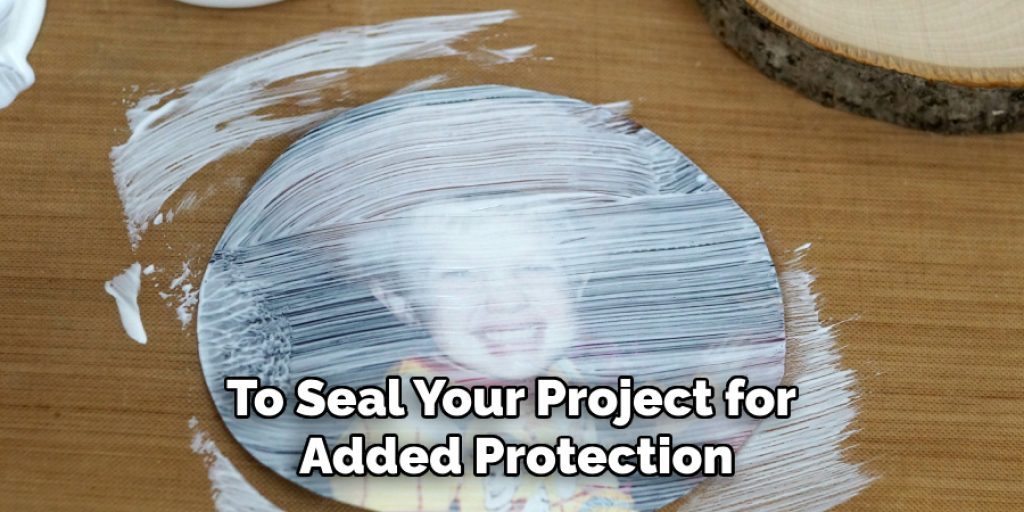
Step 5. Seal Your Project:
Once your wood slice is dehydrated, it’s time to seal your project for added protection. If you use spray varnish, take your wood slice outside or to a well-ventilated area and shake the canister well. Hold the spray about 12 inches away from the surface of the wood and apply a light, even coat over the entire piece. Be sure to cover the edges to prevent any moisture from seeping in. Allow the first coat to dry according to the manufacturer’s instructions—usually takes 15-30 minutes. If desired, apply a second coat for better durability, letting it dry completely between applications. This final sealing step ensures your pictures remain vibrant and protected from wear, making your wood slice artwork last for years.
Step 6. Finishing Touches:
With your wood slice fully sealed, adding some finishing touches to enhance its overall appearance is time. Consider painting or staining the edges of the wood slice to complement the colors in your pictures. Use a small brush for meticulous control, ensuring the paint or stain adheres well. Additionally, add embellishments like ribbons, twine, or decorative elements to personalize your project further. These accents can add charm and character, transforming your wood slice into a unique piece of art.
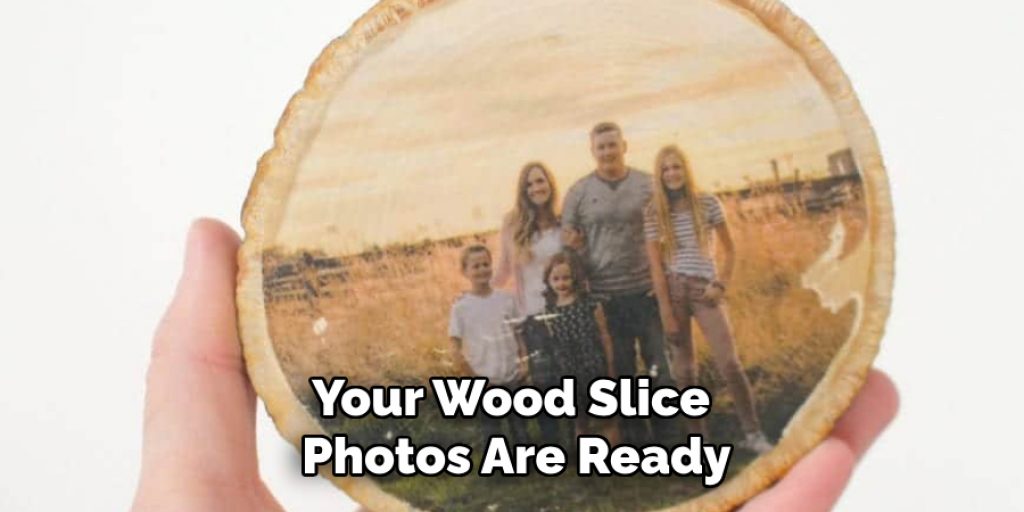
Step 7. Display Your Artwork:
Once all the finishing touches are complete and thoroughly dry, it’s time to showcase your beautiful creation. Decide where you’d like to display your wood slice—whether hanging on a wall, placed on a shelf, or used as a centerpiece for a table. If hanging, you can attach a picture hanger or use twine to create a rustic look. Consider using a small easel or simply placing it flat for tabletop displays. Your wood slice photos are ready to be admired by everyone visiting your home!

Step 8. Care and Maintenance:
To ensure your wood slice pictures remain fresh and vibrant, it’s essential to practice proper care and maintenance. Keep them out of direct sunlight to prevent fading and avoid exposure to excessive moisture, which can warp the wood. If needed, gently dust the surface with a soft cloth to remove any dirt or grime. For occasional touch-ups, you can apply a new layer of Mod Podge over your pictures or reseal them with spray varnish as required. With a bit of care, your wood slice art will be a lasting testament to your creativity.
By following these easy steps, you can create stunning wood slice pictures that add a touch of natural beauty to your home decor.
5 Things You Should Avoid
- Skipping Surface Preparation: Not preparing your wood slice properly can lead to poor adhesion and an uneven finish. Always ensure you clean and dry the surface before starting.
- Overloading with Mod Podge: While it’s important to apply enough Mod Podge for good adhesion, using too much can result in a soggy appearance and extended drying times. Stick to a generous but controlled application for the best results.
- Ignoring Drying Times: Rushing through drying times can compromise the integrity of your project. Always allow sufficient time for each layer to dry completely before moving on to the next step.
- Using Poor-Quality Images: Low-quality or blurry images won’t translate well on your wood slice. Always choose clear, high-resolution pictures for a polished final product.
- Neglecting Sealing: Failing to seal your finished project can leave your pictures vulnerable to damage from moisture and wear. Always use a protective layer to keep your artwork looking fresh and vibrant.
By avoiding these common mistakes, you can ensure a successful and long-lasting wood slice picture project.
Conclusion
How to put pictures on wood slices is a rewarding project that allows you to combine creativity and craftsmanship.
By following the systematic steps outlined—from preparing the wood slice and applying Mod Podge to sealing and displaying your artwork—you can produce unique pieces that enhance your home decor. It’s important to pay attention to details, such as ensuring proper adhesion, allowing adequate drying times, and using high-quality images, as these factors contribute significantly to the final result.
With patience and care, you’ll craft beautiful wood slice pictures that not only showcase your memories but also serve as charming conversation starters in any space. Enjoy the process and let your artistic expression shine!
Elizabeth Davis
Elizabeth is a creative writer and digital editor based in the United States. She has a passion for the arts and crafts, which she developed from a young age. Elizabeth has always loved experimenting with new mediums and sharing her work with others. When she started blogging, she knew that DIYquickly would be the perfect platform to share her tutorials and tips. She's been writing for the blog from the beginning, and her readers love her helpful advice and easy-to-follow instructions. When she's not writing or editing, Elizabeth enjoys spending time with her family and friends.


