How to Reduce Length of Dress Without Cutting
Are you tired of always wearing that long dress but don’t want to cut it? Well, you’re in luck! There are several ways to reduce the length of a dress without cutting it.

When it comes to altering a dress, there are various reasons one might want to reduce its length without resorting to cutting the fabric. Perhaps you love a particular garment but find it just a bit too long for your taste or need to adjust a dress for a special occasion without making permanent changes. Learning how to reduce length of dress without cutting the original fabric can be a valuable skill that allows for flexibility in your wardrobe.
This guide will explore practical methods to shorten your dress, including techniques like folding, tacking, or using temporary hemming solutions, ensuring you can confidently showcase your style.
What Will You Need?
Before getting started, make sure you have the following materials on hand:
- A measuring tape
- Pins
- Sewing machine or needle and thread
- Scissors
- Iron
- Temporary hemming solutions (e.g., iron-on adhesive tape or fabric glue)
Once you’ve gathered all the necessary supplies, let’s dive into how you can reduce the length of your dress without cutting it.
10 Easy Steps on How to Reduce Length of Dress Without Cutting
Step 1: Measure the Desired Length
Begin by determining how much shorter you want your dress to be. Use a measuring tape to find the length you want, from the waistline (or the appropriate starting point depending on the dress style) down to where you envision the hemline falling. It’s best to ask for help from a friend or use a mirror to ensure you have a clear view of the length while measuring. Note this measurement down to ensure accuracy in the following steps. Taking your time with this initial measure will help achieve a professional-looking result without any cutting involved.

Step 2: Pin the Fabric
Once you have measured and determined the desired length, it’s time to pin the fabric in place. Carefully fold the hem of the dress to the marked length and secure it with pins. Start at one side of the dress and work your way around, ensuring the fabric is evenly folded. Use as many pins as necessary to keep the fabric secure and in place, checking for consistency in the hemline. This step is crucial as it provides a stable base for the next steps and helps to avoid any shifting while you work.
Step 3: Secure the Hem
After pinning the fabric to the desired length, it’s time to secure the hem. You can do this by either hand-sewing or using a sewing machine to create a temporary stitch along the folded edge. If you’re opting for hand-sewing, use tiny, even stitches to keep the hem in place without being overly noticeable. For those using a sewing machine, set it to a straight stitch and carefully sew along the edge, removing the pins as you go.
This action will hold the fabric in its new position while allowing you to adjust without any permanent alterations. Remember to backstitch at the beginning and end to reinforce your stitches.
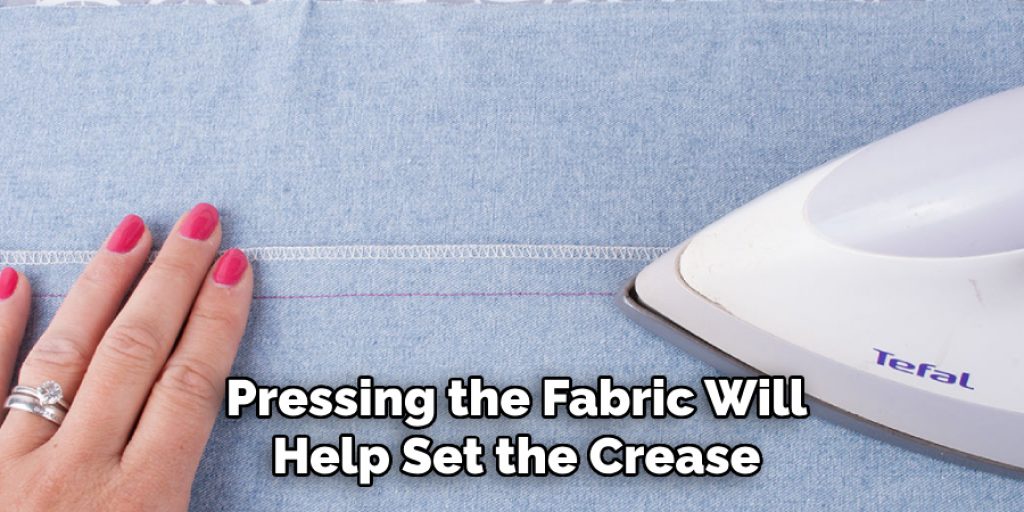
Step 4: Press the Hem
Once you’ve secured the hem, the next step is to press it. Using an iron, gently press along the folded edge to create a crisp finish. Be sure to use the appropriate heat setting for the fabric type to avoid damage. Pressing the fabric will help set the crease, ensuring the hem maintains its new length and looks neat. This step is critical in achieving a professional appearance, as it enhances the overall look of the alteration and provides a polished finish. After pressing, let the hem cool down before moving on to the next step.
Step 5: Consider Temporary Hemming Solutions
If you prefer not to sew, you can use several temporary hemming solutions. An iron-on adhesive tape is a great option; simply cut a piece of the tape and place it between the folded hem and the dress fabric, then press with the iron as per the product instructions. This method creates a secure bond without damaging the dress. Alternatively, fabric glue can be applied to the hem fold for a quick fix; ensure sufficient drying time before wearing the dress. These methods provide versatility, allowing you to adjust the dress length as needed without making any permanent alterations.
Step 6: Try on the Dress
After you’ve secured the hem and pressed it, it’s essential to try on the dress to ensure the new length is precisely how you envisioned it. Put the dress on and check the fit in a mirror from all angles. This is the perfect moment to assess whether you’re satisfied with the length or if any additional adjustments are needed. Remember to consider how it looks with the shoes you plan to wear, as this can influence the overall appearance. If necessary, make minor tweaks to the hem by redoing the pinning or securing process to get it right.
Taking the time to try on the dress will help avoid any surprises later on and ensure you feel comfortable and confident in your altered garment.
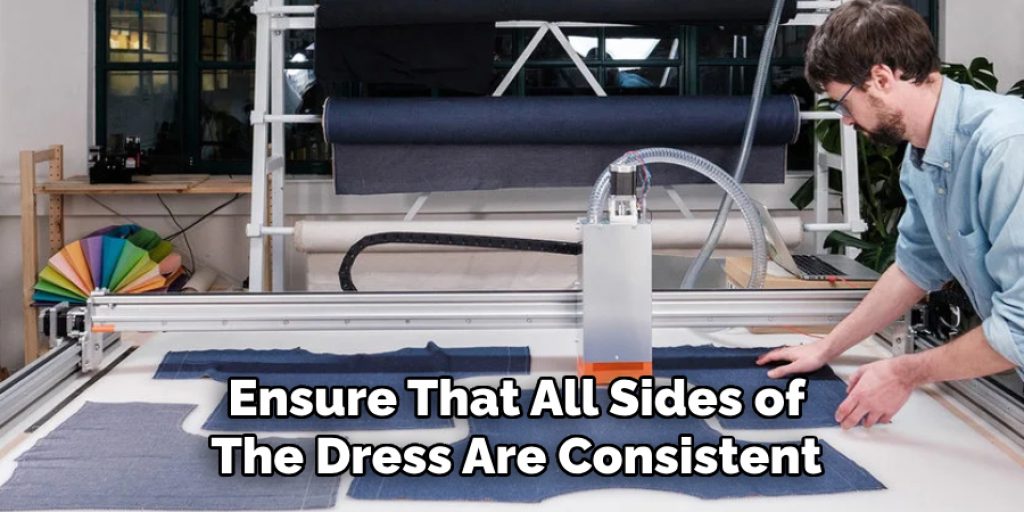
Step 7: Final Adjustments
After trying on the dress, look closely at how the hem falls. If you’re pleased with the length but notice any unevenness or irregularities in the hemline, make slight adjustments by re-pinning or adjusting your temporary stitches. Sometimes, a tiny tweak can significantly improve achieving a uniform look. Ensure that all sides of the dress are consistent and meet your expectations.
Step 8: Secure the Hem for Long-Term Wear
If you decide the temporary solutions are insufficient for your needs, consider securing the hem for long-term wear. Use a sewing machine or needle and thread to create a more permanent stitch along the hemline, following the same method but ensuring your stitches are uniform and secure. This will help prevent any unraveling or loosening over time, especially if you plan to wash the dress regularly.
Step 9: Clean Up
Once you’ve completed your alterations and secured the hem for long-term wear, cleaning up your workspace effectively is essential. Begin by removing leftover pins and cleaning up any stray threads that may have accumulated during the process. This ensures safety and prevents any potential snags on the dress or other fabrics. Dispose of any materials used, such as scraps of adhesive tape or excess fabric, to maintain an organized environment.
Additionally, if you’ve used any tools like an iron or sewing machine, ensure they are turned off and properly stored away after you’ve finished your project. Finally, give your dress one last press with the iron, ensuring it looks neat and polished before wearing or storing it away. This attention to detail will not only extend the life of your garment but also enhance your overall sewing experience by creating a tidy space for future projects.
Step 10: Enjoy Your Newly Altered Dress
With your dress now tailored to your desired length, take a moment to appreciate your handiwork. Wear your dress confidently, knowing you’ve enhanced it with your skills. Whether it’s for a special occasion or everyday wear, enjoy the satisfaction of altering a garment to better reflect your style.
By following these ten steps, you can easily hem a dress to your desired length and achieve a professional-looking finish.
5 Things You Should Avoid
- Ignoring the Fabric Type: Different fabrics require different handling techniques. Avoid using methods that might damage delicate materials, such as applying high heat to synthetic fibers. Always check the care tag for guidance before proceeding.
- Over-Relying on Temporary Solutions: While temporary hemming options can be helpful, relying solely on them may lead to problems with wear and tear. Avoid sticking to these methods if you plan to wear the dress frequently; instead, consider more permanent options for durability.
- Skipping the Fitting Process: It is crucial to try on the dress during the alteration process. Avoid the temptation to skip this step, as it can lead to mistakes in the length adjustment. Continually assess the fit before a mirror to ensure it meets your expectations.
- Neglecting to Secure Stitches: If you choose to sew, avoid skipping the backstitching or securing steps. This can result in the hem unraveling or loosening over time, potentially ruining your hard work and the dress itself.
- Failing to Clean Up: Maintaining a safe and tidy workspace is important. Avoid leaving stray pins, threads, or other materials lingering around, as they can pose hazards or damage fabrics. A clean environment will also help ensure you have everything you need for future projects.

Conclusion
How to reduce length of dress without cutting is a practical and versatile approach that allows you to tailor your garment while preserving its original integrity. By utilizing temporary solutions such as fabric tape or glue, you can achieve a modified hem without permanent alterations, making it easy to adapt your dress for different occasions or styles.
The key steps include effectively securing the hem, trying on the dress for fit, and making any necessary adjustments to ensure a polished finish. Additionally, opting for more permanent stitching methods provides durability for regular wear, ensuring your alterations last. With careful execution and attention to detail, achieving your desired length can enhance the dress itself and your overall sewing skills and confidence.
Enjoy the process and embrace the satisfaction that comes from crafting a garment tailored to your personal style.
Elizabeth Davis
Elizabeth is a creative writer and digital editor based in the United States. She has a passion for the arts and crafts, which she developed from a young age. Elizabeth has always loved experimenting with new mediums and sharing her work with others. When she started blogging, she knew that DIYquickly would be the perfect platform to share her tutorials and tips. She's been writing for the blog from the beginning, and her readers love her helpful advice and easy-to-follow instructions. When she's not writing or editing, Elizabeth enjoys spending time with her family and friends.