How to Sand Without Dust
Do you hate the dust that sanding creates? Well, there are some tricks to avoiding most of the mess. In this blog post, we will share some tips on how to sand without dust. Follow these simple steps, and you’ll be able to get the job done quickly and easily.

When you’re sanding a piece of wood, the last thing you want is a cloud of dust obscuring your vision and making a mess. We’ll show you how to sand without creating a dust storm in this guide. We’ll also give you some tips on how to avoid gouging the wood while you’re at it. Let’s get started!
10 Ways on How to Sand Without Dust:
1. Use a Vacuum Cleaner:
The easiest way to avoid dusting off your finish is to use a Shop-Vac. Just hook it up, plug it in and start sanding! The dust goes directly into the vacuum bag. No cleanup!
2. Use a Dust Deputy:
A dust deputy is a device that you add to your sander, and it creates an instant vacuum by separating the dust from the airflow on its way to the bag. This saves time and effort and reduces mess. You’ll get more suction with less work. It works with your shop vacuum, dust collection system, or just by itself.
3. Use Bags:
Collecting the dust into bags is easy to avoid having co-workers complain that you’re making too much mess. However, bags also contain fine particles, so it may be helpful to put your project in a clear bag for easier cleanup.
You can then leave it in the bag, close it up, and go. Open the bag and pour out the contents into a trash can when you finish. A box fan on your workbench will suck the clean air through the filter bags and keep your shop dust-free.

4. Use Your Shop-Vac:
The shop vac can also work as a dust collector. Just attach the hose to your sander and the other end to the shop vac. This will suck up all the dust and keep your work area clean.
5. Use a Dust Right System:
A dust right system is an inexpensive way to collect the dust while sanding. It works with palm sanders, orbital sanders, drum sanders, or any other type of sander or grinder you have. The kit comes with a 15-gallon vacuum filter bag and clips that attach it securely to your machine.
6. Use a Downdraft Table:
A downdraft table is a great way to collect dust when sanding. It sits under your workbench, and the air is sucked down through the table and into a dust collector. This keeps the dust from flying all over your shop.
7. Use a Sheet of Plexiglass:
First, you’ll need to attach the sheet of plexiglass over your workbench so that it covers the entire surface. Then, put your sander on top of the plexiglass. Use any type of sandpaper; this method works great with 60 or 80 grit paper. You can also use a belt sander. The plexiglass will protect your workbench, and the dust will be collected below.
8. Use a Sanding Screen:
A sanding screen is an easy way to collect dust while sanding. It’s a screen that you put over your workbench and then attach your sander to it. The sandpaper will be held against the screen, and the dust will fall through the holes.
9. Use a Rapid Sander:
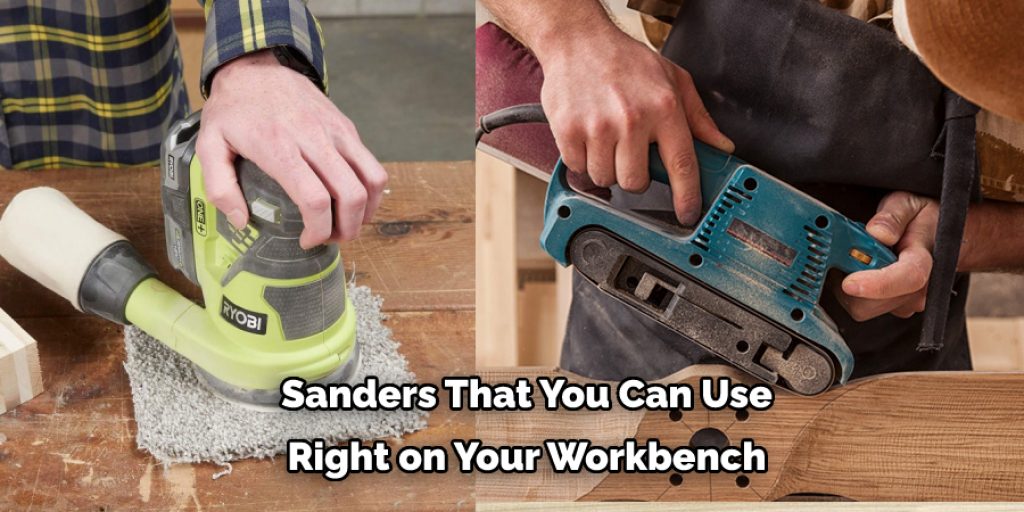
Rapid sanders are small, battery-powered sanders that you can use right on your workbench. They come with a collection bag so the dust goes directly into the bag instead of all over your shop. The downside is they don’t have much power, so you might need to use them in conjunction with your regular sander for some jobs.

10. Use a Palm Sander:
A palm sander is an excellent way to sand without dust. They’re small and easy to use, with just enough power for most jobs around the house. You can buy one that’s battery-powered or plug it into the wall. Either way, you’ll get good results with less mess.
There you have it! Ten ways to sand without dust. With just a little preparation, you can keep your work area clean and minimize the amount of cleanup necessary when you’re finished. Happy sanding!
Some Tips and Suggestions:
1. If you are using an electric sander, use a dust mask to avoid breathing in the dust.
2. If you are using a belt sander, wear goggles to avoid getting sand in your eyes.
3. Always use a dustpan and brush to clean up any messes and avoid creating dust clouds.
4. Wet the surface before sanding to help reduce the amount of dust created.
5. Sand in the direction of the wood grain to avoid creating unsightly scratches.
6. When sanding with wonderful sandpaper, use a wood block to avoid creating scratches in the wood.
7. Sanding blocks are ideal for flat surfaces and edges and round pieces such as chair legs.
8. When using an electric sander, wear protective gloves to avoid getting splinters or any other small pieces of wood in your hands that can become problematic later.

Things to Consider When Sanding Without Dust:
1. Choose the Right Sandpaper for the Job:
Coarse sandpaper is best for quickly removing large amounts of material, while fine sandpaper produces a smoother finish.
2. Dust Collection:
Make sure you have a way to collect the dust created by sanding. This can be done with a dust mask, shop vacuum, or dust collector.
3. Temperature and Humidity:
These can affect how the sandpaper performs. In hot, dry conditions, sandpaper will become clogged more quickly. Conversely, in cold, humid conditions, the sandpaper may not stick to the surface as well.
4. Sanding Technique:
The way you sand can also affect how much dust is created. For example, sanding in a circular motion will create more dust than rubbing in a linear motion.
5. Surface Preparation:
The better the surface is prepared, the minor sanding is required, and less dust is created. Make sure to remove any debris, paint, or finish from the surface before sanding.
6. Shop Ventilation:
Good ventilation is essential for reducing the inhalation of particles and fumes created during sanding and protecting machinery from dust. Dust collectors should be close to the source of the dust for maximum efficiency, while local automotive or industrial vacuums can collect both fine particles and dust.
7. Dust Collectors:
Dust collectors, also known as cyclones or exhaust hoods, can reduce your exposure to dust and fumes. They remove the larger pieces of debris from the airstream before the air passes through a filter bag or cartridge.
9. Wear Safety Equipment:
When sanding, it is essential to wear safety glasses and breathing and dust masks.
How Will You Control the Dust?
Dust is an unfortunate by-product of sanding, but it can be minimized with proper controls. The key to controlling dust is where you do the sanding and what you use to filter the air. For example, if your sander operates on a wet-dry vacuum, hook up your shop vac directly to the sander.

This allows you to connect a drop tube directly to the sander’s output port, which will send the dust-laden air into your vacuum instead of into the room where it can settle onto surfaces and collect in corners. Most wet/dry vacs have an available adapter that allows you to hook up this way; check with your local hardware store or home center.
Conclusion:
This blog was about how to sand without dust so that you don’t have to worry about inhaling the particles into your lungs or exposing others in your home. There are many benefits to using an air filtration system during the process of sawing and planing lumber, including better visibility for cutting lines on boards and improved air quality inside the workshop.
Dust control systems also help reduce fire hazards from dusty debris accumulating near power tools like table saws and band saws. We hope this guide was informative to help you achieve a safe and healthy woodworking project. If you want to know more then feel free to comment below!


