How to Tie Decorative Knots
Are you tired of using plain old knots in your daily life? Are you looking for a way to add some decorative flair to your rope tying skills? Well, look no further!
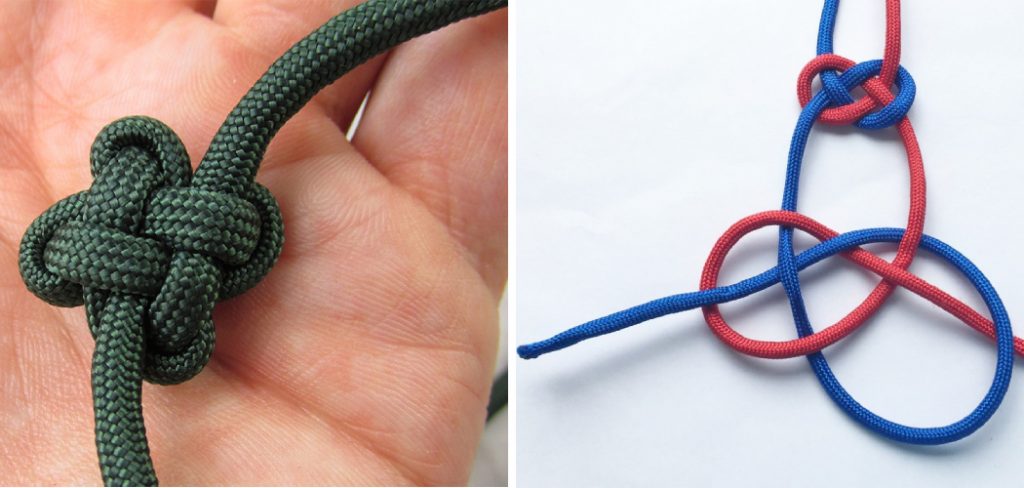
Tying decorative knots is both an ancient craft and a contemporary hobby that combines the beauty of art with the functionality of knots. This intricate skill has been passed down through generations, transcending cultures around the world. Whether you’re adorning a piece of jewelry, embellishing home décor, or enhancing the riggings of a ship, mastering the art of decorative knotting opens up a world of creative possibilities. In this guide, we’ll explore the basics of how to tie decorative knots.
Whether you’re a novice looking to learn a new craft or an experienced knot tier aiming to expand your repertoire, this guide is designed to inspire and instruct in the elegant art of knot tying.
What are the Importance of Tying Decorative Knots?
Decorative knots are more than just aesthetically pleasing. They also serve practical purposes such as:
- Enhancing the strength and durability of ropes
- Adding a personal touch to gifts or handmade items
- Elevating the design of jewelry or accessories
- Creating unique and eye-catching decorations for special occasions
Furthermore, decorative knots can also have symbolic meanings and cultural significance. In some cultures, certain knots are used to ward off evil spirits or bring good luck, while others may represent love, friendship, or other values.
What Will You Need?
Before diving into the world of decorative knotting, make sure you have the necessary tools and materials:
- Different types of ropes or cords (such as cotton, nylon, or paracord)
- Scissors
- Measuring tape or ruler
- Pins or clips to hold the rope in place while tying
- Optional: a foam board or mat to help keep the knots in place while working
To add even more creativity to your projects, it’s always good to have a variety of rope colors and thicknesses, as well as different types of closures, such as clasps or beads.
10 Easy Steps on How to Tie Decorative Knots
Step 1: Start with the Basics – The Square Knot
The square knot is a foundational decorative knot and a perfect starting point for beginners. Here’s how to tie it:
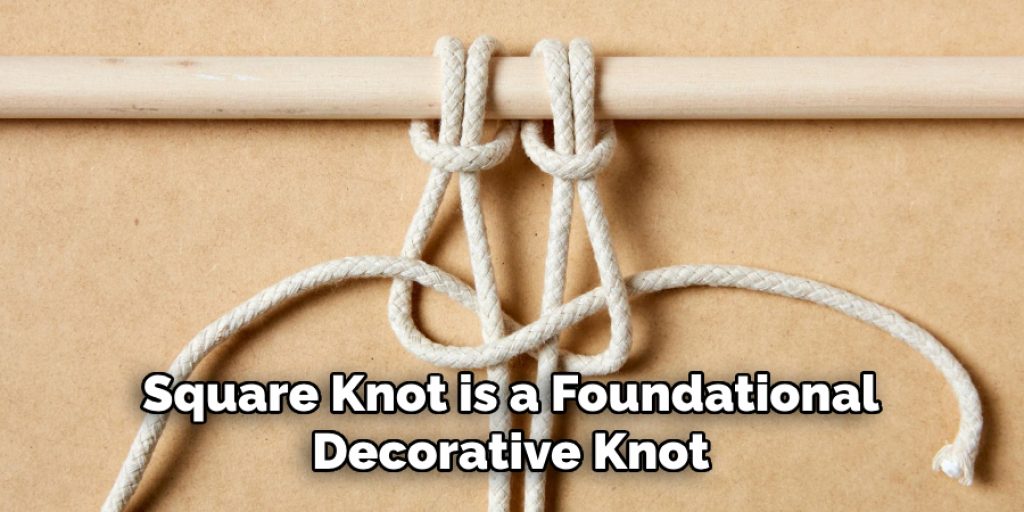
- Take two ropes or ends of the same rope and lay them side-by-side.
- Pass the right end over and under the left end, pulling it tight to form the first half of the knot.
- Next, take the new right end (previously the left) and pass it over and under the new left end.
- Pull both ends tight to secure the knot.
This simple yet versatile knot is not only great for joining two ropes together but also serves as the base for many decorative knot projects. Its balanced structure and symmetry make it an ideal candidate for bracelets, keychains, and other decorative items. Practice this knot until you become comfortable with it, as it will be a crucial building block for more complex designs.
Step 2: The Cobra Knot for Bracelets and Belts
The cobra knot, also known as a square knot sinnet, is next in line and popular for making survival bracelets, belts, and keychains. Here’s a straightforward way to create a cobra knot:
- You will need two pieces of rope or cord. Cross them at the center to form an ‘X’.
- Take the rope on the left and place it over the right rope, then under the two center strands and up through the loop on the right side.
- Pull both ends tight.
- Repeat the process, alternating the starting side each time (right over left, then left over right), to create a series of flat, square knots.
This technique results in a functional yet stylish, durable, decorative pattern. The repetitive nature of the cobra knot makes it meditative and satisfying to tie, with the final product being extremely rewarding.
Step 3: Mastering the Monkey’s Fist for Weighted Decor
The Monkey’s Fist is a classic knot originally used to add weight to the end of a rope, making it easier to throw. Nowadays, it’s also popular for creating decorative items and keychains. Here’s how to tie a Monkey’s Fist:
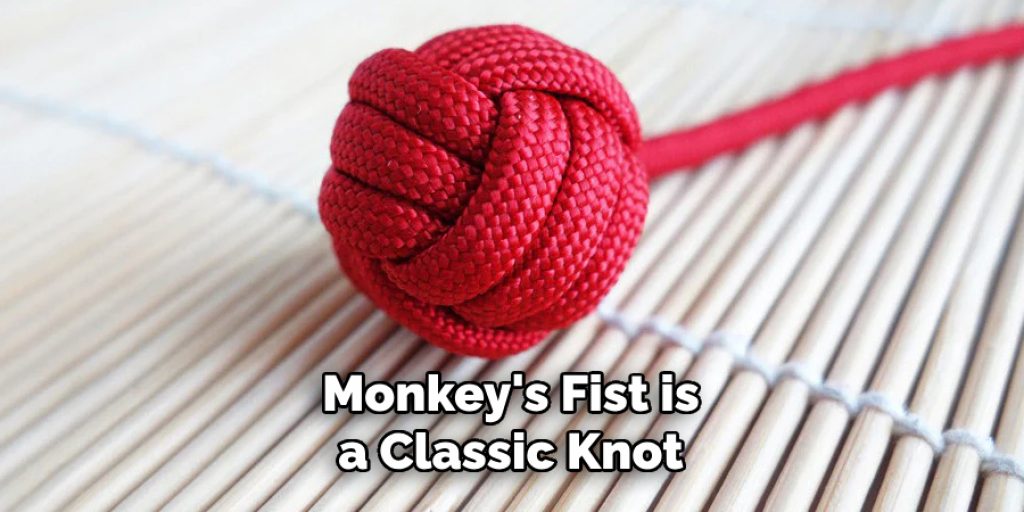
- Begin with a long piece of rope. Hold the end in your hand and wrap the rope around your fingers three times.
- Next, remove the coiled rope from your hand, maintaining its shape, and make three more wraps around the middle of the initial coils, perpendicular to them.
- Then, make three more wraps inside the previous coils, threading the end through the center of the knot each time. This step gets tricky, so take it slow.
- Tighten the knot by gradually pulling on each loop and adjusting the coils until you achieve a firm, evenly rounded knot.
- Tip: To add weight or create a more substantial decorative item, consider placing a marble or small ball inside the knot before tightening.
The Monkey’s Fist can be challenging at first but becomes easier with practice. This knot not only looks impressive but can also serve a functional purpose, making it a valuable addition to your knot-tying skills.
Step 4: Crafting the Lanyard Knot for Charms and Handles
The Lanyard Knot, also known as the Diamond Knot, is fantastic for finishing the ends of a bracelet or serving as the central part of a decorative keychain. It adds a professional touch to any project and here’s a simple way to achieve it:
- Start with a loop of rope. Take one end and make a loop, laying it over the other part of the rope.
- Take the other end and pass it over the first loop, under the crossing point, and up through the center of the first loop, creating a second loop beside the first.
- Now, take the end of the rope that just created the second loop, follow it around, and pass it through the opposite loop.
- Pull on all the ends to tighten the knot, making adjustments to ensure it forms a symmetrical diamond shape.
The Lanyard Knot may require some patience and practice to perfect, but its attractive appearance and practicality are well worth the effort. It’s an excellent knot for adding decorative elements to lanyards, creating handles for bags, or simply as an ornamental addition to your rope projects.
Step 5: The Fisherman’s Knot for Joining Two Ropes
The Fisherman’s Knot is an excellent choice for securely joining two pieces of rope, especially useful for creating necklaces and bracelets, or extending the length of cords for larger projects. Here’s how to execute it:
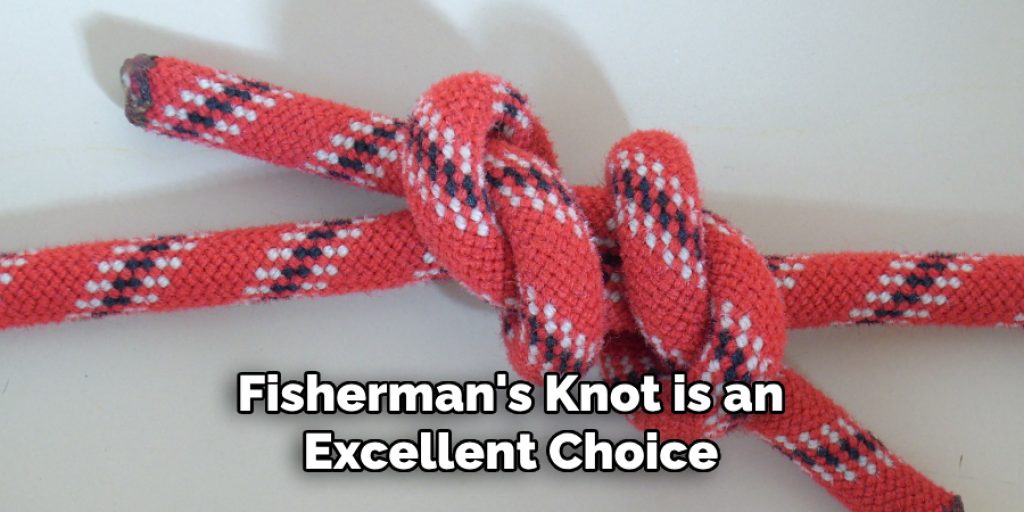
- Take the ends of the two ropes you wish to join and overlap them.
- With the end of the first rope, tie an overhand knot around the second rope, pulling it tight.
- Then, with the end of the second rope, tie an overhand knot around the first rope.
- Pull both knots tight towards each other until they are snug.
This knot is straightforward and efficient, creating a strong bond that is difficult to break. The beauty of the Fisherman’s Knot lies in its simplicity and neat, symmetrical appearance, making it an ideal choice for projects that require both form and function.
Step 6: The Trucker’s Hitch for Adjustable Tension
The Trucker’s Hitch is a valuable knot for anyone looking to secure items with adjustable tension. It’s especially useful for tying down loads on a vehicle or creating adjustable lines in camping setups. Here’s how to tie this versatile knot:
- Start by tying a small loop in the middle of your rope. This loop will act as a pulley, giving you a mechanical advantage.
- Pass the free end of the rope around your anchor point and then through the loop you just made.
- Now, create a second loop by making a half-hitch around the main line, securing the rope that comes out of the first loop.
- Pull the free end to tighten and adjust the tension as necessary. Once you’ve achieved the desired tension, secure the free end with another half-hitch around the main line for added security.
The Trucker’s Hitch is brilliant for situations where high tension is needed, and it allows for easy release and adjustment of tension. Mastering this knot adds a valuable tool to your repertoire, useful in a multitude of practical applications.
Step 7: Tying the Bowline Knot for a Fixed Loop
The Bowline Knot is renowned for its strength and reliability, creating a loop that may not slip under tension, making it indispensable for boating, climbing, and securing objects. Here’s how to tie this essential knot:
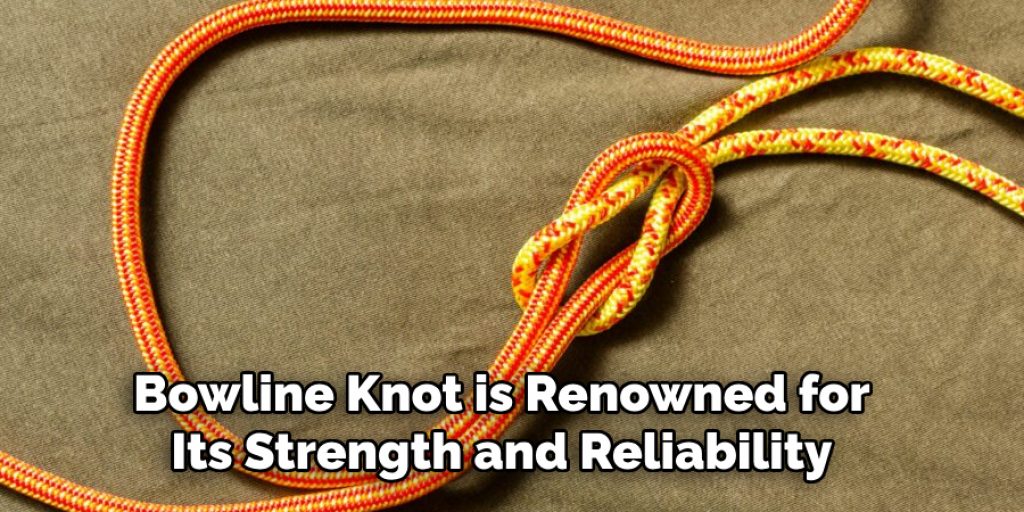
- Start by forming a small loop in the standing part of your rope, leaving enough rope for the desired loop size.
- Pass the free end of the rope up through the loop, around the standing part, and then back down through the loop.
- Tighten the knot by pulling on the free end while holding the rope’s standing part.
- Tip: Remember the saying, “The rabbit comes out of the hole, goes around the tree, and then back down the hole,” to help memorize the steps.
The Bowline is celebrated for its strength, ease of tying, and quickness of untying, even after bearing a heavy load. It’s a versatile knot that, once mastered, opens up numerous possibilities in knot tying.
Step 8: Securing with the Square Knot for Everyday Use
The Square Knot, also known as a Reef Knot, is perfect for tasks that require tying two ends of a rope or string together securely and straightforwardly. This knot is particularly useful for temporarily tying bags, shoe laces, or binding items together. To tie a Square Knot, first, hold one end of the rope in each hand.
Then, tie the left rope over and under the right rope. Repeat this process with what was the right rope, tying it over and under the left. Pull both ends tightly to secure the knot. It’s important to note that while the Square Knot is excellent for many general purposes, it isn’t recommended for situations where safety is critical, as it can slip under certain conditions. This knot’s simplicity and utility make it a fundamental skill in knot tying, easily remembered and applied in various settings.
Step 9: The Sheet Bend for Combining Ropes of Different Sizes
The Sheet Bend is the ideal knot to effectively join two ropes of dissimilar thicknesses. This technique is crucial for situations where you need the strength and length of combined ropes, such as in rescues or securing equipment. Here’s the method to tie a Sheet Bend:
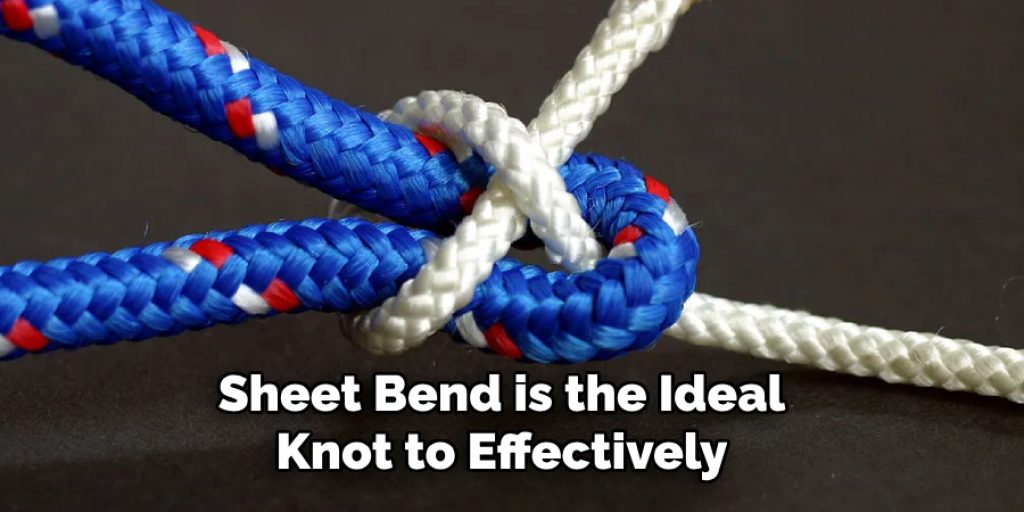
- Start by creating a bight (a U-shaped bend) in the thicker or more stable rope.
- Next, take the thinner rope and pass it through the bight from behind.
- Wrap the thinner rope under the bight’s entire loop, then tuck it under itself.
- Pull both ends to tighten the knot, ensuring it’s secure before applying full tension.
The Sheet Bend is celebrated for its effectiveness in joining ropes of varying diameters, holding firm where other knots might slip or come undone. Its simplicity and reliability make it a go-to technique in the versatile world of knot-tying, essential for adventurers, sailors, and survivalists alike.
Step 10: The Clove Hitch for Quick and Effective Anchoring
The Clove Hitch is a simple yet incredibly effective knot for quickly securing a rope to a post, pole, or another similar structure. Ideal for temporary holds or as a starting point for more complex riggings, here’s how to tie a Clove Hitch:
- Begin by wrapping the rope around the object, such as a post.
- Cross the rope’s working end over the standing part, then wrap it around the object again.
- Tuck the rope’s working end under the last wrap before pulling both ends to tighten the knot against the object.
The beauty of the Clove Hitch lies in its simplicity and ease of untying, even after bearing weight. This knot is fundamental for tasks requiring quick adjustments or temporary attachment, making it an indispensable part of any knot-tying skill set.
By following these ten easy steps, you can confidently learn and apply a variety of useful knots for various purposes.
5 Additional Tips and Tricks
- Practice with Different Materials: Experiment with various types of cords and ropes to discover how each material behaves differently when knotting. Materials like paracord, jute, cotton, and synthetic fibers each offer unique textures and levels of grip, affecting the final look and ease of tying.
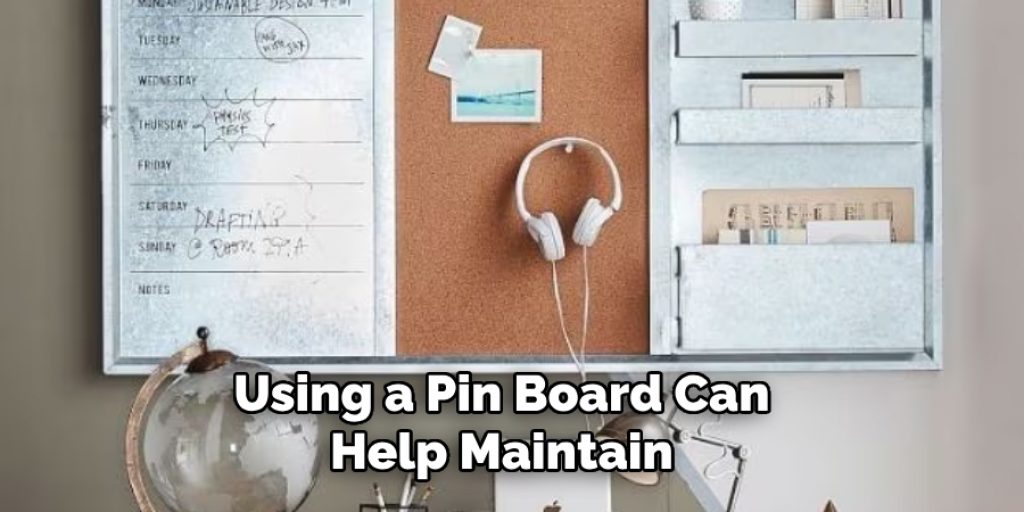
- Use a Pin Board: For complex decorative knots, using a pin board can help maintain tension and keep your work organized. Pins can hold your working loops in place, allowing for more precision and the ability to adjust your work easily before tightening the knot completely.
- Learn the Basics Well: Mastering simple knots and understanding their structure is essential. Skills learned from basic knots like the square knot or the figure-eight knot provide a foundation on which many decorative knots build. This knowledge makes learning advanced patterns more manageable.
- Keep Your Cords Tangle-Free: Prevent frustration by managing your cords efficiently. Use cord organizers or wind your materials onto bobbins or spools. This will keep them from tangling as you work and make it easier to handle longer lengths of cord.
- Watch Online Tutorials: Visual learning can be incredibly helpful for understanding the intricate steps of decorative knotting. There are countless video tutorials available online that can provide step-by-step instructions and demonstrate techniques that might need help to grasp from diagrams or written instructions alone.
With these additional tips and tricks, you can elevate your decorative knotting skills to the next level.
5 Things You Should Avoid When Tying Decorative Knots
- Avoid Rushing Through the Process: Tying decorative knots requires patience and precision. Rushing can lead to mistakes and knots that are uneven or do not hold well. Take your time to ensure each step is completed correctly for the best results.
- Don’t Ignore Knot Tension: Consistent tension is key to creating beautiful, uniform knots. Avoid letting your tension vary too much, as it can make your knots look sloppy and inconsistent. Pay attention to the tightness of each twist and turn for a polished finish.
- Steer Clear of Poor-Quality Materials: Using low-grade cords or ropes can significantly affect the appearance and durability of your knots. Avoid materials that fray easily, have an inconsistent thickness, or are too stiff to work comfortably with. High-quality materials make a significant difference in the outcome of your projects.
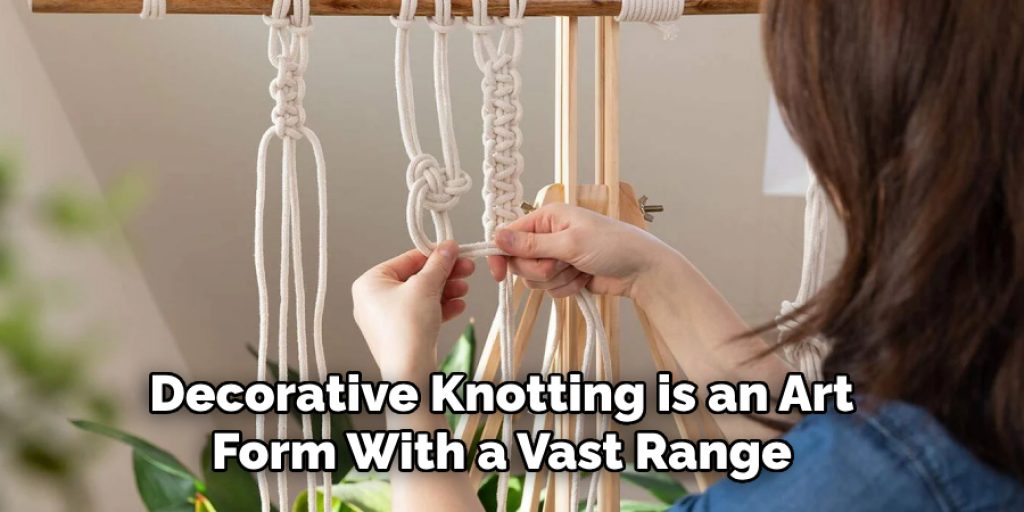
- Remember Continuous Learning: Decorative knotting is an art form with a vast range of techniques and styles. Don’t limit yourself to a small set of knots; avoiding new patterns can stunt your growth and creativity. Regularly challenge yourself with new techniques to improve and expand your repertoire.
- Avoid Working Without a Plan: Starting a project without a clear plan or pattern in mind can lead to frustration and wasted materials. Avoid improvisation when you’re aiming for a specific result. Planning your design and having a clear vision of the outcome can help streamline the process and ensure a successful project.
By avoiding these common mistakes, you can improve the quality and consistency of your decorative knots.
Conclusion
How to tie decorative knots is a fascinating and versatile skill that can be used for both practical and decorative purposes. Whether you’re interested in camping, sailing, or just looking to add some unique touches to your home decor, mastering the art of knot-tying can greatly enhance your repertoire of skills.
By following the steps outlined in this guide and practicing with different materials, you can confidently learn and apply a variety of useful knots. Remember to take your time, pay attention to tension, and use high-quality materials for the best results.
With some dedication and practice, you’ll be able to create intricate and beautiful knots that are sure to impress. So grab some rope or cord, follow these steps, and let your creativity and skill take you to new heights in the world of decorative knotting.


