How to Apply Deck Correct
Would you like to learn how to apply deck Correct? It’s a substance that helps repair and protects decks from weathering, fading, and staining. In this blog post, we’ll provide you with some tips properly. There are a few important things to keep in mind when applying the deck correctly.

You can ensure that your deck looks great and lasts for years by following these steps. First, make sure to sweep the deck’s surface clean and remove any debris. Then, use a brush to apply the deck correctly and evenly. Finally, be sure to follow the directions on the container, and allow the correct to dry completely before using the deck. Keep reading to know more!
What is Deck Correct?
Deck correct is a type of coating that helps repair and protect decks. It comes in various colors and can be applied to both wood and composite decks. Deck correct provides a durable, long-lasting surface that helps prevent weathering, fading, and staining. It also helps to fill in any cracks or small imperfections on the deck’s surface, giving it a smooth and uniform appearance.
You can find deck correct at your local home improvement store or online. Be sure to read the label and choose the correct type for your specific deck material. Additionally, it’s important to note that deck correct should only be applied on dry surfaces with temperatures between 5 and 35 degrees Celsius.
Why Should You Apply Deck Correct?
As a homeowner, you’re always looking for ways to improve your home’s appearance and add value. One way to do both of those things is by applying Deck Correct to your deck. Deck Correct is a special sealant that will protect your deck from the weather and make it look new again.
Here are some reasons why you should apply Deck Correct to your deck:
- First, it will protect your deck from the weather.
- It will make your deck look new again.
- It is easy to use.
- It is affordable.
- You will not have to sand or seal your deck again.
- If you are looking for a way to improve the appearance of your deck and protect it from the weather, then you should apply Deck Correct. It is an easy-to-apply sealant that will make your deck look new again, and it is affordable.
What Things You’ll Need:
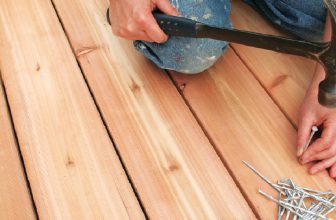
1. Garden Hose:
Before you start applying deck Correct, be sure to thoroughly clean your deck with a garden hose. This will remove any dirt and debris that may have accumulated on the surface. You can also use a power washer for tougher stains. It’s important to have a clean surface before applying the deck correct. The hose is an essential tool to have on hand. You will need this to clean and rinse the deck’s surface before and after applying the deck correct.

2. Broom or Brush:
To ensure that the deck correct is applied evenly, you’ll need a broom or brush to spread it out. The best option would be a wide bristle brush as it covers more area and gets into small crevices. You can also use a roller for larger areas, but a brush will be more effective in reaching tight spots. But don’t worry; even if you can’t reach some areas with the brush, you can always touch up those spots later. The broom or brush will also be used to remove any excess deck correct and ensure a smooth finish.
3. Deck Correct:
Of course, you’ll need the Star of the Show – deck correct? Be sure to choose the right type for your specific deck material. You can find deck correct in various colors, so make sure to pick one that complements your deck. You can also mix colors to achieve a custom shade, but be sure to test it on a small area first before applying it to the entire deck.
4. Protective Gear:
As with any home improvement project, safety should always come first. Be sure to wear protective gear such as gloves, goggles, and a face mask when handling deck correct. This is especially important when sanding or using a power washer. You want to protect yourself from any chemicals or debris that may cause harm.
Step-by-Step Guide: How to Apply Deck Correct
Step 1: Read the Instructions First
It is essential to read the instructions on the Deck Correct container first before starting. This will tell you how much Deck Correct to use and what preparation is necessary before application. You should also take note of any safety precautions and how long the drying time is. It’s always better to be fully informed before starting any project. You can also watch tutorial videos online for a visual guide.
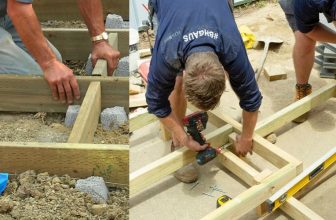
Step 2: Position the Ladder Safely
Before ascending the ladder to begin the job, make sure it is positioned safely. Ladder safety is important, especially if you will be working on a taller deck. Have someone hold the ladder steady while you climb up. The ladder should be on a solid and steady surface, and you should always face the ladder when climbing up or down. It’s also a good idea to have someone supervise you while on the ladder.
Step 3: Start by Cleaning
The first step in applying Deck Correct is to clean the surface of the deck. Next, use a garden hose and a pressure washer to remove any dirt, debris, or loose paint. Be sure to hold the nozzle of the pressure washer at least six inches away from the deck’s surface to avoid damaging it. Let the deck dry completely before moving on to the next step. The surface needs to be completely dry before applying the deck correct. It’s best to wait at least a day for the deck to dry thoroughly.
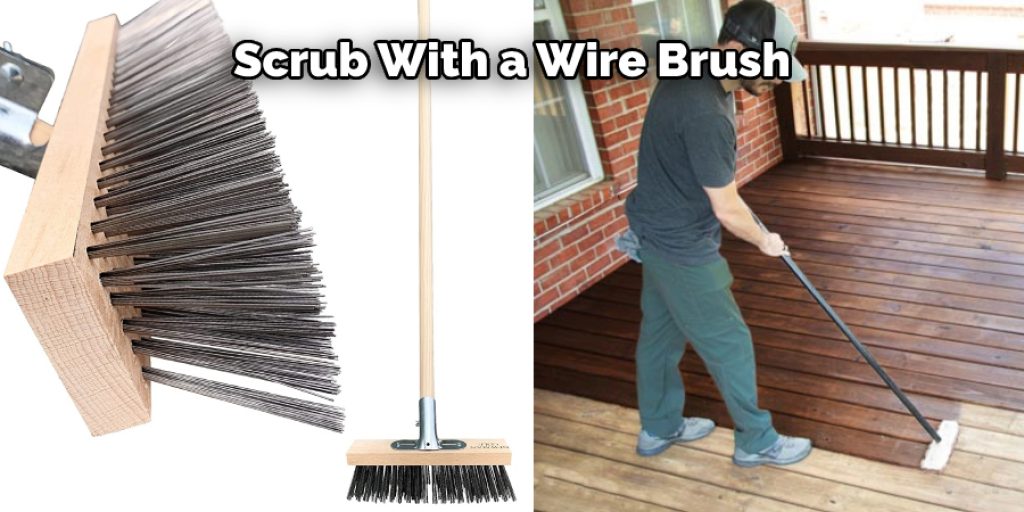
Step 4: Scrub with a Wire Brush
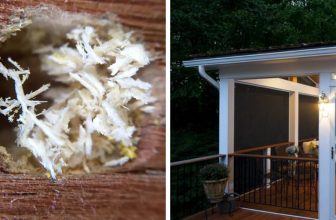
Once the deck is clean, use a wire brush to scrub any particularly dirty areas or stubborn stains. Be sure to brush in the direction of the grain to avoid damaging the wood. You can also use a commercial deck cleaner or a mixture of water and bleach to remove any mold or mildew. Rinse well with the garden hose and let dry completely. The cleaner the deck’s surface, the better the Deck Correct will adhere. You can also use a sanding block for any rough spots or imperfections. But don’t overdo it, as you don’t want to sand off too much of the wood’s surface.
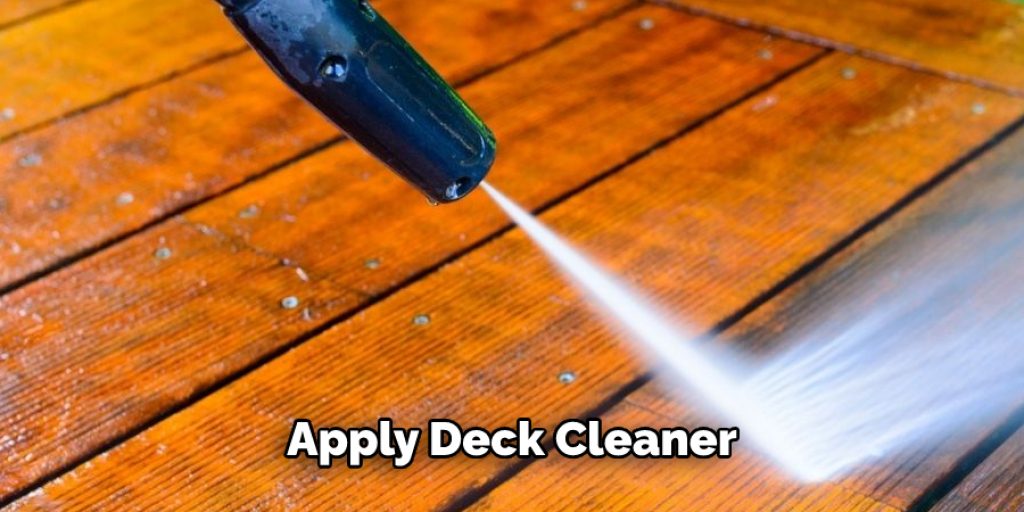
Step 5: Apply Deck Cleaner
Next, mix up a batch of deck cleaner according to the instructions on the container. Use a bucket and a sponge to apply the cleaner to the deck’s surface, working in small sections at a time. Allow the cleaner to soak in for a few minutes before rinsing it off with a garden hose. This will remove any remaining dirt, grime, and stains. It’s essential to let the deck dry completely before proceeding. You can also use a leaf blower to speed up the drying process. You want to make sure the deck is completely dry before applying the Deck Correct.
Step 6: Rinse with a Garden Hose
Once the deck cleaner has been rinsed off, use a garden hose to clean off all residues. Be sure to rinse in the direction of the grain to avoid damaging the wood. If necessary, you can use a scrub brush to remove any remaining dirt or grime. But be gentle to avoid any scratches on the wood. It’s essential to let the deck dry completely before moving on. You can do a spot check to ensure there are no water droplets on the surface. If there are, wait for them to dry before proceeding. You can also use a leaf blower to speed up the process.
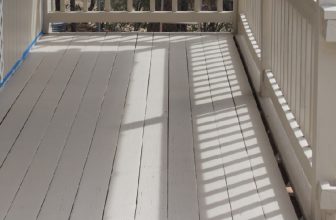
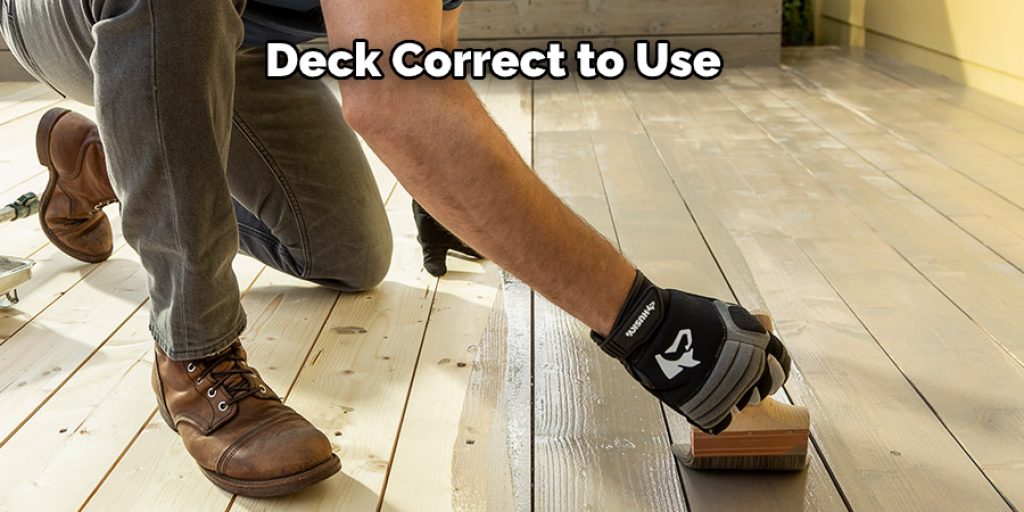
Step 7: Apply Deck Correct
Finally, it is time to apply the deck Correct. Mix up a batch of Deck Correct according to the instructions on the container. Then, pour it into a garden pump sprayer. Begin by spraying the railing and working your way down to the decking boards. It’s essential to work in small sections at a time to ensure the deck correct is applied evenly. If you notice any significant drizzling, use a brush to spread it out evenly.
Overlap each stroke by about six inches. When you finish a section, back-brush the product with a stiff-bristled brush to work it into the cracks and crevices. Allow the Deck Correct to dry for about four hours before walking on it.
That’s it! Your deck is now protected from the weather and will look great for years to come. Follow these simple steps, and you’ll be able to keep your deck in top condition with minimal effort.
Some Tips When Applying Deck Correct:
Here we have given some tips on how to apply the deck correct
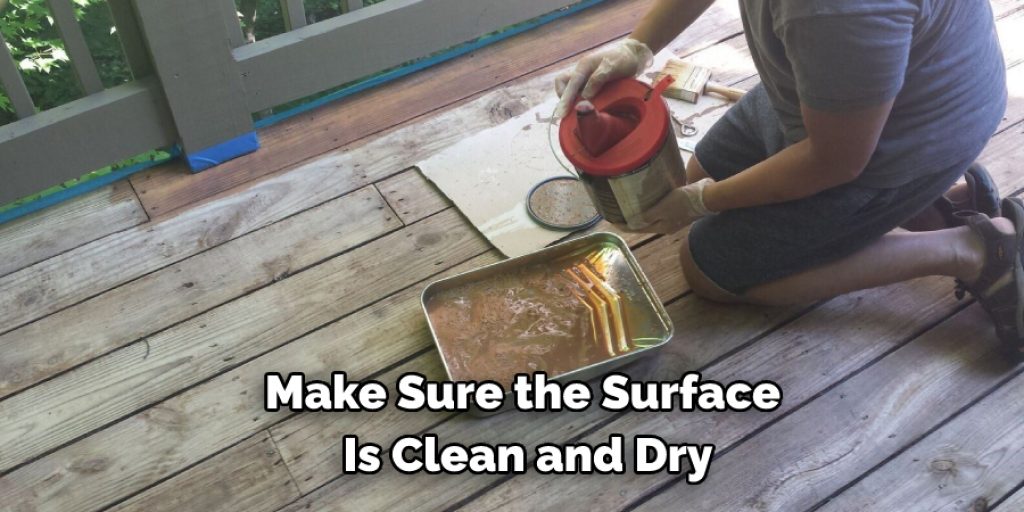
1. Make sure the surface is clean and dry.
2. Apply with a brush or roller in long, even strokes.
3. Feather out any excess product at the edges.
4. Let the product dry completely before walking on it.
5. Apply in temperatures above 50 degrees Fahrenheit.
6. Do not apply in direct sunlight.
7. If applying in multiple coats, wait at least four hours between coats.
How to Use Cabot Deck Correct?
Cabot Deck Correct is a deep-penetrating stain that revitalizes old, worn-out decks and makes them look new again. It is easy to apply, dries quickly, and lasts for years.
Here are simple instructions on how to use Cabot Deck Correct:
Step 1: Clean Your Deck
The first step is to clean your deck. You can use a power washer, but be careful not to damage the wood. If you don’t have a power washer, you can rent one from your local hardware store. Mix one cup of household bleach with three gallons of water and use a pump sprayer to apply it to the deck. Scrub the surface with a stiff brush, then rinse thoroughly.
Step 2: Apply Deck Correct
Once your deck is clean, it’s time to apply the deck Correct. You can use a brush, roller, or pump sprayer to apply the stain. Make sure to coat the entire surface evenly. Use a brush to work the product into cracks and crevices. If you’re working in sections, make sure to overlap each stroke by about six inches. You can use a wood block or putty knife to feather out any excess stain at the edges.
Step 3: A Roller or Brush
If you’re using a roller, go with a 3/8-inch nap or less. If you’re using a brush, use a synthetic bristle brush. Please do not use a natural bristle brush, as it will shed bristles into the stain. It’s best to have a separate brush for the stain and one for back brushing. But if you use one brush, make sure to clean it thoroughly before switching tasks. The back brushing is essential because it helps push the stain into the wood and ensures even coverage.
Step 4: Allow Deck Correct to Dry
After you have applied Deck Correct, you will need to allow it to dry. Depending on the temperature and humidity, this can take 24 to 48 hours. Once it is dry, you can apply a sealant. If you want to apply a second coat, make sure to wait at least four hours between coats. The second coat will provide extra protection and increase the longevity of your deck.
Step 5: Let It Dry
Once you have applied the sealant, you will need to wait for it to dry. This can take up to 24 hours. Once it is dry, your deck will be protected from the elements and ready to use. Enjoy your beautiful, revitalized deck!
Frequently Asked Questions:
Is Deck Correct a Stain or Paint?
Deck Correct is an oil-based product, so it falls into a stain category. There are many different types of stains available on the market, but they all share one common goal: to protect and enhance the natural beauty of wood.
Some stains are water-based, while others are oil-based. The type of stain you choose will depend on the type of wood you are working with and your personal preferences.
What Are the Benefits of Deck Correct?
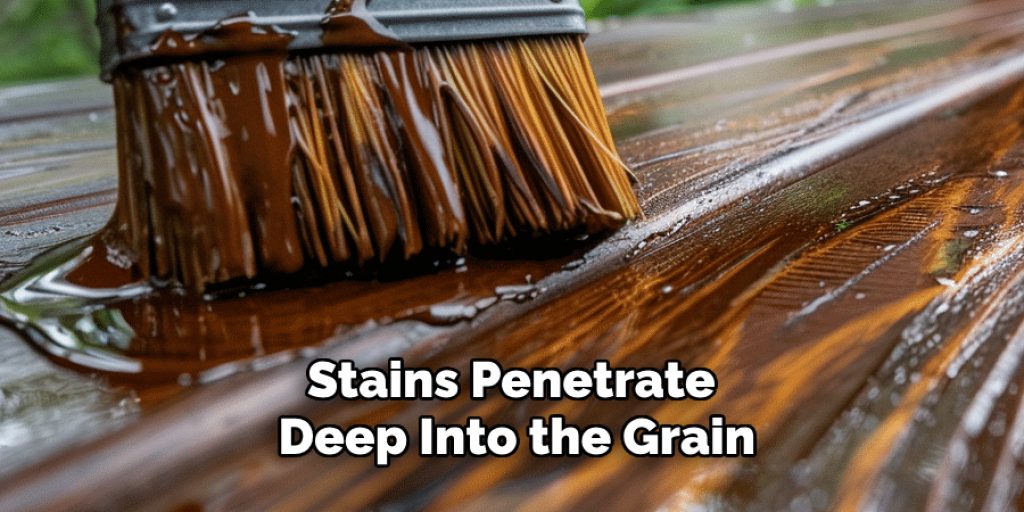
Deck Correct has several benefits that make it a great choice for staining your deck. First, it is an oil-based product, penetrating deep into the wood to protect it from the inside out. It also contains a UV blocker to protect the wood from sun damage, and it is resistant to mildew and mold.
Deck Correct is also very easy to apply. It goes on like thick paint, so it is easy to spread evenly over the surface of your deck. And because it is an oil-based product, it does not require a primer, so you can save time and money by skipping that step.
What is the Difference Between Stain and Paint?
The main difference between stain and paint is that stain is absorbed into the wood while paint forms a protective layer on top of the wood. Stains penetrate deep into the grain to protect and color the wood, while paint covers the surface.
Stain is available in a variety of colors and can enhance the wood’s natural grain. It is perfect for new or old wood and can be applied to decks, fences, siding, and other outdoor surfaces.
On the other hand, paint is available in a variety of colors and finishes. It is perfect for hiding imperfections in the wood and protecting it from the elements. If you are looking to refresh the look of your deck, the stain may be the better option.
What Kind of Paint Do You Use on a Wood Deck?
Paints contain mildewcides, which help prevent the growth of mold and mildew on the deck’s surface. These paints also have a higher level of UV protection to help keep the paint from fading in the sun. When choosing paint for your deck, select one that is specifically designed for decks.
Oil-based paints are generally more durable and longer-lasting than latex-based paints. However, they are also more difficult to apply and require more coats. On the other hand, latex-based paints are easier to apply and usually only require one or two coats. However, they also tend to be less durable than oil-based paints.
Conclusion:
Deckbuilding is an essential part of Magic, and it can be tricky to get right. This can be a daunting task, but with the right information and careful planning, it can be a fun project that adds value to your home.
We hope you have found this guide on how to apply deck correct helpful and that you will follow our tips to create a beautiful and long-lasting deck for your home. Do you have any other questions about how to apply the deck correctly? Let us know in the comments below.
Angela Ervin
Angela is the executive editor of DIY quickly. She began her career as an interior designer before applying her strategic and creative passion to lifestyle and home. She has close to 15 years of experience in creative writing and online content strategy for housekeeping, home decorations as well as other niche efforts. She loves her job and has the privilege of working with an extraordinary team. She lives with her husband, two sons, and daughter in Petersburg. When she's not busy working she spent time with her family.