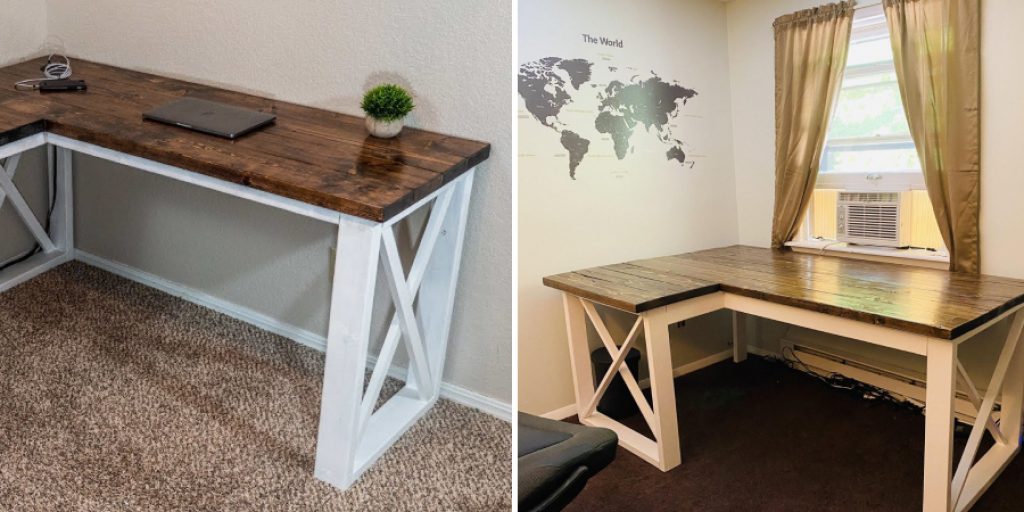
How to Make a Corner Desk
Do you have an empty corner in your home that’s begging for something useful? Look no further than building a custom corner desk! Not only will it make the perfect addition to any room, but it will also give you a personalized workspace for all of your day-to-day tasks.
This blog post will walk you through all the steps needed how to make a corner desk from scratch. You’ll learn which tools and materials are required, as well as some handy tips along the way. So if you’re looking to upgrade your home office or DIY workspace, this is definitely the project for you!
Essential Materials That You Will Need
Given below are all the materials that you will need to make your custom corner desk:
• Wood
You will need a wooden board or plywood of any size, depending on the size of the desk you want to make.
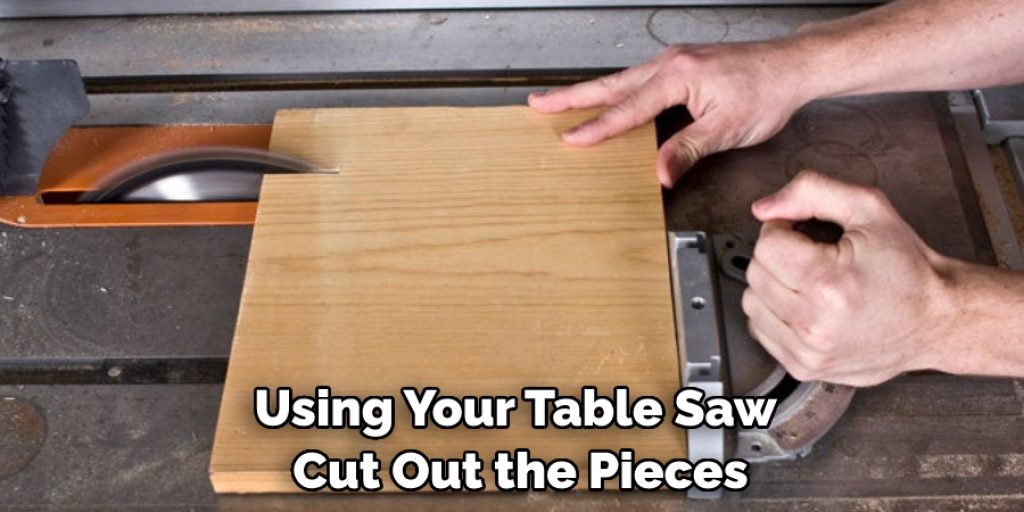
• Table saw
You will need a table saw to cut out the shape of your desk.
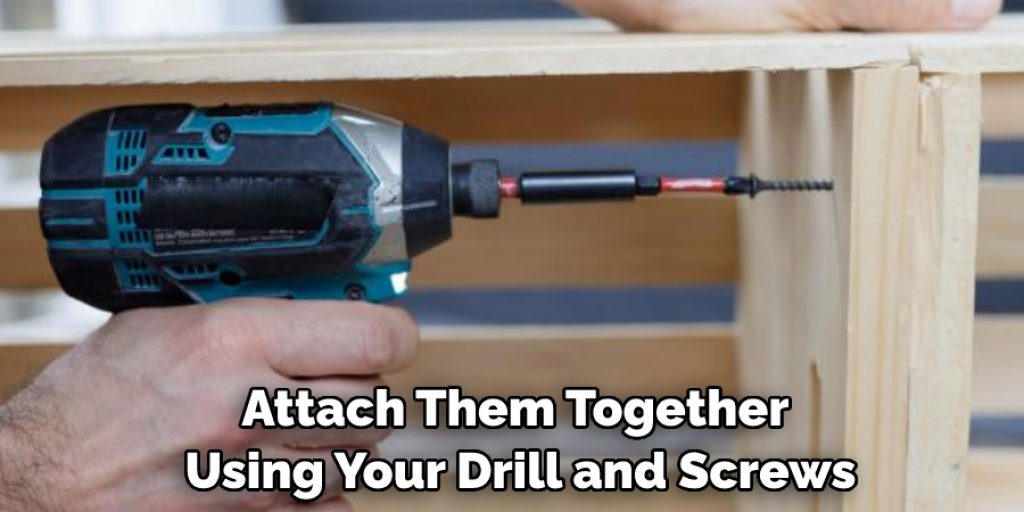
• Drill and screws
You will need a drill and screws to attach the pieces together.
• Sandpaper
To make the surface of your desk smooth and even, you will need some fine grade sandpaper.
• Stain or paint (Optional)
If you want to give your desk a personal touch, you can use a stain or paint to make it unique.
• Foam brush (Optional)
A foam brush can be used for staining or painting the wood.
Step-by-step Guidelines on How to Make a Corner Desk
Step 1: Measure the Room Corner:
Measure the corner of the room that you want to use for your desk. This will be the area where you’ll build your desk and should give you a better idea of how much wood to purchase. It’s important to get the measurements right, so take your time and be precise. Make sure to also measure the area around the corner desk to ensure that there won’t be any obstructions when you build it.

Step 2: Purchase Your Wood:
Head to your local hardware store and purchase a piece of wood or plywood that will fit in your measured corner space. Make sure to get extra wood than what you need, so you have enough for any mistakes or mishaps during building. You can also use scrap wood if you have some lying around. It’s important to get good quality wood that won’t break easily. But also remember to look for wood that’s within your budget.
Step 3: Cut Out The Desk Pieces:
Using your table saw, cut out the pieces of wood for your desk according to the measurements from earlier. If you plan on including drawers in your design, make sure to leave enough space between each piece. You can also use a jigsaw if needed. If you make any mistakes, don’t worry. Just use some sandpaper to smooth out the edges and start over again.
Step 4: Attach The Pieces Together:
Once you have the pieces cut out, it’s time to attach them together using your drill and screws. Make sure that all the pieces fit tightly together and that there are no gaps between each board. If you find any gaps or misalignments, make sure to adjust them before securing the pieces with screws. So that’s it! Your custom corner desk is now ready to be used.
Step 5: Sand Down The Desk Surface:
Using your sandpaper, sand down the entire surface of your desk until it’s even and smooth. This will help ensure that your desk looks professional and will last for years to come. However, you can skip this step if your wood is already smooth. But make sure to check it first, just in case. It’s better to be safe than sorry! Remember to also sand down any rough edges that you may have accidentally created while cutting the wood.
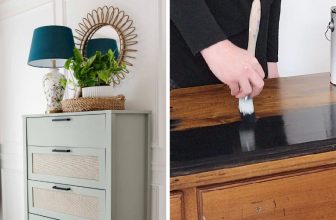
Step 6: Stain or Paint Your Desk (optional):
If you want to add a personal touch to your desk, you can stain or paint it. Use the foam brush to apply the finish of your choice and make sure to cover every area evenly. Then, let the stain or paint dry before you use it. It’s important to use a good quality finish that will protect your desk from scratches and other damage. If you decide to go with a darker finish, make sure to also apply a few coats of clear sealer for extra protection.
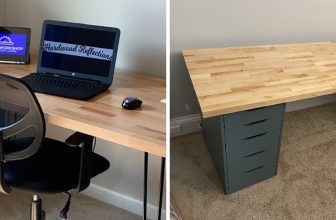
Step 7: Add The Legs To Your Desk:
Once the surface of your desk is dry, you can now add the legs. You can use either metal or wooden legs for this project, depending on what look you’re going for. Attach them securely with screws and ensure that they are firmly placed before moving on to the next step. Before you know it, your desk is ready to be used! Make sure to also check the stability of your desk before you start using it.
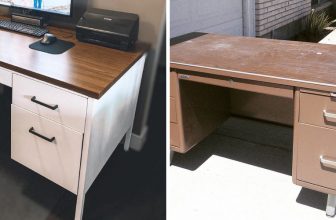
Step 8: Add Drawers (Optional):
If you want drawers in your corner desk, now is the time to attach them. Make sure to measure out where each drawer will go and attach them securely with screws. It’s important to use quality drawer slides so that the drawers will function properly. If you need help with this step, there are plenty of tutorials online that can show you how to do it. You can also buy drawer slides that will fit perfectly on your desk.
Step 9: Add Any Additional Features (Optional):
If you want to add any additional features such as shelves or cable management systems, now is the time to install them. Make sure that everything fits correctly and is secured tightly before moving on to the next step. But that’s it! You have now successfully built your own corner desk and can start enjoying it in no time. But remember to always keep safety in mind while building furniture, especially when using tools.
Step 10: Clean and Polish Your Desk:
Once all of your features are installed, it’s time to give your desk a good clean and polish. Use a damp cloth to wipe off any dust or dirt from the surface and use furniture polish or wax to make it shine. That’s it! You have now completely finished your corner desk. Enjoy the fruits of your labor and start using it right away.
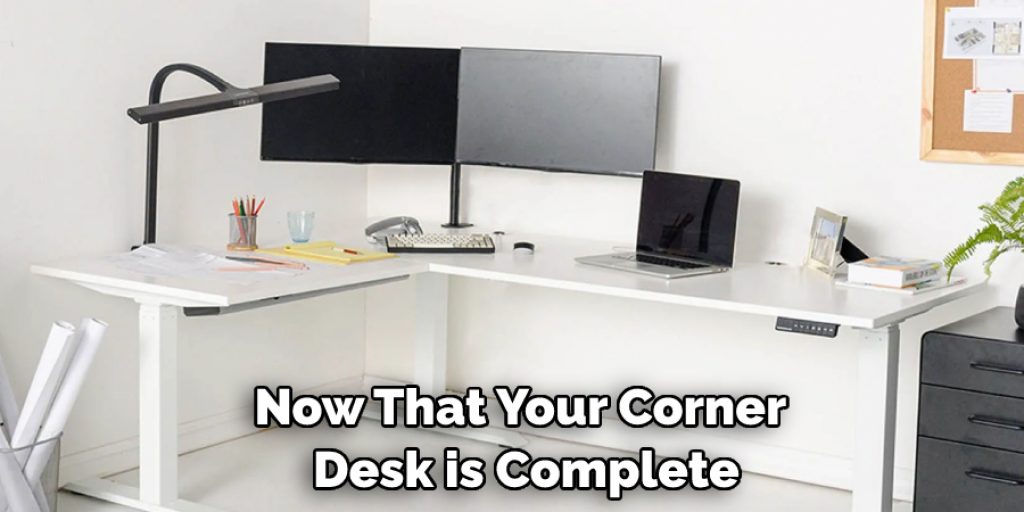
Step 11: Move Your Corner Desk Into Place:
Now that your corner desk is complete, you can move it into its place in the corner. Make sure to lift the desk correctly and have someone help you if needed. It’s also important to make sure that the area around your desk is clear of any obstacles. Once it’s in place, you’re all set! Your corner desk is now ready to be used. Be sure to enjoy the satisfaction of having built something with your own two hands!
Step 12: Enjoy Your New Corner Desk:
Now that your corner desk is set up, it’s time to enjoy it! Fill it with all of your work items and decorations to make it feel like home. So take a look at your masterpiece and enjoy the fact that you built it yourself. Making your own corner desk can be an incredibly satisfying experience, so be sure to take pride in your accomplishment. And don’t forget, you can always make changes or add features to your desk if you ever want to! Enjoy your desk and have fun with it.
Congratulations! You now know how to make a corner desk. With some patience and attention to detail, you can create a beautiful desk that will last for many years to come.
Do You Need to Use Professionals?
In some cases, you may need to hire professionals to help with making your corner desk. However, if you follow the steps outlined above and take the time to research the materials and tools you need, you can make a beautiful corner desk with your own two hands. So get started today and enjoy the satisfaction of making something with your own two hands! Good luck!
Frequently Asked Questions
Q: How Long Does It Take to Make a Corner Desk?
A: The time it takes to make a corner desk varies depending on the size of the desk and the complexity of the features you plan to add. However, on average it should take anywhere from 4-6 hours for an experienced DIYer.
Q: How Much Does It Cost to Make a Corner Desk?
A: The cost of making a corner desk also varies depending on the type of materials and tools you use. Generally speaking, it should cost anywhere from $50-$100 for the basic materials and hardware required to build the desk.
Q: What Tools Do I Need To Build a Corner Desk?
A: The tools you need to build a corner desk will depend on the type of desk you decide to make. Generally, the following tools are required: a drill, saw, screwdriver, sandpaper, and measuring tape. You may also need additional tools such as clamps or chisels depending on the complexity of your project.
Conclusion
We hope that this blog post on how to make a corner desk gave you the confidence and knowledge to make your own corner desk. Crafting furniture is a great way to save time and money while adding a unique dynamic to any room in your house. Plus, it’s incredibly rewarding to have those pieces in your home that you created yourself with your own hands.
Building a functional piece like a corner desk requires determination, but all components are easy enough for novices to tackle with minimal experience and basic tools. So don’t be intimidated, even if you’re a beginner! If it’s something you want to do, give it a try – you might surprise yourself with what you can create!
Do you have an empty corner in your home that’s begging for something useful? Look no further than making your own wonderful corner desk – we promise the effort will definitely be worth it!
Angela Ervin
Angela is the executive editor of DIY quickly. She began her career as an interior designer before applying her strategic and creative passion to lifestyle and home. She has close to 15 years of experience in creative writing and online content strategy for housekeeping, home decorations as well as other niche efforts. She loves her job and has the privilege of working with an extraordinary team. She lives with her husband, two sons, and daughter in Petersburg. When she's not busy working she spent time with her family.