
How to Block Knitting
Knitting is a craft that provides endless possibilities for creativity and garment making. But when it comes to finishing your knitting projects, a crucial step can make all the difference in the final result: blocking your work.
Maybe you’ve heard of blocking but don’t know where to start, or perhaps you’ve tried it before but didn’t get the desired result. No worries – in this article, we’ll guide you through how to block knitting so you can achieve a professional-looking finish every time.
Can You Block Knitting?
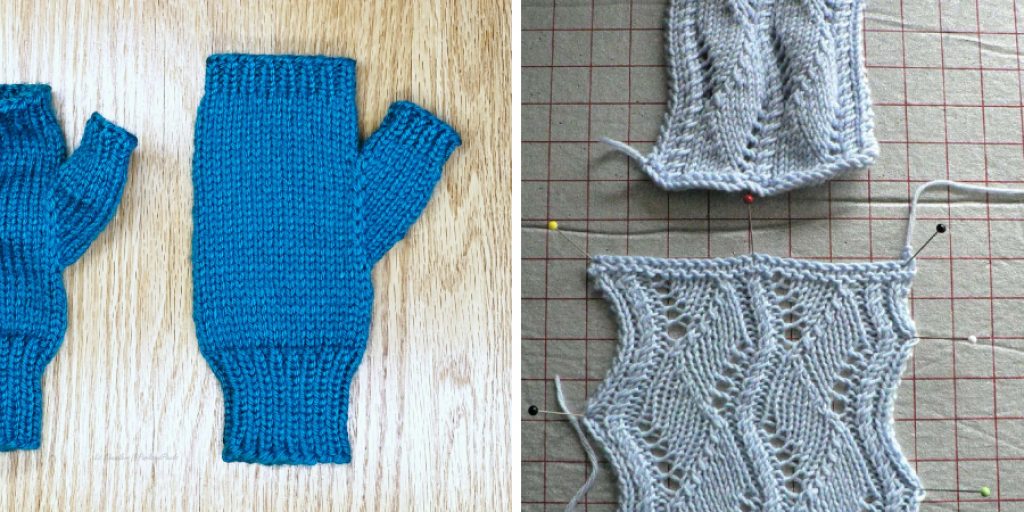
Knitting is a popular hobby enjoyed by many individuals of all ages and backgrounds. But what happens when you hit a snag with your project? Can you block knitting to fix any imperfections? The answer is yes! Blocking is a technique used to shape and smooth out your knitted fabric.
With just a few simple steps, you can even out your stitches and give your finished product a polished look. Whether you’re a seasoned knitter or just starting out, learning to block your knitted items is a skill worth mastering. So don’t be afraid to embrace the process and take your knitting to the next level.
Why Should You Block Knitting?
Knitting is a beloved pastime for many, but have you considered the benefits of blocking your finished knitting projects? Blocking involves gently washing and reshaping your item to maintain its desired shape and size. By blocking your knitwear, you can smooth out any lumps or bumps, even out the stitches, and allow the fabric to drape beautifully.
Additionally, blocking can help your garment last longer by reducing wear and tear on the fibers. So, next time you finish a knitting project, take the extra time to block it – you won’t regret the stunning results!
How to Block Knitting: Simple Steps to Make Your Projects Look Professional
1. Understand What Blocking Means
Before diving into the actual blocking process, it’s essential to understand what it means and why it matters. Blocking refers to shaping and setting your knitting work to its final measurements. It helps even out stitches, open up lace patterns, and create a smoother finished fabric. Blocking can be done with natural and synthetic fibers and is an excellent way to improve the drape and fit of your knitted pieces.
2. Choose Your Blocking Method
There are different ways to block your knitting, and your chosen method will depend on your project’s fiber content, desired results, and personal preference. Wet blocking is the most common and traditional method, which involves soaking your knitting in lukewarm water, rolling it in a towel to remove excess moisture, and then pinning it to a blocking board or mat to dry.
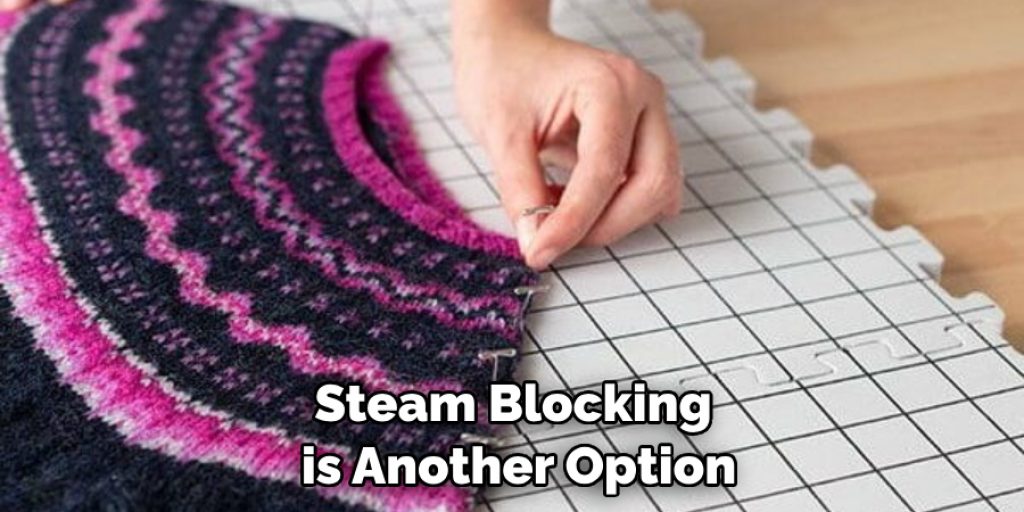
Steam blocking is another option that involves using a steam iron or handheld steamer to apply moisture and heat to the knitting while shaping it. Some knitters also use spray blocking, spritzing water onto the knitting and then pinning it down on a flat surface.
3. Gather Your Blocking Supplies
Regardless of the blocking method you choose to use, there are some essential tools that you’ll need to have on hand. First and foremost, you will need a surface to pin your knitting project onto. A foam-blocking mat or a bed covered with towels can work well. You’ll also need rustproof T-pins or blocking wires to secure the knitting.
Many knitters swear by a water-filled spray bottle, which can be used for both wet and spray-blocking methods. Finally, a tape measure and a ruler can be useful for ensuring that your work is blocked to the desired measurements.
4. Follow Blocking Instructions for Your Specific Project
Some knitting patterns will include blocking instructions within the pattern or in a separate section. Always refer to these instructions to determine the best blocking method for your project and recommended measurements and drying times. If your pattern doesn’t include blocking instructions, you can follow general guidelines for blocking your type of fiber. For example, wool can handle more aggressive blocking than cotton or silk.
5. Fine-Tune Your Blocked Knitting
Once your knitting project is dry and unpinned, you may notice some uneven areas or edges that need refinement. This is your chance to fine-tune your blocking. You can use a steam iron to smooth out any bumps or waves in the fabric or gently tug and reshape areas that are still not flat. Be cautious not to stretch the fabric too much, or you may lose its shape entirely.
6. Let Your Knitting Rest
After you’ve finished blocking and fine-tuning your knitting project, it’s important to allow it to rest for a few hours up to a day or two before wearing or using it. This will give the fabric time to settle into its new shape and ensure that your hard work won’t be undone or distorted.
7. Enjoy the Results of Your Hard Work
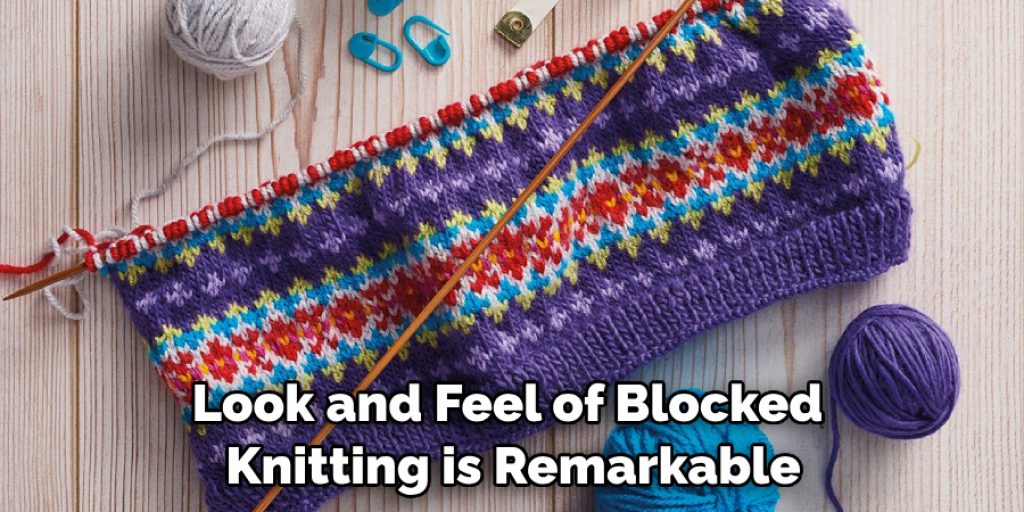
Once your knitting project has rested, it’s time to enjoy the results of your hard work. The difference in the look and feel of blocked knitting is remarkable. It can transform an ordinary piece into something special that looks professionally made—all thanks to a few simple steps. So, don’t be afraid to try blocking and discover the magic of crafting beautiful, expertly shaped projects. Happy knitting!
That’s it! You’ve now learned how to block knitting and have the steps to follow for success. Get started on your next project and enjoy the results of your hard work!
5 Considerations Things When You Need to Block Knitting
1. The Type of Yarn
The type of yarn you use will have a big impact on how your finished project looks. If you want a softer, more draping fabric, choose yarn from natural fibers like wool or cotton. If you want a sturdier fabric that will hold its shape better, choose a synthetic fiber like acrylic or polyester.
2. The Weight of the Yarn
The weight of the yarn you use will also affect the finished project. Heavier yarns like worsted weight and chunky weight will result in a thicker, warmer fabric, while lighter yarns like sport weight and fingering weight will result in a thinner, cooler fabric.
3. The Needle Size
The needle size should match the weight of the yarn you’re using. Heavier yarns require larger needles, while lighter yarns require smaller needles. Using the wrong needle size can result in an unfinished project that is too loose or tight.
4. The Gauge
Gauge is the number of stitches and rows per inch that you knit. It’s important to match the gauge of your project to the gauge specified by the pattern so that your finished project is the correct size. If your gauge is too loose, your project will be too big; if your gauge is too tight, your project will be too small.
5. The Pattern
When you’re ready to start knitting, it’s important to choose a pattern that is appropriate for your skill level. If you’re a beginner, look for patterns labeled “easy” or “beginner-friendly.” These patterns will have simple stitch patterns and minimal shaping. As you become more experienced, you can tackle more complex patterns with intricate stitch patterns and more detailed shaping.
Benefits of Block Knitting
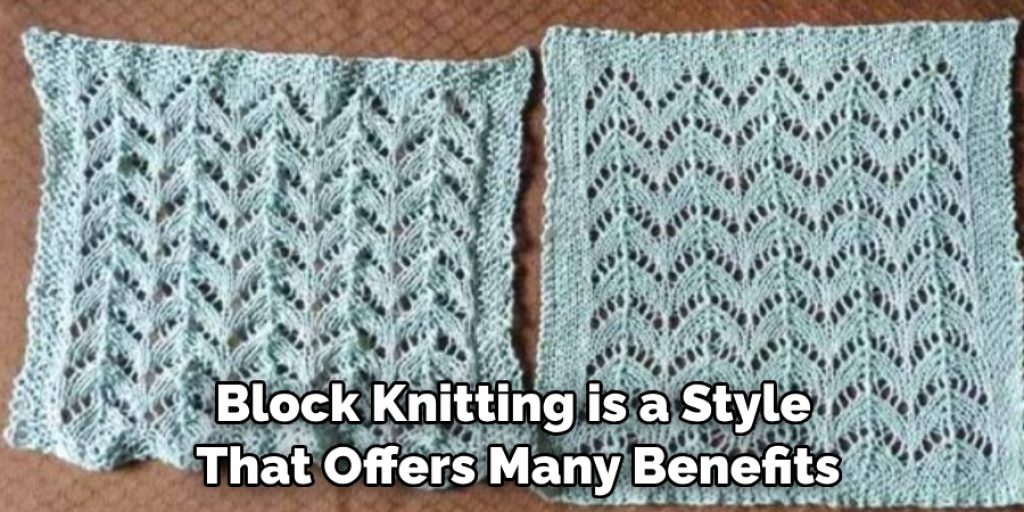
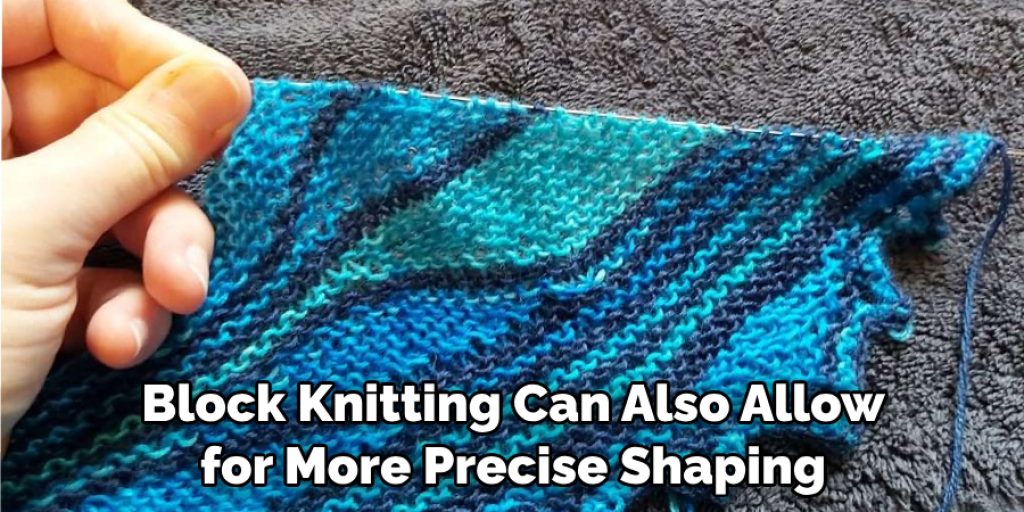
Block knitting is a style that offers many benefits for those who practice it. Not only can it produce beautiful and intricate designs, but it also allows for easier management of larger projects. Block knitting divides the work into manageable sections, making it easier for knitters to keep track of their progress and spot mistakes before they become bigger problems.
Block knitting can also allow for more precise shaping and sizing of objects like blankets and garments, resulting in a final product that is both beautiful and functional. So if you’re looking to up your knitting game and make things a little bit easier on yourself, block knitting is worth considering.
Some Common Mistakes People Make When Trying to Block Knitting
Knitting is a fun and rewarding hobby that allows you to create beautiful and unique clothing and accessories. However, even experienced knitters can sometimes make mistakes when trying to block their knitting. One common mistake is using the wrong blocking method for the type of yarn or stitch pattern being used. Another mistake is not allowing the knitting to dry completely before removing the pins or weights used during blocking.
To avoid these and other common mistakes, it’s important to take the time to research the best blocking techniques for your particular project and to follow the instructions carefully. With patience and attention to detail, you can achieve perfectly blocked knitting every time.
Conclusion
Blocking your finished knitting project is a simple process that can take your work from okay to exceptional. By taking the time to understand what blocking means, choosing the right method, gathering the proper supplies, following instructions, and fine-tuning your work, you are sure to have professional-looking results every time. Thanks for reading our post about how to block knitting.
Nancy Behan
Nancy is an embroidery artist, fashion blogger and a full time editor at DIY quickly. Nancy edits the fashion section on DIY quickly, focusing on the embroidery and cross stitch articles, alongside with fabric and other costume design elements. She graduated from the University of Michigan with a Bachelor of Arts in Art History. She loves to work on her own projects, read books and watch romantic movies in her spare time.


