How to Make a Floral Arch Without Foam
How to make a floral arch without foam is a beautiful way to add a touch of natural beauty to any event, whether it be a wedding, garden party, or special celebration.

This method allows for a more environmentally friendly and sustainable approach to floral design, utilizing fresh blooms and greenery while minimizing waste. This guide will explore the steps and materials needed to craft a stunning floral arch that looks breathtaking and provides a unique, organic aesthetic. As you follow along, feel free to get creative and add your personal touches to make this project truly one-of-a-kind.
With careful planning and a little creativity, you can create a magnificent floral display that will enhance the atmosphere of your gathering and leave a lasting impression on your guests.
What Will You Need?
To make a floral arch without foam, you will need the following materials:
- A sturdy base for your arch such as a metal or wooden frame
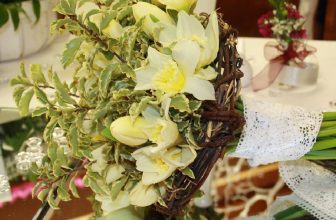
- Fresh flowers and greenery of your choice (consider using locally sourced and seasonal blooms)
- Floral wire or cable ties
- Pruning shears or scissors
- Optional: additional decorative elements such as ribbons, fabric, lights, etc.
It is essential to have all of these materials ready and easily accessible before beginning the project. This will help ensure a smooth process and prevent any delays.
10 Easy Steps on How to Make a Floral Arch Without Foam
Step 1. Prepare Your Workspace:
Creating a floral arch requires a dedicated and organized workspace to streamline the process and keep all materials within reach. Start by selecting a flat surface, preferably outdoors or in a well-ventilated area, where you can comfortably construct your arch. Lay down a drop cloth or old sheets to protect the surface from debris, water, or plant material. Ensure that you have sufficient lighting, as this will help you see the colors and details of the flowers.

Gather all your materials—base frame, flowers, tools, and decorative elements—so they are easily accessible. This preparation will enhance your efficiency and provide a more enjoyable experience as you bring your floral vision to life.
Step 2. Assemble the Base Frame:
Begin by adequately assembling the sturdy base for your floral arch. If using a metal frame, ensure all connections are secure and stable. For wooden frames, check that all joints are tightly fastened. Depending on the size of your arch, you can anchor the base into the ground for added stability, especially if it will be outdoors. Once the frame is secured, place it in the desired location for your arch, ensuring it is positioned where guests can appreciate it but does not obstruct pathways.
Step 3. Prepare Your Flowers and Greenery:
Before attaching anything to the arch, take the time to prepare your fresh flowers and greenery. Trim the stems of each flower at an angle to encourage water absorption and remove any leaves that may fall below the water line. Group your blooms and greenery by type and color for easier access as you begin arranging them. This step will help you visualize the design and ensure a harmonious look.
Step 4. Start with Your Greenery:
Begin the arrangement by attaching greenery to the base frame. Use floral wire or cable ties to secure the stems, interweaving the greenery throughout the frame to create a lush backdrop. Start from the bottom and work your way up, ensuring a balanced distribution. This foundational layer will serve as the framework for the flowers, providing texture and volume.
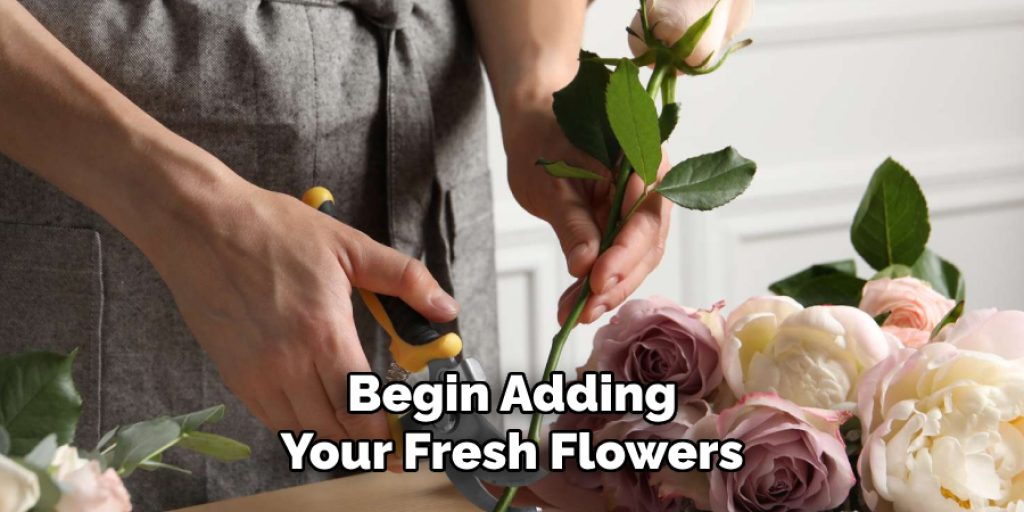
Step 5. Add Your Flowers:
Once the greenery is in place, begin adding your fresh flowers. Starting from the center or one side, attach the flowers to the frame using floral wire or cable ties, angling them outward for a more natural appearance. Layer different types of flowers, playing with varying heights and placements to achieve depth. Continue filling in the arch until you’re satisfied with the arrangement.
Step 6. Incorporate Decorative Elements:
Enhance your floral arch by incorporating decorative elements like ribbons, fabrics, or fairy lights. Drape ribbons along the frame for a romantic touch, or weave in lights for a whimsical effect, especially if the arch will be displayed in the evening. Be sure to firmly secure these elements so they complement the floral arrangement without distracting.
Step 7. Final Touches and Adjustments:
Take a step back and view your floral arch from different angles. This will help you identify areas that need more flowers or greenery. Make adjustments as needed, ensuring that everything appears balanced and visually appealing. Don’t hesitate to trim any stems that are too long or out of place.
Step 8. Hydrate Your Flowers:
Maintaining the freshness and longevity of your floral arch is crucial, especially if it will be displayed for an extended period. Once you’ve completed the arrangement, it’s essential to hydrate your flowers thoroughly. If possible, mist the blooms and greenery with water to immediately boost moisture. For a more extended hydration method, place the entire arch in a shady spot away from direct sunlight for a few hours before your event.

If your design allows, consider placing the stems in a bucket of water while working on other parts of the arch. This keeps the flowers hydrated and allows them time to drink up and perk up, enhancing their appearance before the final reveal. You can also use a floral preservative mixed with water to nourish your blooms, helping them stay vibrant longer while minimizing wilting. By ensuring your flowers are well-hydrated, you enhance the overall beauty of the arch, making it a stunning focal point for your event.
Step 9. Secure the Arch in Place:
Once your floral arch is complete and you’ve made all necessary adjustments, it’s time to secure it in its final location. If the arch is intended for outdoor use, consider driving stakes into the ground and attaching them to the base frame for enhanced stability against wind or movement. For indoor settings, ensure the base is positioned on a sturdy, flat surface that can support the weight of the arrangement.
If necessary, use weights or sandbags discreetly to anchor the structure. Checking the stability of your arch before the event will help ensure it remains a safe and beautiful feature for all to enjoy.
Step 10. Add Personal Touches:
To make your floral arch genuinely unique, consider adding personal touches that reflect the theme of your event or the personalities of those being celebrated. This could include photographs, personalized signs, or even small mementos that have significance to you or your guests.
You can attach these elements to the arch using floral wire or decorative clips, ensuring they are securely fastened and easily removed after the event. Such additions not only enhance the visual impact of the arch but also create a more intimate and memorable experience for everyone involved.

By following these steps, you can create a stunning and personalized floral arch that adds enchanting touch to any event.
5 Different Ways to Use a Floral Arch
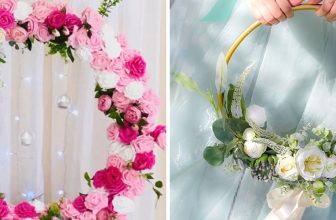
- Wedding Ceremony Backdrop: A classic and popular way to use a floral arch is as a backdrop for wedding ceremonies. It adds an elegant and romantic touch to the setting, creating a beautiful focal point for exchanging vows.
- Photo Booth Backdrop: Using a floral arch as a backdrop for events with photo booths can elevate the photos and create a more aesthetically pleasing background. Guests will love taking pictures in front of the gorgeous arrangement.
- Outdoor Events Decor: A floral arch can add color and charm to the natural surroundings if you’re hosting an outdoor event such as a garden party or picnic. Use it as a picturesque entrance or a feature in the middle of the event space.
- Indoor Decor: A floral arch can also be used for birthday parties, bridal showers, or baby showers. It adds a touch of elegance and whimsy to any indoor setting.
- Wedding Reception Decor: Instead of only using a floral arch during the ceremony, consider repurposing it as decor for the wedding reception. It can be used as a backdrop for the head table or as a photo booth backdrop for guests to enjoy throughout the night.
There are endless possibilities for using a floral arch, making it a versatile and beautiful addition to any event.
5 Things You Should Avoid
- Neglecting the Stability of the Base: Before starting the arrangement, ensure that your base frame is adequately secured and stable. A flimsy or unstable structure can collapse the arch under the weight of the flowers and greenery.
- Using Non-Water-Absorbing Materials: Avoid using materials that do not retain moisture for your floral arch, as this can lead to wilting flowers. Instead, opt for fresh materials that can effectively absorb water or use hydration techniques as detailed in the earlier steps.
- Overcrowding the Design: While filling every inch of the frame with flowers and greenery may be tempting, overloading the arch can lead to a cluttered appearance. Focus on strategic placements that highlight your blooms and create a balanced look.
- Ignoring Weather Conditions: If your arch will be displayed outdoors, be mindful of the weather. Rain, excessive heat, or strong winds can damage your arrangement. Avoid delicate flowers that are prone to wilting under harsh conditions.
- Skipping Regular Maintenance: Once your floral arch is set, remember to check on it regularly, especially if it’s displayed for an extended period. Failing to maintain your arrangement can lead to drooping flowers and an unappealing appearance.

By avoiding these common mistakes, you can ensure that your floral arch remains a beautiful and captivating addition to any event.
Conclusion
How to make a floral arch without foam is not only achievable but also environmentally friendly and cost-effective.
By carefully selecting a stable base, utilizing natural materials, and employing proper hydration techniques, you can design an exquisite arch that showcases your chosen flowers beautifully. Remember to incorporate personal touches and consider the stability of your arrangement, especially in outdoor settings. Regular maintenance will ensure that your floral arch stays vibrant throughout your event.
With creativity and attention to detail, your foam-free floral arch will serve as a breathtaking focal point that enhances the atmosphere of any celebration.
Check it out to Wrap a Stroller Box for Baby Shower
Elizabeth Davis
Elizabeth is a creative writer and digital editor based in the United States. She has a passion for the arts and crafts, which she developed from a young age. Elizabeth has always loved experimenting with new mediums and sharing her work with others. When she started blogging, she knew that DIYquickly would be the perfect platform to share her tutorials and tips. She's been writing for the blog from the beginning, and her readers love her helpful advice and easy-to-follow instructions. When she's not writing or editing, Elizabeth enjoys spending time with her family and friends.