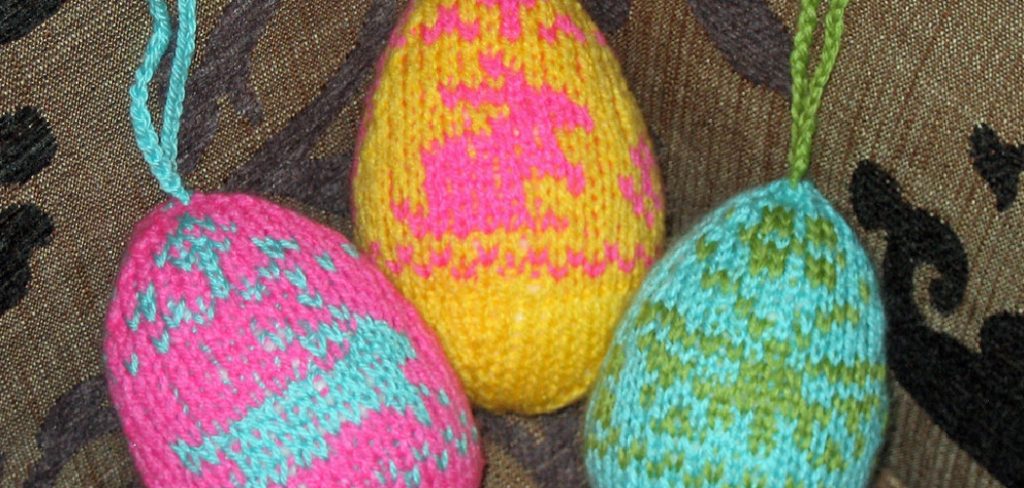
How to Crochet Easter Eggs
Easter eggs have long been a symbol of new beginnings and the celebration of spring. Traditionally, they represent fertility and rebirth, often adorned with intricate designs and vibrant colors. Crocheting Easter eggs is a fun and engaging way to participate in this timeless tradition and allows for personal creativity and craftsmanship. Creating these decorative eggs provides a unique opportunity to explore different patterns and yarn colors, resulting in beautiful, handmade decorations.
In this article, we’ll go through the essential steps on how to crochet Easter eggs, guiding you from the basic techniques to the final touches, ensuring you enjoy every moment of this delightful craft.
Materials Needed
To get started on your crocheted Easter eggs, gather the following materials:
- Yarn: Choose various colors to create a vibrant assortment of eggs.
- Crochet Hook: Select the appropriate size for best results based on your chosen yarn.
- Stuffing Material: Use polyester fiberfill for a soft and rounded finish.
- Tapestry Needle: Essential for sewing in ends and finishing off your eggs neatly.
- Scissors: A must-have for cutting yarn at the end of your project.
The right materials are crucial for achieving the best results and creating beautifully crocheted Easter eggs.
Basic Crochet Stitches and Techniques
Before diving into crocheting your Easter eggs, it’s essential to familiarize yourself with some fundamental crochet stitches and techniques that will be utilized throughout the project.
Chain Stitch (ch)
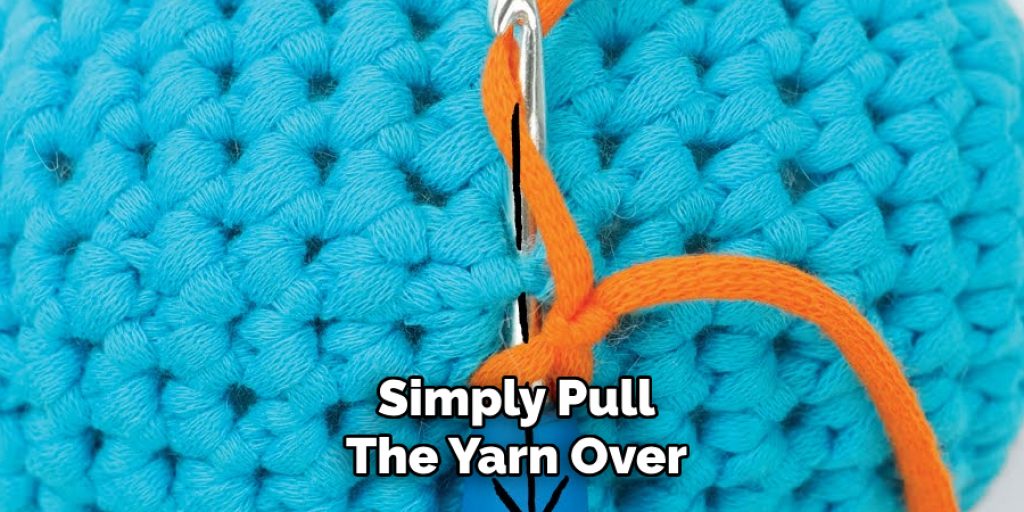
The chain stitch is the foundation of most crochet projects. To create a chain, simply pull the yarn over and pull the yarn through the loop on your hook. Repeat until you have the desired length.
Single Crochet (sc)
The single crochet stitch is versatile and commonly used. To make a single crochet, insert your hook into the stitch, yarn over, and pull through. You will have two loops on your hook; yarn over again and pull through both loops.
Slip Stitch (sl st)
The slip stitch is often used to join rounds or move the yarn to a different part of your work without creating additional height. To make a slip stitch, insert your hook into the stitch, yarn over, and pull the yarn through both the stitch and the loop on your hook.
Magic Ring
To start your egg, a magic ring or adjustable loop allows for a tight center. Begin by wrapping the yarn around your fingers to form a loop, insert your hook into the ring, yarn over, and pull up a loop. Continue crocheting stitches into the ring according to your pattern instructions.
Increasing and Decreasing Stitches
To shape your egg, increasing stitches involves working two or more stitches into the same stitch, while decreasing involves crocheting two stitches together. These techniques will help achieve the desired egg shape, ensuring it tapers gracefully at both ends.
How to Crochet Easter Eggs: Crocheting the Egg Body
1.Starting the Egg
To begin crocheting your egg, create a magic ring to form the base. Start by wrapping the yarn around your fingers to create a loop, then insert your crochet hook into the center of the ring, yarn over, and pull up a loop. Next, chain one and make six single crochets into the ring. Pull the tail of the yarn to close the ring tightly, ensuring no gaps remain. This will serve as the foundation for your egg.

Once you’ve completed the first round, keeping track of your stitch count is crucial. Use a stitch marker to indicate the beginning of each round, as this will help maintain an even shape as you work. After ensuring a solid base, you will proceed to increase the stitch count in the subsequent rounds to shape the egg’s base.
2.Shaping the Egg
Continue crocheting in the round from the base. For the first few rounds, you will increase the stitch count gradually by working two single crochets into each stitch from the previous round. This will create the rounded bottom of your egg. It’s beneficial to note your total stitch count at the end of each round to ensure consistency. For example, if you start with six stitches in the first round, the next round should have twelve stitches, followed by increasing to eighteen in the third round.
As you progress, transition into even rounds where you crochet one single crochet in each stitch without any increases. This will form the middle section of the egg, contributing to its overall shape and size. Keep an eye on the egg’s symmetry during this phase – rotating your work can help identify any uneven spots.
When it’s time to taper the top of the egg, begin decreasing stitches evenly. This involves working single crochet two stitches together to effectively reduce the stitch count while maintaining the egg shape. Gradually decrease until you reach a point where you have a few stitches left. Be sure to keep the final rounds snug, ensuring a smooth and finished look. Also, ensure to step back occasionally and view your work from a distance to double-check its symmetry and shape, allowing you to make adjustments as necessary for a well-crafted egg.
Stuffing and Closing the Egg
Once you’ve reached the desired shape for your crocheted egg, it’s time to stuff it. Carefully insert small amounts of polyester fiberfill, ensuring that you fill each section evenly to maintain the egg’s form. Aim for a balance—avoid overstuffing, which can distort the shape, and under-stuffing, which may leave it floppy. Gently manipulate the stuffing to ensure it reaches all corners and curves.
After filling, you will want to close the egg smoothly. To do this, use a slip stitch technique along the top opening or thread a tapestry needle with the yarn tail and pull it through the remaining stitches, gathering them together. Weave in the ends securely by going through the stitches a few times, ensuring everything stays neatly in place.
Decorating the Crocheted Egg
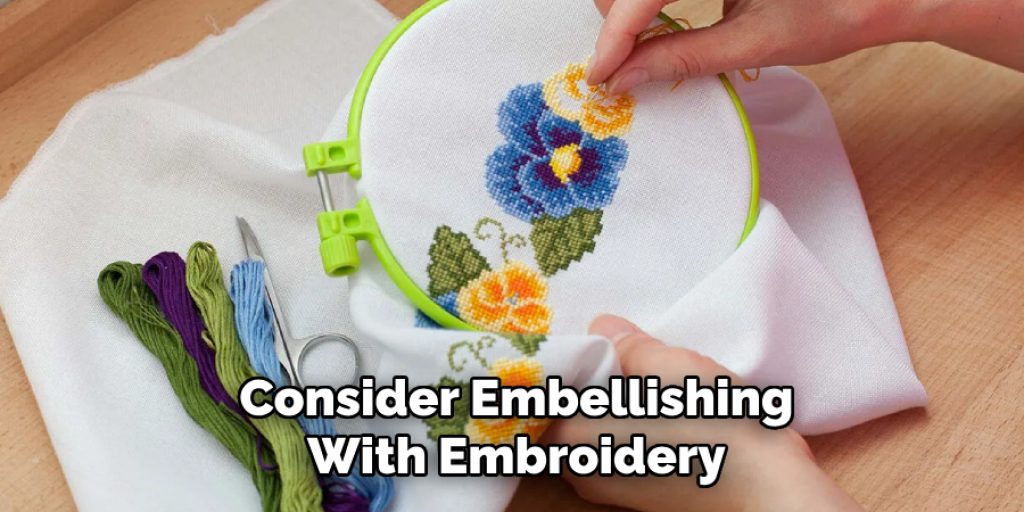
With your egg securely closed, it’s time to add your personal touch. You can create stunning surface details by using contrasting yarns to crochet stripes, dots, or other patterns that complement your egg’s color scheme. For added flair, consider embellishing with embroidery, beads, or sequins, which can transform a simple egg into a striking piece of art.
To truly make each egg unique, experiment with different designs or themes for a coordinating set. Finally, attaching small crochet flowers or bows can provide a whimsical finish, enhancing the charm of your Easter decorations. Let your creativity flow as you design each egg!
Alternative Designs and Variations
Crocheting eggs opens up a world of creativity, and one great way to stand out is by experimenting with multi-colored designs. You can easily create vibrant eggs by using different yarns for each section, enabling you to develop stripes, spirals, or blocks of color that make each egg unique. For those looking to create eggs of varying sizes, adjusting the yarn weight and hook size allows you to make larger or smaller eggs according to your preferences.
Additionally, using different stitches can enhance the texture of your eggs. For instance, incorporating half double crochet or double crochet stitches can provide a plush, raised effect that adds visual interest. Thematic designs are also an exciting avenue; opt for pastel hues to reflect a soft, spring feel or lively bright colors for a more festive vibe. The flexibility in design allows you to craft a collection that resonates with your celebration.
Troubleshooting Common Issues
While crocheting your eggs, you may encounter a few common issues, such as uneven shapes or lumps. If you notice any irregularities, take a moment to assess your tension; adjusting your grip can often resolve these problems. If your egg doesn’t close neatly, gather the remaining stitches tighter using a tapestry needle to create a smoother finish.
For minor mistakes, rather than unraveling the entire project, consider trying to incorporate them creatively into your design or use a slip stitch to close off the area discreetly. Remember, each project is a learning experience, and embracing imperfections often leads to delightful surprises!
Tips for Beginners
When diving into the world of crochet, particularly with how to crochet Easter eggs, starting with simple designs can build your confidence. Practicing with scrap yarn before selecting your final colors allows you to hone your technique without fear of making mistakes. Additionally, keeping stitch markers handy will help you track rounds and increases, ensuring consistency in your work. Remember, patience and practice are key to improving your crochet skills; don’t rush the process, and enjoy each stitch as you learn.

Conclusion
In recap, crocheting Easter eggs involves creating a solid base, shaping the egg, stuffing and closing it, and finally adding personal decorative touches. As you explore various designs, don’t hesitate to experiment—there’s joy in creativity! Remember, creating handmade decorations is a delightful celebration; every finished egg reflects your unique style. Embrace the journey of learning how to crochet Easter eggs, and allow yourself to enjoy the process as much as the finished projects.
Elizabeth Davis
Elizabeth is a creative writer and digital editor based in the United States. She has a passion for the arts and crafts, which she developed from a young age. Elizabeth has always loved experimenting with new mediums and sharing her work with others. When she started blogging, she knew that DIYquickly would be the perfect platform to share her tutorials and tips. She's been writing for the blog from the beginning, and her readers love her helpful advice and easy-to-follow instructions. When she's not writing or editing, Elizabeth enjoys spending time with her family and friends.