
How to Make Teardrop Wreath
Teardrop wreaths are a stunning and versatile addition to any home decor, offering a distinctive shape that sets them apart from traditional round wreaths. Their elegant silhouette makes them perfect for various occasions, from festive holidays to seasonal decor and year-round celebrations.

Whether adorned with vibrant flowers for spring or rich greenery for winter, teardrop wreaths can enhance the aesthetic of any space. In this article, you will learn how to make teardrop wreaths, guiding you through each step of the creation process—from selecting materials to adding the finishing touches. By the end, you’ll understand the charm of teardrop wreaths and be equipped to craft your own unique designs.
Materials and Tools Needed
To create your teardrop wreath, gather the following materials: a grapevine or wire wreath base, floral wire for securing elements, assorted greenery such as evergreen or ivy, and flowers that complement your chosen theme. Decorative elements like ribbons, ornaments, or seasonal accents can enhance its visual appeal.
As for tools, you’ll need wire cutters to trim materials, a hot glue gun for affixing decorations, scissors for clean cuts, and pliers to assist with wiring. Optional materials might include bows to add flair or other seasonal decorations like berries to give your wreath a festive touch.
Planning Your Design
Before diving into creating your teardrop wreath, it’s essential to plan your design carefully. Start by choosing a theme or color scheme that resonates with the occasion or season you’re celebrating. Whether you opt for warm autumn hues, fresh spring pastels, or classic holiday colors, this initial step will inform your material selections. Next, consider the placement of different elements within your wreath.
Visualize where the greenery, flowers, and decorative accents will sit to create a balanced and harmonious arrangement. It can be beneficial to sketch a basic layout or gather inspiration from online resources and craft books; this will help you visualize how the final product might look and ensure a cohesive design. By mapping out your creative vision, you’ll enhance the overall aesthetics of your wreath.
Preparing the Base
With your design planned, it’s time to prepare your wreath base. Begin by shaping your grapevine or wire wreath into a teardrop form, which should have an elongated appearance with a pointed bottom. If you’re using a grapevine base, gently manipulate the vines to achieve the desired shape, while a wire base can be adjusted as needed.

Depending on your materials, you may want to secure the shape with floral wire to ensure it holds. Once shaped, give it a final check to ensure that the base is sturdy and balanced, providing a strong foundation for attaching your greenery and decorative elements later on. This preparatory step is crucial for a successful teardrop wreath that stands out beautifully.
How to Make Teardrop Wreath: Adding Greenery
1.Selecting Greenery
Choosing the right greenery is vital for achieving a vibrant and lush teardrop wreath. You may consider using hardy varieties such as evergreen, which adds durability and a classic touch, or opt for soft textures like eucalyptus for a modern aesthetic. Ivy is another excellent choice, known for its trailing vines that bring a natural flow to your design. Ensure that you cut the greenery to appropriate lengths, typically around 6 to 8 inches, so that they can be easily arranged and secured within the wreath.
When arranging the greenery, pay attention to the overall silhouette and visual balance. Cluster longer pieces towards the bottom of the teardrop and shorter ones toward the top, creating a seamless transition. This will enhance the aesthetic appeal and lay a solid foundation for the flowers and other decorative elements that will follow.
2.Attaching Greenery
To secure greenery to the wreath base effectively, use floral wire to attach each stem firmly. Start by placing larger pieces of greenery at the bottom and layer smaller pieces on top, ensuring a full and lush appearance. As you attach each piece, wrap the floral wire around the stem and the base while holding it securely in place, being careful not to damage the base. To achieve an even coverage, step back occasionally and assess the overall look; this will help you fill any sparse areas.
It’s essential to maintain a balanced appearance throughout—aim for symmetry while embracing a natural, organic feel. Don’t hesitate to adjust the positioning of the greenery as necessary, making sure that the arrangement flows gently and complements the teardrop shape, setting the stage perfectly for the flowers and decorative elements to come.
Incorporating Flowers and Decorative Elements
Choosing Flowers
Selecting the right flowers is essential for enhancing the beauty of your teardrop wreath and ensuring they align with your chosen theme. Begin by identifying focal flowers, typically larger and more visually striking, to serve as the centerpiece of your arrangement—think sunflowers for summer or rich, deep red roses for winter. Pair these with filler flowers such as baby’s breath or small daisies to create depth and vibrancy.
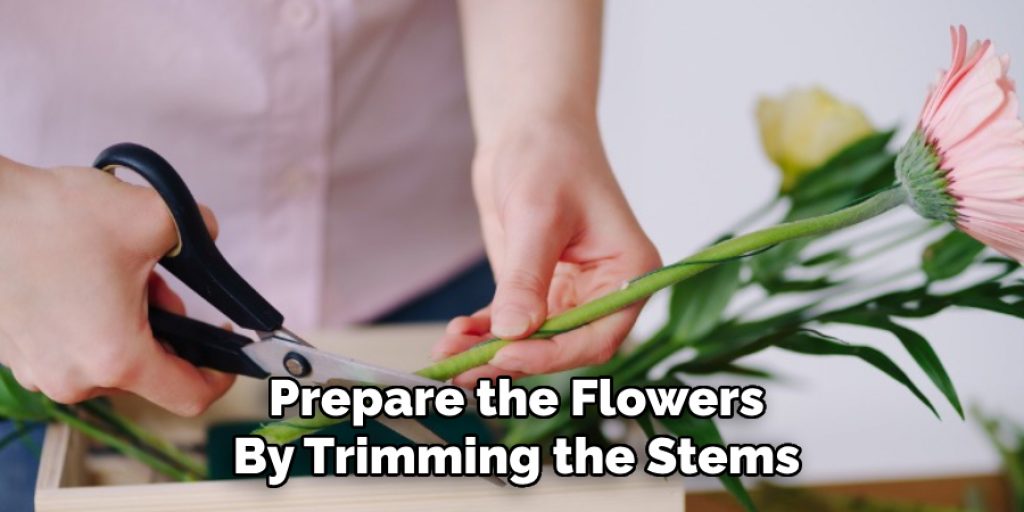
Once you have your selection, prepare the flowers by trimming the stems to about 6 inches long and removing any excess leaves from the lower part of the stems. This step makes for a neater appearance and encourages better water absorption when you start securing them to the wreath. By curating a harmonious mix of flowers, your wreath will bloom with color and charm.
Adding Decorative Elements
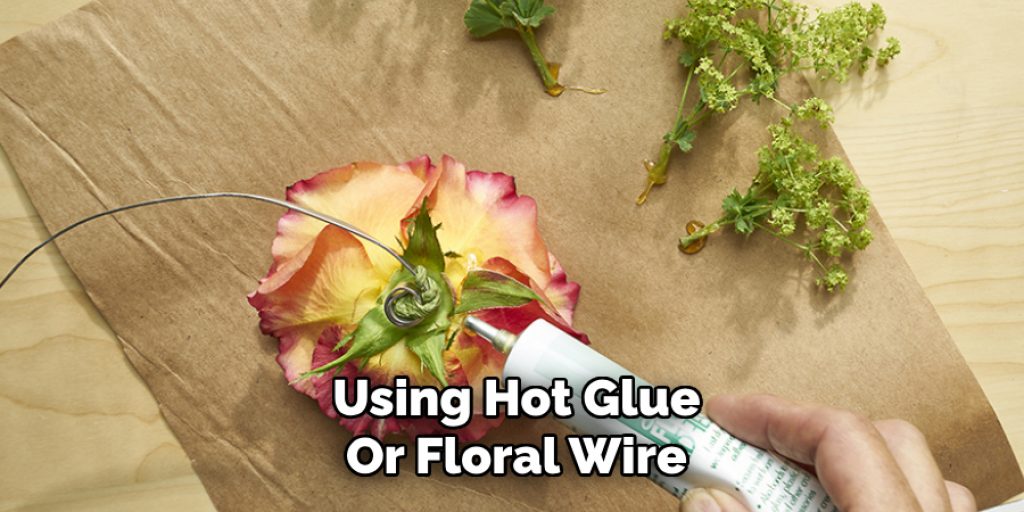
To elevate the visual appeal of your teardrop wreath, consider incorporating seasonal or thematic decorations that resonate with your design. Options include pinecones for a rustic autumn theme, berries for a festive winter look, or delicate ornaments for a whimsical touch. As you add these accents, distribute them evenly around the wreath to ensure balance and cohesion. Secure each element firmly using hot glue or floral wire, taking care to position them in a way that complements the flowers and greenery you’ve arranged.
Step back periodically to assess the aesthetics and make adjustments as needed, ensuring that the decorative elements enhance rather than overwhelm the natural beauty of the wreath.
Creating and Adding a Bow
Choosing the right ribbon is crucial for tying together your design. Look for a ribbon that matches your wreath’s theme, whether it’s a bold plaid for autumn or a delicate satin for spring. To create a bow, start by cutting a length of ribbon, typically around 30 inches. Make two loops, crossing one over the other, and secure the center with a small wire or string. From this point, you can create additional loops for a fuller bow if desired.
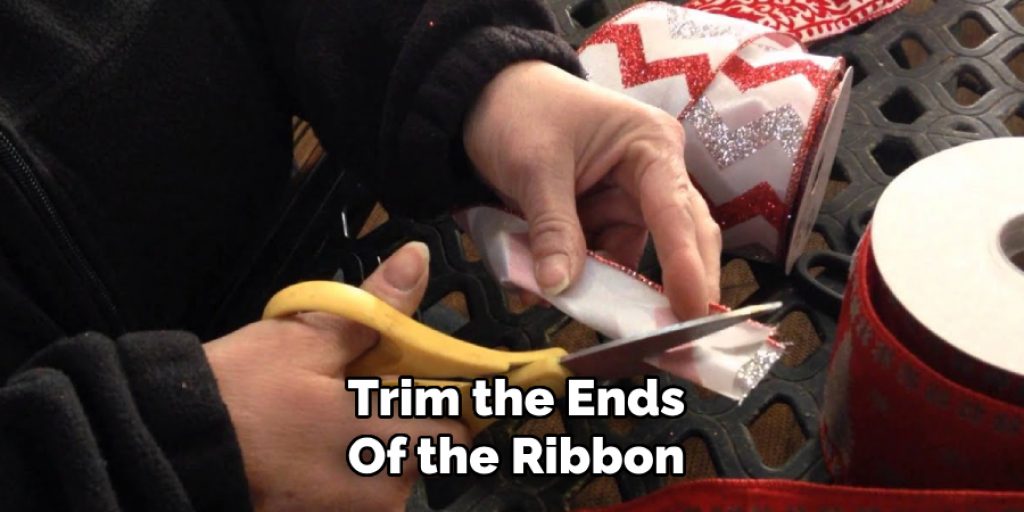
After the desired shape is achieved, trim the ends of the ribbon into a V-shape for a polished finish. Finally, attach the bow to the top or bottom of the teardrop wreath using floral wire or hot glue, positioning it to enhance the overall design. The bow will act as a charming focal point, bringing your wreath to life.
Final Adjustments and Finishing Touches
When your wreath is nearly complete, take a moment to fluff and adjust the greenery and flowers for fullness. Gently lift and reposition any stems that may appear flat or out of place, ensuring a lush, three-dimensional look. Step back to assess the overall composition, making sure each element sits harmoniously within the teardrop shape. Ensure
Hanging the Teardrop Wreath
To hang your teardrop wreath, attach a sturdy loop of floral wire or ribbon to the back. Ensure it is firmly secured, as this will support the wreath’s weight. Choose a suitable location that highlights its beauty—typically on a front door, wall, or above a mantelpiece. To ensure the wreath hangs securely, check that the loop is evenly spaced and adjust its position for visual balance. Lastly, step back and enjoy your wreath’s impact on the space, making any final adjustments to achieve the perfect presentation.
Frequently Asked Questions (FAQs)
1. What Type of Greenery Is Best for A Teardrop Wreath?
For a teardrop wreath, hardy varieties like evergreen provide durability, while softer textures such as eucalyptus give a modern touch. Consider using a mix to achieve a balanced look that reflects your desired aesthetic.
2. How Do I Choose the Right Flowers for My Wreath?
Select flowers based on the season and theme of your wreath. Larger focal flowers, like sunflowers or deep red roses, can create visual interest, paired with smaller filler flowers, such as baby’s breath, for added depth and vibrancy.
3. What Is the Best Way to Secure Decorative Elements onto The Wreath?
You can secure decorative elements using hot glue or floral wire. Distribute these accents evenly for balance and position them to complement the arrangement without overwhelming the greenery and flowers.
4. How Can I Ensure My Wreath Hangs Securely?
Attach a sturdy loop of floral wire or ribbon to the back of your wreath, ensuring it is firmly secured. When hanging, choose a location that showcases the wreath’s beauty and adjust the loop for visual balance so it hangs properly.
Conclusion
In summary, creating a teardrop wreath involves thoughtful steps: selecting and attaching greenery, choosing flowers, adding decorative elements, crafting a bow, and finally hanging your masterpiece. Each stage allows for creativity and personal expression, encouraging you to explore different styles and seasonal themes.
Remember, the process of how to make teardrop wreath is not just about the final product but the joy of crafting and bringing your ideas to life. So, don’t hesitate to experiment with various textures, colors, and shapes, as each wreath you create uniquely reflects your artistic vision. Enjoy the satisfaction of DIY projects and the beauty they add to your home!
Elizabeth Davis
Elizabeth is a creative writer and digital editor based in the United States. She has a passion for the arts and crafts, which she developed from a young age. Elizabeth has always loved experimenting with new mediums and sharing her work with others. When she started blogging, she knew that DIYquickly would be the perfect platform to share her tutorials and tips. She's been writing for the blog from the beginning, and her readers love her helpful advice and easy-to-follow instructions. When she's not writing or editing, Elizabeth enjoys spending time with her family and friends.


