How to Build a Mattress
Building a mattress may seem like a daunting task, but with the right materials and approach, it can be a rewarding DIY project. Whether you’re looking to customize your sleeping surface for improved comfort or simply want to explore an alternative to store-bought options, creating your own mattress allows for a personal touch in your bedroom.

This guide will walk you through the essential steps for how to build a mattress, from selecting suitable materials to assembling your mattress, ensuring you achieve a perfect blend of comfort and support tailored to your needs.
What is a DIY Mattress?
A DIY mattress is a handmade sleeping surface crafted by individuals rather than purchased from a retail store. This approach allows for a high degree of customization, enabling builders to choose materials, firmness levels, and designs that suit their specific sleep preferences and body types. Common materials used in DIY mattresses include foam, latex, natural fibers, and innerspring coils, which can be combined or modified to achieve the desired comfort and support.
Creating a DIY mattress not only gives you the freedom to personalise your sleeping experience but also often results in a more sustainable and cost-effective option compared to conventional mattresses.
Why Build Your Own Mattress?
Building your own mattress offers several distinct advantages that can enhance your sleeping experience. Firstly, personalization is key; crafting your own mattress allows you to select materials and firmness levels that cater to your unique comfort preferences and sleeping styles. This is particularly beneficial for those with specific health needs, such as back pain, where a tailored solution can make a significant difference.
Additionally, DIY mattresses often provide a more sustainable option, as you can choose eco-friendly materials and reduce waste associated with mass-produced mattresses. Cost savings are another compelling reason; by sourcing materials directly and avoiding retail markups, you can create a high-quality mattress at a fraction of the price. Ultimately, building your own mattress empowers you to take control of your sleep environment, ensuring it meets your exact needs and promotes better rest.
10 Methods How to Build a Mattress
1. Choosing the Right Materials
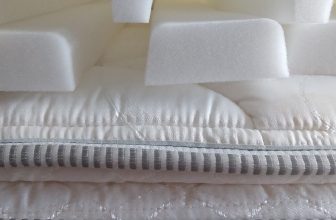
The first step in building a mattress is selecting the right materials. The core components include the support layer, comfort layer, and cover. For the support layer, high-density foam, latex, or innerspring coils are common choices. The comfort layer can consist of memory foam, latex, wool, or cotton.

The cover should be made of breathable, durable fabric such as cotton, bamboo, or a blend. Research the pros and cons of each material to decide which combination will best meet your comfort, support, and durability needs.
2. Determining the Mattress Size
Before purchasing materials, determine the size of the mattress you want to build. Standard mattress sizes include Twin, Full, Queen, and King, but you can customize the dimensions to fit a specific bed frame or space. Measure the area where the mattress will be placed to ensure accuracy. Keep in mind that the size of the mattress will affect the amount of materials you need, so plan accordingly.
3. Creating the Support Layer
The support layer is the foundation of your mattress and plays a crucial role in providing stability and durability. If you choose high-density foam, cut it to the desired size using a sharp knife or electric cutter. For latex, use a serrated knife or electric carving knife for clean cuts. If you prefer an innerspring core, purchase a pre-made innerspring unit and cut it to size if necessary. Ensure the support layer is even and smooth to provide a solid base for the comfort layers.
4. Adding the Comfort Layer
The comfort layer is responsible for the mattress’s feel and comfort. It can consist of one or more materials layered together. For a memory foam comfort layer, cut the foam to size and place it on top of the support layer. If using latex, follow the same procedure. For a more traditional feel, you can add a layer of cotton or wool batting. Layering different materials can enhance comfort and provide a balanced sleeping surface. Secure the comfort layer to the support layer using fabric adhesive or stitching.

5. Constructing the Mattress Cover
The mattress cover encases the entire mattress and protects the internal layers. Choose a durable and breathable fabric for the cover, such as cotton or bamboo. Measure and cut the fabric to fit the dimensions of the mattress, leaving extra material for seams. Sew the fabric pieces together, creating a snug cover for the mattress. If you prefer a removable cover for easy washing, add a zipper along one side. Ensure the cover is well-fitted to prevent shifting or bunching during use.
6. Quilting the Mattress
Quilting adds an extra layer of comfort and durability to the mattress. It involves sewing the cover and comfort layers together with a layer of batting in between. Place the batting on top of the comfort layer, then cover it with the fabric for the mattress cover. Use a sewing machine to quilt the layers together, creating a pattern that secures the batting in place. Quilting helps distribute weight evenly and prevents the internal layers from shifting.
7. Securing the Layers
Securing the layers together ensures the mattress remains stable and durable over time. In addition to quilting, you can use tufting to hold the layers in place. Tufting involves inserting a long needle with thick thread or twine through the entire mattress and tying it off on both ends. This creates small, even depressions on the surface of the mattress, adding both aesthetic appeal and structural integrity. Tufting can be done in a grid pattern for even distribution.

8. Adding Edge Support
Edge support is important for maintaining the shape and structure of the mattress, especially if you frequently sit or sleep near the edges. To add edge support, cut strips of high-density foam or latex and attach them around the perimeter of the mattress. Alternatively, you can use reinforced springs for added durability. Secure the edge support to the mattress layers using fabric adhesive or stitching. Proper edge support prevents sagging and extends the lifespan of the mattress.
9. Assembling the Mattress
Once all the components are prepared, it’s time to assemble the mattress. Lay the support layer flat on a clean, open surface. Place the comfort layer(s) on top, ensuring they are aligned correctly. If you’re using multiple layers, stack them in the desired order. Pull the mattress cover over the entire assembly, ensuring it fits snugly and securely. If you opted for a zippered cover, zip it closed. Check that all layers are smooth and even, with no lumps or gaps.
10. Final Adjustments and Quality Check
After assembling the mattress, make any final adjustments to ensure it meets your comfort and support needs. Lie down on the mattress to test its feel and make sure it provides adequate support. Check for any uneven areas or loose layers and adjust as necessary. Conduct a thorough quality check, ensuring all seams are secure and the cover is properly fitted. If everything looks and feels good, your DIY mattress is ready for use.

Common Mistakes to Avoid
When building your own mattress, there are several common pitfalls to steer clear of to ensure optimal comfort and durability.
- Choosing Incompatible Materials: Using materials that do not work well together can lead to discomfort or reduced support. For instance, pairing a very soft comfort layer with a firm support layer might create an unbalanced feel. Always research compatibility and consider how different materials interact.
- Neglecting Measurements: Failing to accurately measure the dimensions of the bed frame and the materials can result in a mattress that does not fit properly. Use precise measurements and double-check them before cutting any materials.
- Skipping the Quality Check: After assembling the mattress, it’s essential to conduct a thorough quality check. Neglecting this step could leave you with uneven layers or loose seams, impacting the mattress’s performance. Test the mattress before completing the project to ensure it meets your expectations.
- Ignoring Breathability: Choosing materials that retain heat or do not allow for adequate airflow can lead to an uncomfortable sleeping environment. Opt for breathable fabrics and foams designed to regulate temperature and moisture.
- Underestimating Edge Support: Many DIY mattress builders overlook the importance of edge support. Failing to add this feature can result in sagging edges, making it difficult to sit or sleep near the perimeter comfortably. Always incorporate edge support into your design.
Conclusion
Building a mattress from scratch is a detailed and rewarding process that allows for complete customization. By carefully selecting materials, determining the right size, and following each step meticulously, you can create a comfortable and durable mattress tailored to your preferences. Whether you choose foam, latex, or innerspring components, the end result will be a unique and personalized sleeping surface that meets your specific needs. Thanks for reading, and we hope this has given you some inspiration on how to build a mattress!


