How to Make a Felt Tree
Are you looking for a fun and festive way to decorate your home for the holidays? Look no further than making your very own felt tree! This unique craft project is perfect for all ages and can be easily customized to fit any holiday decor.
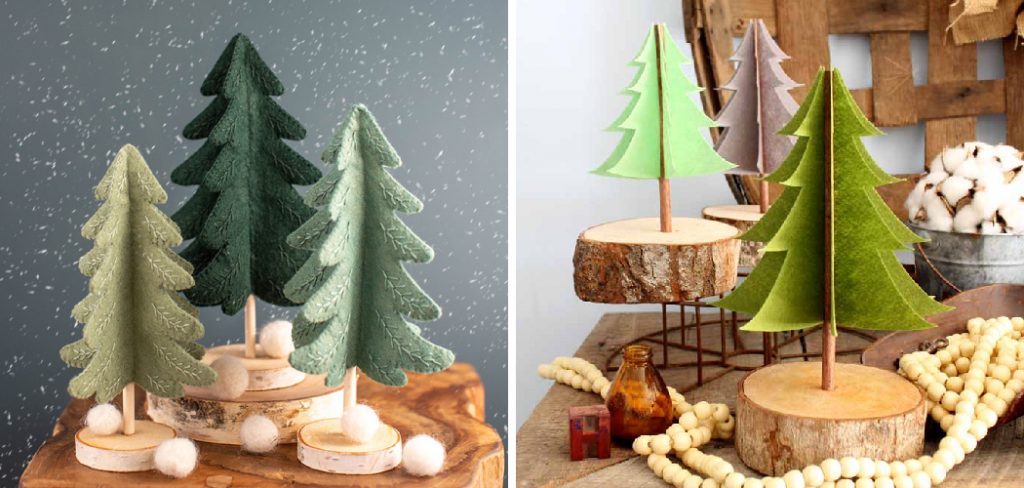
How to make a felt tree is a delightful and rewarding craft project that brings a touch of nature indoors while allowing for personal creativity. Perfect for both children and adults, this craft can be tailored to various skill levels and can be used as a decorative piece or a playful toy. Using simple materials like felt, scissors, and glue, you can construct a vibrant tree complete with colorful leaves and perhaps even little critters to inhabit it.
This guide’ll walk you through the steps necessary to craft your felt tree, providing tips and ideas to let your imagination flourish.
What Will You Need?
Before getting started, gather all the necessary materials to ensure a smooth crafting experience. Here are the essential items you will need:
- Green felt fabric
- Scissors
- Fabric glue or hot glue gun
- Brown pipe cleaners or twigs
- Assorted colored felt sheets for leaves and decorations
- Optional: bead eyes, pom-poms, sequins, buttons, ribbons, etc.
Once you have all the materials, find a clear work area, and let’s get started!
10 Easy Steps on How to Make a Felt Tree
Step 1: Cut Out the Tree Pieces
Begin by sketching the shape of your tree on a piece of paper as a template, or you can freehand it directly onto the green felt. For a traditional Christmas tree shape, create a triangle with a broad base and a pointed top. Alternatively, you can craft a more whimsical shape depending on your desired design. Once satisfied with your template, carefully cut out two identical tree pieces from the green felt. These will serve as the front and back of your felt tree, providing stability and structure. If you’re feeling adventurous, consider cutting out different-sized leaves or decorative shapes from your assorted colored felt sheets at this stage, as these will add depth and vibrancy to your tree later on. Aim to keep your cuts smooth and uniform, ensuring that all pieces fit together nicely for an appealing overall look.

Step 2: Assemble the Tree Base
Once you have your two identical tree pieces cut out, it’s time to assemble the base for your felt tree. Lay one of the green felt tree pieces flat on your work surface. If you’re using brown pipe cleaners or twigs as the trunk, place them at the tree’s base. If you prefer a solid base, simply fold a small strip of felt to create a sturdy trunk and glue it securely. Then, take the second tree piece and carefully align it on top of the first piece, ensuring that any trunk or supports are adequately encapsulated between the two layers. Use fabric glue or a hot glue gun along the edges to secure them together, leaving the bottom open if you wish to add decorations later. Hold the edges together to let the glue set, ensuring a solid bond for your felt tree.
Step 3: Add the Leaves and Decorations
Now that your tree base is assembled, it’s time to bring it to life with leaves and decorations. Start by taking the assorted colored felt leaves you cut out earlier. Using fabric glue, begin attaching the leaves to the front of the tree piece, arranging them in a way that feels balanced and visually appealing. You can layer the leaves, overlap them, or create patterns to give your tree added texture and dimension. Feel free to get creative with additional decorations! Attach bead eyes, pom-poms, sequins, or any other embellishments you gathered, using glue to secure them in place. Be sure to leave some areas open so you have space for future decorations or hang ornaments if desired. Once you’re satisfied with the look, allow the glue to dry completely before moving on to the next step.
Step 4: Secure the Tree Layers
With the leaves and decorations affixed to the front of your tree, it’s essential to secure the layers for stability and longevity. Carefully flip the tree over to expose the back piece. If you’ve decided to leave the bottom open for future additions, be cautious not to glue that section shut. Apply a generous amount of fabric glue or use your hot glue gun along the edges of the back tree piece, then press it firmly onto the decorated front piece. Ensure all edges are lined up neatly and the decorations remain intact. For added durability, consider placing some weights or pressing the tree under a heavy book while the glue dries. This step will enhance your felt tree’s overall integrity and keep it upright for years.
Step 5: Create the Tree Topper
A tree isn’t complete without a magnificent topper! For this step, you can get creative with how you’d like to finish your felt tree. A straightforward option is to cut out a star shape from a piece of yellow or gold felt. You can either glue the star directly onto the top of the tree or use a small pipe cleaner to create a more dimensional look by bending it into a cone shape for added height. If you desire, consider adding more embellishments to the topper, such as sequins or glitter, to make it really stand out. Once your tree topper is in place, ensure it’s securely glued so that it stays put during display. Allow the glue to dry completely before moving on to the final touches of your felt tree.

Step 6: Add Finishing Touches
Now that your tree topper is securely in place, it’s time to add the finishing touches that will truly personalize your felt tree. Consider embellishing the tree with ornaments made from small felt circles or shapes, beads, or sequins. You can also attach colorful ribbons and bows to enhance its festive spirit. If you’ve left the bottom open, this is an excellent opportunity to add more decorative elements or even a tiny felt skirt to cover the base. Once you’ve completed your decorating, take a moment to step back and assess your creation. Make any last adjustments or additions to elevate your felt tree’s appearance.
Step 7: Prepare for Display
With your felt tree fully decorated and finished, it’s time to prepare it for display. Choose a suitable location where your tree will shine, be it on a mantle, table, or window sill. If you’ve included a felt skirt or other base decorations, position them neatly around the bottom for a polished look. Ensure that your felt tree is stable and won’t tip over easily, adjusting its position if necessary. If desired, you can also create a charming backdrop by placing it against a festive fabric or decorative wall that complements the colors of the tree. Finally, step back and admire your handiwork, taking pride in your unique holiday decoration that brings warmth and joy to your space.
Step 8: Create a Maintenance Routine
To keep your felt tree looking its best throughout the holiday season, it’s essential to establish a regular maintenance routine. Start by dusting the tree gently with a soft cloth or using a lint roller to remove any dust or debris that may accumulate. If your tree becomes soiled or stained, spot clean it with a damp cloth and mild soap, ensuring not to soak the felt as it may lose its shape. Additionally, consider storing your tree in a breathable fabric bag when not in use, away from direct sunlight to prevent fading.
Step 9: Enjoy the Holiday Spirit
Now that your felt tree is beautifully displayed and well-maintained, it’s time to embrace the holiday spirit! Gather family and friends around your creation to share the season’s joy. You can even incorporate fun activities, such as crafting additional decorations or hosting a themed evening to celebrate together. Encourage everyone to add their own special touches or ornaments to the tree, creating lasting memories and making it a collaborative centerpiece for your festivities. Enjoy the warmth and charm your felt tree brings to your home, reminding everyone of the love and creativity shared during this particular time of year.

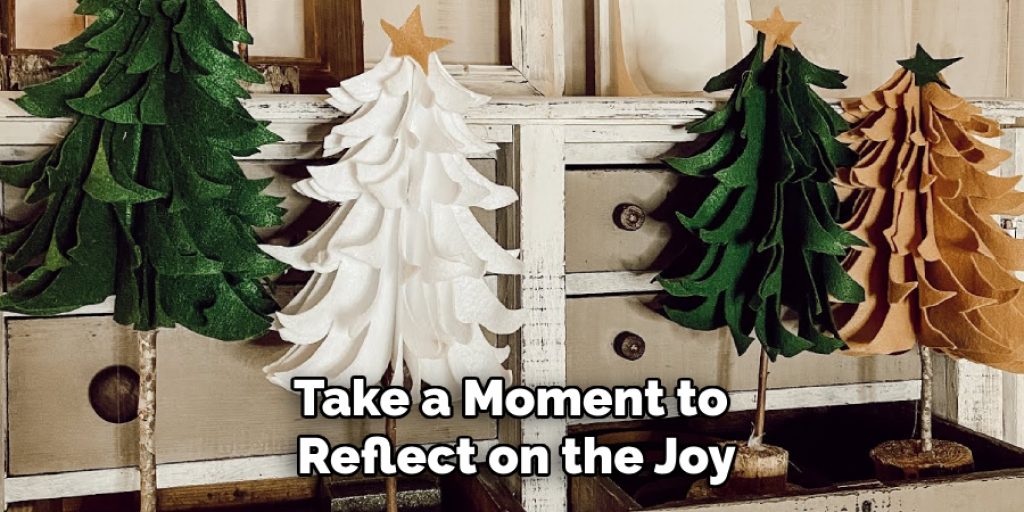
Step 10: Reflect on Your Creation
After the holiday season has come to a close, take a moment to reflect on the joy and creativity that your felt tree has brought to your home. Consider documenting your crafting process with photos or notes about what worked well and what you might change for next time. This reflection can inspire new ideas for future decorations or modifications you’d like to make to your felt tree. Share your experience with friends or family, encouraging them to create their ownfeltcrafts that celebrate their styles and preferences. Ultimately, this personal reflection not only preserves the memories of your holiday crafting but also fuels your creative spirit for upcoming projects.
By following these simple steps, you can create a beautiful and unique holiday decoration that will be cherished for years.
Conclusion
How to make a felt tree is a delightful and rewarding project that allows you to express your creativity while enhancing your holiday decor.
By following the step-by-step process, from crafting the tree’s base to adding personal touches, you not only produce a unique decoration but also foster a sense of joy and togetherness. This craft can be a cherished tradition for years to come, inviting family and friends to participate in decorating and celebrating the spirit of the holidays.
As you display your felt tree, may it serve as a reminder of the warmth and creativity that the season brings, as well as an opportunity to reflect on the cherished memories made along the way. Happy crafting!
Elizabeth Davis
Elizabeth is a creative writer and digital editor based in the United States. She has a passion for the arts and crafts, which she developed from a young age. Elizabeth has always loved experimenting with new mediums and sharing her work with others. When she started blogging, she knew that DIYquickly would be the perfect platform to share her tutorials and tips. She's been writing for the blog from the beginning, and her readers love her helpful advice and easy-to-follow instructions. When she's not writing or editing, Elizabeth enjoys spending time with her family and friends.