
How to Join Crochet Side Seams
Crocheting is a versatile and rewarding craft that allows creators to transform simple yarn into beautiful, functional items. One of the essential skills in crochet is learning how to join side seams effectively, which is crucial for assembling garments, bags, and other projects.
This guide on how to join crochet side seams will walk you through the process of joining crochet side seams, providing tips and techniques to ensure a polished finish. Whether you’re a beginner looking to enhance your skills or an experienced crocheter seeking new methods, mastering seam joinery will elevate your crochet creations.
Why Join Crochet Side Seams?
Joining crochet side seams is vital for a polished and professional finish in your projects. It not only ensures that the pieces fit together neatly but also enhances the overall structure and durability of the item. Seam joining allows for a seamless transition between crochet pieces, creating a cohesive look that can elevate the quality of your work.
Moreover, mastering this technique opens doors to more complex and intricate designs, enabling you to tackle a variety of patterns and styles with confidence. A well-joined seam can also significantly impact the comfort and wearability of garments, as it reduces bulk and provides smooth contours against the body.
Needed Materials
To join crochet side seams effectively, you will need some basic materials. These include:
Yarn:
Choose a yarn that is compatible with your project and provides the desired level of durability and structure. Using the same yarn for both sides of the seam will ensure a seamless finish.
Crochet Hook:
Select a hook size that is appropriate for your yarn and project. It’s best to use the same hook you used to create the crochet pieces that are being joined.
Yarn Needle:
A yarn needle is essential for weaving in ends and joining seams. Choose one with a large enough eye to fit your chosen yarn.

8 Step-by-step Guidelines on How to Join Crochet Side Seams
Step 1: Lay Out Your Pieces
Begin by laying out the crochet pieces you intend to join on a flat surface. Ensure that they are aligned properly, with the right sides facing each other. This will help you visualize how the final project will look and make it easier to stitch the seams.
Take a moment to adjust the placement as needed, ensuring that the edges to be joined are aligned evenly. This preparation step is essential for achieving a neat, polished finish in your crochet project.
Step 2: Prepare Your Yarn
Next, cut a length of yarn that is three times the length of the seam you intend to join. This will provide enough yarn for weaving in ends and make the joining process more manageable.
Thread your yarn needle with one end of the cut yarn, leaving a tail at least six inches long on both sides. These tails will be woven into the crochet piece later.
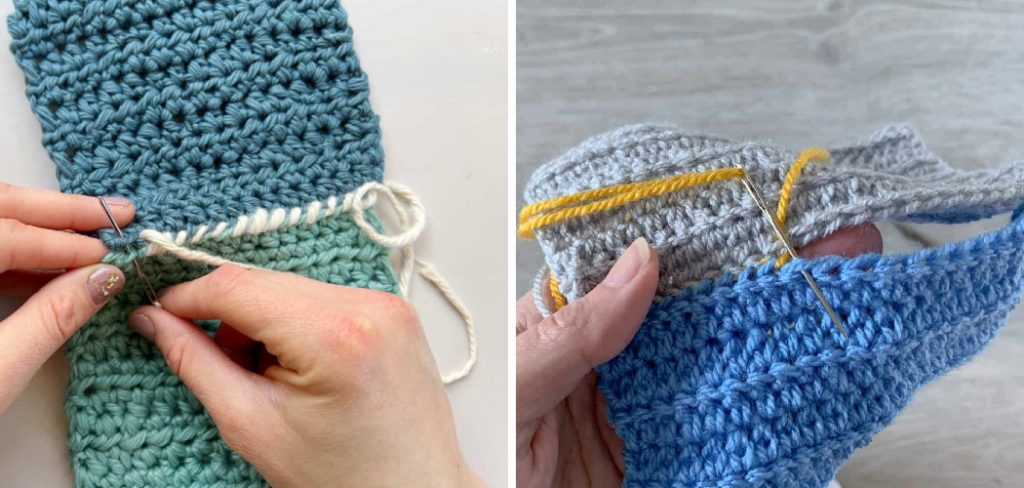
Step 3: Insert Hook into First Stitch
To begin joining the seams, insert your crochet hook into the first stitch of the piece on the right side, making sure to catch both the first loop of the upper piece and the corresponding loop of the lower piece. This initial stitch is crucial for securing the seam, so take care to ensure both pieces are aligned correctly.
Once your hook is inserted, yarn is pulled over and pulled through, creating a slip stitch that connects the two pieces. Continue to secure the seam by alternating between the two pieces and stitching through corresponding stitches along the edge, maintaining a consistent tension to ensure an even finish.
Step 4: Reach the End of the Seam
Continue stitching through both pieces, maintaining an even tension and checking periodically to ensure that the edges are aligned correctly. When you reach the end of the seam, leave a six-inch tail at least on both sides.

You can secure the seam further by weaving in these tails, using your yarn needle to stitch back and forth through the seam stitches.
Step 5: Repeat for All Seams
Once you have completed the first seam, it’s time to repeat the process for any additional seams you need to join. Follow the same steps: lay out the pieces, prepare your yarn, insert your hook into the first stitch, and stitch through to secure each seam. Be mindful of maintaining consistent tension throughout and ensuring that each seam aligns correctly.
Take your time to ensure that each join is neat and matches the quality of the first. If you encounter any discrepancies, carefully adjust the stitches as needed before moving on to the next seam. After all seams are joined, you will have a beautifully assembled piece ready for the final finishing touches.
Step 6: Weave in Ends
As with any crochet project, weaving in ends is an essential step that gives your work a professional look. Using your yarn needle, weave the tails of the joined seams back and forth through the stitches to secure them. Once you are satisfied with the securing, trim off any excess yarn.
It’s essential to take the time and care to weave in these ends, as it ensures that your project stays intact for years to come.
Step 7: Block Your Piece
Blocking is a process that involves wetting and reshaping your crochet piece to achieve a more polished look. It’s especially beneficial for assembled garments or items with intricate designs, as it helps even out stitches and provides a better drape.
To block your joined pieces, dampen them lightly with water or steam using an iron, then pin them into place on a flat surface until they dry completely.

Step 8: Enjoy Your Finished Project
Congratulations! You have successfully learned how to join crochet side seams effectively. Take a moment to admire your work and celebrate the accomplishment. Now, you can enjoy wearing or using your beautifully assembled crochet piece with confidence, knowing that it is durable, professional-looking, and uniquely yours.
Following these guidelines and practicing regularly will help you master joining crochet side seams and open the door to more complex designs and projects. Keep experimenting, learning, and creating beautiful works of art with your newfound skill! Happy crocheting!
Things to Remember
- Always use a compatible yarn and hook size for your project.
- Take the time to properly align and lay out pieces before joining seams.
- Maintain consistent tension to ensure an even finish.
- Weave in ends for a professional look and to prevent unraveling.
- Blocking can enhance the overall appearance of assembled crochet pieces.
- Practice makes perfect, so keep trying and experimenting with different techniques and projects.
Additional Tips
- If you are new to crochet or struggling with aligning seams, pinning the pieces together before stitching can make it easier to maintain alignment.
- Use stitch markers or contrasting yarn to mark where each seam should be joined for more complex projects with multiple seams.
- Experiment with different crochet stitches or techniques when joining seams to add texture and visual interest.
- Don’t be afraid to make mistakes! Crochet is a forgiving craft, and unraveling and starting over is all part of the learning process.
- Remember to have fun and enjoy the process. The satisfaction of completing a beautiful crochet project is worth the effort put into joining seams with care and precision. #HappyCrocheting
Frequently Asked Questions
Q1: Can I Use a Different Type of Yarn for Joining Seams Than the One Used for the Project?
A1: While it is possible to join seams with a different type of yarn, it is not recommended. Using the same yarn ensures that the seams blend seamlessly with the rest of the project, maintaining consistency in both appearance and durability.
Q2: How Do I Fix a Mistake in My Seam?
A2: If you make a mistake while joining seams, carefully undo the stitches and redo them. You can also use a crochet hook to gently adjust any uneven or misaligned stitches before securing the seam.
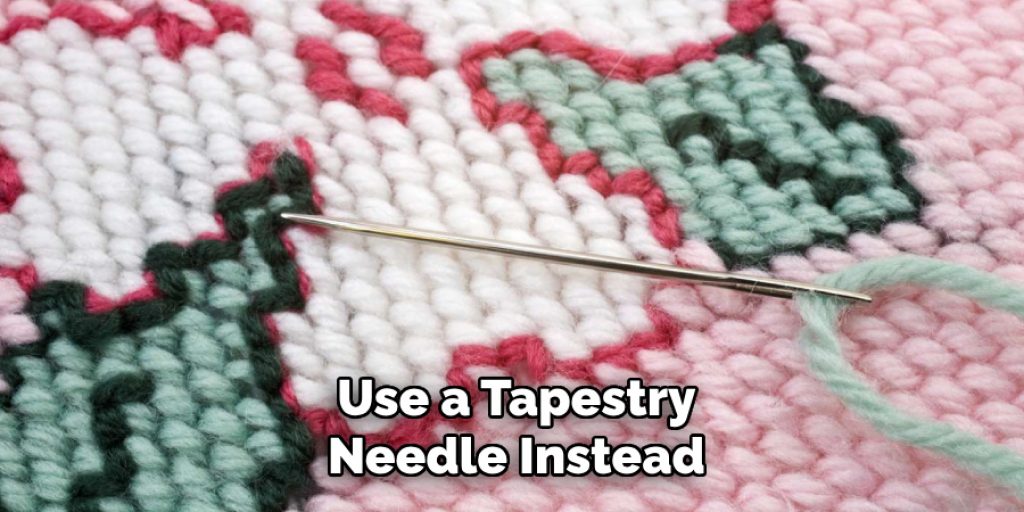
Q3: Can I Use This Technique for Joining Seams on Knitted Pieces?
A3: Yes, this technique can be used for joining seams on knitted pieces as well. Simply use a tapestry needle instead of a crochet hook to stitch through the corresponding stitches on each piece.
Q4: How Do I Keep My Seams Straight and Even?
A4: It’s essential to take your time and pay close attention when stitching the seams. Maintaining consistent tension and checking periodically to ensure that the edges are aligned correctly will help keep your seams straight and even. Pinning the pieces together before stitching can also be helpful in achieving a straight seam.
Conclusion
Mastering the art of joining crochet side seams opens up endless possibilities for your projects. With these simple steps and some practice, you can elevate the quality of your work and create seamless transitions between crochet pieces.
Remember to choose appropriate materials, take time to align pieces correctly, maintain consistent tension while stitching, weave in ends carefully, and block your finished piece for the best result. With these tips on how to join crochet side seams in mind, you can confidently take on any crochet project and create beautiful, durable pieces that will last for years to come. Happy crocheting!
Elizabeth Davis
Elizabeth is a creative writer and digital editor based in the United States. She has a passion for the arts and crafts, which she developed from a young age. Elizabeth has always loved experimenting with new mediums and sharing her work with others. When she started blogging, she knew that DIYquickly would be the perfect platform to share her tutorials and tips. She's been writing for the blog from the beginning, and her readers love her helpful advice and easy-to-follow instructions. When she's not writing or editing, Elizabeth enjoys spending time with her family and friends.


