
How to Add a Mantel to a Brick Fireplace
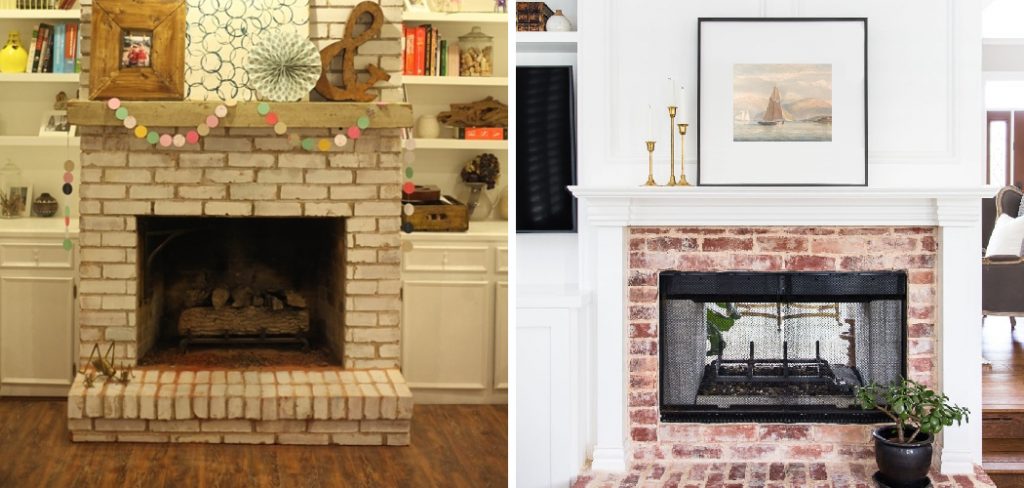
Are you tired of staring at a plain brick fireplace in your living room? Adding a mantel to your brick fireplace can instantly bring character and style to the space. It’s also a great way to showcase photos, art pieces, or seasonal decorations.
How to add a mantel to a brick fireplace can significantly enhance the visual appeal and functionality of your living space. A well-chosen mantel adds decorative charm and provides a practical shelf for displaying photographs, artwork, or seasonal decor. Installing a mantel may seem daunting, especially with the sturdy nature of brick, but with the right tools and techniques, it can be a rewarding DIY project.
This guide will explore the essential steps, materials needed, and tips for successfully adding a mantel that complements your style and elevates your home’s interior design.
What Will You Need?
Before diving into the installation process, having all the necessary tools and materials ready is essential. Here is a list of what you will need:
- Tape measure
- Stud finder
- Level
- Pencil
- Safety goggles
- Drill with masonry bit
- Screws and anchors
- Wood for the mantel shelf
- Saw (circular or miter)
- Wood stain or paint
- Sandpaper or sander
It’s also important to note that some brick fireplaces may require additional materials such as construction adhesive, depending on their design and structure. Now, let’s start on adding a mantel to your brick fireplace.
10 Easy Steps on How to Add a Mantel to a Brick Fireplace
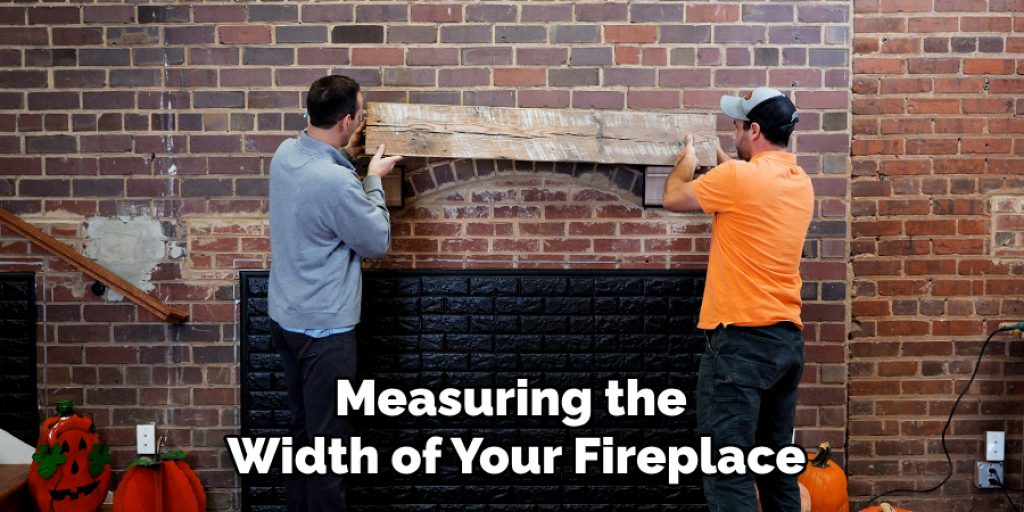
Step 1: Measure and Mark
Begin by measuring the width of your fireplace to determine the appropriate size for your mantel. Once you have decided on the dimensions, use a pencil to mark the desired height on the wall above the fireplace. It’s recommended to place the mantel at a height that allows for adequate display space while remaining visually appealing. Ensure your markings are level using a level tool for an even installation.
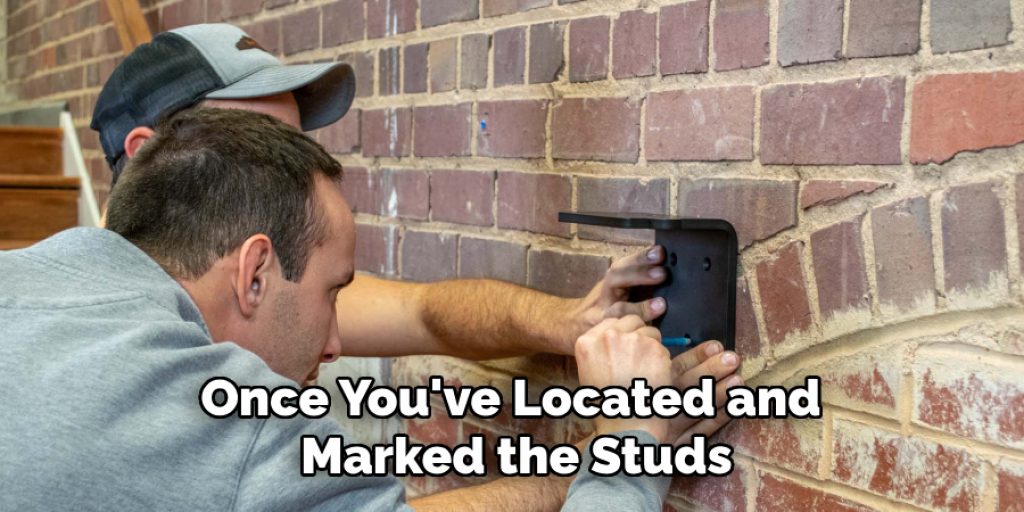
Step 2: Find the Studs
Next, use a stud finder to locate the wall studs above your fireplace. Studs provide the necessary support for the mantel, ensuring it is securely attached. Once you’ve identified the studs, mark their positions with a pencil. Attaching the mantel brackets to the studs is typically best for improved stability. If your mantel extends beyond the studs, you may need to use wall anchors to provide additional support.
Step 3: Prepare the Mantel Brackets
Once you’ve located and marked the studs, it’s time to prepare the mantel brackets. Brackets will support the mantel, so choosing the right size is crucial. If you’re using pre-made brackets, ensure they are compatible with the weight of your chosen mantel. If you’re crafting your brackets, cut the wood pieces to the desired dimensions, then sand them down for a smooth finish.
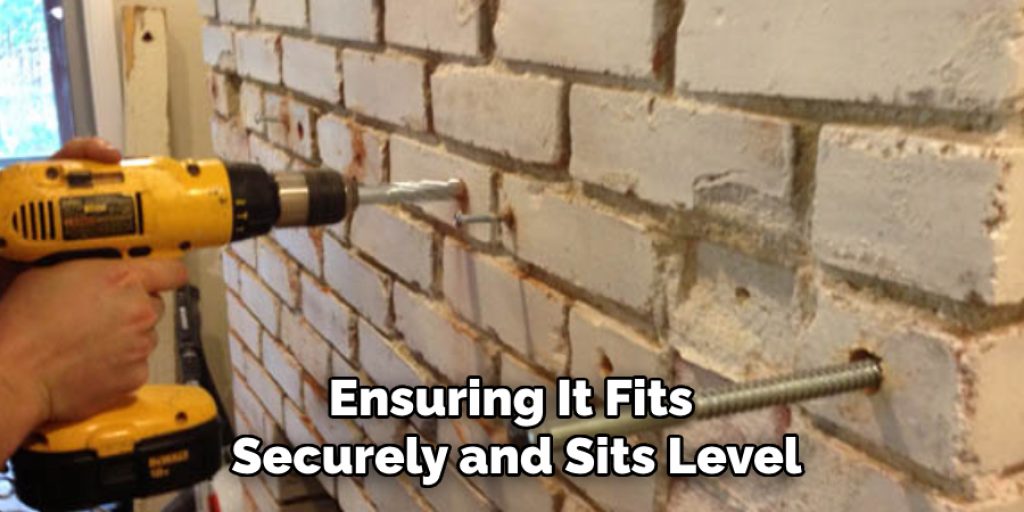
Step 4: Attach the Brackets
Attach the brackets to the wall at the marked stud locations using your drill and masonry bit. Start by pre-drilling holes in the brick for the screws and anchors. Then, affix the brackets securely, ensuring they are level before tightening all screws. If using wall anchors, insert them per the manufacturer’s instructions, then attach the brackets.
Step 5: Prepare the Mantel Shelf
Now that your brackets are securely in place, it’s time to prepare the mantel shelf. Start by selecting a piece of wood that complements your interior style—options may include hardwoods like oak or softer woods like pine, depending on your desired aesthetic and budget. Measure the length of the brackets to ensure the mantel shelf spans adequately across them for even support. Cut the wood to the correct dimensions using a circular or miter saw. Once cut, inspect the edges of the wood for any rough spots.
Sand the edges and surfaces thoroughly to create a smooth finish, enhancing the overall appearance and preventing splinters. If you prefer a particular finish, apply wood stain or paint at this stage. Allow sufficient time for it to dry completely, as this ensures durability and enhances the wood’s natural beauty, setting the stage for a stunning final result.
Step 6: Place the Mantel Shelf
With your mantel shelf prepared and finished, it’s time to place it onto the brackets. Carefully lift the shelf and align it with the brackets, ensuring it fits securely and sits level. It’s helpful to have a second pair of hands during this phase to steady the shelf while you adjust it into the perfect position. Ensure that the mantel is flush against the wall and that there are no gaps between the shelf and the brackets. A well-fitted mantel creates a polished look and ensures greater stability.
Step 7: Secure the Mantel
Once the mantel shelf is correctly placed on the brackets, the next step is to secure it to prevent any shifting or wobbling. Depending on your installation method and the design of your brackets, you may need to drill screws through the brackets into the underside of the mantel shelf. Use the level once more to ensure that everything remains even during this process. If your design does not allow for direct attachment through the brackets, consider using construction adhesive to seal the shelf in place further, applying it along the top edges of the brackets before setting the mantel down.
Step 8: Finishing Touches
Now that your mantel is securely in place take a moment to inspect everything. Check that all screws are tightened and that the mantel does not rock or shift. This is also an excellent time to fill any visible holes or gaps from screws or brackets with wood filler to enhance the overall appearance. Once the filler dries, sand it down to create a smooth surface that can be painted or stained to match the rest of your mantel.
Step 9: Style Your Mantel
After ensuring that everything is secure and visually appealing, it’s time to style your new mantel! This is where you can get creative and showcase your personality. Consider adding a mix of decorative elements such as framed photos, candles, vases, or seasonal decorations. Arrange these items in a way that draws the eye while maintaining balance. Having varying heights and textures adds depth and visual interest to your display.
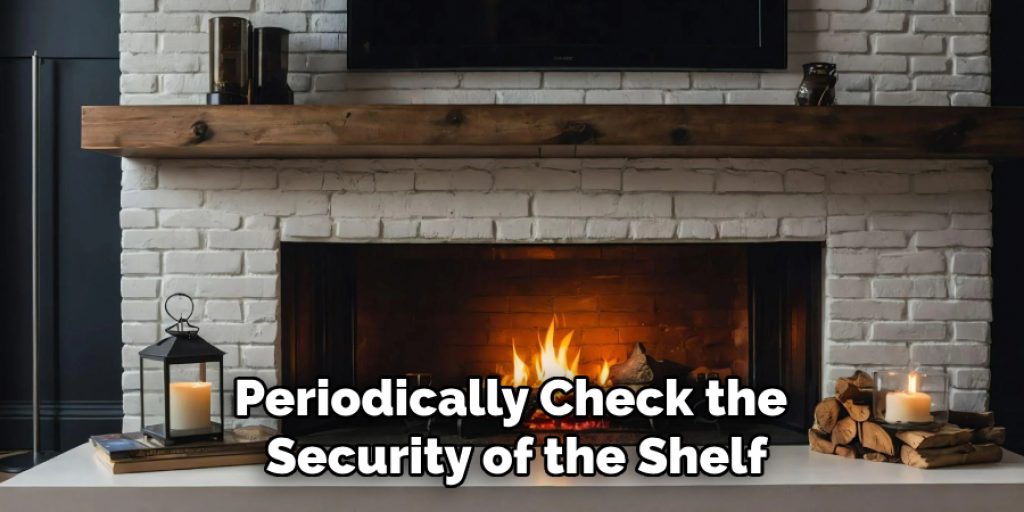
Step 10: Maintain Your Mantel
Finally, make a plan for routine maintenance of your mantel. Periodically check the security of the shelf and its brackets, particularly if heavy items are placed on it. Cleaning the mantel regularly with a soft cloth will help keep it looking its best and prevent dust build-up. If the wood requires care, consider reapplying a protective finish as necessary to maintain its shine and durability, ensuring that your mantel remains a stunning focal point in your living space for years to come.
By following these steps, you can successfully install a mantel above your fireplace and create a beautiful and functional addition to your home.
5 Things You Should Avoid
- Neglecting to Check Local Codes
Before starting your mantel installation, check local building codes or regulations. Some areas have specific requirements for the installation of mantels, especially concerning height and materials, which you should adhere to for safety and compliance.
- Using Inadequate Fasteners
Avoid using screws or anchors that are not rated for the weight of your mantel. Opt for heavy-duty anchors and screws specifically designed for masonry to ensure a strong and secure installation that can support decorative items without risking the mantel’s stability.
- Overloading the Mantel
Be cautious not to overcrowd your mantel with heavy or oversized decorative items. This can not only affect the aesthetic appeal but also put undue stress on the brackets and screws, potentially leading to accidents or damage over time.
- Ignoring Surface Preparation
Do not skip the preparation and sanding of your mantel shelf. Rough edges can lead to splinters and an unpolished look. Ensuring a smooth surface enhances both the safety and the overall appearance of your installation.
- Rushing the Installation Process
Taking your time is crucial. Rushing through measurements, drilling, or securing the mantel can lead to misalignment or structural weaknesses. Each step should be completed with careful attention to detail to ensure a beautiful and safe result.
By avoiding these common mistakes and following the steps outlined above, you can confidently install a mantel above your fireplace and create a beautiful and functional addition to your home that will bring warmth and style for years to come.
Conclusion
Installing a mantel above a brick fireplace not only enhances the aesthetic appeal of your space but also provides a functional area for displaying decorative items.
By following the steps outlined in this guide on how to add a mantel to a brick fireplace—ranging from gathering the right materials and tools, ensuring accurate measurements, to securing and styling your mantel—you can achieve a professional-looking installation. Additionally, being mindful of common mistakes ensures a sturdy and visually appealing result that will be a focal point in your home for years to come.
Enjoy the warmth and character that a beautifully crafted mantel brings, and take pride in your DIY accomplishment!
Angela Ervin
Angela is the executive editor of DIY quickly. She began her career as an interior designer before applying her strategic and creative passion to lifestyle and home. She has close to 15 years of experience in creative writing and online content strategy for housekeeping, home decorations as well as other niche efforts. She loves her job and has the privilege of working with an extraordinary team. She lives with her husband, two sons, and daughter in Petersburg. When she's not busy working she spent time with her family.


