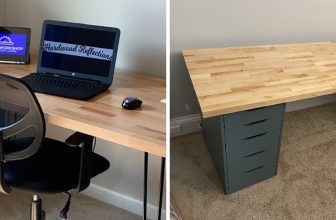
How to Attach Power Strip to Desk
Integrating a power strip into your desk is a practical and convenient solution to manage electronic devices and minimize cable clutter in your workspace. Attaching a power strip securely to your desk not only provides easy access to power but also enhances organization and functionality. This guide will walk you through the step-by-step process of how to attach power strip to desk.
From choosing the right location and method for securing the power strip to ensuring proper cable management, we’ll cover essential tips and techniques. By the end, you’ll have a seamlessly integrated power source that empowers your productivity and keeps your desk tidy. Let’s delve into this electrifying journey of optimizing your workspace with a strategically attached power strip.
The Importance of Convenient Power Access
In today’s age of technology, most of us rely heavily on electronic devices to get through the day. From smartphones and laptops to desktop computers and tablets, most people use at least one electronic device on a daily basis.
With this growing dependence on technology, having easy access to power outlets has become essential. This is especially true in work environments, where employees are expected to stay connected and productive throughout the day.
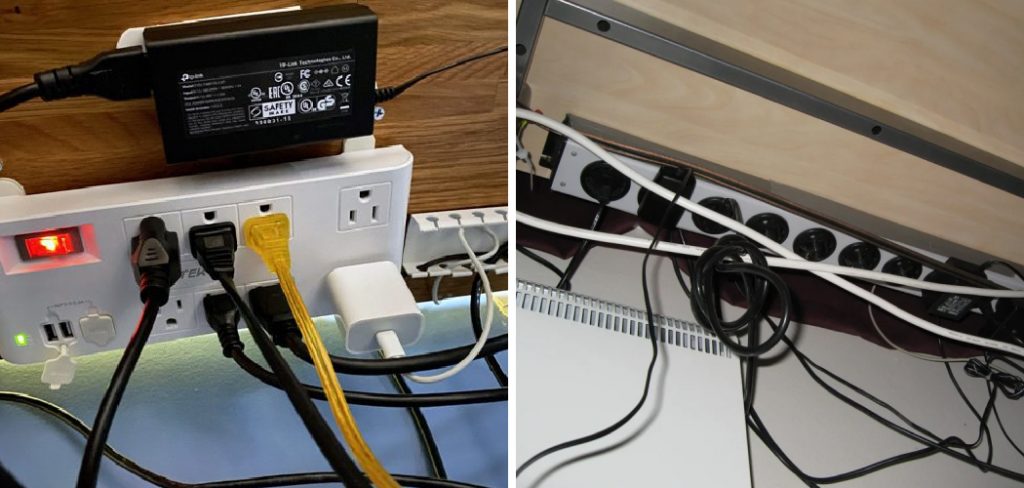
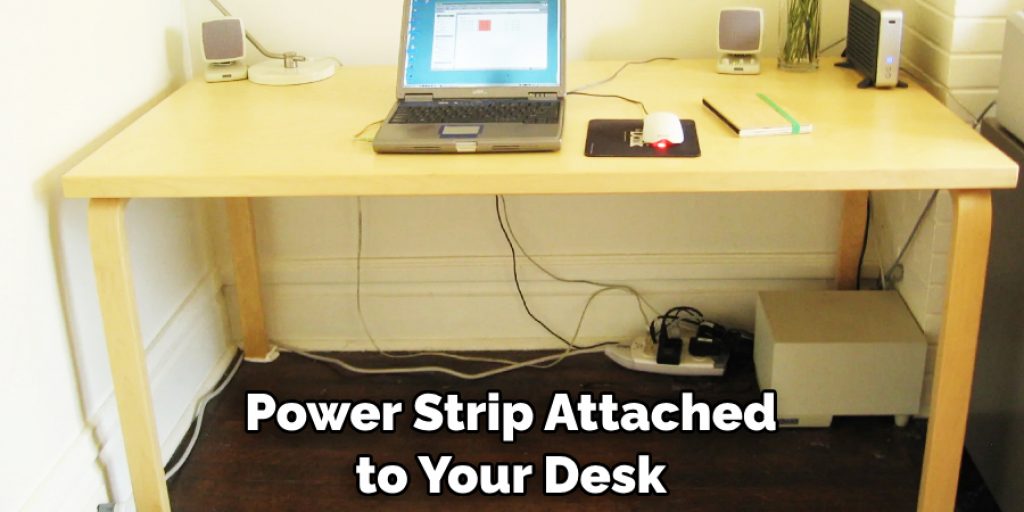
One way to ensure convenient power access in a work setting is by attaching a power strip to your desk. A power strip allows you to easily connect multiple devices at once, without having to constantly unplug and switch out cords. This not only saves time but also reduces wear and tear on your electronic devices’ charging ports.
Moreover, attaching a power strip under your desk or to the side of your desk can also help keep cords and wires organized, preventing potential tripping hazards and keeping your workspace neat and clutter-free. This is especially useful in shared workspaces where there may be multiple devices and cords in use.
Benefits of Attaching a Power Strip to a Desk
There are many benefits to attaching a power strip to your desk. Some of the most common reasons include convenience, organization, and safety.
Convenience:
Attaching a power strip to your desk makes it much more convenient to access multiple outlets in one place. This is especially useful if you have multiple electronic devices that need to be plugged in at once, such as a computer, phone charger, and desk lamp. Rather than having to crawl under your desk or search for an available outlet on the wall, you can simply plug all of your devices into the power strip attached to your desk.
Organization:
Having a power strip attached to your desk also helps with organization. Instead of dealing with tangled cords and a cluttered workspace, you can neatly manage all your cords by plugging them into the power strip. This not only makes your desk look more organized, but it also reduces the risk of tripping over cords or accidentally unplugging something important.
10 Steps How to Attach Power Strip to Desk
1. Gather the Necessary Materials
Before you begin, make sure you have all of the necessary materials on hand. You will need a power strip, screws, an electric drill, and a screwdriver. It is also helpful to have a measuring tape so that you can measure the distance between the holes in the desk and the power strip.
2. Measure the Distance Between Holes
Using your measuring tape, measure the distance between the two holes in your desk that will be used to attach the power strip. This will determine how long your screws need to be in order for them to fit properly. Make sure to take accurate measurements and write them down for reference.
3. Insert Screws
Once you have determined how long your screws need to be, insert them into each hole in your desk. Make sure they are securely tightened before proceeding to step 4. However, if your desk is made of metal or glass, you will need to use a drill with the appropriate bit to create holes for your screws. Be careful not to apply too much pressure when drilling into these materials to avoid damaging them.
4. Place Power Strip
Place the power strip onto your desk so that it sits flush against it and is aligned with the two screws that you inserted earlier. Make sure it is secure before proceeding to step 5. Though this is a relatively simple task, it is important to ensure that the power strip is properly attached to avoid any potential hazards or damage.
5. Mark Drill Holes
Using a pencil or marker, mark where you would like to drill holes into your desk to attach the power strip securely. Be sure to double-check these measurements before drilling! Additionally, you may want to use a level to ensure the power strip will be straight when attached.

6. Drill Pilot Holes
Using an electric drill, carefully drill pilot holes into each spot that was marked earlier on your desk for attaching the power strip securely. Make sure not to drill too deep! The screws provided with the power strip should be long enough to go through the desk, but not too long that they stick out on the bottom.
7. Attach Anchor Bolts
Once all of your pilot holes have been drilled, insert anchor bolts into each one and tighten them until they are secure but not overly tight, as this could damage both your desk and power strip over time from pressure being applied from both sides of the bolt head simultaneously when tightened down too much at once.
Anchors are used to create a strong and secure attachment between the power strip and desk. They come in various sizes, materials, and designs, so make sure to choose the one that is suitable for your particular desk material (i.e. wood, metal or composite). It is important to use anchors as they distribute the weight of the attached items evenly across a larger surface area, reducing the risk of damage to the desk and power strip.
8. Insert Screws Into Anchor Bolts
Insert screws into each anchor bolt and then tighten them down until they are snug but not overly tight, as this could damage both your desk and power strip over time from pressure being applied from both sides of the screw head simultaneously when tightened down too much at once. Once each screw is snug, use a power drill or manual screwdriver to tighten them down further until they are secure.
9. Connect Power Strip Wires
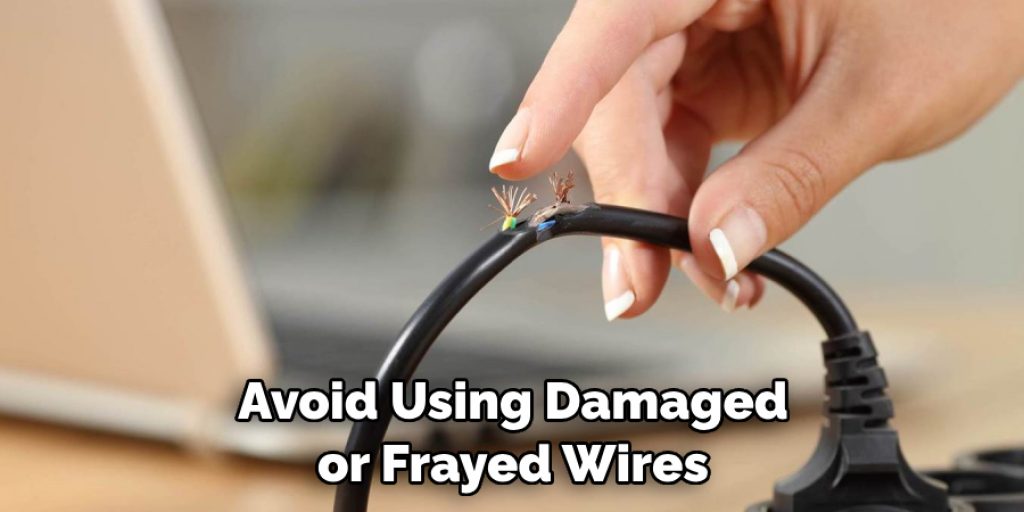
Connect any wires coming out of your power strip such as ground wires or other safety features if applicable, according to manufacturer instructions for safe use. Make sure all wires are securely attached and well-insulated. Avoid using damaged or frayed wires as they can pose a safety hazard.
10. Test Power Strip Functionality
Test out whether or not everything is working correctly by plugging something into each outlet on your power strip and turning it on/off multiple times. If everything works correctly, then congratulations – you have successfully attached a power strip to your desk! However, if something isn’t working as it should be, then don’t worry – here are a few troubleshooting tips to help you figure out the issue.
Common Mistakes to Avoid When Attaching a Power Strip to Your Desk
When it comes to setting up your workspace, attaching a power strip to your desk can be a convenient way to have easy access to multiple outlets. In this document, we will discuss these mistakes and how to avoid them, so you can safely and securely attach a power strip to your desk.
Overloading the Power Strip
One of the most common mistakes people make when attaching a power strip to their desk is overloading it with too many devices. It may be tempting to plug in all of your electronics into one power strip, but this can lead to overheating and potential fire hazards. To avoid this mistake, make sure to read the power strip’s specifications and only plug in devices that fall within its recommended wattage limit.
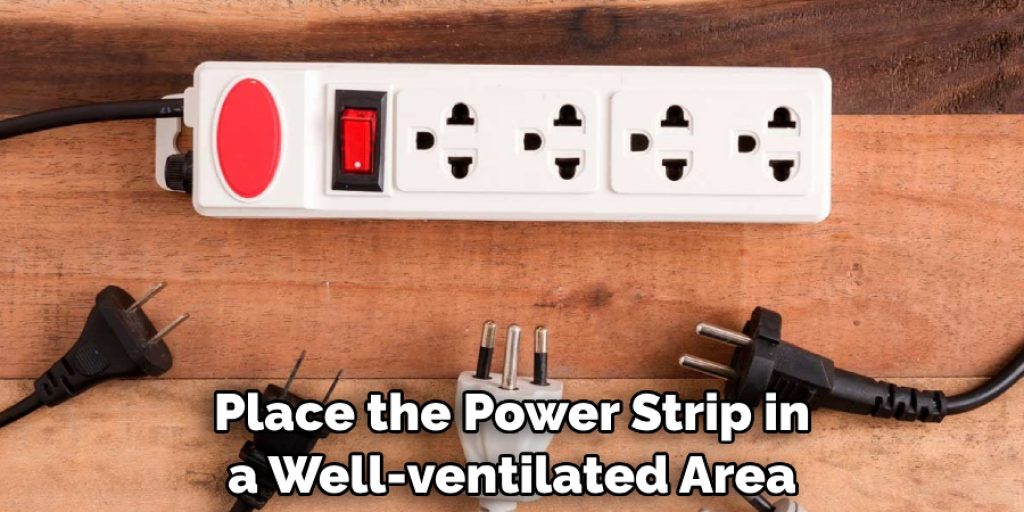
Placing the Power Strip in a Tight or Confined Space
Another mistake to avoid is placing the power strip in a tight or confined space. This can also lead to overheating as it restricts air flow and can potentially damage the power strip or your devices. Make sure to place the power strip in a well-ventilated area with enough space around it for proper air flow.
Conclusion
In conclusion, attaching a power strip to a desk is a great way to save space and keep your cords organized. Plus, it’s relatively easy to do with the help of command strips or adhesive tape. As demonstrated, you can even be creative and use smaller tools like canvas cords as makeshift zip ties if the situation calls for it.
All in all, attaching a power strip to your desk is an essential step for tidying up your workspace and keeping cords out of sight. With some careful planning and creativity, you’ll have a neat organizational system in no time. Now that you know how to attach power strip to desk, go ahead and give it a try! And don’t forget to take pictures so you can show off your new handy organizational skills!
Angela Ervin
Angela is the executive editor of DIY quickly. She began her career as an interior designer before applying her strategic and creative passion to lifestyle and home. She has close to 15 years of experience in creative writing and online content strategy for housekeeping, home decorations as well as other niche efforts. She loves her job and has the privilege of working with an extraordinary team. She lives with her husband, two sons, and daughter in Petersburg. When she's not busy working she spent time with her family.