How to Backstitch Cross Stitch
Backstitching is an essential technique in cross stitching that adds definition and detail to your designs. By creating solid lines or outlines, backstitching enhances the overall appearance of your cross stitch project and brings your design to life. Whether you’re a beginner or an experienced cross stitcher looking to refine your skills, learning how to backstitch cross stitch is a valuable addition to your repertoire.
In this article, we will explore the art of backstitching in cross stitch, providing step-by-step instructions and tips to help you master this technique. From understanding the basics of backstitching to choosing the right thread and creating clean and precise lines, we will guide you through the process, enabling you to add depth and dimension to your cross stitch creations. So grab your needle, thread, and fabric, and let’s dive into the world of backstitching in cross stitch.
Introducing the Backstitch Technique in Cross Stitch
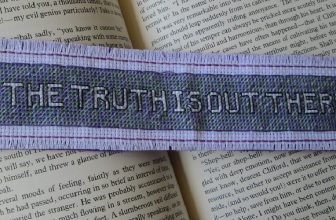
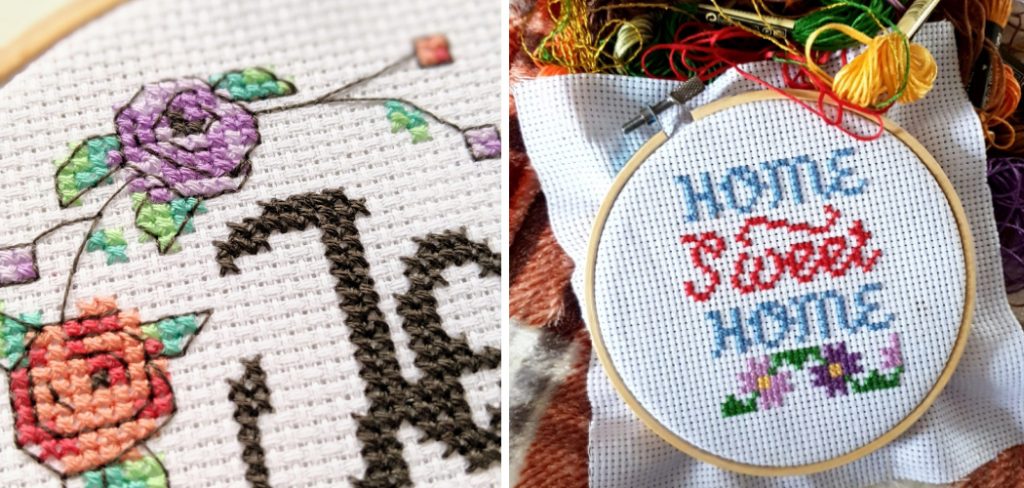
The backstitch technique is an essential part of cross-stitching. It is used to create the outlines and details that finish off a project. The backstitch is also used for outlining letters, numbers, and other special designs in cross-stitch projects. This stitch can be done with single strands or two strands depending on the look you are trying to achieve. It adds texture and depth to any design.
Backstitching works by stitching multiple lines of small stitches in the same direction over an area of fabric. Each individual line should be one stitch wide, but they can range from 1/4 inch to 1/2 inch long. To begin your backstitches, use a straight stitch first before moving along the line.
Move in the same direction as your first stitch and repeat until you have reached the end of the area to be stitched. When you reach the end, begin again at the beginning of your line and repeat until you are done.
When stitching with two strands, choose a thicker thread for more texture. Make sure to use even tension when setting up your backstitches so they come out looking clean and neat. Stitching too tightly will cause puckers and unevenness, while stitching too loosely could lead to gaps or unraveling stitches.
Once you get comfortable with this technique, it becomes easier to develop intricate patterns and designs on any piece of fabric with your cross-stitch projects. The backstitch technique is an invaluable skill to have in your cross-stitch arsenal. With practice and patience, you will be able to create beautiful projects with this fun technique.
Exploring the Purpose and Benefits of Backstitching
Backstitching is an important part of the art of cross-stitch. It’s a technique that consists of reverse stitching, also known as “outline stitching” or “overcasting stitches.” The term backstitch can also refer to outline stitches worked independently along the edges of fabric shapes, such as leaf veins in appliqué work and printed lines for counted thread needlework.
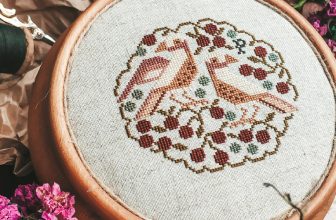
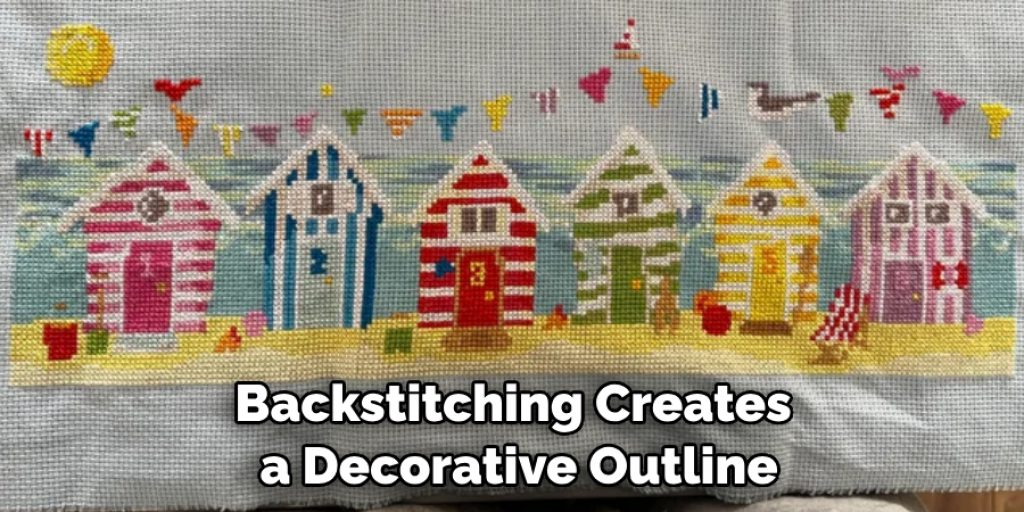
Backstitching creates a decorative outline around each pattern element and helps to strengthen the design by providing support and structure for individual elements within it. In addition to its aesthetic value, backstitching serves another purpose: it adds detail to your finished product that is usually not possible with regular cross-stitches alone.
Backstitching is also used to finish a project by providing an attractive border around the edges of the fabric that frames the design. This edging helps provide stability and protection from wear and tear, making it ideal for items like wall hangings or clothing.
Overall, backstitching adds depth and character to your finished cross-stitch projects while helping them last longer. With just a few stitches, you can make a beautiful piece of art that will stand the test of time! So if you’re looking to add some extra detail or strength to your work, be sure to give backstitching a try!
10 Ways How to Backstitch Cross Stitch
Step 1: Understand the Purpose of Backstitching
To begin, it’s crucial to understand why backstitching is necessary in cross stitch. Backstitching adds definition, outlines, and details to your design that cannot be achieved with cross stitches alone. It enhances the overall visual impact and gives your project a polished and professional finish.
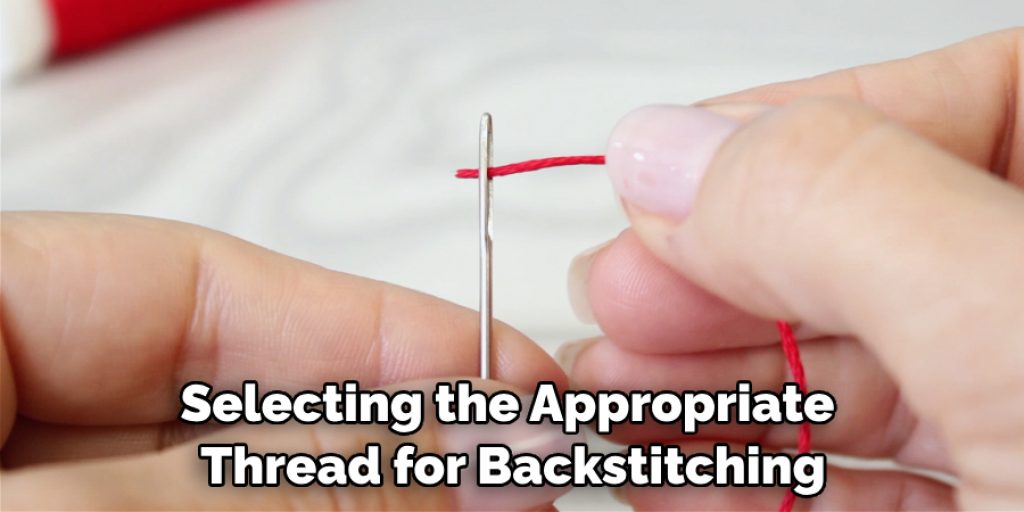
Step 2: Choose the Right Thread
Selecting the appropriate thread for backstitching is essential. Choose a thread color that complements your cross stitch design. It’s common to use a single strand of embroidery floss or a slightly thicker thread for more prominent lines. Consider using a contrasting color for added visual interest.
Step 3: Thread Your Needle
Thread your needle with the chosen thread, ensuring it is securely knotted at one end. Use a needle size that easily glides through the fabric without leaving large holes. A smaller needle will create finer and more precise stitches.
Step 4: Plan Your Backstitching Lines
Before starting the backstitch, carefully plan the lines you want to create. Identify the areas in your design that require outlines, details, or added definition. It’s helpful to mark these lines on your fabric with a water-soluble pen or tailor’s chalk to guide your stitching.
Step 5: Begin Backstitching
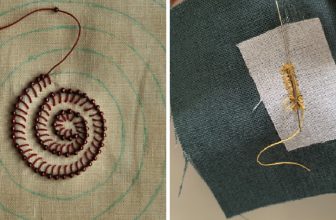
Start backstitching by bringing the needle up from the back of the fabric at the starting point of your line. Insert the needle back into the fabric a short distance ahead and bring it up again at the next point, following the desired path of your line. Repeat this process, creating a continuous line with evenly spaced stitches.
Step 6: Maintain Consistent Stitch Length
To achieve clean and precise lines, strive for consistent stitch lengths throughout your backstitching. Keep your stitches evenly spaced and of the same length. This uniformity will enhance the overall appearance of your design.
Step 7: Secure Your Stitches
To ensure that your backstitches remain secure, take care to make small anchoring stitches as you progress. These small stitches should be worked over the existing cross stitches or between the fabric threads, ensuring they are hidden and do not interfere with the front of your design.
Step 8: Navigate Corners and Curves
When encountering corners or curves in your design, adjust your backstitching technique accordingly. For sharp corners, create a diagonal stitch across the corner to maintain a clean and crisp angle. For gentle curves, use smaller and closer stitches to create a smooth transition.

Step 9: Pay Attention to Detail
Backstitching allows for intricate detailing in your cross stitch design. Utilize this technique to add small elements, accents, or text to personalize your project. Take your time and pay attention to the finer details, ensuring your stitches are neat and precise.
Step 10: Finishing Touches
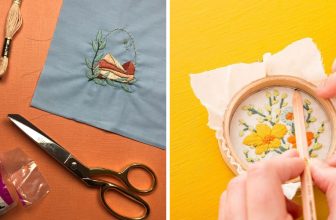
Once you have completed all the necessary backstitching lines, weave your thread through a few backstitches on the back of your fabric to secure it. Trim any excess thread, taking care not to cut any existing stitches. Finally, gently wash and press your finished cross stitch project to remove any marks or wrinkles, revealing its true beauty.
Things to Consider When Backstitching Cross Stitch
When backstitching cross stitch, there are several things to consider in order to ensure successful results. The first thing to consider is the type of thread being used. It is best to use a strong, smooth thread for backstitching because it will help to ensure that the stitches remain in place after the project is finished.
1. Choose the Right Color:
Ensure that the thread you choose is a suitable color for your project. This will help to maintain continuity throughout your work and help to create an even look.
2. Measure Accurately:
It is important to measure correctly when backstitching as this will ensure that the stitches are all even and consistent in size. Take care to measure from the center of the stitch and use a ruler if necessary.
3. Be Consistent with Stitches:
When backstitching, it is important to make all stitches consistent in size and length. This will help to ensure that the finished product looks even and professional.
4. Create Evenly-Spaced Columns:
To create an even look when backstitching, it is important to space the stitches in evenly-spaced columns. This will help to create a cohesive and attractive design.
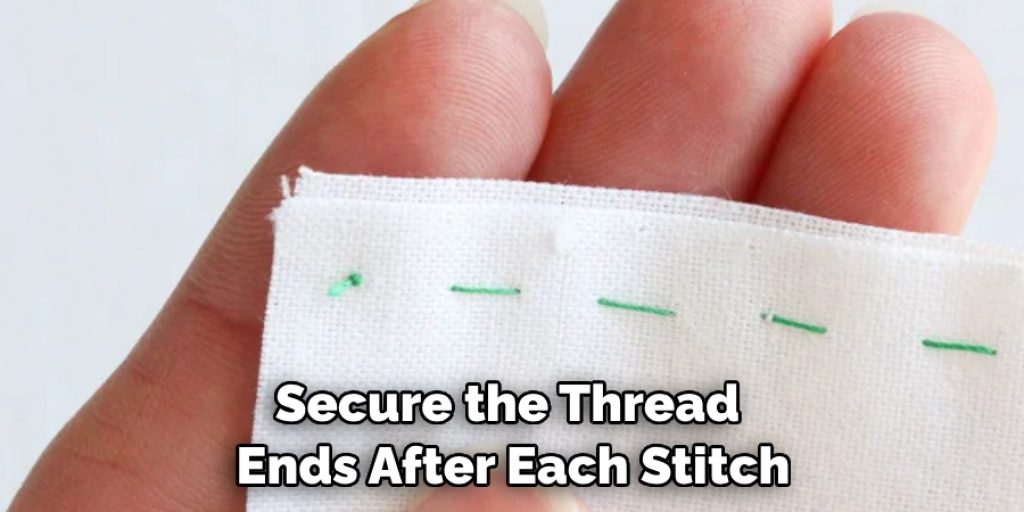
5. Secure Thread Ends:
Always remember to secure the thread ends after each stitch. This will help ensure that the stitches remain firmly in place once the project is completed.
By following these steps, you can ensure that your backstitching is successful and professional-looking. With careful planning and attention to detail, you will be able to create beautiful cross-stitch projects. Good luck!
Conclusion
Crafting has many benefits, such as reducing stress, strengthening the mind-body connection, and improving overall emotional well-being. To be able to create a stunning design with cross-stitching is both a rewarding accomplishment and an incredible experience. With patience and practice, anyone can master the skill of backstitching in no time!
Do not be afraid to experiment with different stitches and shapes to create a one-of-a-kind piece that reflects your unique vision. Learning how to backstitch cross stitch does not have to be intimidating; take your time crafting each stitch carefully and enjoy the mindful journey as it unfolds. So go ahead, grab some thread, and start embroidering! With dedication and hard work, you’ll be completing beautiful projects like looking like an expert in no time!
Nancy Behan
Nancy is an embroidery artist, fashion blogger and a full time editor at DIY quickly. Nancy edits the fashion section on DIY quickly, focusing on the embroidery and cross stitch articles, alongside with fabric and other costume design elements. She graduated from the University of Michigan with a Bachelor of Arts in Art History. She loves to work on her own projects, read books and watch romantic movies in her spare time.