How to Clean 3d Printer Bed
Keeping your 3D printer bed clean is essential for successful prints. Dirty surfaces can cause the filament to stick, leading to warped and uneven prints. If left unchecked, a dirty print bed can even lead to damage to your 3D printer. By properly cleaning a 3D printer bed, you can eliminate this issue and ensure that your prints are successful.
The most important step for keeping your 3D printer bed clean is to use a soft cloth and isopropyl alcohol (IPA) to remove any residue from the surface of the print bed. IPA will help break down any stubborn adhesives, allowing you to wipe them away easily. When wiping down the bed, be sure to use consistent pressure and a circular motion. This will help ensure an even cleaning and prevent any unnecessary damage. In this blog post, You will learn in detail how to clean 3d printer bed.
Step by Step Processes for How to Clean 3d Printer Bed
Step 1: Inspect the 3D Printer Bed
Before beginning the cleaning process, take a look at your 3D printer bed. If any large pieces of debris are stuck to the bed that can be easily removed by hand, go ahead and do so. This will make scrubbing off any remaining residue much easier.
Step 2: Pick the Right Cleaning Product
There are several types of cleaning products available on the market, so pick one that is specifically made for 3D printers or other electronics. Avoid using harsh chemicals or abrasive cleaners, as they can damage your 3D printer bed. Before beginning the process of cleaning your 3D printer bed, make sure to protect your work area. Lay down some newspaper or a cloth to catch any debris and liquid that may be released during the cleaning process.

Step 3: Spray the Cleaning Solution onto the Bed
Spray your chosen 3D printer cleaning solution directly onto the bed. Make sure to cover all areas of the bed, leaving no part untouched. After spraying the cleaning solution onto your bed, take a brush that has soft bristles and scrub off any stubborn residue or dirt. Make sure to move in small circular motions when scrubbing so as not to damage the surface of the 3D printer bed.
Step 4: Wipe Down the Bed with a Clean Cloth
Once all of the stubborn residues has been removed, take a clean cloth and wipe down the bed. Press firmly so that all the dirt and cleaning solution is removed from the surface. After wiping down the bed, take a cloth dampened with water and rinse off any remaining residue. Make sure to apply pressure to the surface so that all of the dirt is completely removed from the 3D printer bed.

Step 5: Dry With a Clean Cloth
Once you’ve rinsed off the bed, use a clean cloth to dry the surface. Make sure to press firmly so that all of the water is absorbed from the 3D printer bed. After drying your bed, look at it and ensure there are no remaining pieces of dirt or residue left behind. If you see any areas needing cleaning, repeat the cleaning process from Step 4.
Step 6: Let the Bed Air Dry Completely
Once you’ve finished cleaning your 3D printer bed, let it air dry completely before turning on the power and using it again. This will ensure maximum efficiency when printing with your 3D printer.
Following these steps ensures that your 3D printer bed is properly maintained and clean for optimal printing performance.
Precautions for How to Clean 3d Printer Bed
- Always wear protective gear such as gloves and a mask to avoid coming into direct contact with harsh chemicals used for cleaning.
- Make sure to disconnect the power supply before attempting any kind of cleaning procedure.
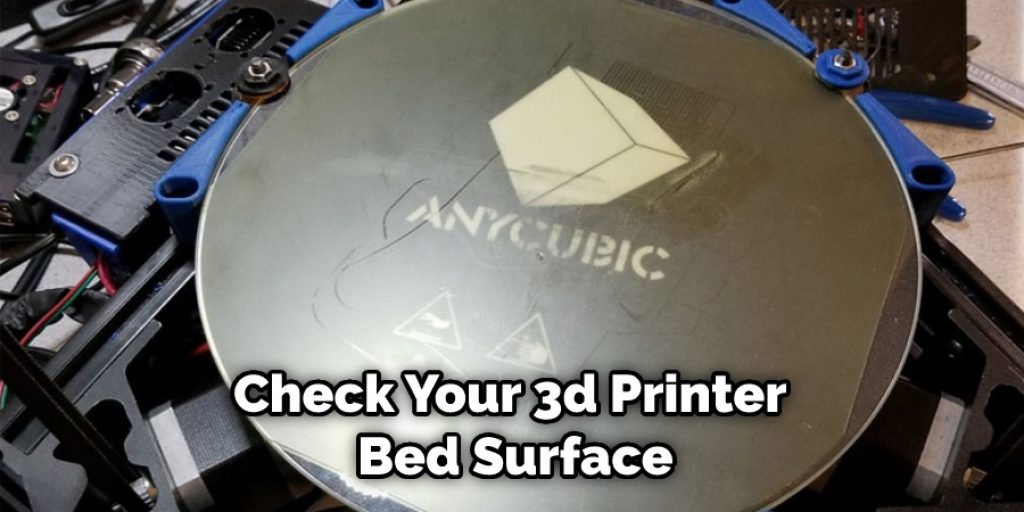
- Check your 3d printer bed surface material first – some materials are sensitive to certain detergents, so make sure to use the right cleaning agent for your bed.
- Use a soft brush or cloth to gently scrub for stubborn dirt and grime before applying any solvent.
- Avoid using glass cleaner on 3d printer beds as it can corrode certain materials and ruin the surface of the bed.
- Once cleaned, make sure to dry the 3d printer bed with a lint-free cloth or paper towel before use.
- Store the cleaning solvent in its original container to prevent any accidents caused by unintentional contact with other materials.
These simple steps and precautions can help ensure your 3d printer bed is kept clean and functioning optimally.
How Can You Prevent Dirt and Debris From Building Up on the 3d Printer Bed?
In order to prevent dirt and debris from building up on a 3d printer bed, you can take certain steps throughout the 3d printing process. Here are some tips:
- Before beginning your print job, make sure that the surface of your 3d printer bed is free from dust and debris. This includes wiping any excess plastic, residue, or particles from the bed.
- Use tape or an adhesive sheet to cover the 3d printer bed for each print job. This will help keep the surface of the bed clean and reduce the amount of dirt and debris that can build up during printing.
- Clean your extruder nozzle regularly to ensure that no debris is left behind on the printer bed. This will help keep the nozzle clean and reduce dirt and debris buildup on the 3d printer bed.
- When your print job is complete, remove any tape or adhesive sheets that you used to cover your 3d printer bed, and then use compressed air to blow off any remaining dust and debris.
By following these tips, you can help prevent dirt and debris from building up on your 3d printer bed and keep it clean for future printing jobs.
How Can You Avoid Damaging the 3d Printer Bed While Cleaning It?
When it comes to cleaning your 3d printer bed, one of the most important things to consider is how not to damage the bed itself. To avoid damaging the printer bed while cleaning, here are a few tips:
- Use only mild soap or detergent and warm water to clean off any dust or debris from the surface. Avoid using any abrasive cleaners or solvents, as these can damage the bed.
- Do not use a metal brush on the bed, as this can cause scratches and other damage to the surface of the bed. Use a soft cloth or sponge instead.
- If there is adhesive residue on your 3d printer bed, use gentle rubbing alcohol to remove it. Avoid using any harsh chemicals or solvents, as these can damage the bed.
- To avoid scratching the bed during cleaning, make sure that you do not use sharp objects such as knives or scissors to scrape off any residue or debris.
- When wiping down the surface, do not use any paper towels or rags that could have particles on them. Use a lint-free cloth instead.
Following these tips will help ensure that your 3d printer bed remains clean and pristine for years to come.

Are There Any Special Techniques That Should Be Used When Cleaning Your 3d Printer Bed?
Yes, there are some special techniques that should be used for cleaning your 3d printer bed. First, ensure you have adequately powered off and disconnected the 3d printer from all power sources. Before cleaning, you should also remove any objects from the printing surface, such as support material and failed prints. Next, use a combination of compressed air and isopropyl alcohol to clean the 3d printing bed. This will help to eliminate grease, oil, dust, or other contaminants that could affect the adhesion of future prints. Start by using a brush to remove any loose particles from the surface. Then spray a large amount of isopropyl alcohol onto the printing bed and allow it to sit for a few minutes before wiping it down with a clean microfiber cloth.
Finally, you can use compressed air to blow away any residual particles after the alcohol has been wiped away. If there are still areas of residue or contamination that remain, you may need to go through the cleaning process again until they have been removed. Make sure to take your time and be thorough while cleaning, as even the smallest particles can affect the quality of your prints.
How Do You Clean the Area Around the 3d Printer Bed?
Properly cleaning the area around your 3d printer bed is an important step in ensuring that prints are of high quality. Before cleaning the bed, it’s important to protect yourself and those around you from any potentially hazardous cleaning chemicals or particles by wearing protective eyewear and gloves. The first step in cleaning the area around the 3d printer bed is to remove any debris that may be present.
This includes wiping away resin, plastic particles, and other materials that may have been left behind from a recent print job. Once all of the visible mess has been removed, it’s important to use a dust collector or vacuum than to pick up any particles that may have been left behind.

Once the area is clean, it’s time to start cleaning the 3d printer bed itself. Begin by using a damp cloth or sponge to remove any dirt, dust, and other debris from the bed. A solution of warm water and dish soap can be used for tougher stains and marks. It is important to ensure that the cleaning solution does not come into contact with any of the hard components of the printer, as this can cause damage. After cleaning, dry the bed with a clean cloth and apply a thin layer of oil or lubricant to keep it in good condition.
Conclusion
In conclusion, cleaning the 3D printer bed is an important task that should be done regularly to ensure a successful print. To properly clean your bed, you will need to use a variety of tools, such as rubbing alcohol, scraper blades, and lint-free cloths. Once you’ve removed any residue on the bed, it’s important to check your printer’s settings for the proper bed temperature and surface adhesion prior to printing. I hope this article has been beneficial for learning how to clean 3d printer bed. Make Sure the precautionary measures are followed chronologically.