How to Clean a Heat Exchanger
Heat exchangers are used in many processes and applications to transfer heat energy from one medium to another. This type of equipment is essential for the efficient operation of industrial plants, including those that produce petrochemicals, refinery products, fertilizer, and pharmaceuticals.
While replacing or repairing a damaged heat exchanger can be costly, the cost savings associated with keeping the equipment in good condition can be substantial.
Regular cleaning of a heat exchanger will help to ensure its efficiency and performance, reduce energy costs and extend its life. In order to keep your heat exchanger running efficiently, it is important to learn how to clean it properly. In this blog post, You will learn how to clean a heat exchanger in detail.
Step by Step Processes for How to Clean a Heat Exchanger
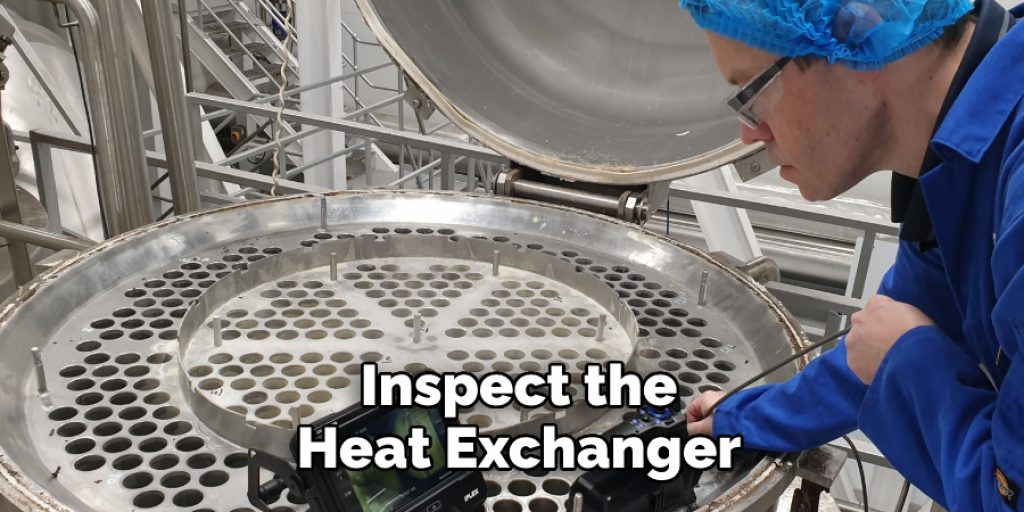
Step 1: Inspect the Heat Exchanger
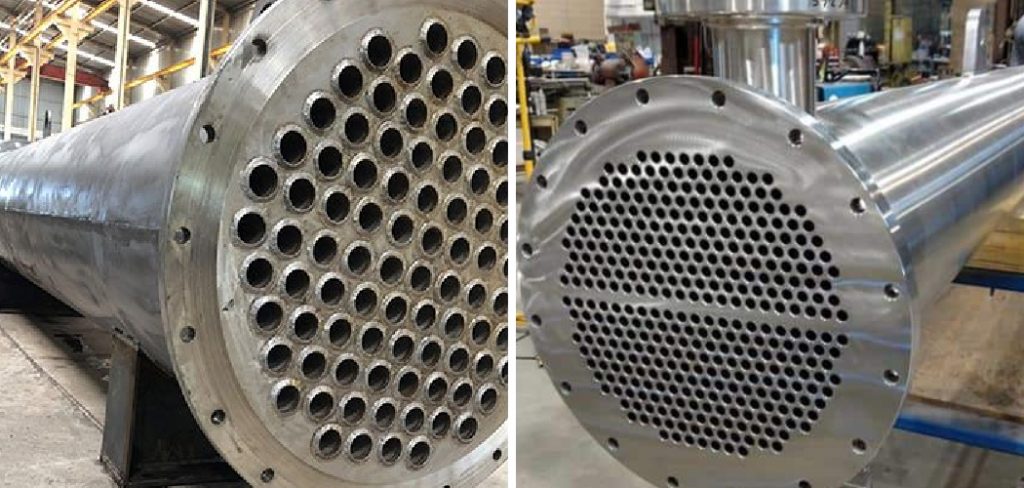
Before cleaning a Heat Exchanger, inspecting the unit for any visible signs of damage is important. Check for corrosion, cracks, or other abnormalities that could indicate deterioration. If you notice any problems, it is best to have the heat exchanger professionally serviced before cleaning.
Step 2: Prepare the Equipment
Once the Heat Exchanger has been inspected, it’s time to gather the necessary equipment and supplies. This will depend on the type of cleaning procedure you plan to use. Generally speaking, chemical cleaners, brushes, and other tools may be needed in order to clean a heat exchanger properly.
Step 3: Disassemble the Heat Exchanger
Before cleaning, the heat exchanger must be disassembled into its component parts. This will help ensure that all areas of the unit are properly accessed and cleaned. During this step, take notes and pictures to reassemble the Heat Exchanger properly.
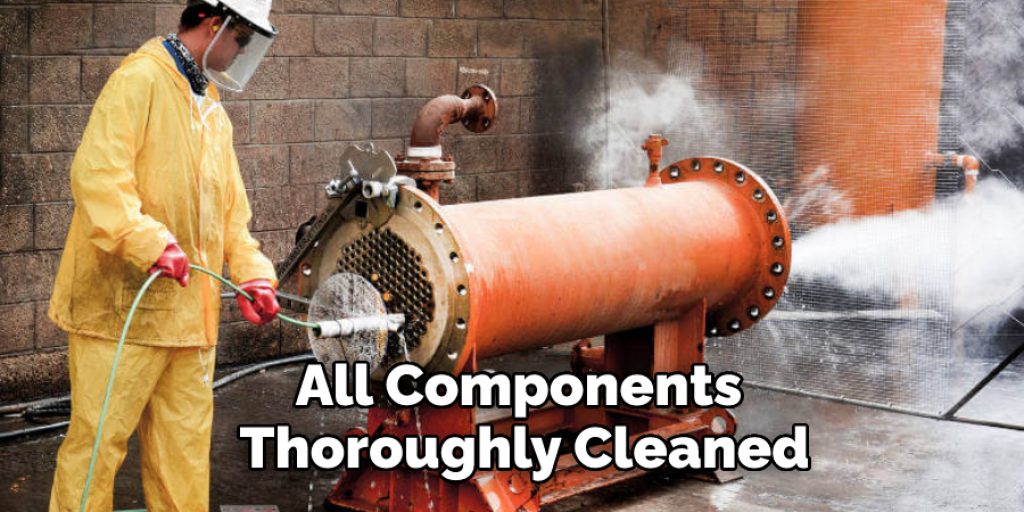
Step 4: Clean the Heat Exchanger Components
Now that all of the components are separated, they can be cleaned individually. Depending on the cleaning procedure used, some parts may require scrubbing with brushes or other tools, while others may only need to be rinsed off. Make sure to follow any manufacturer instructions for cleaning as closely as possible.
Step 5: Reassemble the Heat Exchanger Components
Once all components have been thoroughly cleaned, they can be reassembled into the heat exchanger. Be sure to follow any instructions provided by the manufacturer and keep track of your notes from when you disassembled the unit in order to ensure everything is put back together properly.
Step 6: Test the Heat Exchanger
Once all components have been reassembled, testing the heat exchanger before putting it into operation is a good idea. This will help to ensure that everything is working correctly and that there are no issues due to improper assembly or cleaning. If there are any components that were not disassembled during the cleaning process, they can now be cleaned. This may include exterior panels, tubes, or other parts that need not be removed.
Step 7: Rinse and Flush the Heat Exchanger
After all, components have been cleaned and reassembled, it’s important to rinse and flush the unit. This will help to ensure that any remaining debris or contaminants are washed away and will not interfere with the heat exchanger’s performance. Finally, reconnect all tubing and wiring to the Heat Exchanger. Make sure to use any notes or diagrams you created during the disassembly process to ensure everything is properly connected before running a test.
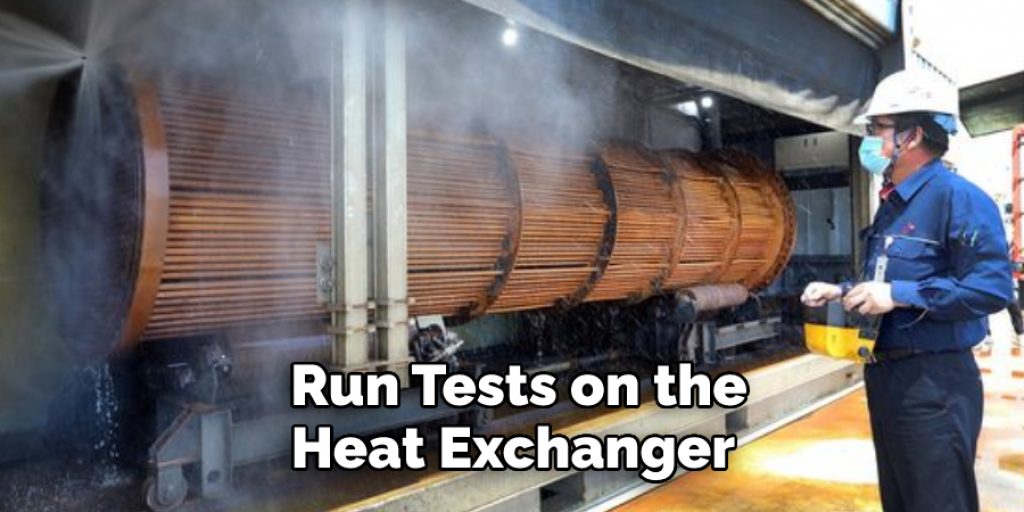
Step 8: Test and Monitor the Heat Exchanger
After all, components have been reconnected; it’s important to run tests on the heat exchanger to ensure it functions properly. Once the tests have been completed, and all readings are within normal parameters, you can now monitor the heat exchanger for any signs of trouble or performance issues.
By following these steps, you will be able to successfully clean a heat exchanger and ensure that it is operating efficiently. Keep in mind that different types of heat exchangers may require slightly different cleaning procedures, so make sure to read the manufacturer’s instructions before attempting any maintenance or cleaning.
8 Safety Precautions for How to Clean a Heat Exchanger
- Wear the appropriate PPE (Personal Protective Equipment) when servicing a heat exchanger. This includes safety glasses, long sleeves, and steel-toe boots to protect you against potentially hazardous materials used in the process.
- Ensure all power sources are completely shut off before beginning work on a heat exchanger. This includes turning off the power to electrical components and disconnecting any fluid lines that may be connected to the system.
- Ensure you have proper ventilation when cleaning a heat exchanger. This is especially important if you are using harsh chemicals or solvents in the process.
- Only use approved materials and products when servicing a heat exchanger. Read the product labels to ensure they are compatible with the type of metal in your system and safe for heat exchanger use.
- Ensure any tools, debris, or residue from cleaning is disposed of properly to avoid contamination of other systems.
- Take additional safety precautions if working with an interior heat exchanger. This could include using a respirator, protective gloves, face shield, and other PPE to guard against fumes and dust.
- Check the rate of flow in your system before beginning any cleaning process. This can help you determine the best approach for cleaning the heat exchanger without causing any damage to the system.
- Above all, work slowly and carefully when cleaning a heat exchanger. Make sure that you are familiar with how your system works before attempting any maintenance or repair, so you do not cause any further damage to the system.

Following these safety precautions ensures that you can safely and effectively service your heat exchanger.
How Should You Inspect the Integrity of the Heat Exchanger After It Has Been Cleaned?
Once you have completed the cleaning process, it is important to inspect the heat exchanger again to ensure that it has been adequately cleaned and all deposits or residues have been removed.
To do this, use a light source such as a flashlight and carefully inspect the inner surfaces of the heat exchanger for any build-up that may not have been removed during the cleaning process. If any build-up is visible, you may need to repeat the cleaning process until it has been completely removed.
Another way to inspect the integrity of a heat exchanger is by performing pressure tests on its components. This is done by connecting pressurized air or nitrogen to one side of the exchanger and measuring the pressure drop across it.
If the heat exchanger shows any signs of leakage or other damages, then you may need to replace it. To further ensure that your heat exchanger is working properly, you can also perform a visual inspection to check for corrosion and other wear and tear signs.
How Do You Properly Store and Maintain the Heat Exchanger After It Has Been Cleaned?
Once the heat exchanger has been cleaned, storing and maintaining it properly is important. This will ensure that the heat exchanger remains in good condition and functions correctly for longer. The following are some tips to help you properly store and maintain your heat exchanger:
- Store the Heat Exchanger in a Dry Place: Make sure to store the heat exchanger in a dry place, such as a cabinet or closet. Humidity can cause rust and corrosion on the heat exchanger’s metal components, which can lead to failure.
- Check for Leaks Regularly: Inspect the heat exchanger regularly for any visible signs of leaks or damage. If any leaks or damage are found, have the unit repaired as soon as possible to avoid serious damages and malfunctions.
- Clean Regularly: Clean the heat exchanger regularly with a soft cloth and mild detergent to remove any dust and debris. This will help reduce the chances of dirt and debris clogging up the unit and will also help to extend the life of the heat exchanger.
- Inspect Connections and Valves: Inspect any valves, connections, or other components attached to the heat exchanger regularly for signs of corrosion or damage. If any corrosion or damage is found, have it repaired as soon as possible.
By properly storing and maintaining the heat exchanger, you can ensure that it will last longer and perform better for a much longer time. Following these simple tips will also help to reduce the chances of costly repairs or failures in the future.
How Can You Prevent Future Build-up on a Heat Exchanger?
Preventative maintenance of heat exchangers is essential to ensure efficient and continuous operation. There are a few ways to keep the heat exchanger clean and free from build-up:
- Use high-quality feedwater that is free from suspended solids, oils, or other contaminants.
- Utilize proper water chemistry control to avoid scale and corrosion.
- Install proper strainers on inlet piping before the heat exchanger to help reduce the fouling of tubes.
- Regularly inspect the heat exchanger for any signs of physical damage or blockage caused by contaminants.
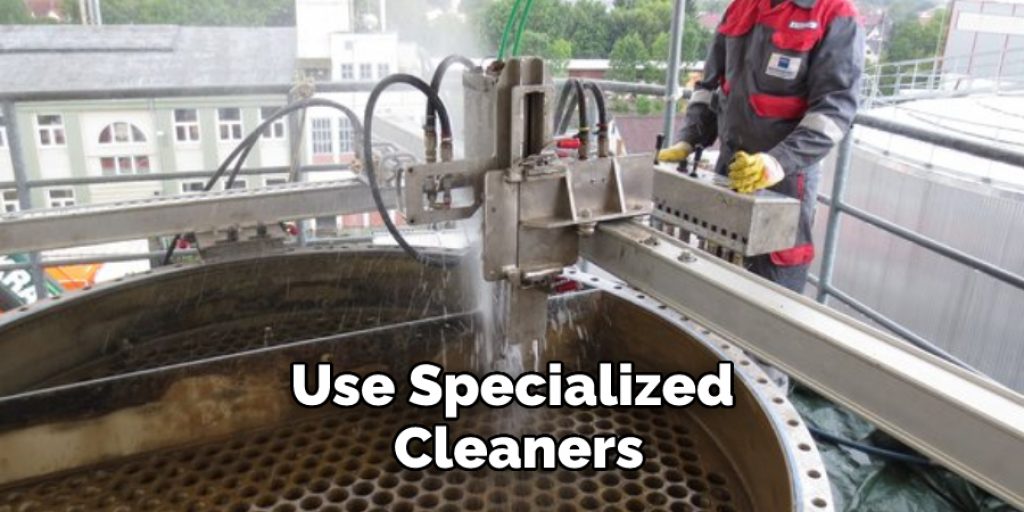
- Use specialized cleaners and chemicals to clean the heat exchanger according to the manufacturer’s instructions if needed.
By following these preventative measures, you can keep your heat exchanger running smoothly for years to come.
Conclusion
In conclusion, proper maintenance and cleaning of a heat exchanger are essential in order to keep it running efficiently. To clean a heat exchanger, start by turning off the power supply and draining any liquid from the system. Next, use an industrial-strength cleaner to remove dirt and debris from the surface of the metal plates. Once all residue has been removed, rinse the plates with hot water, and inspect for any damage.
Finally, reassemble the heat exchanger and fill it with liquid before turning the power supply back on. With regular maintenance and proper cleaning, your heat exchanger can remain in optimal condition for years to come. I hope this article has been beneficial for learning how to clean a heat exchanger. Make Sure the precautionary measures are followed chronologically.
Angela Ervin
Angela is the executive editor of DIY quickly. She began her career as an interior designer before applying her strategic and creative passion to lifestyle and home. She has close to 15 years of experience in creative writing and online content strategy for housekeeping, home decorations as well as other niche efforts. She loves her job and has the privilege of working with an extraordinary team. She lives with her husband, two sons, and daughter in Petersburg. When she's not busy working she spent time with her family.