How to Clean a Piano Keyboard
Are you an aspiring musician looking for easy ways to keep your piano in tip-top condition? Assuming regular upkeep, cleaning a piano keyboard is an essential part of maintaining its luxurious appearance and sound quality. Unfortunately, many people find the task daunting due to not knowing where to start or how to go about it safely without damaging their beloved instrument. Don’t worry!
In this blog post on how to clean a piano keyboard, we’ll take a look at all the steps necessary for cleaning a piano keyboard properly so that you can make sure your treasured piano stays in great shape!
Benefits of Cleaning Your Piano Keyboard
Before we dive into the steps to clean a piano keyboard, let’s first understand why cleaning is essential. Regularly cleaning your piano keyboard not only helps it look great but also improves its longevity. Over time, dust, dirt and grime can accumulate on the keys, leading to discoloration and difficulty in playing. Additionally, cleaning your piano keyboard also removes any germs or bacteria that may have accumulated over time from use.
Now that you know why it’s critical to clean your piano keyboard let’s delve into the steps required. Remember, it’s always better to clean your piano keyboard regularly rather than wait for dirt and grime to build up!
10 Step-by-step Guidelines on How to Clean a Piano Keyboard
Step 1: Gather Your Supplies
The first step to cleaning a piano keyboard is to gather all the necessary supplies that you’ll need. Some of these include:
- A Soft Microfiber Cloth
- A Gentle Cleaner Specifically Designed for Piano Keyboards
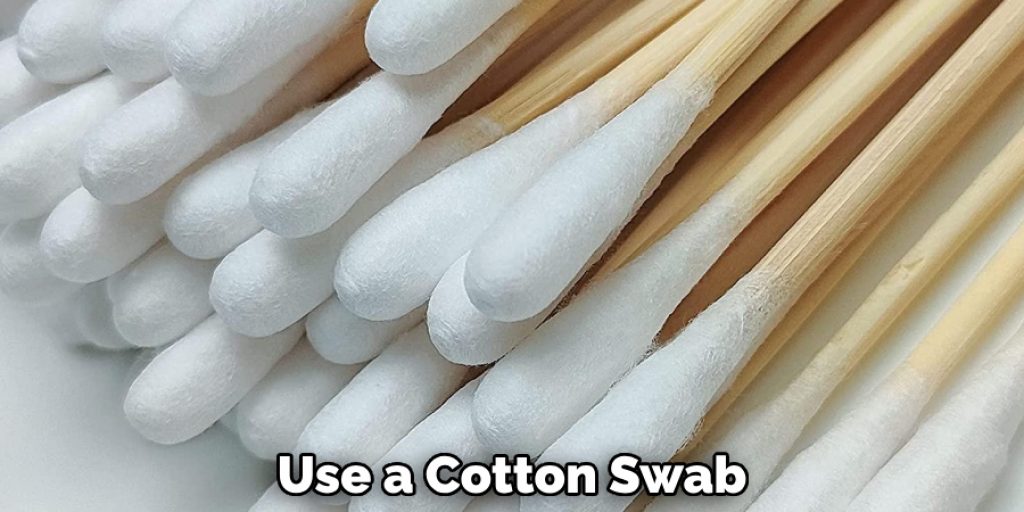
- Cotton Swabs
- Distilled Water
Step 2: Preparation
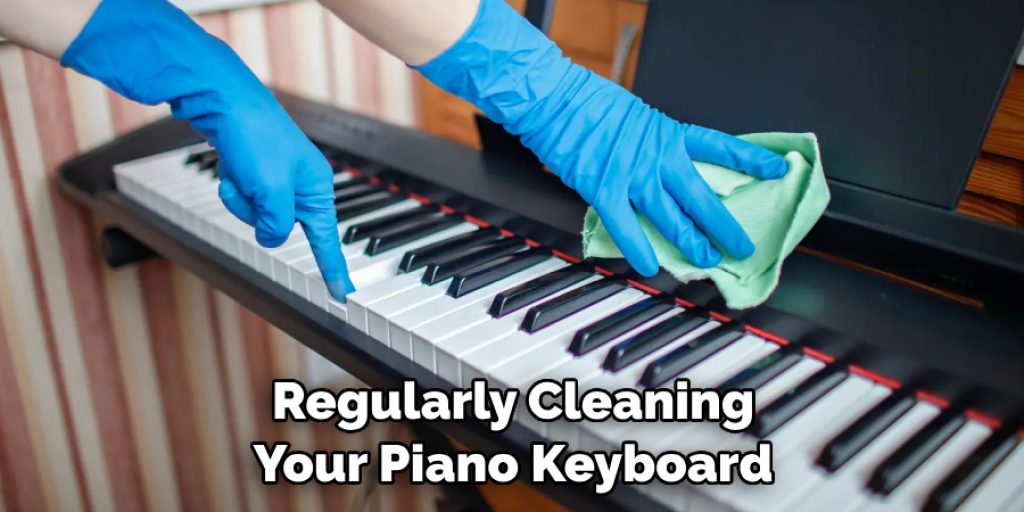
Before cleaning your piano keyboard, make sure to turn it off and unplug it from the power supply. This step is crucial to avoid any electrical shocks or damage to the instrument. It’s also essential to cover the piano strings and parts you’re not cleaning with a soft cloth or towel to prevent any liquid from seeping through.

It’s also advisable to wear gloves while cleaning to avoid transferring any oils from your hands onto the keyboard. You can also spread an old towel or sheet underneath the keyboard to protect your floors from any drips.
Step 3: Dusting
Using a soft microfiber cloth, gently dust off the piano keys and keyboard surface. Make sure to remove any loose debris or particles that may have accumulated over time. Avoid using any feather dusters or harsh cloths as they can scratch or damage the piano keys. You can also use a small vacuum cleaner on the lowest setting to get rid of any stubborn dust particles.
Step 4: Cleaning Solution
Next, you’ll need to make your cleaning solution. Mix equal parts of distilled water and a gentle piano keyboard cleaner in a spray bottle. Avoid using regular household cleaners or harsh chemicals as they can damage the keys’ finish and cause discoloration.
It’s also essential to test the solution on a small, inconspicuous area of the keyboard before using it all over. But, if you’re not confident in making your own solution, you can purchase pre-made piano keyboard cleaners from music stores.
Step 5: Cleaning
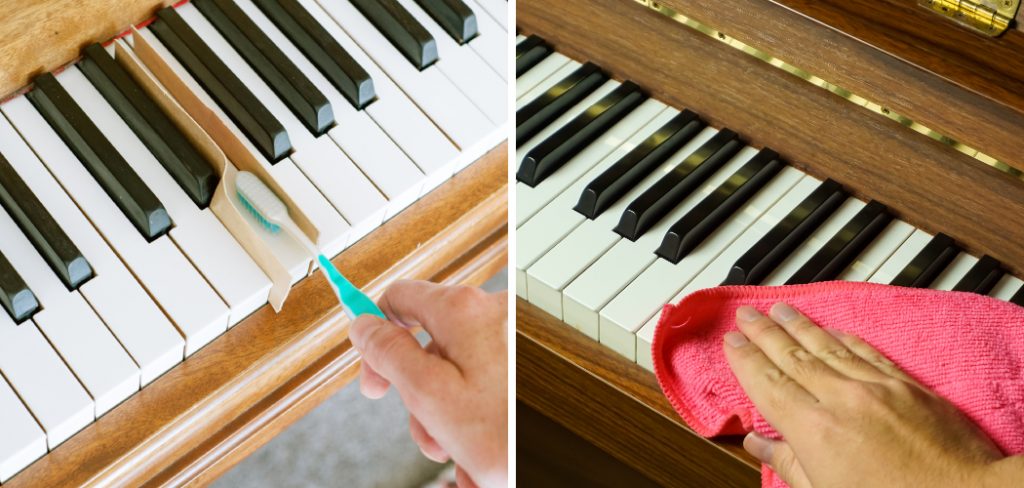
Spray the cleaning solution onto a soft microfiber cloth and gently wipe down each key from left to right, starting at the top of the keyboard. Avoid getting any liquid in between the keys as it can cause damage to the internal components. As you clean, use a cotton swab dipped in the solution to get rid of any stubborn dirt or grime in between the keys and hard-to-reach areas. It’s essential to be gentle and avoid pressing too hard on the keys, as this can cause damage.
Step 6: Drying
After cleaning, use a dry microfiber cloth to wipe down the keys again to remove any excess moisture. It’s crucial to ensure that the piano keyboard is completely dry before turning it back on or playing it. Also, avoid using a hairdryer or any other heating device to speed up the drying process as heat can damage the keys and cause them to warp.
Step 7: Cleaning the Keyboard Casing
If your piano keyboard has a casing, gently wipe it down with a damp cloth using the same cleaning solution used for the keys. Avoid using too much water or any harsh chemicals that can damage the finish. You can also use a small amount of gentle soap on the cloth to remove any stubborn stains. Although it’s essential to keep the casing clean, be careful not to get any liquid inside the piano.

Step 8: Polishing
To give your piano keyboard a shiny finish, you can use a dedicated piano key polish or a small amount of mineral oil on a soft cloth. Gently rub the cloth over each key and wipe off any excess polish with a dry cloth. However, avoid using any polishes or oils that contain chemicals or solvents as they can cause damage to the piano keys. Remember, a little goes a long way with polishing.
Step 9: Cleaning Piano Pedals
If your piano has pedals, use a damp cloth with a small amount of gentle soap to clean them. Avoid using too much water and make sure to dry them thoroughly after cleaning. Also, don’t use any harsh chemicals as they can cause damage to the pedals’ mechanics. It’s also essential to avoid using any oils or polishes on the pedals as these can make them slippery and challenging to use.
Step 10: Regular Maintenance
To keep your piano keyboard in excellent condition, it’s vital to clean it regularly. Make sure to dust off the keys and surfaces every week and perform a deep cleaning at least once a month. Also, avoid eating or drinking near your piano to prevent any spills or food particles from getting on the keys. Always use a gentle touch when playing to prevent any damage, and keep your piano covered when not in use to protect it from dust and dirt.
Now that you know the 10 steps required for cleaning a piano keyboard let’s take a look at some essential maintenance tips to keep it in top shape.
Maintenance Tips for Your Piano Keyboard
- Avoid Using Any Harsh Chemicals, Soaps, or Oils when Cleaning
- Store Your Piano Keyboard in a Dry and Cool Place to Avoid Damage from Heat and Humidity
- Have Your Piano Tuned Regularly by a Professional
- Clean Up Any Spills or Stains Immediately
- Avoid Using Too Much Water When Cleaning
By following these maintenance tips on how to clean a piano keyboard and regularly cleaning your piano keyboard, you can ensure that it stays in excellent condition and produces beautiful music for years to come. Remember, proper care and maintenance not only preserve the appearance of your piano keyboard but also contribute to its overall performance and longevity.
Frequently Asked Questions
Q: Can I Use Regular Household Cleaners to Clean My Piano Keyboard?
A: No, you should avoid using regular household cleaners as they can damage the keys’ finish and cause discoloration. It’s best to use a gentle cleaner specifically designed for piano keyboards or make your own with distilled water and mild soap.
Q: How Often Should I Clean My Piano Keyboard?
A: It’s ideal to dust off your piano keys and surfaces once a week and perform a deep cleaning at least once a month. However, if you use your piano frequently or have pets in the house, you may need to clean it more often.
Q: Can I Use Oils or Polishes on My Piano Keyboard?
A: No, using oils or polishes on your piano keyboard can cause damage and make the keys slippery. Stick to using a gentle cleaning solution specifically designed for piano keyboards.
Q: How Do I Clean Between the Keys of My Piano Keyboard?
A: Use a cotton swab dipped in the cleaning solution to get rid of any stubborn dirt or grime between the keys. Gently wipe from left to right to avoid pushing any debris further into the keyboard.
Conclusion
Show pride in your clean piano keyboard by taking a step back and admiring it in all its glory. This activity may even offer a great opportunity to bond with your family, and there is nothing quite like the satisfaction of having a freshly cleaned instrument! Cleaning instruments offer an inexpensive approach to maintaining your musical investments in their best condition, so be sure to take some time periodically to keep up with the cleaning process.
Spruce up your piano keyboard today and treat yourself to a much-needed refresh that not only enhances its performance but also helps you to enjoy playing the piano even more. Embrace the joy of music and invest in yourself with regular DIY cleaning. Thanks for reading this article on how to clean a piano keyboard.
Angela Ervin
Angela is the executive editor of DIY quickly. She began her career as an interior designer before applying her strategic and creative passion to lifestyle and home. She has close to 15 years of experience in creative writing and online content strategy for housekeeping, home decorations as well as other niche efforts. She loves her job and has the privilege of working with an extraordinary team. She lives with her husband, two sons, and daughter in Petersburg. When she's not busy working she spent time with her family.